
Canva is one of the best graphic design websites and is currently trending because it has so many premade features that make designing extremely accessible for both professionals and beginners alike.
While Canva is a fairly simple platform to learn, it can be overwhelming if you are just getting started using it. This is due to its extensive library of features and professional tools that while allowing individuals to design, can be unknown territory!
This guide was written with beginners in mind and will direct you through all the first steps to creating on the platform.
I’m Kerry, an artist, and graphic designer who has researched and used tons of digital design software, websites, and platforms to find the very best ones. Canva has always been one of my favorites over the years and I have created hundreds of projects and designs for all different purposes.
This post will serve as an in-depth guide to Canva for beginners. I will focus on the basic information that you will need to know in order to start designing and highlight some key tips so that you can save time and make the most of all of the features available!
Ready? Let’s get started!
Table of Contents
Chapter 1: Canva Basics
Before diving into any more details related to using Canva, it is wise to take a moment and make sure that it is the best design platform for your needs! There are indeed lots of options out there (such as Figma, VistaCreate, Adobe Suite, and Photoshop), but if you are looking for an easy, navigable, and concise option, Canva is probably the right choice for you.
One of the strongest arguments for Canva is that it is relatively easy to figure out, has a friendly user interface, and is easy to access designs. The company also offers a strong, free version that is perfect for anyone who wants to just check out the website. (You do have to create an account though.)
Canva also offers an immense variety of premade elements that are ready to use immediately, including tons of free fonts, professional-looking presentation templates, and so many other project types that it is so easy to build amazing graphics and projects with little training.
However, if you are someone who wants extreme editing and prefers to build projects completely from scratch, include coding elements, or like using layers in your designs, then Canva probably isn’t the best design platform for your needs.
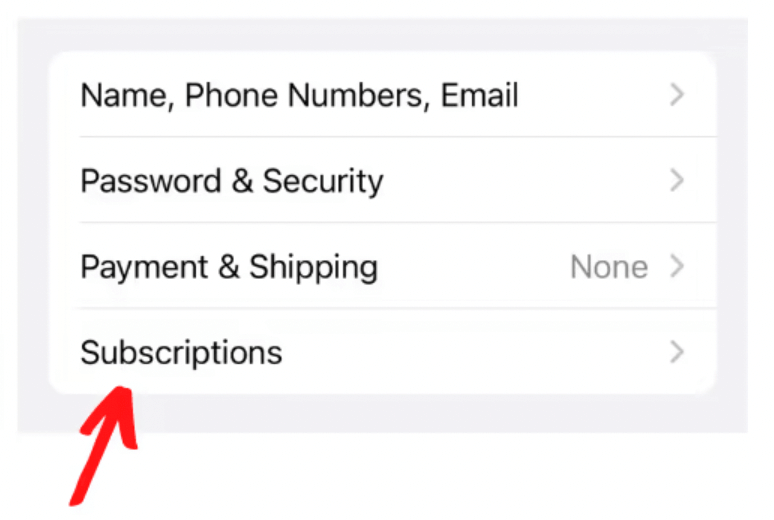
If for some reason you are not satisfied with Canva, you can cancel your account at any time, as long as you do so through the same browser that you signed up on. (For example, if you started using Canva Pro on a traditional web browser, you will need to cancel the subscription through that and not the app on your phone.)
When you can, your account will remain active until the end of the subscription period – which we will explain in Chapter 2!
Chapter 2: Canva Subscription Plans
If you are looking to elevate your graphic design game a bit, you may want to choose to subscribe to one of Canva’s paid plans. Within these subscriptions, you have access to more features on the platform, including their full library of premade elements and templates.
To give you a little comparison, within the free version, users have access to hundreds of design templates and thousands of graphics and photo elements that can be added to projects, simply by dragging and dropping them onto the canvas. For those on a budget, it is a great option because you can create some awesome designs without any cost!
If you are willing to pay a bit to be granted full access to Canva, there are two main plans that are available and allow users to have full reign over the offerings. The first, Canva Pro, is a great choice if you are an individual who is looking for complete access for $12.99 per month or $119.99 per year.
The other subscription plan, Canva for Teams, is designed for people who want to share accounts on a grander scale.
This plan is mainly used by businesses. Managers or team leads can add employees so that they all can collaborate and share projects together. While each person will have an individual login, there will be a shared projects section that makes it easy to collaborate.
Depending on the number of employees that will be added, prices for this plan range from $149.90 a year (maximum of 5 users) to $6,424.90 (maximum of 50 users). This is a great option for those who also want to create Brand Kits that will keep marketing consistently for your business.
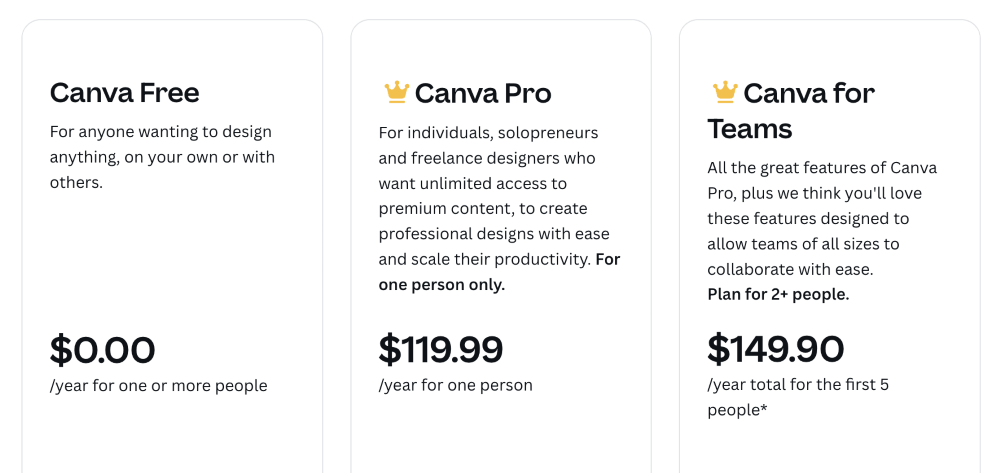
Also, if you’re curious as to how plans affect storage, the free version provides you with 5GB of initial storage. If you are on the Canva Pro or Canva for Teams plan, you will receive 1TB of cloud storage, which is great since you won’t have to worry about running out of storage- especially for shared projects!
Chapter 3: Starting Your First Project
Luckily, once you’re ready to begin, it’s easy to set up an account on Canva. You can just go to their website or download the mobile app and then create an account using your preferred login credentials (such as email or Google), and create a password.
Once you have created your Canva account, you will wind up on the home screen. This will be the main spot where you can start projects and choose specific dimensions, project types, and templates. You can also open any projects from your library that you’ve already started and saved here.
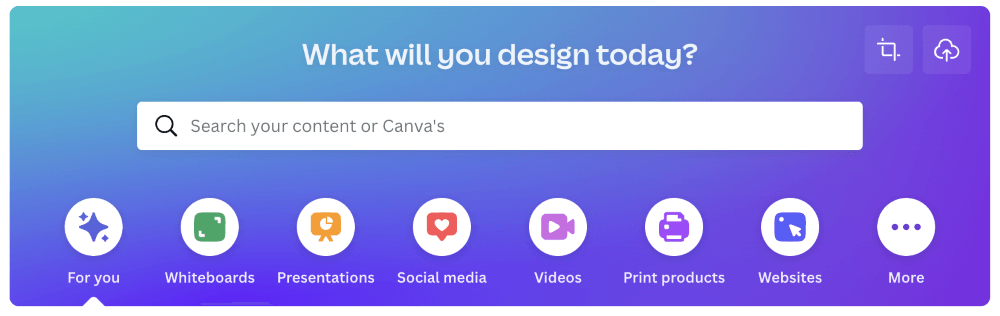
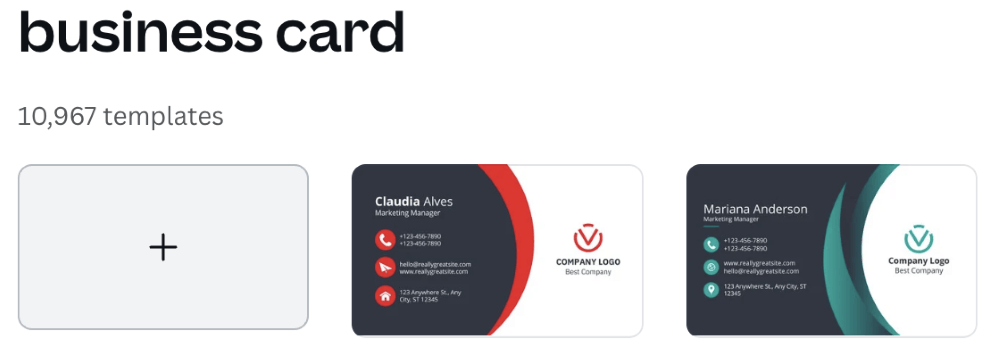
On the home screen, users also have the option to create a blank canvas by typing in specific dimensions or choosing a premade project size that is fit for specific purposes, such as social media posts, presentation slides, or business cards.
When you choose the type of your project, the next step to learning to use Canva is to familiarize yourself with its offerings and what a basic canvas looks like. The platform is fairly easy to navigate, so you won’t be spending much time looking for the tools.
You can search for terms in the search bar or click on the template icon that you want to use, and just like that you will be brought to your project canvas! If you do not choose a template, a blank canvas will appear based on the size dimensions that you chose.
The left side of the canvas will be your main spot to choose and switch tools and elements since that is where the main toolbar is located. This spot includes elements such as photos, text boxes, borders, and other graphics to add to your work.
Each of these buttons is labeled and once you click on it, submenus will appear where you can search for specific designs or click and drag choices onto your canvas.
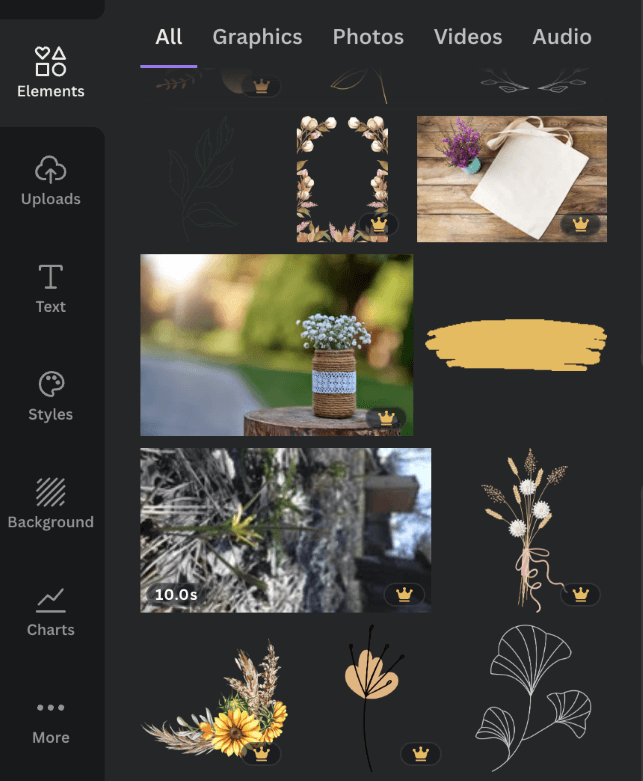
Once you have included a Canva element onto the canvas, you can resize it by clicking on it and dragging the corners to make it larger or smaller. You can also change the orientation or rotate their elements by clicking on it and then holding and dragging the circular rotate button that appears.
Chapter 4: Advanced Features

Compared to programs like Photoshop which are designed for professionals to build their projects from scratch, Canva doesn’t have as many advanced features.
However, being that it has a free version and is accessible to all types of users, the platform does have capabilities that allow even the most basic designer to add some cool features to their projects with little effort or technique.

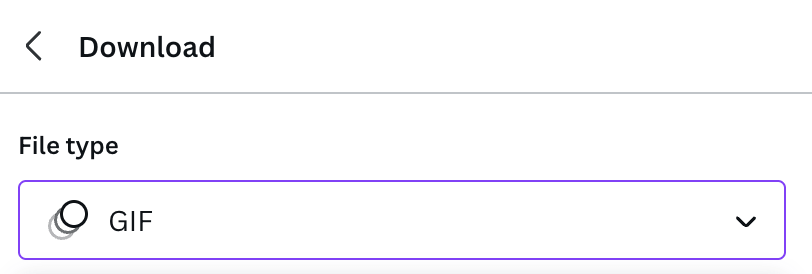
For example, while there are websites and apps out there where you can find thousands of GIFs to use when texting, creating a presentation, or marketing, it is always cool to be able to create your own GIFs which you can experiment with on Canva!
Chapter 5: Image Editing
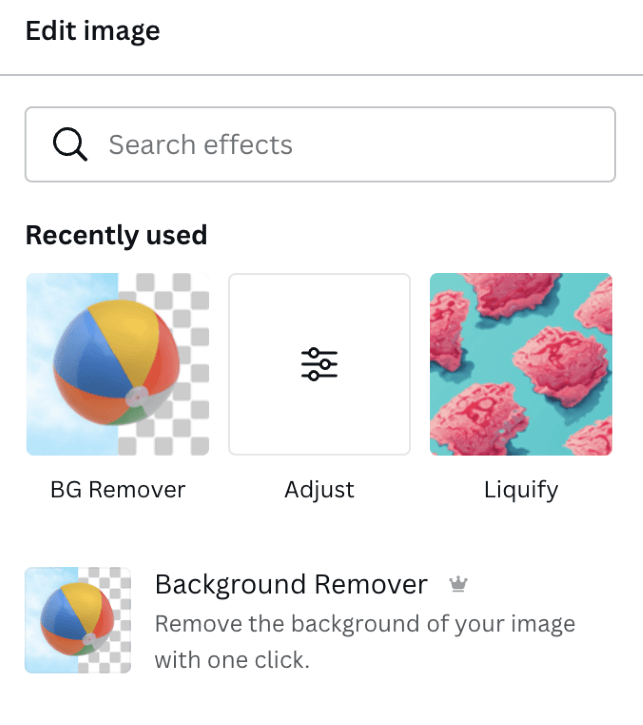
Although Canva isn’t known as an image editor, Canva Pro is a one-stop shop for editing and creation, with a toolbox of features to help merge the two.
One of the features that allow for easy editing is the included background remover tool. With this, you can edit elements and create totally new ones that fit your vision. Removing the background or using the Magic Eraser tool also allows for transparent backgrounds which is perfect for PNGs.
Canva Pro also has a great feature with one-click resizing to adjust your work to custom dimensions. This saves a lot of time when you need to create multiple versions for different platforms, such as publishing to various social media platforms.
Chapter 6: Interactive Elements
While Canva is growing and adding more and more interactive elements each month, one of the fun interactive elements that users can use is the Animate text tool.
In order to do this, all you have to do is highlight the text box that you want to animate. At the top of your canvas, an additional toolbar will appear. Towards the right side of it, you’ll see a button that says Animate.
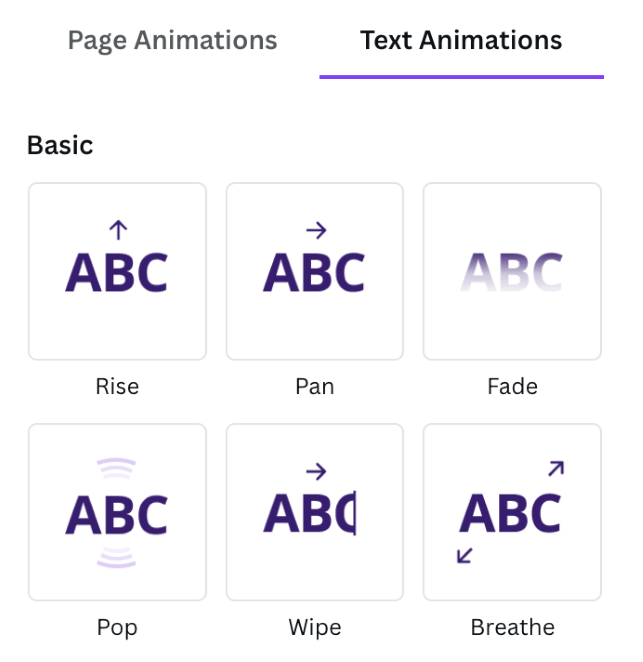
This is a great tool if you’re looking to create any presentations, social media posts, or marketing materials, but you can let your creative mind explore!
Chapter 7: Using Canva for Business Purposes
After you get used to designing on Canva, you may want to venture into using it to design for a business. There are many users out there who create sellable digital products such as templates, invitations, worksheets, or designs for print-on-demand products through Canva.
Many users, especially those who are on the Canva for Teams account where users can collaborate with others in a company so that everyone can stay on the same page and not waste time going back and forth to see if the vision is on point!
You can even create business cards, presentations, or branding materials that will make sure that their marketing is consistent through all venues.
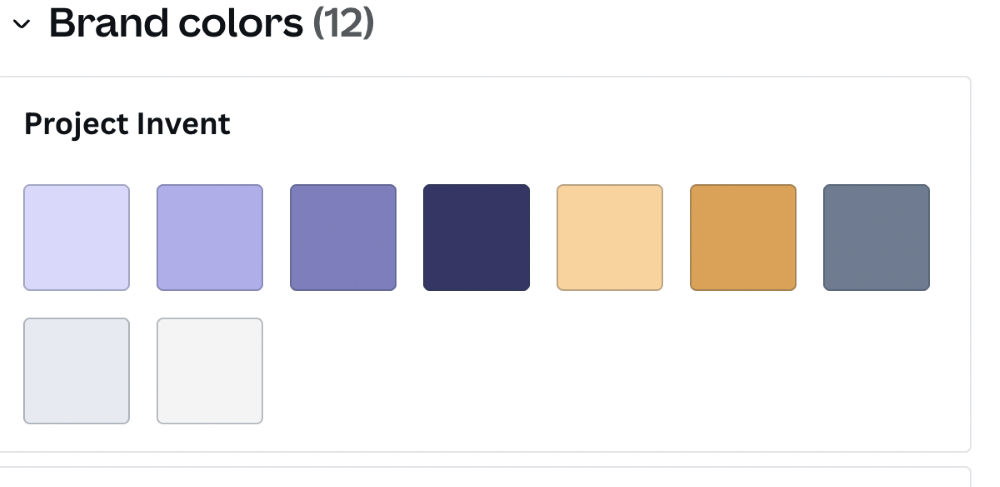
By creating a brand kit, you will be able to build a brand from scratch or add colors, palettes, and fonts so that you can keep your marketing materials consistent. In addition, users can incorporate brand logos, images, and more into their designs!
Users can also create personalized email signatures that will make their correspondences even more professional and align with their brand!
Chapter 8: Troubleshooting

No matter how strong your skills are in Canva, sometimes it is inevitable that problems arise. These issues may stem from updates on your device, wrong clicks, or simply snafus with the platform. Most of the problems that users have experienced using Canva are easy to fix, so do not worry!
Knowing how to troubleshoot some of the common issues in Canva is good to learn. There may be times when you are not able to fix the problem on your own, but it is always worth trying before having to contact an external entity to get the help that you need.

If you ever run into weird glitches or other issues when working in Logic, sometimes a simple reset of the app and/or your Mac is all that’s needed. Just be sure to save your current project before closing out on anything.
Sometimes Canva’s platform does go down and it can be extremely frustrating if you are relying on it for a time-sensitive project. This issue may be internal and users have to wait until Canva’s team fixes the issue.
For problems that are a bit more challenging to figure out, you might be due for an update. happen occasionally, and it’s always good to use the app’s most recent version to avoid any issues. And also, keep macOS up to date on your Mac.
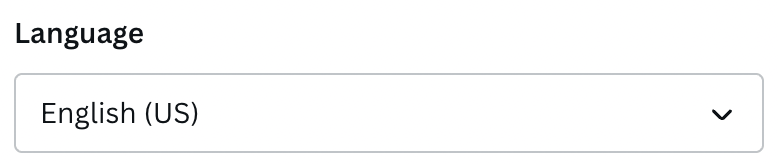
This issue does not come up often, but if the Canva website happens to change to a language that you do not know or didn’t choose as your default option, you can easily fix it by going to the Settings button (which is the little gear at the top of the home screen).
If you encounter more pressing issues or can’t seem to fix them on your own, Canva has a Help Center that is accessible from their website. There you will be able to search through a catalog of resources that can guide you in the right direction or get in contact with a representative who will be able to assist you.
Final Thoughts
Now that you’ve read through this guide to using Canva, you should be ready to create your first project. Don’t worry if you don’t get it right away- there is always a learning curve with new tools, and playing around with the system is a part of the process!
I’ve found that trying out different projects and tools, even if they weren’t my first choice has been a really effective way to further my graphic design skills. Plus, if you look online, there is a ton of inspiration for projects if you feel a bit stuck!
Do you have other tips, tricks, suggestions, or advice for beginners on using Canva? What has motivated you to use this graphic design platform? Share your thoughts and comments in the section below!