
On Canva you can remove the background of an image with ease by clicking on the image and editing it using the background remover tool. With just a click, artificial intelligence can highlight the background and remove it from a picture.
My name is Kerry, and I’ve been involved in digital design and art for many years. I’ve used Canva for quite some time now and am very familiar with the program, what you can do with it, and tips to use it even easier.
In this post, I’ll explain how to remove a background from a picture in Canva using the Background Remover tool. You’ll also learn how to restore any background images that you previously erased.
Let’s get into it!
Table of Contents
Key Takeaways
- You won’t be able to remove background from images for free as the background remover tool is only accessible through a Canva Pro account.
- You can restore the background of an image by using the restore brush found within the background remover toolbox.
Can I Remove the Background of an Image without Canva Pro?
Unfortunately, in order to remove the background from an image on Canva, you must have a Canva Pro account. Through additional steps, you can edit the image on Canva and export it to other programs to remove the background, but there isn’t a streamlined process without Canva Pro.
How to Upload an Image on Canva
Before utilizing the background remover tool, you’ll need to have an image to work with! You can find thousands of graphics in Canva’s library or upload your own picture to the canvas based on your specific vision.
Steps to upload your own picture to Canva
1. Open your project and select Uploads on the left side of the platform.
2. Choose Upload Media or click on the three dots to import a file from a variety of sources such as Google Drive, Instagram, or Dropbox.
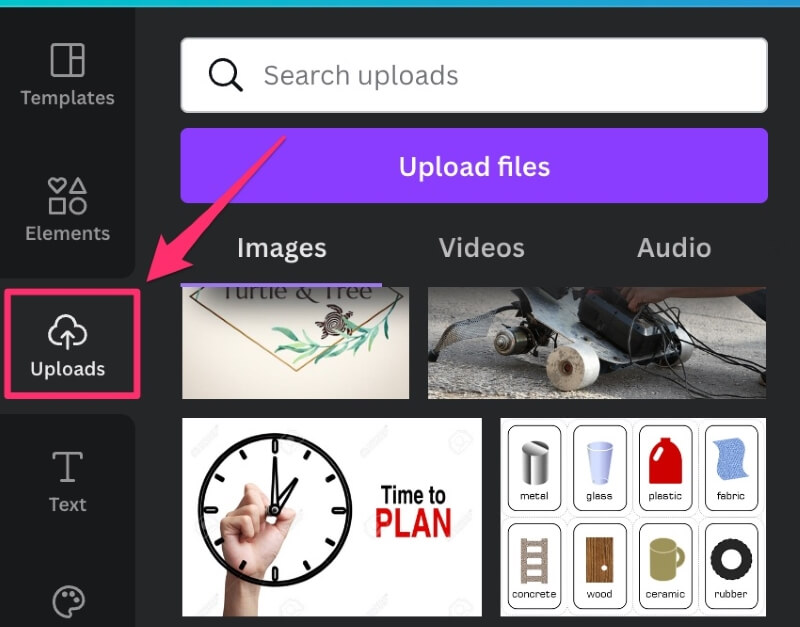
3. Select your image and click open or insert. This will add the photo to your Image Library.
4. In that library, choose the image that you want to insert by clicking on it and dragging it onto the canvas. Then you can work with it in your design!
How to Remove a Background from an Image
Removing the background of an image has become a widely utilized method in image editing and graphic design. It is useful for projects such as social media posts, Etsy listings, or website graphics where you need to highlight the subject without a distracting background.
Follow these steps to remove the background from an image:
1. If you’re working on a new design, click on the Photos tab on the left side of the platform to choose an image. (If you’re working with an image that is already on your canvas, simply click on it to make the selection.)
2. Select the photo that you would like to use and drag it onto the canvas.
3. Click on the image you want to remove the background from and tap on the Edit image button towards the top of the workspace.
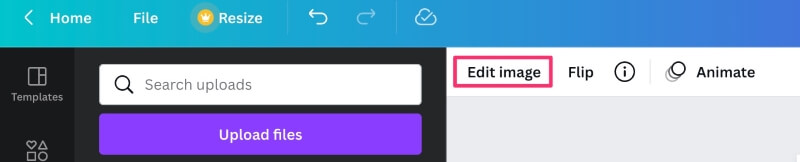
4. In the pop-up menu, select the Background Remover tool and wait for Canva to remove the background of the image. (This may take some time if your internet speed is slower.)

5. Inspect the image to make sure that all the background is removed. If it isn’t all gone, you can use the erase brush to erase any leftover background pieces more accurately.
How to Use the Eraser Tool
If you aren’t completely happy with the results of using the background remover tool, you can fine-tune the outcomes by using the eraser tool by following these steps.
1. While in the Background remover toolbox, you will see two extra brush options with one labeled “eraser”.
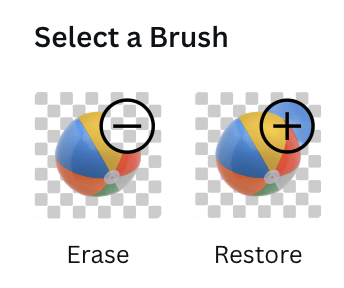
2. Tap on the eraser tool and adjust the brush size by sliding the circle on the scale to make the brush either larger or smaller.
3. Bring your cursor over the image while clicking and holding the brush over selected areas to erase any additional pieces of the image.
If you choose a smaller brush size, it will allow you to fit in tinier spaces in the image and allow for more accuracy in background removal.
How to Restore Background in Canva
If you used the background remover tool and no longer want a transparent background or need it visible in certain places, you can easily restore it. It is important to note that this function is only available after you have used the background remover tool first!
Follow these steps to restore the background of an image:
1. While in the Background remover toolbox, you will see two extra brush options with one labeled “restore”.

2. Tap on the restore tool and adjust the brush size by sliding the circle on the scale to make the brush either larger or smaller.
3. Bring your cursor over the image while clicking and holding the brush over selected areas to restore any pieces of the image that you want visible again.
Final Thoughts
Knowing how to remove a background from an image will give you a ton more choices when developing graphic design projects. These polished images will allow you to create and produce cleaner and more professional results that will amplify your designs.
What types of projects do you use background remover for? Share your thoughts, questions, and tips in the comment section below!