
ScreenFlow
Summary
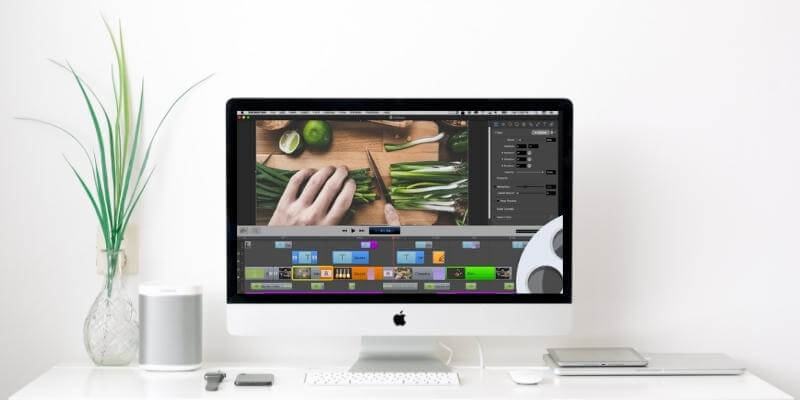
ScreenFlow is a quality screencasting and video editing app for Mac. It captures your actions on desktop screen, and then you can edit the recordings by trimming and rearranging the content as well as by adding callouts, annotations, and motion. With a layered timeline and plenty of features you would be hard-pressed to find in a standard video editor, you’ll definitely get the job done.
The app is best suited for those who want to make good-looking videos for educational or marketing purposes. With ScreenFlow, teachers can use it to screencast simple how-to videos that will help enhance classroom engagement. Marketing professionals can create an explainer video or tutorial for their products. YouTubers or bloggers can quickly cut together a professional video that engages their audiences.
However, if you’re just a casual user who is looking for a tool to record desktop/mobile screen activities and only has basic needs for editing, you could turn to free or cheaper alternatives. Also, it is worth noting that ScreenFlow is a Mac-only product, if you’re on a PC you probably want to try Camtasia — the best alternative for ScreenFlow though Camtasia is more expensive.
What I Like: Clean & simple interface. Drag-and-drop layered timeline. Easy to add elements. Good quality of relevant tools for annotation.
What I Don’t Like: Lack of effect presets, arrows and callouts. No royalty-free resources beyond pre-installed transitions.
What is ScreenFlow?
It is an app for capturing screen activities and creating a video that can be edited with callouts and annotations as needed. This is primarily used for technical reviews of programs, software tutorials, or other applications in which it is necessary to show another person your screen. It eliminates the need to try and film your screen with an outside device.
Is ScreenFlow safe to use?
Yes, ScreenFlow is completely safe to use.
My teammate JP has been using the app for several years (see this post he wrote), and a scan using Bitdefender and Drive Genius found ScreenFlow free of any malware issues. The Telestream site also passes the Norton Safe Web filter, and uses SSL to encrypt its servers. This means transactions on the site are secure.
The app itself is also safe and easy to use. If you export to platforms such as Vimeo and Youtube, you will need to input login credentials; the app cannot do anything without your permission and you can revoke its access to your accounts at any time.
Is ScreenFlow free?
No, ScreenFlow is not free. It costs $149 for new users. The more expensive ScreenFlow plans include extra resources.
If you aren’t sure about paying that much money for a program right away, you can use the free trial version for 30 days, with the caveat that all exported videos will be watermarked with the words “DEMO MODE”.
Is ScreenFlow for Windows?
Unfortunately, ScreenFlow is a Mac-only application for the time being. If you want something similar to ScreenFlow for your PC, you can read this article on ScreenFlow alternatives for Windows, or check out the alternatives section near the bottom of this review.
How to use ScreenFlow?
Learning a new program from scratch can be daunting. Luckily, there are plenty of resources to help you get started with ScreenFlow. This review will give you a brief overview of the tools available, but you can also check out the video tutorial page provided by Telestream.
If the provided tutorials aren’t your style, maybe YouTube will yield something you prefer. Just search around and you’ll find tons of them.
Table of Contents
Why Trust Me for This ScreenFlow Review
My name is Nicole Pav, and I’ve been trying out new technology since I first put my hands on a computer. I know the joy of finding great free software and the disappointment of not finding out if a paid program is worth it. Like you, my budget is limited and I don’t want to spend it on something that doesn’t offer much value. That’s why I use these reviews to provide clear and unbiased information on programs you may not have experience with.
During the past several days, I’ve tested almost every feature of ScreenFlow to see if it works as the developer claims. Note: the app offers a full-functionally free trial, meaning I wasn’t given the program for free or sponsored by their parent company Telestream.
After experimenting with the program, I created a sample video which you can see in the section below. I also contacted their technical team to evaluate how supportive they were. You can read more about that in the “Reasons Behind My Review Ratings” section below.
Detailed Review of ScreenFlow
In order to get started with the app, I watched several tutorial videos from their resource section. I highly recommend you do so as well. I then created this video to demonstrate the main features of ScreenFlow.
As you can see, the video is watermarked with “DEMO MODE” due to the fact that I used the trial version of ScreenFlow. But the video should give you an idea of the features available, from the basic screen recording to text, callouts, annotations, and overlapping video or picture-in-picture.
Setup & Interface
When you first download ScreenFlow, the app will ask to be moved to your applications folder. Once things are up and running, I was impressed with the cleanliness of the design, which fits well with the rest of my Mac. It was a refreshing change from crowded interfaces and overlapping buttons. There are three options to get going with ScreenFlow.
You can choose “New Recording” to create new media by capturing your screen and/or microphone. Alternatively, you can create a new blank document or open one you’re already working on. No matter what you choose you’ll eventually end up here:
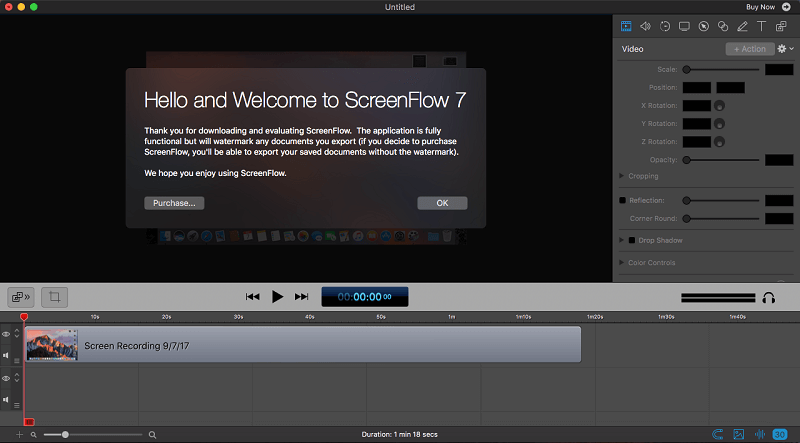
The first time you launch the app, it will include the welcome message shown above over the canvas area. However, the main areas of the program remain the same. The right-hand panel has all of your editing tools such as video adjustments, audio, and annotations, while the bottom panel is the timeline. You can resize these tools at will. The center section is the canvas; it displays your active media.
If you’ve created a screen recording, it will be automatically added to the document you’re working on. Using a blank new document means you’ll need to gather the material yourself.
Screen Recording & Media
Screen recording is a key feature of ScreenFlow, and the program excels at capturing video. When you choose to make a new screen recording, you’ll be prompted with a dialog box for capture settings such source and audio options.
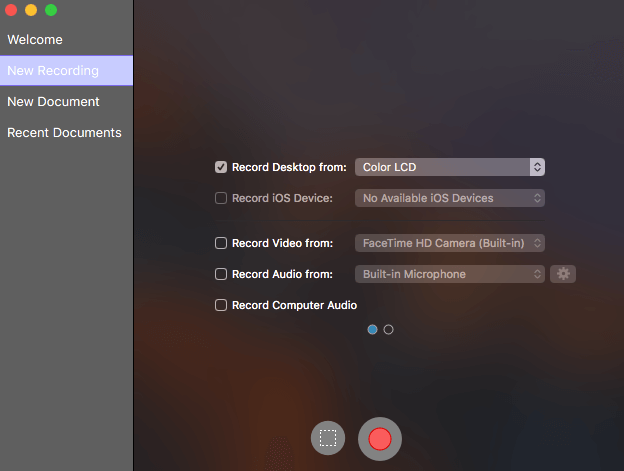
ScreenFlow has the ability to record your desktop or any iOS device connected via the lightning connector to your computer, which is very helpful for Apple fans who may need to demonstrate a mobile feature during their video. I have an Android phone, so this feature wasn’t available to me.
If you want to show yourself as well, you can choose to capture video from your webcam. All Mac computers have a built-in camera, but if you prefer an external or third-party recorder, you can choose this instead. The same applies to using the built-in microphone or your own recording device.
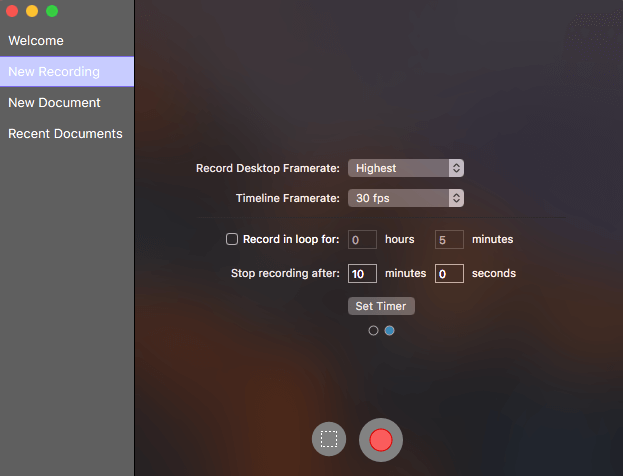
The second page of options is a little bit more specific, such as the framerate you prefer, or if you want to record for a specific amount of time. While the default frame rate should be fine for most users, you may want to consider lowering it (if your computer has limited RAM) or raising it (if you’re recording something technical and have the computing power to compensate).
Once you’re ready to go, use the red circle button to start recording your whole screen or choose the rectangle to select a portion of the screen by dragging the mouse. With everything set up, there will be a brief 5-second countdown before recording commences.
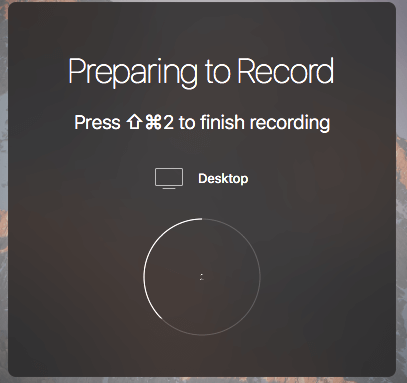
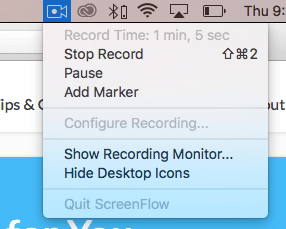
The Shift + Command + 2 option is a great way of ending your video, but you can also check the top menu bar of your computer for the ScreenFlow icon and stop the recording by clicking on it instead if you can’t remember the hotkeys.
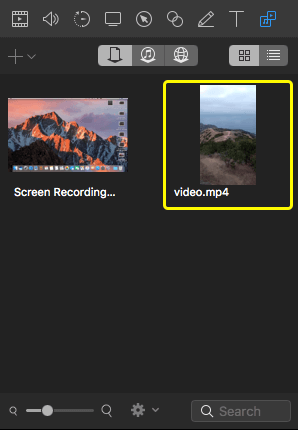
When you finish recording, you’ll be automatically sent to a new document (or the one you were working on), and your recording will be in the timeline and media resource panel.
Available on the right-side editing panel, the media tab includes any video clips you’ve uploaded, audio you’ve selected from iTunes or your computer, and a copy of your screen recordings.
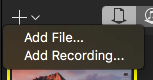
To add to this section, simply click the plus and select the file you want from your computer. Alternatively, you can create a new screen recording if that’s what you need.
Whatever you choose, the file will be added and can be dragged into the timeline for use right away.
Timeline & Editing
Editing is the second key feature of ScreenFlow, and the options complement the focus on screen recording and screen capture. The editing features are all contained in the panel on the right side of the interface, which makes them easy to access and use. All sections scroll vertically in the editing panel. There are eight different editing buttons, so I’ll be highlighting the main purpose of each to give you an overview of the editing functionality.
Video
The leftmost button, represented by a film icon is for changing the overall video clip settings such as the aspect ratio and cropping. You can also edit the clip opacity and fine-tune its position.
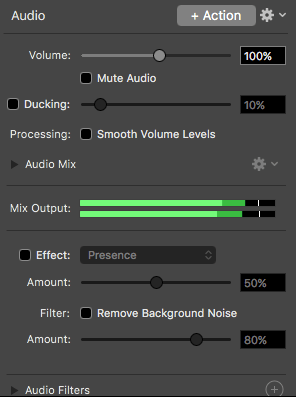
Audio
If you’ve added audio to your movie or if you recorded a clip with audio, you can change the settings in this tab. Volume, ducking and rudimentary mixing options are available as well. You can also add effects to the audio if you’re looking for a little something more.
Video Motion
Represented by a small circle, video motion allows you to alter how your video travels or pans during the time it is playing. This will add an action to the timeline that you can move by dragging and dropping, with options for altering the duration and type of move.
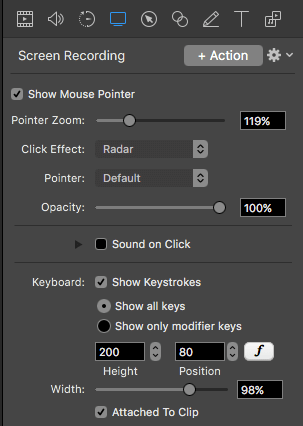
Screen Recording
Specifically for clips that have been created with ScreenFlow, this option allows you to add mouse click effects or change the size and shape of the cursor in the video. You can also make the video display the keys you’ve pressed while recording (this is extremely useful for tutorial videos) or add clicking noises.
Callout
Inserting a callout will add an item to your timeline and allow you to highlight a specific section of your video. This particular button has a lot of options from the shape and zoom to the drop shadow and callout border. You’ll be able to make a callout that fits your vision and looks clean.
Touch Callout
For those working with or making iPhone and iPad videos, touch callouts allow you to create an annotation that marks what finger movements you made in order to create an effect. For example, a zoom would show two circles gradually moving away from each other.
Annotations
If you need to circle, mark, or point to a specific section of your video, the annotations tool will allow you to create shapes and markings on top of the video. You can choose the colors of the animation, as well as the font and line weight.
Text
If your video needs text and titling, you can do this with the text tool. It offers all of the basic Apple fonts in multiple styles and alignments. You can also drag to rearrange the placement of the text over your video or add a backdrop.
What seems like the ninth editing option is the media library, previously explained in “Screen Recording & Media”. However, you can use the settings gear on a clip in the timeline to bring up these editing options as well:
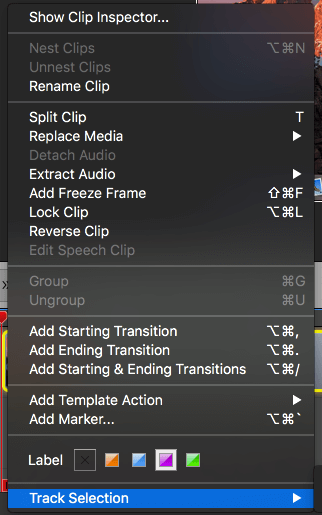
Many of these editing options add tiles to the timeline, which allows them to be rearranged and changed easily. The ScreenFlow timeline works in layers, so the topmost items cover those beneath them. This can lead to obscured content if you’re not careful but is generally effective for creating multiple effects at once.
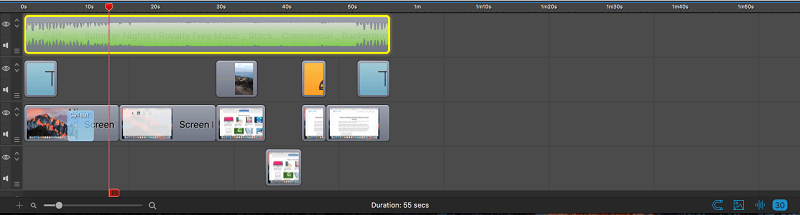
In the image, you can see the background audio track as the topmost layer, which does not block any content because it is not a visual component. Beneath this are several annotations I created in my sample video (blue for text, orange for an animation). The various video clips are also scattered amongst the layers, overlapping each other as needed.
You can move items between layers with ease, or through the timeline by dragging a block to where you want it. This timeline also has a snapping function that allows blocks to line up right next to each other, preventing accidental gaps in the footage.
Export & Publish
When your video has been completed, you can export it in a number of ways. The most standard way would be to choose FILE > EXPORT, which will create a shareable file of your video.
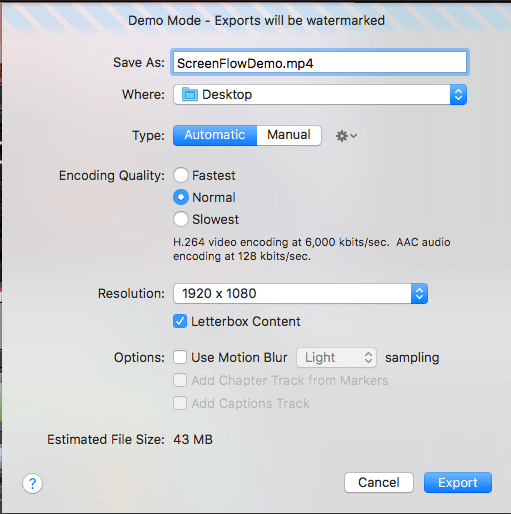
You have plenty of customization options when it comes to exporting, starting with the name of your file. If you don’t like the type of file it selects by default, you can choose from one of many options instead by changing the “automatic” selection to “manual”. Your options are WMV, MP4, MOV, or several more technical alternatives.
You can also set the resolution of your video. With some file types, you can add chapter markers for use in players like Quicktime.
If you don’t need a shareable file and would rather directly upload to your video sharing platform of choice, ScreenFlow offers that option as well.

Vimeo and Youtube are the most well-known video sharing sites, but you may want to add the file via a cloud storage service like Dropbox. Whatever you choose, you’ll need to select your settings in the same way as for a normal export, but you’ll also need your login credentials for the program you are uploading too. These permissions only to allow ScreenFlow to upload your video; the program will not do anything without your explicit permission. Additionally, you can revoke permissions at any time.
Reasons Behind My Review Ratings
Effectiveness: 4.5/5
ScreenFlow does exactly what it says, and excellently. Capturing and recording your screen is a quick and simple process, with plenty of advanced options for customization. The editing features are well developed and intuitive to use.
You can create relevant effects such as callouts and text overlay with ease. The timeline is also full-featured, with a layered management system that lets you add complex effects and manage your media easily. However, the program is most useful for annotating screen recordings and would be ill-suited to other forms of editing; it lacks versatility.
Price: 3/5
For your money, you do get a very functional and well-designed program. It does what it claims to and the process is very simple. However, it comes with a large price tag. Unless you’re a professional, $149 for an editing program that isn’t especially flexible is going to be a reach.
Even as a professional, you could buy a more full-featured program for around the same price, making ScreenFlow particularly expensive for its niche. This app would be a good fit for those who need to both capture screen recordings and edit the video clips. If you make a living on video editing, though, you’ll probably want to look for a high-end video editor such as Adobe Premiere Pro or Final Cut Pro.
Ease of Use: 5/5
Thanks to ScreenFlow’s clean user interface, I had no problem finding the tools I needed. Everything was clearly labeled and noticeable. The drag and drop features in the timeline were functional and worked smoothly, and even included a snapping feature for lining up clips. Overall, I had a great experience and enjoyed working with what the app offers.
Support: 5/5
There are many resources that support the ScreenFlow app, from standard email support to video tutorials and an active online forum. I checked out a few of the tutorial videos and found them very informative, with easy-to-follow instructions. There is also a large forum community available for answering questions, as well as a direct “contact us” option. Although they offer a premium plan with email support response guaranteed within 8 hours, my question was answered in less than 12 without purchasing the support plan.
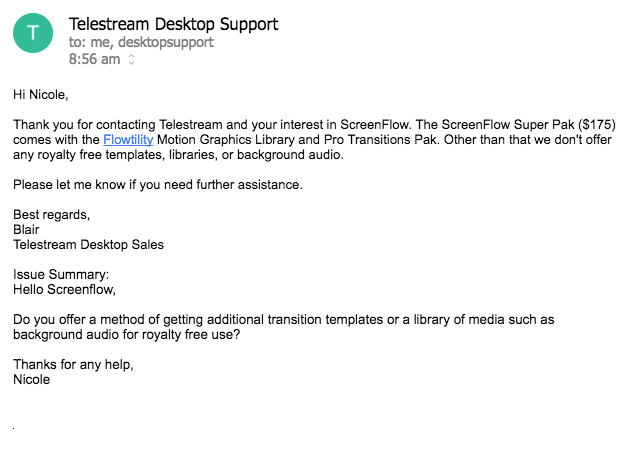
I found their answers helpful and complete. In addition to all of their other resources, that definitely earns a 5-star rating.
ScreenFlow Alternatives
Camtasia (Windows/Mac)
For a powerful video editor combined with great screen recording capabilities, Camtasia offers professional-level features. It expands upon some features that ScreenFlow has, and includes many beyond them as well. You can read our take on this full Camtasia review here.
Filmora (Windows/Mac)
Another competitor with a great track record, Filmora is a video editing suite with the ability to screen record built-in. It offers many of the same recording features as ScreenFlow. For a closer look, check out our review of Filmora here.
Quicktime Player (Mac)
A default for Macs and free for PCs, Quicktime offers you screen recording functionality, though you’ll need to go elsewhere to edit your footage. You can capture your whole screen, a section, or just audio in a similar way to ScreenFlow. However, it doesn’t have any editing functionality beyond trimming content from the beginning or end.
SimpleScreenRecorder (Linux)
Linux users often get left out of the equation when it comes to software, but thankfully open source options are around to fill in the gaps. SimpleScreenRecorder was created with an easy interface for capturing all your content needs. However, you’ll need a second program to edit your video.
We also reviewed the best screen recording software in a separate post.
Conclusion
If you’ve ever wanted more from your screen recordings, ScreenFlow will definitely give you that. It simplifies and streamlines the process of screen recording, and even has the ability to add in other clips and media. The callout and annotation features allow you to create a more immersive and understandable video, while its clean interface allows you to do everything you need with ease.
It is best suited for screen recording edits rather than other media creations due to a lack of versatility and broader editing features such as stock media. While it is a bit pricey for a screencasting tool, it’s impossible to deny the clean efficiency of Screenflow.
So, what do you think about this ScreenFlow review? Leave a comment below.
Can you, within a single ScreenShare recording session, toggle back and forth between sharing the screen and not sharing the screen (so that you see the presenter on the camera only but not the screen)? I want to be able to toggle back and forth as necessary to make a point and not be stuck in either screen share mode or no screen share.
I’ve only seen this feature available on Camtasia and am looking for an easier alternative (for a Mac).
I have tried them all and I use screenflow absolutely for anything video related with my mac.
It is awesome to create GIFs, editing videos and is super fast and well worth the price!
I have made a tutorial on my blog of some features I love about this software I hope that you will check them out as well!
I am very passionate about technology and SEO and this is one of the few essential tools I have.
True Nicole. Downloaded their trial version recently. It has so much limitations, but after upgrading its amazing. I didn’t want Apple’s High priced Final Cut as my needs are just creating video tutorials for my students.
Screenflow does the job perfectly and i am not even using plenty of tools available in it.
Will definitely recommend it to anyone looking for a good screen recorder app.
Robin.