Filmora
Summary
Filmora is a great video editing app that balances powerful features with an intuitive interface at an affordable price point. It supports all modern video formats, as well as HDR, 4K, and 8K video editing and output. There are a range of handy AI-powered tools for speeding up the editing process and creating impressive effects with ease, although some of the best tools require an additional monthly subscription at a high cost.
It’s not a professional video editing suite for making Hollywood blockbusters, but most beginner and intermediate videographers looking to create high-quality shareable videos quickly and easily will be happy with the results. Once you’re finished editing, you can upload directly to YouTube, TikTok, and Vimeo to share your creation with the world.
What I Like: Excellent video editing tools. 4K/8K & HDR video support. Integrated stock media library. Vertical video effects. Built-in screen recording. YouTube / TikTok / Vimeo uploading. Optional GPU acceleration for faster encoding.
What I Don’t Like: Extra subscription for effects and plugins is very expensive.
Is Wondershare Filmora really 100% free?
No, Wondershare Filmora is not free. It is a paid app available as a yearly subscription or as a one-time purchase, and there is also an additional monthly subscription available for access to advanced AI tools, effects, and presets. There is a free trial available, but some features will be inaccessible, and any videos that you export will have an extremely visible watermark.
How much does Filmora cost?
There are two main purchasing options: a one-year license that must be renewed annually for $51.99 (Mac) and $61.99 (Windows), or a lifetime license for a single payment of $79.99 (Mac) and $89.99 (Windows). These licenses are only valid for a single computer, but multi-seat licenses are also available on a sliding scale depending on the number of copies you want to use simultaneously.
If you already purchased the software but lost your license key or you’re re-installing on a new computer, you can recover your license key by clicking the “Register” menu at the top and selecting “Retrieve Registration Code.” This will take you to the support section of the Wondershare website, and allow you to enter the email address used to purchase the software. You’ll then receive an email that contains your registration code, and you can enter it to regain full access to the software.
Do YouTubers use Filmora?
Yes, many YouTubers use Filmora, although there isn’t a lot of detailed information available about market share for video apps. It’s not quite as popular as industry-standard editors like Adobe Premiere Pro or Final Cut Pro, but those apps are also capable of creating professional-quality feature films.
Can Filmora be trusted?
Wondershare has been making software since 2003, and Filmora is widely used around the world. From a purely technical standpoint, the software is completely safe to use and passes malware checks from Windows Security and MalwareBytes AntiMalware.
Is Filmora safe to use?
The program is absolutely safe to use, and both the installer file and the program’s executable file pass virus and malware scans from Microsoft Security Essentials and Malwarebytes AntiMalware. The Mac version also passed scans from Drive Genius.
The installer program available from the official website connects directly to their servers to ensure that you’re downloading the latest and most stable copy of the software currently available. The installation process is simple and straightforward, and it doesn’t attempt to install any unwanted adware, add-ons, or other third-party software.
How to remove the Filmora watermark?
Removing the watermark on exported videos is extremely easy, and only requires that you purchase a license key for the software. There are several ways to do this from within the application, including the prominent red “Register” menu item in the toolbar as well as the “Unregistered” link in the bottom right corner.
Once your registration is complete, you simply enter your license code, and the watermark will be removed from any videos you export in the future.
Table of Contents
Why Trust Me for This Filmora Review
My name is Thomas Boldt, and I’m a college-educated graphic designer with experience in motion graphic design as well as a dedicated photography instructor, both of which require me to work with video editing software. Creating tutorial videos is one of the best ways to showcase more complicated photo editing techniques, and high-quality video editing is an essential element for making the learning process as smooth as possible.
I also have extensive experience working with all types of PC software, from small open-source programs to industry-standard software suites, so I can easily recognize a well-designed, high-quality program. I’ve put Wondershare Filmora through several tests designed to explore its range of video editing and exporting features and documented all of the results of the process with screenshots you’ll see throughout this review.
I have not received any kind of compensation or consideration from Wondershare to write this Filmora review, and they have no editorial or content input of any kind.
Detailed Review of Filmora
Filmora has a huge range of features, and since we don’t have room to talk about every single one of them, I’m going to focus on the main areas that make it worth your time – as well as point out a few issues that might get in your way. I’ll take a look at the editing interface and tools, then explore the fancy new AI-powered tools that Wondershare has included, as well as the available presets, effects, and a few of the most useful extra tools.
Note: The screenshots I used for this article were taken from the Windows version.
Editing Interface
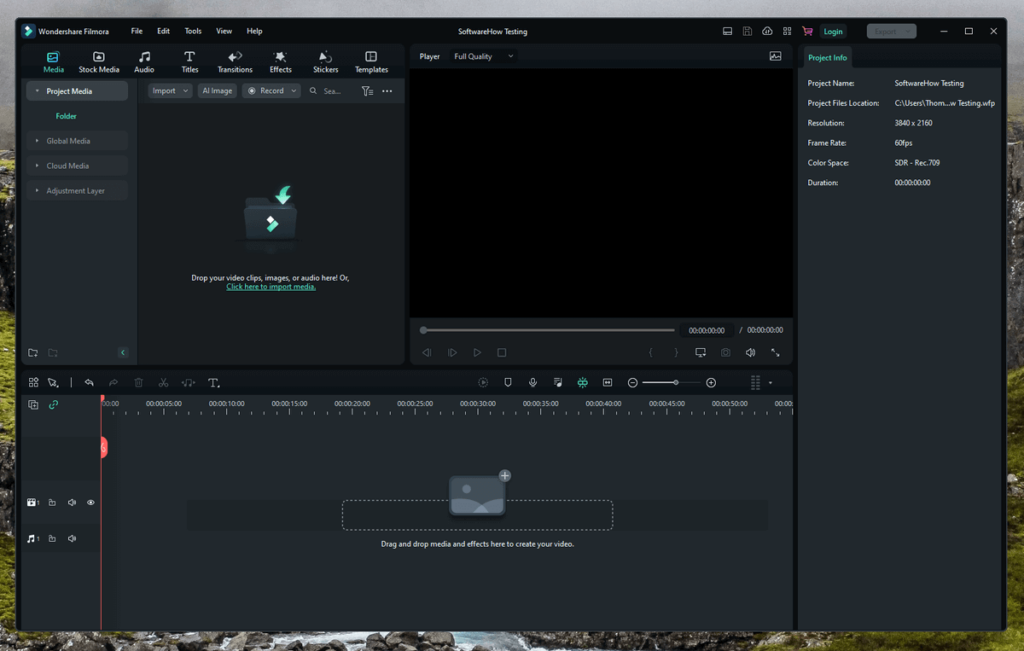
The default interface in the latest version of Filmora feels a bit more cluttered than in previous versions, but this is partly because Wondershare has been hyping one of their latest features: customizable workspaces. While I am usually a big fan of apps that let you customize the user interface, this is one instance where I don’t see as much value in it, but perhaps that’s just because old UI – now known as the “Classic” workspace – was already quite good.
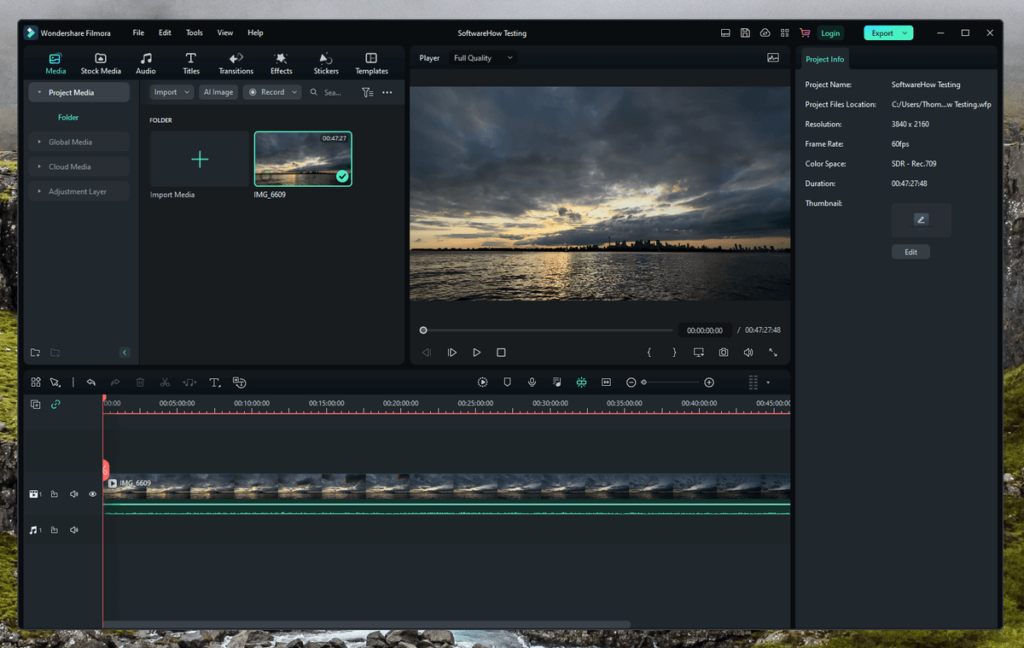
The main section you’ll be working with is the timeline, always located in the bottom left of the screen, which lets you manage all the different video clips, images, overlays, and audio that will become your movie. It uses a simple and responsive drag-and-drop interface that allows you to arrange, trim, and edit your various media elements quickly, and the automatic snapping feature that precisely aligns your clips makes composing your video a breeze.
More advanced editing options for each element of your video are accessed using the Properties panel on the right, where you’re presented with any customizable options related to that item.
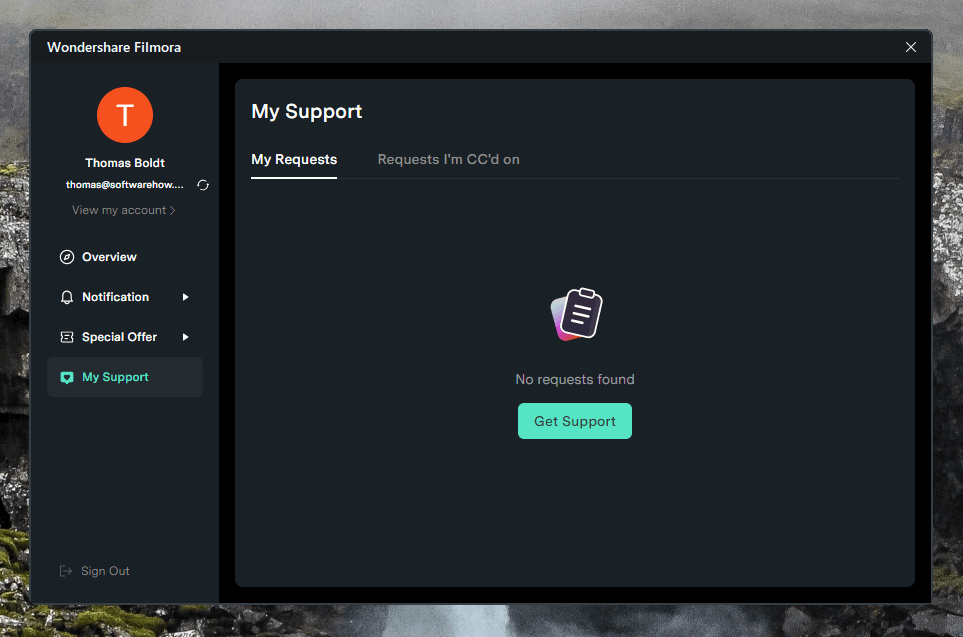
The interface also includes a handy support dashboard, as shown above, that links directly to the Wondershare ticket submission system. If you’ve got an active support ticket, you can manage the interaction using the in-app dashboard, which is a very nice feature – but hopefully, it’s one that you’ll never have to use!
One of the few minor drawbacks of the interface is that it’s impossible to name your tracks, which can make it a bit confusing to find which item you want to edit among a range of similar media elements. It’s not a problem when you’re working on a simple video like the one I made for this Filmora review, but on a larger project, it could be all too easy to get lost in the timeline.
The only other interface issue that I experienced during my testing was that the media window was often a bit too small to browse the various libraries comfortably. You can customize the size of the window by dragging the borders, but it would be nice if there was a ‘Browse Media’ workspace or something similar that made the adjustment a bit faster.
My personal take: Overall, the interface does a good job of providing flexibility without being overwhelming. I think the Classic workspace makes the most sense since there are few situations where you’ll need to see your media library and edit the properties of an object on your timeline at the same time, but everyone works differently, so it’s nice to have the option to customize the workspace.
Basic AV Editing Tools
Filmora’s basic video editing tools are quite excellent. I loaded up a 16 GB 4K video clip, and it automatically suggested using a ‘Proxy’ file that acts as a low-resolution placeholder. This kept the editing process smooth and lag-free during my testing, even when working with large files, and the full-quality copies of your media clips are used when rendering the final version of your video.
Trimming, clipping, and arranging all worked instantly, and the Properties panel provides a huge range of adjustments that can be applied to the clip as a whole. You can adjust every aspect of color, exposure, and playback speed, as well as more basic aspects such as position and rotation, and these effects were also applied instantly.
If you want to apply color adjustments to every element of your video, including titles and other effects, you can add an adjustment layer from the media library as your top track that will act as an overlay for every other element in the timeline. Some handy preset LUTs can completely change the vibe of your video clips.
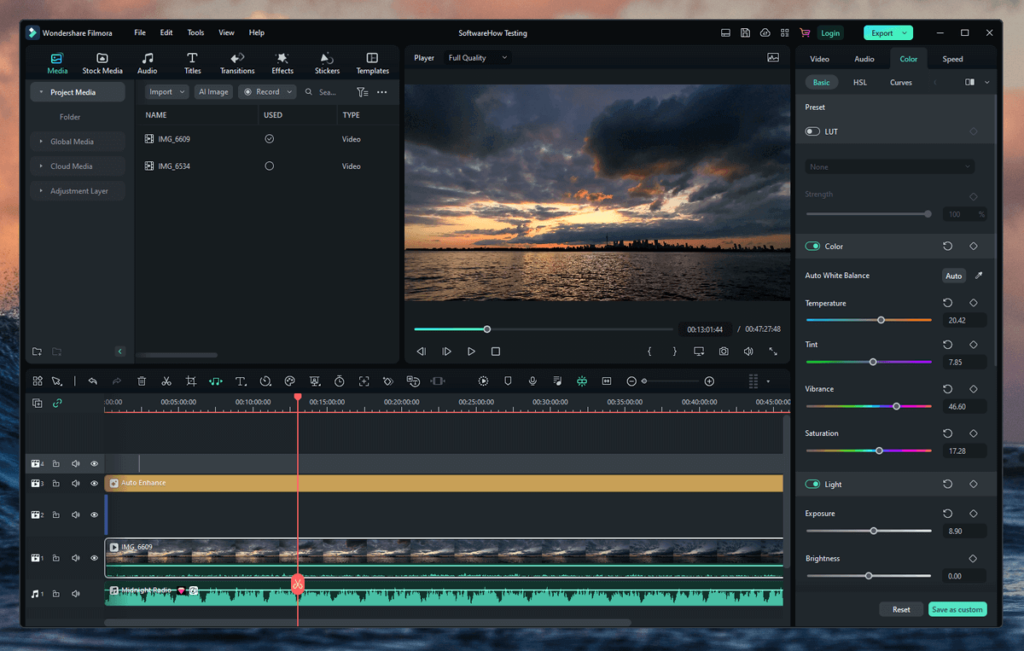
There is also a full suite of masking tools, chroma keying (aka ‘green screening’), keyframing for animating various effects and properties, and just about anything else that you might need to do with video. Some of the most interesting new tools in Filmora are AI-powered, so we’ll take a closer look at them in the next section.
Filmora also has several tools for working with your audio tracks, although only the built-in controls are quite capable in their own right. You can adjust overall volume directly on the timeline, but digging into the Properties panel will let you control pitch, add fades, apply an EQ, remove noise, hums, and other distractions, and even use AI to enhance speech clarity.
You can automatically detect silences in your audio track and use them to cue video edits, and there’s even a built-in visualizer effect that automatically matches your music, bringing back nostalgic memories for me of Winamp visualizations and the beginning of the MP3 digital music revolution. Maybe not useful all the time, but still fun!
My personal take: I always enjoy using an app that has more editing options than I can think of using in a single project, and Filmora delivers on that front. If you can imagine doing it with video, then Filmora can probably do it. To cap it all, each tool is responsive and simple to use, which is what really matters.
Automatic AI Tools
The machine-learning craze has taken the software industry by storm, and Filmora makes full use of the latest advances by offering an impressive range of AI-powered tools that can dramatically improve and simplify your editing process and, at the same time, open up the path to new creative effects that simply weren’t possible before.
On the more practical side of things, you’ve got access to tools like automatic image stabilization, automatic audio denoising, and automatic reframing of widescreen videos into the vertical format popular on smartphones, but there’s a lot more that Filmora can do.
Perhaps the most useful of the AI-powered tools is AI Portrait, which can simplify your entire filming and editing workflow. Instead of messing around with green screens and chroma-keying, AI Portrait will detect humans in your video and help you automatically mask them to remove the background. You can also “attach” image elements to your video subjects, similar to popular Snapchat and TikTok filters, so that the stickers, emojis, and other flourishes automatically follow your subject’s movements.
On the wild and maybe-also-not-really-super-useful side, Filmora also provides access to the latest generational AI tech right in your media library. One click of the ‘AI Image’ button will give you access to a basic text prompt interface with three basic size options and eight different style options. You simply type your image prompt and then let the AI create the image for you.
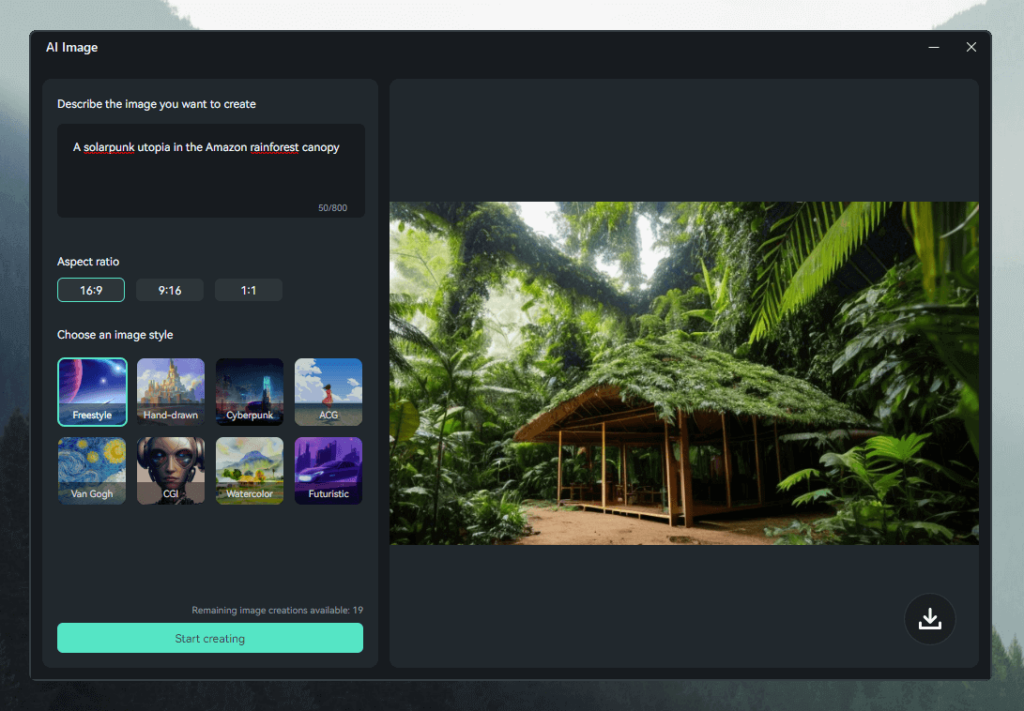
I’m not sure how useful this is for most video projects, but it’s still a lot of fun to play around with. Fortunately, generative AI isn’t ready to create decent-looking video clips (if you’ve seen the AI-generated clip of Will Smith eating spaghetti, you’ll know exactly what I mean – if not, my apologies in advance for the nightmares), but perhaps that day isn’t too far off.
My personal take: For some of these tools, it’s debatable just how much “AI” is actually involved, but some of the more practical AI tools are truly excellent. You’ll also have a lot of fun with the sillier options, as long as you don’t expect them to create Hollywood-level special effects.
Video Effects and Presets
Filmora offers a huge library of different preset elements that you can include in your movies, and some of them are quite good. There are titles, credit sequences, and lower third overlays, as well as a range of filters, LUTs, emojis, animations, and other elements that can be added to your movie with just a few clicks.
Perhaps most importantly, Filmora also includes preset effects and frames for vertical videos, which is key if you’re a hardcore TikToker.
Many of the presets can be fully customized and saved for later use, although some presets only allow you to customize certain parts of them, such as fonts or masking.
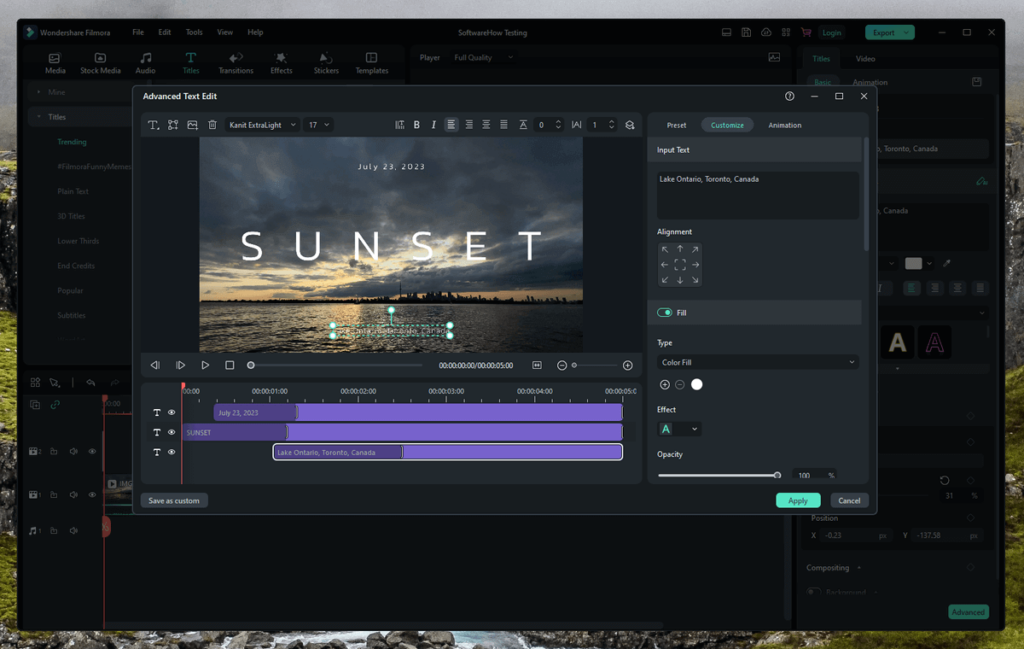
The only real problem with Wondershare’s approach to effects and presets is that many of them require an additional subscription, which costs more than the actual software itself. This add-on gives you access to a Filmstock standard plan, the BorisFX and NewBlueFX effects libraries, and the AI Portrait tool that I discussed in the previous section.
My personal take: I understand that Wondershare wants to keep customers as continuing revenue streams, but I think the pricing for the add-on subscription is a bit steep for the value that it provides. The Standard Filmstock plan is half the price when purchased separately, so it might provide better value unless you do a lot of Tik Tok videos that will benefit from the AI Portrait tool.
Extra Editing Tools
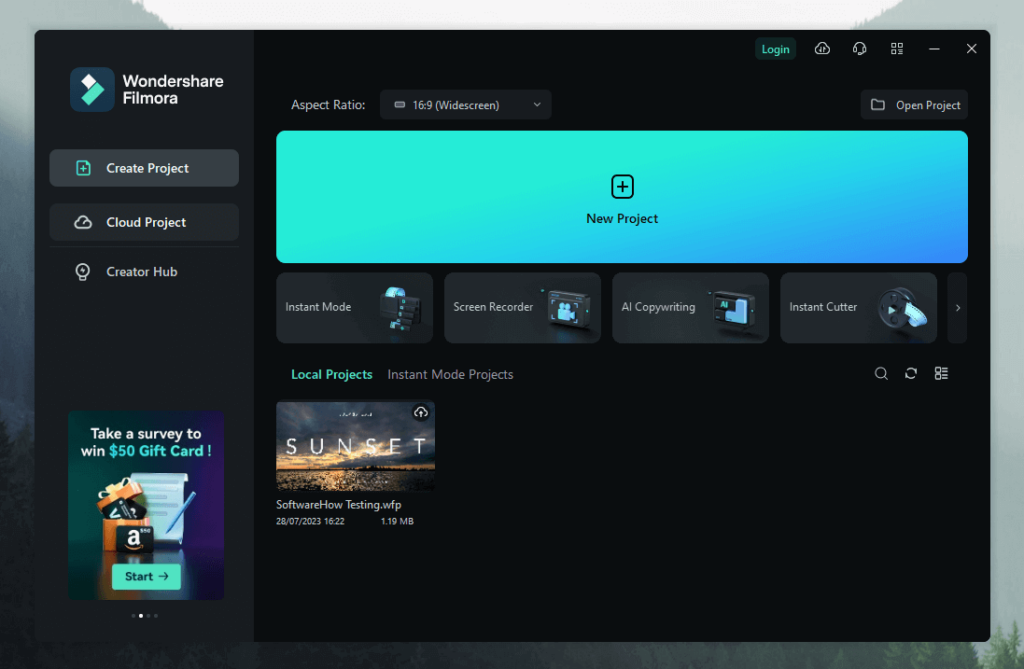
When Filmora first loads, you’re presented with a small project management dashboard. This allows you to resume previous projects or start new ones, but it also provides quick access to some of the more useful tools that are otherwise a bit buried in the Filmora interface, like Instant Cutter for combining action cam footage or Silence Detection for automatically skipping pauses in your media.
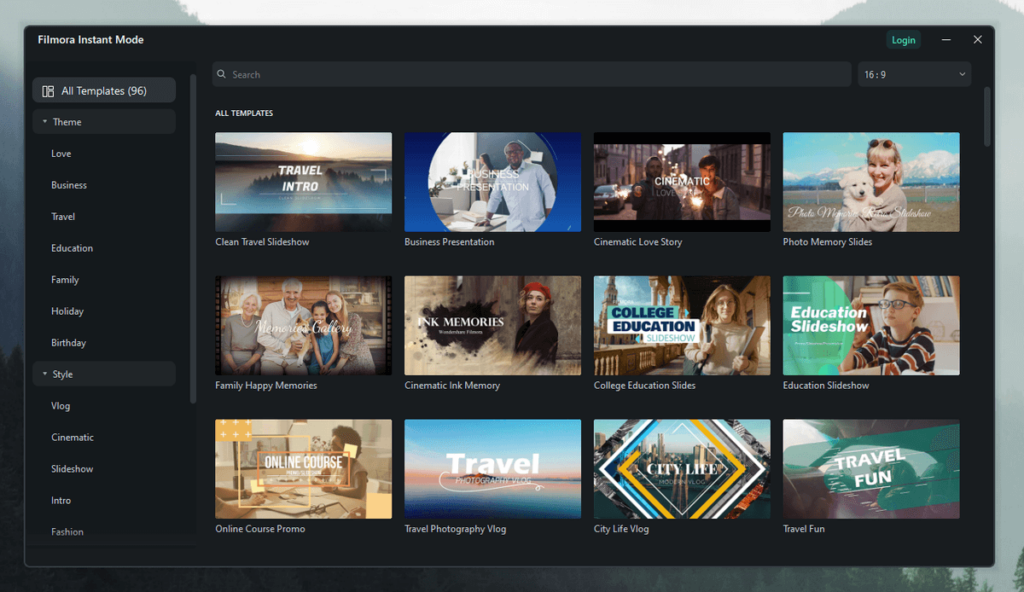
For those of you who are new to video editing, there’s also the extremely user-friendly Instant Mode. Instant Mode walks you step-by-step through the process of creating a video using one of hundreds of preset templates. You simply provide the media, customize any text the preset includes, and then you’re done!
For those of you making on-screen software tutorial videos, the screen recording feature will be a major productivity booster. Instead of using a separate screen capture app to record your instructions, Filmora offers a built-in screen recording feature complete with audio, mouse click tracking, and varying quality options. The resulting file gets imported directly into your media library to be quickly added to any project you’re working on, allowing you to streamline your recording process.
One of the more unique options found in Filmora is made possible by integrating the wildly popular ChatGPT generative AI system as a copywriter. You can ask it to generate video topic ideas around a specific subject, write your video descriptions for you, or even generate entire scripts.
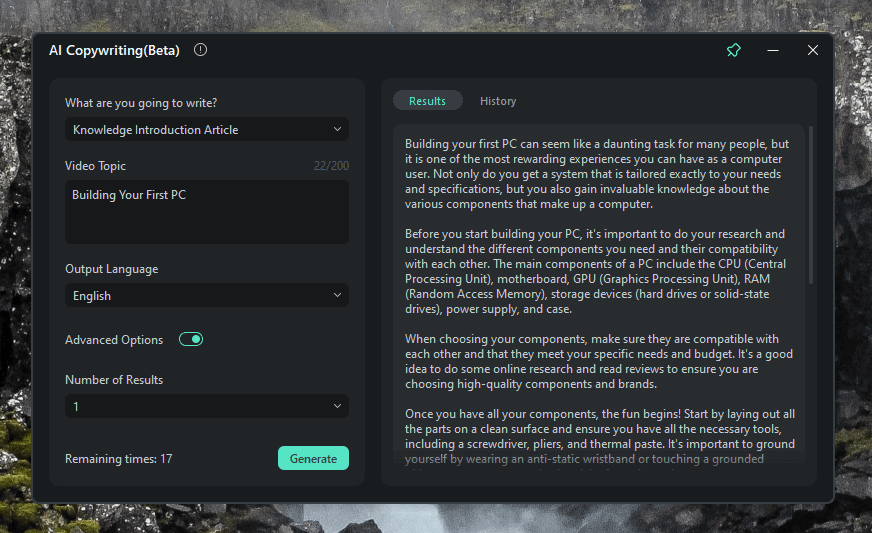
While this is undeniably fun and lets Wondershare talk about how they’re using the latest AI tools, I’m not sure how useful this will be in the long term.
My personal take: For the most part, these extra tools are useful additions, but some are much more successful than others. I’m not convinced of the value of generative AI for this kind of creative purpose, and I think it is better to build your own unique voice rather than using AI as a personality substitute.
Reasons Behind My Ratings
Features: 5/5
Filmora does a great job of editing videos at the enthusiast and prosumer levels, and it’s quite effective at its primary tasks. On top of solid basic editing options, there are also excellent practical and silly AI-powered tools for enhanced workflows and special effects. For most users looking for a video editing program, Filmora will handle anything you can throw at it with ease, streamline your creation process, and help you have fun while doing it.
Pricing: 4/5
The pricing for the base app is quite reasonable, both for a yearly subscription plan that includes regular updates and for the one-time purchase ‘Perpetual’ plan that only includes updates for the current software version.
However, both of those main plans only cover the base Filmora software. To get access to all the latest effects and AI tools, you need to purchase an additional monthly subscription that costs significantly more than the app itself.
Ease of Use: 4/5
The base app itself is well-designed, but there are so many features that the interface is inevitably a bit cluttered. The ability to customize workspaces may be able to clear things up a bit, but Filmora’s Instant Mode provides another extremely user-friendly way to create impressive videos using presets.
Support: 5/5
Wondershare provides an impressive degree of support for Filmora, which is a nice change from previous versions. There is an in-app support dashboard that allows you to directly reach out to Wondershare and manage your active support tickets, and the Wondershare website contains a full support guide and video tutorials, as well as links to YouTube and Instagram communities.
Final Verdict
Overall, Filmora is an excellent video editing app that provides enough tools to keep everyone but the most demanding professionals happy. If you can imagine it in a video, you can probably do it with Filmora, and Wondershare seems dedicated to constantly improving their software which makes the subscription model more appealing than it is for some other apps I could name.
The only real drawback is that the most exciting effects and AI tools require an additional subscription that costs more than the app itself, so you’ll have to decide for yourself whether you think they’re worth it for your needs. Even if you choose to stick with the base app, you’re still getting an excellent video editor.

Thanks for a thorough review of filmora. Very well done! The only thing missing is your video of the final version of Juniper.
Great review, Thomas. Thanks.
But the latest version of Filmora is much different from the older version.
Would you please share your review of the latest version of Filmora?
Excellent review. Very useful to decide before I bought it.
Great review. Very informative and written well for understand by those with varied technical skill/knowledge. Thanks.
Great review. Could you review and recommend some very affordable (like free) audio libraries for video production?
Excellent review of this product. I started using it yesterday and my huge frustration (after 16 hours of trying) is that I can’t export the film I created. I can’t find the maximum size it allows, and I’m sure that’s part of the problem. Do you consult? :/
That must be really annoying! I took a look around on the support site but couldn’t find anything specific about maximum export sizes. Can you reduce the bitrate at all, or choose a more compressed format?
Otherwise, you might want to try submitting a support ticket to the Filmora team at http://support.wondershare.com/
Hope you get it sorted out!