
You may or may not be aware, but that obscure button on every PC keyboard labeled ‘PrtScn’ actually means ‘Print Screen’. While it doesn’t actually create a printout of your screen, as you might guess, it will copy your screen into your computer’s digital clipboard. This basic method has some major drawbacks, however – you can’t specify which part of the screen you want to capture, and you can only record a single image.
There are plenty of reasons why you might want to record your screen, and documenting your instant message threads to make hilarious jokes is just one of them. If you do any kind of digital tutoring, offer or need tech support, or use video conferencing, using your operating system’s default screen capture system won’t be good enough to record you properly.
Whether you want a more precise way to capture specific parts of your screen or if you want to record entire videos, you should ditch the built-in basics and get a dedicated screen recorder.
The best paid screen recorder I’ve reviewed is Flashback Pro from Blueberry Software. It’s a remarkably simple recorder that’s paired with an excellent video editor, which is a rarity among screen recorders. You can capture image and video clips as you’d expect, but you can also add voice/graphic/text annotations and even adjust elements such as cursor size and click-tracking after you’ve recorded your video. The interface is clean and clear, but in case you want some additional help, Blueberry has provided a set of tutorial videos to help you with the most common editing tasks.
The best free screen recording software I’ve run across is an open source project called OBS Studio. Available for Windows, Mac and Linux, it’s a basic screen recorder that allows you to capture multiple video sources at once, combine them, and create some basic transitions between recordings. It’s got a well-designed interface that’s easy to use, but unfortunately, it’s missing the sort of basic video editor and annotator that you can expect in a paid screen recorder.
Table of Contents
Why Trust Me for This Guide
It’s easy to find reviews of software online, but it’s much more difficult to find reliable reviews online. Fortunately for you, you’ve reached an entire site filled with content you can actually trust. My name is Thomas Boldt, and I’ve been working with a wide range of screen recording apps almost since they were first developed as third-party programs.
During my work as a design team manager and a photography instructor, I work exclusively online, and I can’t just let them look over my shoulder as I explain a procedure – they’re probably on the other side of the planet. You know the old saying, ‘a picture is worth a thousand words’? It’s even more true when it comes to a good tutorial video at 30 frames per second, and a good screen recorder makes the entire process extremely simple from start to finish.
Note: None of the software developers mentioned in this post have provided me with any kind of compensation for the writing of this review, and they have had no input or editorial control of the content. All the views expressed here are my own.
Operating Systems and Screen Recorders
Considering that every modern operating system uses a screen to interact with users, there are remarkably few ways to actually capture the content being displayed on your screen. If you’ve ever seen someone posting a smartphone photo of their computer screen (which happens more than you might expect), you’ll realize just how common this problem is and how often people go to ridiculous lengths to solve it.
It’s actually still astonishing to me that screen recording is left out of modern operating systems – at least, full-featured screen recording. It’s always been possible to use the ‘PrtScn’ button (or ‘Command+Shift+4’ on a Mac) to copy a still image of the screen into your virtual clipboard, but that’s more or less the extent of it. Instead, both Windows and Macs use additional programs to manage screen recording and neither of them does a very good job – although Mac’s free Quicktime Player does a much better job than Windows.
If you’re wondering what Windows recorder I mean, don’t feel bad – it’s almost completely unknown, only available in Windows 10, and very limited in terms of features. It’s almost completely unknown because it’s actually a feature called ‘Game DVR’ that is included as part of the Xbox app designed to record gaming sessions. It has extremely limited recording capabilities, and absolutely no editing or other annotation features that you should expect from a fully-featured screen recorder.
MacOS has a screen recorder too, but it’s in the form of the Quicktime Player. It’s much simpler to access compared to the hoops Windows makes you jump through, and you can even do some basic trimming and editing of your video. Your videos must be recorded in a specific format (H.264 video and AAC audio), which may not work for your final output device. Most modern devices will play a video file in this format, but it would be nice to have some degree of choice about how it’s encoded. Yet even with these extra advantages over the abysmal Game DVR feature found in Windows, a dedicated screen recorder has far more to offer.
Both Microsoft and Apple don’t seem to consider adding more capable screen recording features as a high priority, despite the ever-growing popularity of online video. Both try to pitch add-on programs through their own app stores, but it would be far more useful for users to have complete integration at every level of the OS. Until the day that they realize what we want, we’ll all be using third-party apps to capture our screens – and I’m sure those developers are quite happy about it!
Best Screen Recording Software: The Winner’s Circle
Best Paid Choice: Flashback Pro 5
(Windows only, $49 for lifetime home use license, $79 for lifetime business use license)
While it’s a bit more expensive than some of the other screen recorders I reviewed, Flashback Pro makes up for it with a complete all-in-one screen recording solution that also includes an excellent video editor.
Unfortunately, it’s only available for Windows, but Mac users may be able to get it up and running with Parallels Desktop or VMware Fusion. This isn’t supported by the developers, though, so make sure you try it out with the trial version to ensure it works smoothly before purchasing.
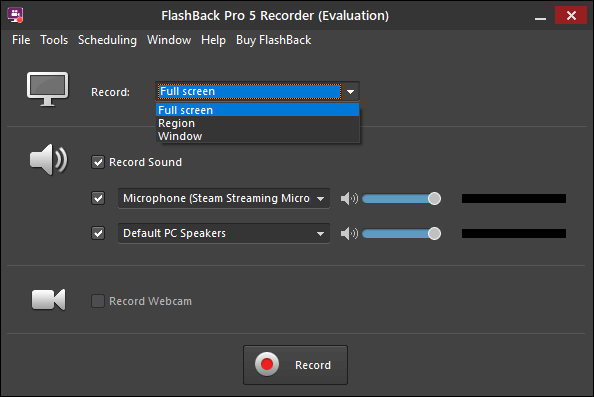
On the surface, Flashback Pro seems like a very simple program. You can record your full screen, a region you specify, or snap the recording to a specific window. You can include system audio as well as a microphone voiceover, and you can also record your webcam at the same time. You can even schedule recordings, although I’m not entirely sure what this feature is intended for. Once you start using it, you realize just how powerful it is – thanks in no small part to the built-in video editor.
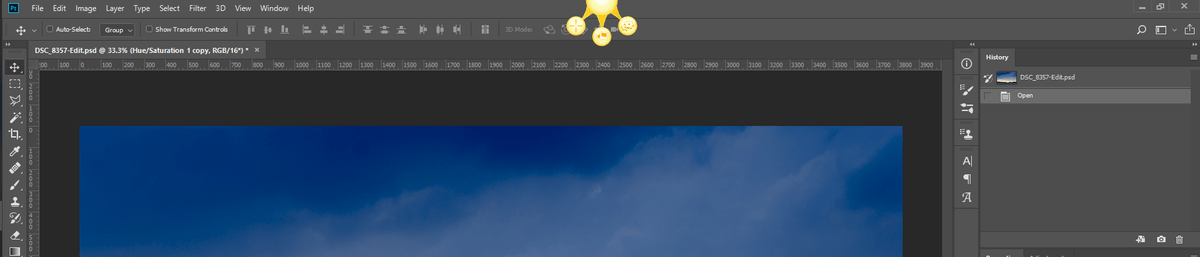
The only slight issue that I ran into when using Flashback was when using the Window recording mode. I found that it was actually too capable of selecting various sections of the Photoshop window, and I had to do a bit of experimenting, waving my cursor around the screen to find the right spot to highlight the entire program and not just one toolbar panel.

There was a bright red selector area to let me know when I found the right spot, but it was still a bit too sensitive.
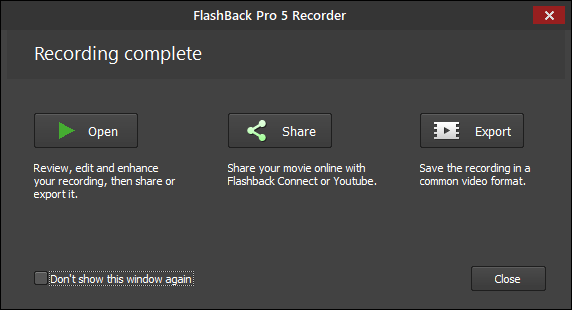
Initially, your recordings are saved as a proprietary Flashback file format, but you can quickly export it as a video file that’s playable on almost any device, or upload directly to a Youtube account from within the program. Flashback really shines when you click ‘Open’, because it loads your recording in Flashback Player. I’m not sure why they named it ‘Player’ since it’s much more of an editor than a player, but that minor point fades into the background as you realize just how capable the editor is.
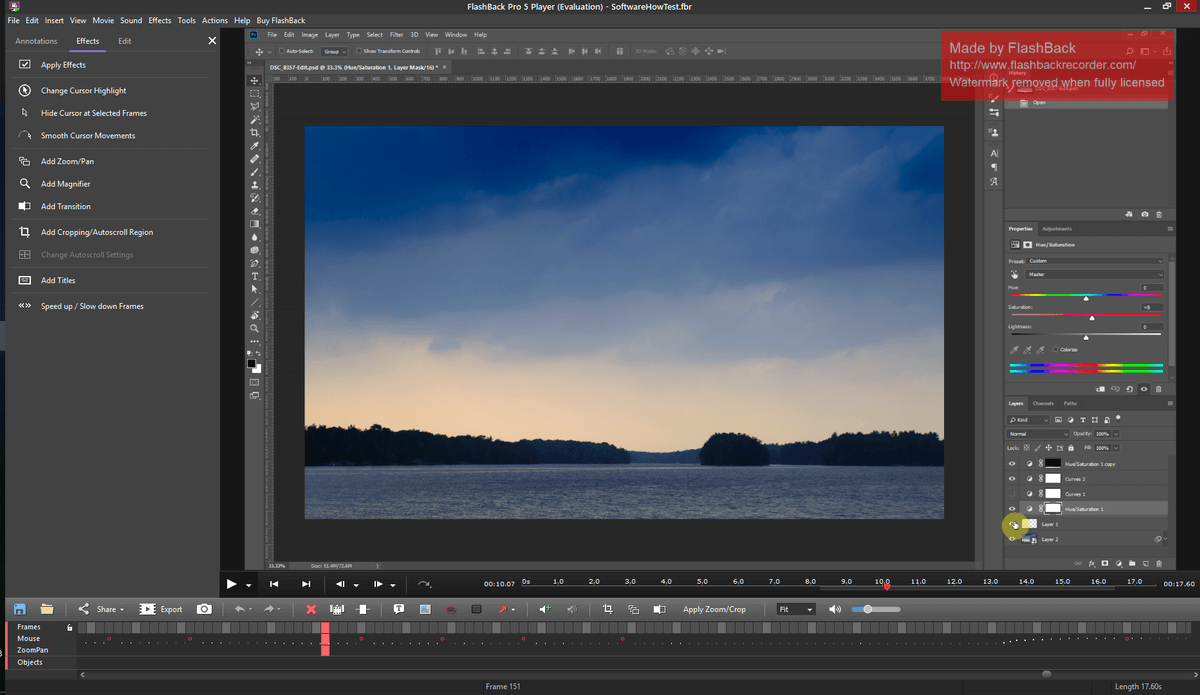
You can do basic edits such as trimming off unwanted sections of your recording, but you can also add a wide range of callouts, arrows, buttons and other images to any point in your video. You may not be able to see too clearly in the screenshot above, but your cursor is highlighted and all your clicks are tracked, which is a huge help for instructional videos and tutorials. You can customize the cursor highlight style, and even increase the size of the cursor itself for extra clarity.
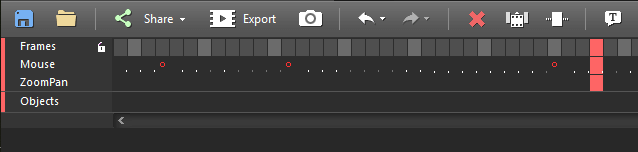
If you’ve got any experience with video editing software, you’ll immediately recognize the timeline that runs along the bottom of the player/editor. Not only does this allow you frame-by-frame control over your video, there’s a special track just for identifying clicks and mouse movements. There are a number of helpful features that make working with video simple, the sort of little design tweaks that you only find in well-designed software. You wouldn’t want to edit a feature film using the editor, but it’s the best one I’ve found in a screen recorder by far.
Once you’ve finished editing your video, you can either export it as a video file or share it online. The sharing process is quite simple, and allows you to upload directly to a Youtube account or an FTP server. You have to allow Flashback to access your Youtube account by signing into your Google account, but you only have to go through the process once and it remembers everything for you.

Flashback is easily the best screen recorder that I’ve ever used, thanks to its simple recording interface and capable video editor. Stay tuned for a full length in-depth review, but in the meantime you can download a free trial version to test it out yourself before buying. The only restriction is that any videos you create will be watermarked in the top right corner, as you can see in the earlier screenshots.
Best Free Choice: OBS Studio
Windows/Mac/Linux
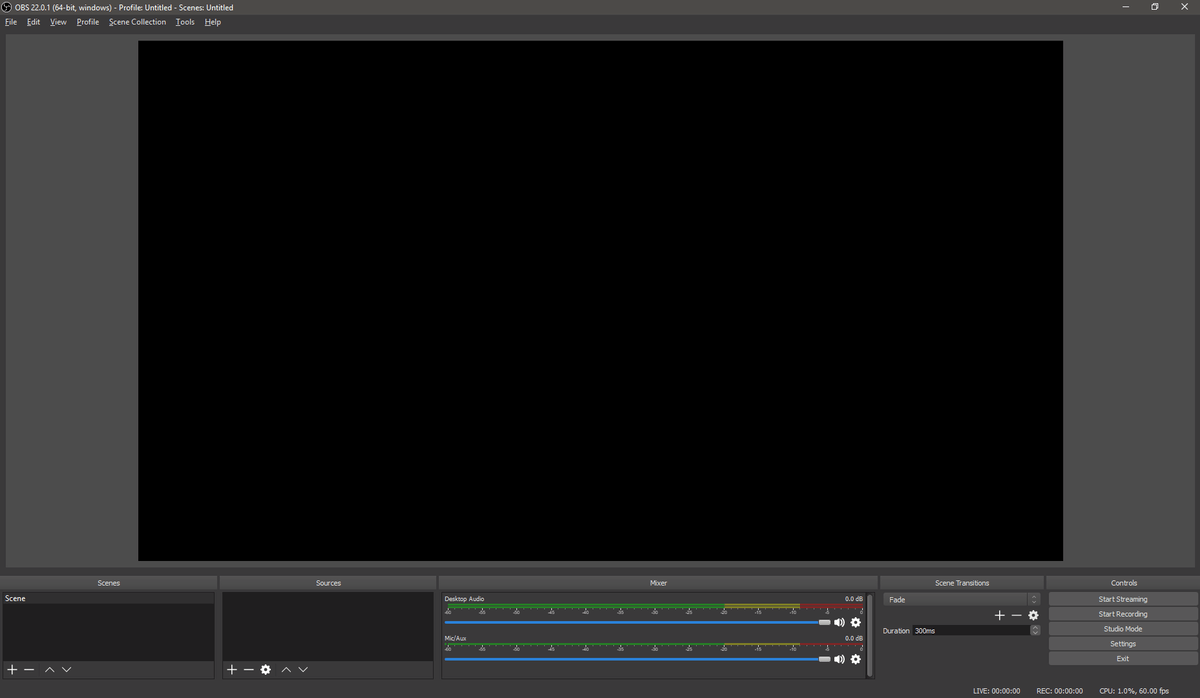
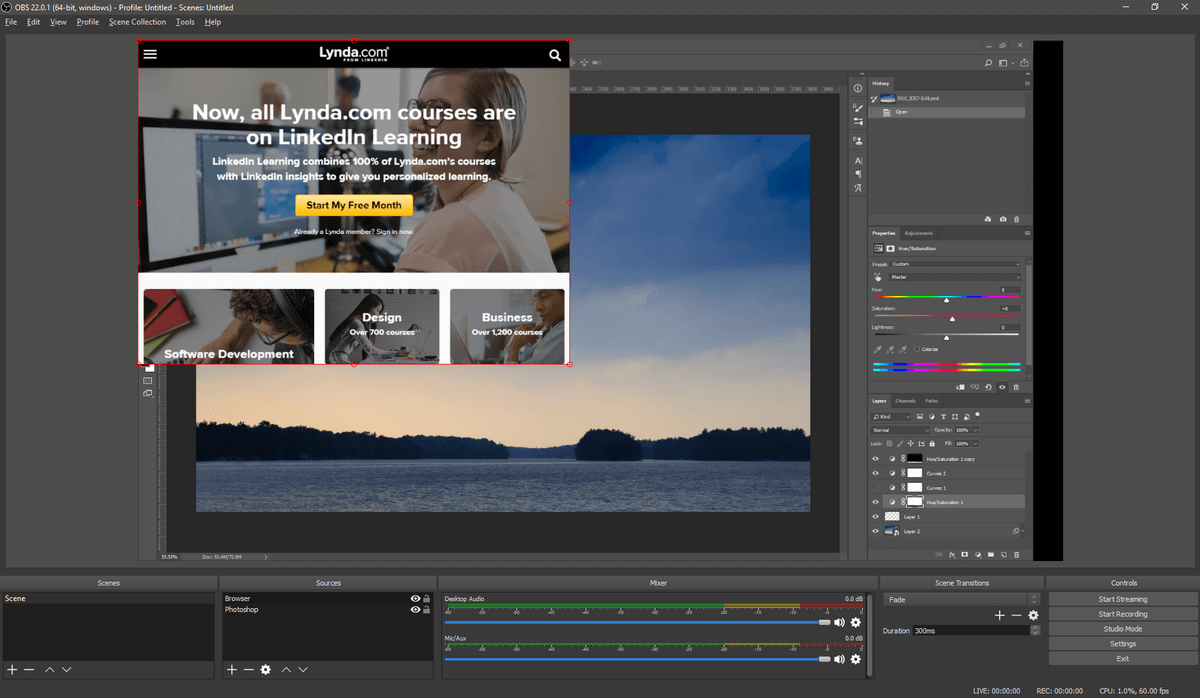
OBS Studio, or Open Broadcaster Software Studio, is an open-source project “created and maintained by Jim” according to the website, but there are a number of contributors who have helped develop the software since its initial releases. Despite the fact that there is no information available on the site about Jim, the software itself is anything but vague. It’s an excellent free alternative to the basic screen recording options your operating system provides, complete with full-featured options for screen recording and integration with a variety of popular streaming services.
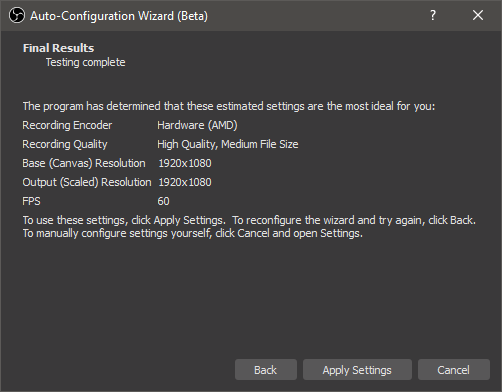
There’s no helpful introductory guide to walk you through the process of using the program for the first time, but there are several basic quickstart guides that have been prepared by other community users (you can find them here). There’s also an auto-configuration wizard that helps you with some of the more technical elements such as resolution and frame rate, although it cautions that it’s still in beta. It worked just fine for me, but I’m not sure why it was necessary to have a walkthrough for this aspect.
Once you’ve gotten the initial setup out the way, you need to configure an image source for your recording. OBS Studio offers a wide range of options from recording a specific program window to recording your entire display, and also allows you to capture full-screen video sources such as games. It can also record directly from a webcam or other video source, or record just audio if you’d prefer.

You can also combine multiple content sources together to create a picture-in-picture effect. This is perfect for combining a tutorial or game stream with a webcam video, a browser, or any other combination of inputs. You can combine as many sources as you want, although beyond two you’re probably going to start giving your users more of a headache than I got from playing around with the tunnel effect.
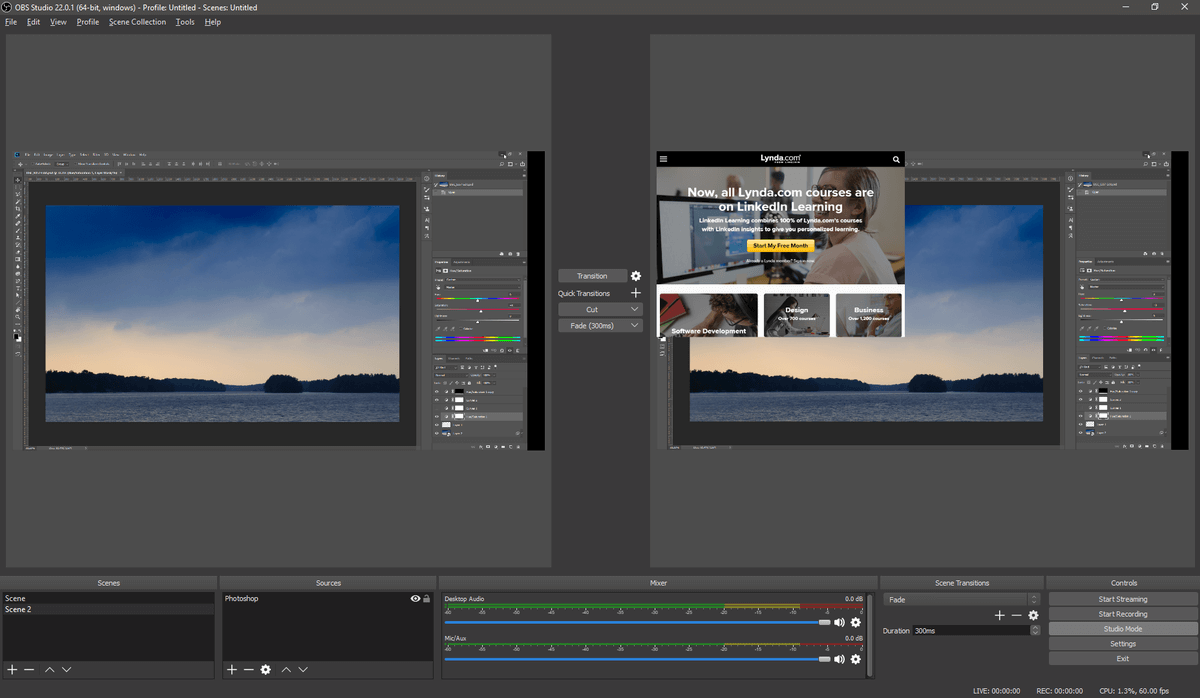
If you want to create a more complex recording, OBS Studio has some basic options that it calls ‘Scenes’. Setting up a Scene follows the same general process as setting up a source, although you’ll want to make sure that you’re in ‘Studio’ mode, which gives you the two scenes side by side so you can ensure that everything transitions properly.
Unfortunately, this is a part of the program that still could use some development work, as your degree of control is fairly limited. You can define various transitions such as fades between the two scenes, but that’s about all. It seems like this would be the perfect location to incorporate a basic video editor, but so far that’s still outside the scope of the program.
For many casual users, OBS Studio will actually provide more features than you need, but it’s refreshing to see such a capable and well-designed program available from the open source community. It’s powerful, flexible, and generally easy to use, although it would be nice to include a basic video editor for trimming clips – especially to help avoid the ‘tunnel vision’ effect you get at the beginning and end of a video when recording your entire display. You can configure hotkeys to start and stop recording/streaming, but for some reason these don’t have a default setting and must be set up first in order to be used.
If you’re looking for a screen recorder on a tight budget, you’ll be hard-pressed to find a more capable option than OBS Studio. If you combine it with a dedicated video editor, you’ll be on your way to creating polished video content in no time.
Best Screen Recording Software: The Paid Competition
1. TechSmith Snagit
Windows/Mac, $49.99
I’ve used a number of TechSmith products over the years, and I’ve always found them to be well-designed, reliable, and filled with excellent introductory guides, tutorials, and tech support. Snagit nearly won the best paid screen recorder category, but its lack of a video editor knocked it out of the running. But unlike Flashback 5 it’s available for Mac, so I’ve explored it in a bit more detail than the rest of the paid competition for those of you looking for a great Mac screen recorder.
Most of the time you’ll probably want to use Snagit in ‘All-in-One’ mode, since it combines most of the features of the Image and Video modes. The only exception is that the Video tab gives you the option to record directly from your webcam, as well as a couple of options about whether you want to capture system audio, microphone audio or both.
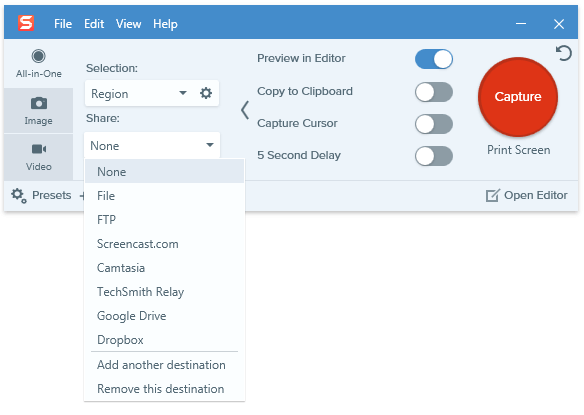
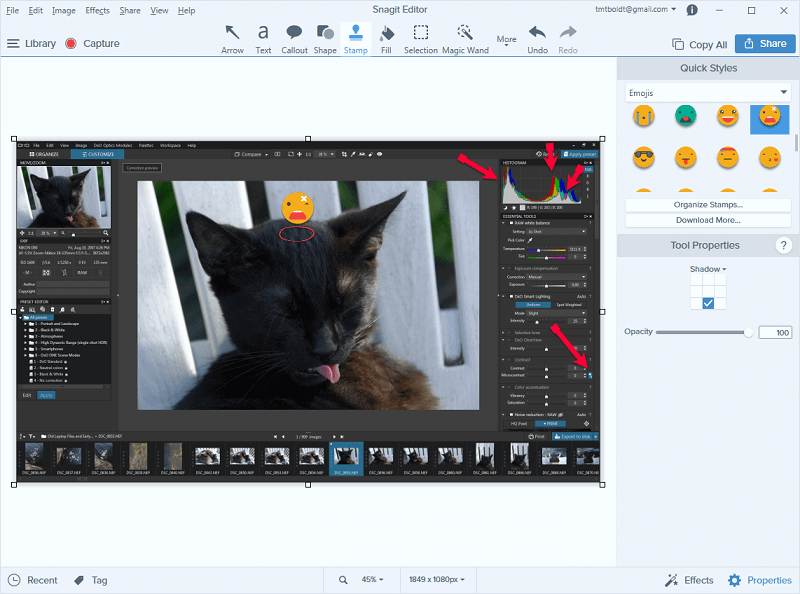
It’s a bit difficult to show screenshots of Snagit in action since it supersedes other screen capture methods, but it uses an intuitive method of defining what area of your screen to capture. You can simply click and drag to define any sized area you want, or you can mouseover various screen elements and it will autodetect what’s being displayed and snap the capture area to match. This feature even works within entire windows, so you can highlight sections of a program, or even the text/buttons within a dialog box if you’d like to (though I’m not sure why you’d need to screencap a single button).
When it comes to saving your final capture, you can save it to your computer, an FTP site, or any of several online storage services. Automating this is a huge help for anyone who needs to share their content immediately, as I often do when creating tutorial and instructional videos.
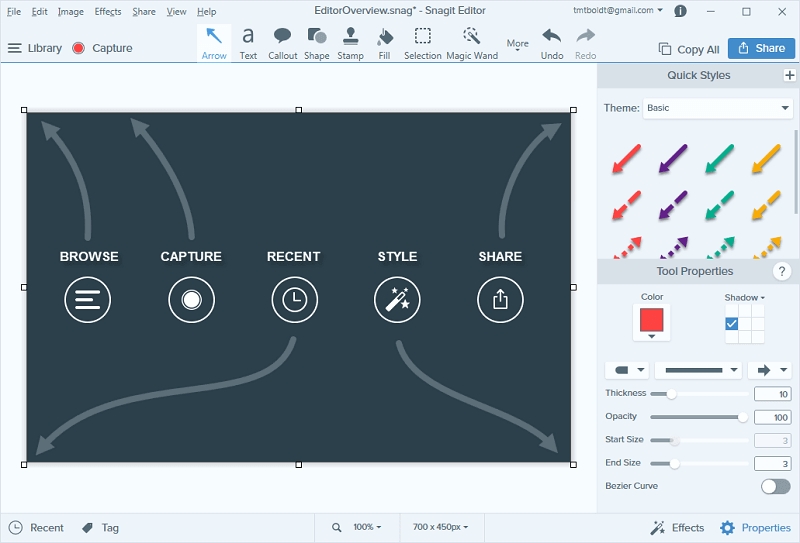
Unlike many screen recording programs, Snagit does allow you to do some basic edits to video captures. You can only trim sections from your video, but for most purposes, this will allow you to remove any unwanted sections from your capture. If you want to do anything more complex, you’ll need to use a dedicated video editor. If you want to annotate or edit a single image, the Snagit Editor provides everything you’ll need right within the program.
I’d really like to see TechSmith include similar features for editing video clips, but that would start to duplicate some of the features found in their excellent Camtasia video editor.
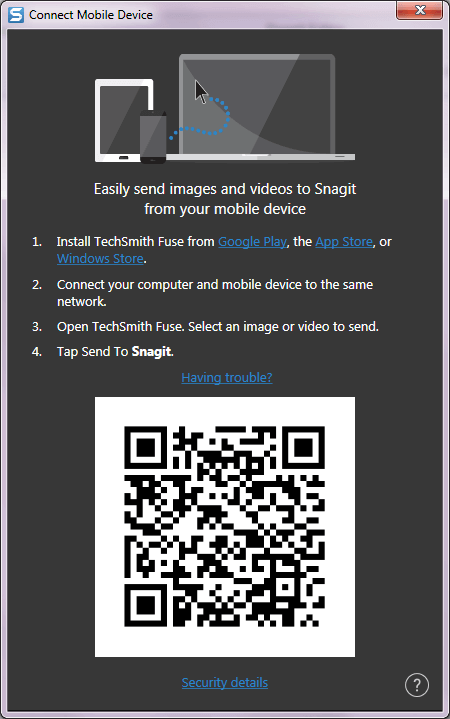
In addition to being a capable, lightweight and user-friendly screen recording app, Snagit also integrates with TechSmith’s mobile app called Fuse (available for Android, iOS and Windows Phone).
This integration is extremely helpful for people who create tutorial and e-learning materials for mobile apps and devices, and it’s a great model for how to bridge the gap between mobile and desktop computers.
All you need to do is install the app, connect to the same network, and click the ‘Send to Snagit’ button on your phone. You’ll be able to edit the images quickly and easily in the Snagit editor, and share them directly with the wider world.
If you’re still unsure if it’s right for you, you can read my longer in-depth Snagit review here on SoftwareHow.
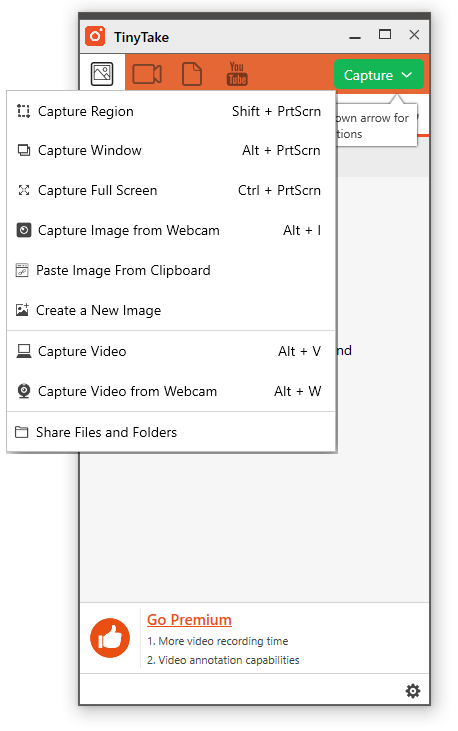
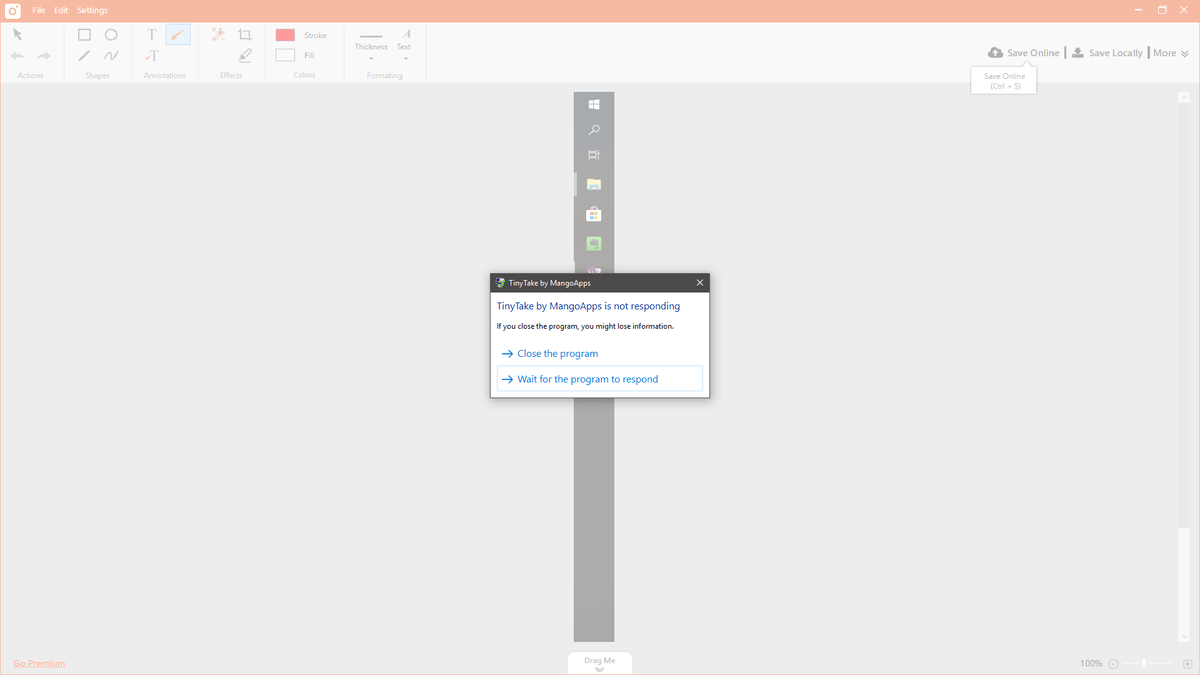
2. TinyTake
(Windows/Mac, subscription plans starting from $9.95 per week up to $199.95 per year)
This is a decent little program with a huge problem: the developers have created a ridiculous range of subscription plans (there are 5 different options), and they’re all quite expensive for screen recording software. As if that wasn’t silly enough, even the most expensive subscription tier still has a limitation on how long your recordings can be.
All of this is based around the fact that TinyTake offers a built-in way to share your recordings online through a dedicated web portal, complete with up to 2TB of storage space. However, in a world full of free online storage from Youtube, Google Drive, Dropbox, OneDrive and others, it seems a bit unnecessary to buy storage space that you can only use for one specific application.
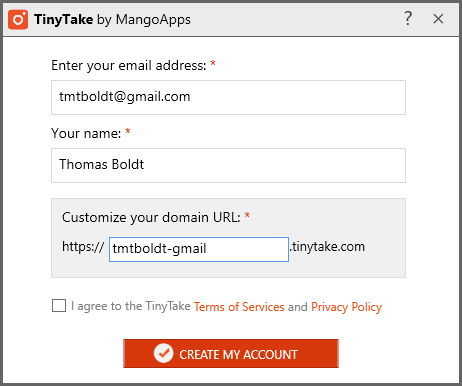
I started to get frustrated with the endless steps in this program before I even got a chance to use it, which isn’t a good sign – but like a good reviewer, I wanted to see what it could do anyways. Using a pre-made authentication system like ‘Sign in with Google’ or Facebook or Twitter would have made the process much simpler for users. That choice doesn’t make sense until you remember that MangoApps’ business model is based around selling you a recurring subscription – so it helps them when you’re locked in.
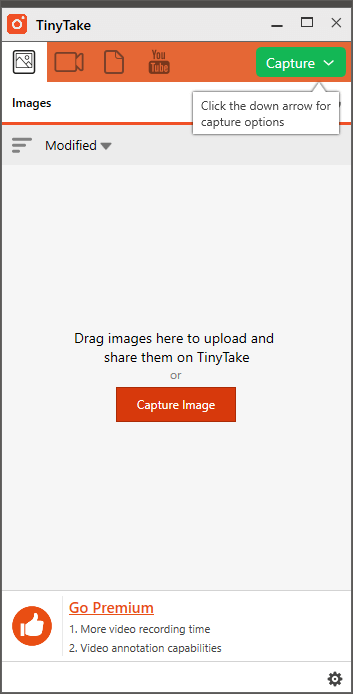
It’s a clearly designed program with decent screen recording functions, which would put it higher on the list of contenders if it was simpler to configure.
My final impression is that the developers don’t ever actually watch anyone else use their software – they would make very different design decisions if they did more user testing. TinyTake has a lot of potential, but it’s buried under so much needless complexity that I can’t really recommend it to anyone.
It’s the only screen recorder that crashed during my testing – and it was already doing the wrong thing before it crashed (who screenshots the taskbar?). You might have better luck, but be sure to test out the free trial for yourself before you buy a recurring subscription plan.
3. MadCap Mimic
($428 USD, Windows/macOS)
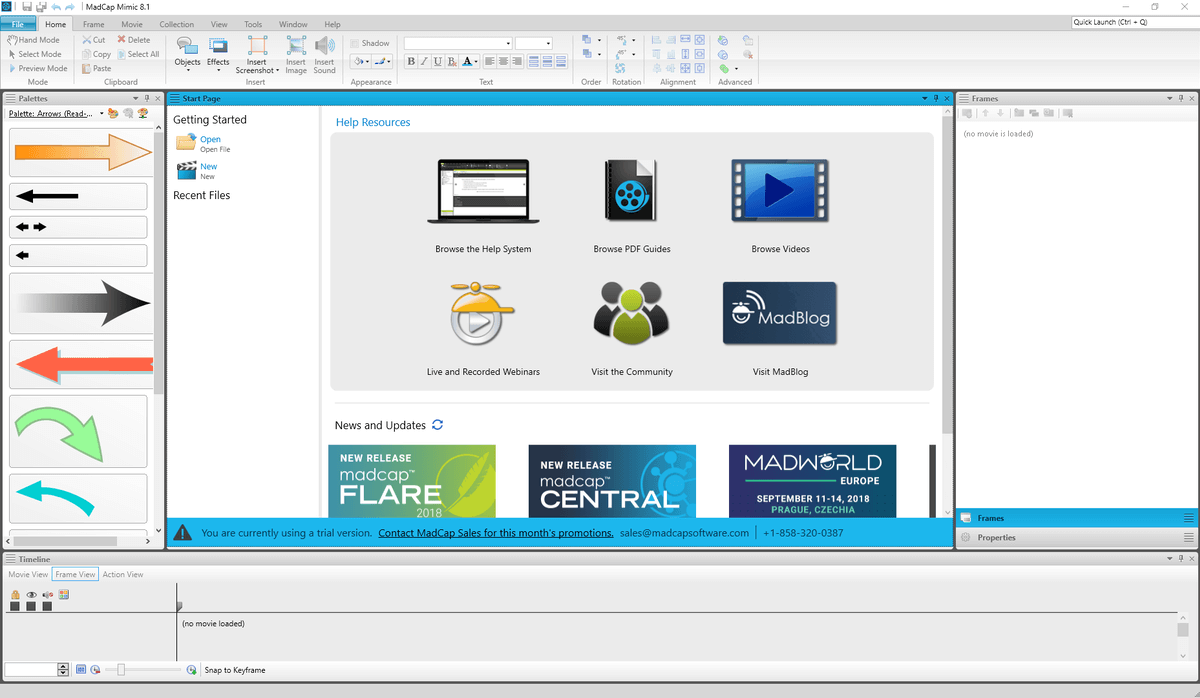
Mimic is definitely at the expensive end of the spectrum for screen recording software, but it’s also one of the most powerful entries in this list. It’s specifically designed for the tutorial and eLearning sector, and as a result, it claims to have a lot of very specialized tools dedicated to that purpose. While that may appeal to some of you it may also put the rest of you off due to its complexity.
You can annotate your recordings, add callouts, and highlight your cursor actions, but nothing I tested justified the price tag. It is possible to automatically upload your videos you Youtube and Vimeo, but those features are buried within a submenu instead of being located below the much more obvious ‘Publish’ button.
If you’re looking for a dedicated tutorial video creator this might be an option for you, but the excessive purchase price should make anyone pause to think. The video editor is at least as capable as our recommended pick, but it comes at almost 6 times the price of a business license. At this price level, you can buy software designed for editing major motion pictures, which means that Mimic doesn’t really fit neatly into any category and you’re better off with one of our other recommendations.
A Couple of Free Screen Recording Software
TechSmith Jing
Windows/Mac
Jing was my go-to in the early days of screen recording due to its utter simplicity, but TechSmith is no longer actively developing it. As a result, it’s falling further and further behind in terms of features, but if you’re just looking to make short and simple recordings in the MP4 format it’s a handy choice.

Jing presents itself as a little yellow orb that docks to the edge of your screen, and you can move it wherever you want. When you mouse over it, it expands to show you some basic options: start a recording, view your past recordings and settings.
Jing was in development before Snagit, and if you’ve tested both you’ll recognize the same method being used to define what area you want to record. It will auto detect various segments of the screen content to make highlighting a specific window easy, although you can also simply click and drag to define a custom area.
You can also add microphone audio to the system audio, but that’s more or less the extent of its recording features. TechSmith has included integration with their free Screencast.com web sharing service to make it simple to get your videos out into the world. While Jing still has a special place in my memory, if you have the budget you’re probably better off with one of our recommended apps.
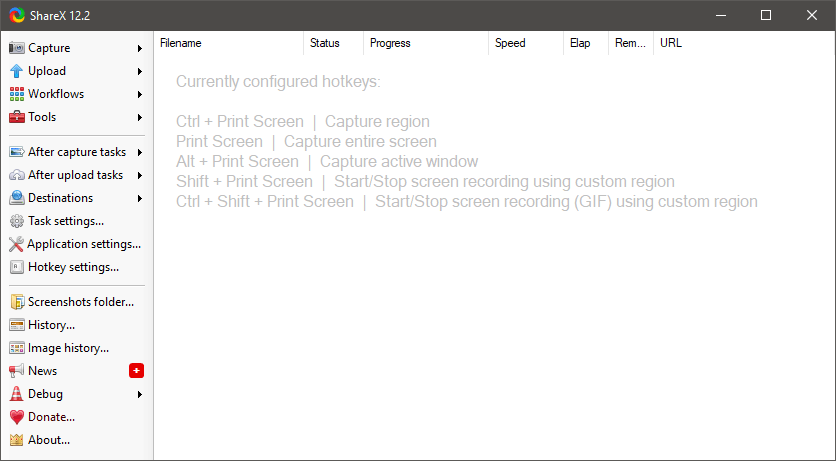
ShareX is a full-featured screen recorder that provides a lot of the functionality found in our paid winner. But like far too much free software, the major drawback is that it’s extremely frustrating to use. All the capability is there, but the interface leaves much to be desired and there’s almost no helpful tutorials or documentation available. Considering how genuinely altruistic most open source software developers are, it still amazes me that they don’t do more work on the interface.
You can do all sorts of basic recording tasks including image and video capture from your screen, specific windows or your webcam. However, the first time you try to record your screen the program automatically downloads ffmpeg.exe for you, when it would be just as easy to include it as a part of the installation package. There are no annotation options or video editing features, but there is an impressive range of built-in sharing features (as you might expect from the name), including many services that I’d never heard of before.
If you take the time to learn it, it’s a perfectly capable screen recording program. If it wasn’t exclusive to Windows, it would have a better chance of winning the ‘Best Free Screen Recorder’ title, but until the developers redesign the UI it just can’t compete.
How We Pick The Best Screen Recording Software
Can it record images and videos?
This is the bare minimum that you would expect from a screen recorder, but it’s surprising how many screen capture programs only allow you to save single images. They’re essentially glorified ‘Print Screen’ commands, which never seemed very useful to me. A good screen recorder will allow you to capture both still images and videos of unlimited length, and the very best will also allow you to record videos when apps are running full-screen (such as games and video conferencing).
Can you adjust on-screen features within your recordings?
If you’re creating a video tutorial or trying to get/provide tech support, it’s important to make every action as clear as possible. When a full desktop screen has been reduced to the size of a video player, it can sometimes be hard to follow cursors or notice when a particular button has been clicked. The best screen recorders will allow you to accentuate all of these elements, increasing the visual size of the cursor and tracking mouse clicks.
Can you add image and voice annotations to your captures?
When you’re capturing a complex full-screen program with plenty of features, you may want to highlight and label specific elements. If you’re recording a series of steps for a video tutorial, it’s much easier if you can simply record a voiceover while you’re demonstrating the actual procedure instead of adding it in later in a separate program. The best screen recorders will allow you to incorporate image and voice annotations directly into your recordings in addition to any system audio.
Does it come with any editing features?
If you’ve ever tried to create a quick screen capture video, you’ll probably appreciate that you don’t always get things right on the first take. Instead of doing ten takes to get an exactly perfect recording, basic editing functions allow you to prune out any inconvenient sections of your video. Even if you’re just creating screenshots, being able to edit and add things directly within your capture program is much simpler than taking everything into a separate image editing program.
Is it easy to use?
As with all software, one of the most important considerations is ease of use. If you create the most powerful screen recording software in the world but make it extremely difficult to use, then (surprise, surprise) nobody will both using it. A well-designed program that prioritizes user experience in its interface design will always be a better choice than another program with similar features buried under a confusing layout.
Final Words
Until Microsoft and Apple take a serious look at incorporating screen recording features into their operating systems at a basic level, you’ll definitely need a third-party program – especially if you want to capture videos. Hopefully, one of these great screen recording programs will meet your requirements, no matter whether you’re creating professional e-learning content or just sharing a funny screenshot with your friends.
Do you have a favorite screen recorder that I left out of this review? Let me know in the comments and I’ll take a look!
Thanks for your post. I like the details. But you miss Bandicam for screen recording software. This software is what I am using. It has worked great.