
Snagit
Summary
TechSmith has a history of producing well-designed reliable software with plenty of features, and Snagit is no exception. It’s very lightweight and unobtrusive during the recording phase and finishes the capture process with a capable image editor that can be learned in just a few minutes. Once you’re satisfied with the final product, you can share your creations online on a wide range of services, from an FTP to Youtube, with just a few clicks.
The only issue that I have with Snagit is the price point. It’s a bit expensive for a screen capture program, and you can often get a decent video editor that includes a screen capture feature at a similar price point.
You already have a basic free screenshot tool. In Windows, you can take a screenshot by pressing the Alt + PrtScn keys; For Macs, it’s Shift + Command + 4. If that’s all that you want, you don’t need to use Snagit at all. But if you are a blogger, journalist, or tutorial maker who has the need to blur sensitive information, add fancy callouts, or capture video of your PC/Mac screen, Snagit is a perfect choice. We highly recommend it.
What I Like: Lightweight. Very easy to use. Image editor included. Mobile companion app. Social sharing integration.
What I Don’t Like: Comparatively expensive. No video editor.
Is Snagit Free?
Snagit is not free, but there is a 15-day free trial that has no limitations on usage. This free trial does require you to sign up for a TechSmith account. Once the trial period is over, you can purchase the full version of Snagit, which includes a lifetime license for both the PC and Mac versions of the software.
Is is safe to use Snagit?
Snagit is absolutely safe to use, as none of its processes interact with your file system except when saving your screen captures. The installation is large, but both the installer file and the program files themselves pass security checks from MalwareBytes Anti-Malware.
Is Snagit better than Snipping Tool?
Yes, Snagit is a much better screen capture tool than Window’s built-in Snipping Tool. Snagit also allows you to capture video and create panoramic scrolling screen captures for large windows, which cannot be done with Snipping Tool. The SnagIt editor is also much better than the Snipping Tool editor thanks to its extra features and greater control – although Snipping Tool is free. Learn more from our detailed comparison here.
Table of Contents
Why Trust Me for This Review?
Hi, my name is Thomas Boldt, and I’ve been a tech fanatic for decades. During my work as a graphic designer and photography writer, I’ve often found it necessary to communicate complex ideas as quickly and clearly as possible.
Creating detailed instructional videos and screen captures is almost always faster and more effective than long-winded text explanations, and as a result, I’ve experimented with a number of different screen capture apps over the years. They are definitely not all created equal, and the last thing you want to do in the middle of a difficult explanation is to stop and struggle with your software, so I appreciate the value of a well-designed capture app.
TechSmith has not provided any compensation in exchange for this review, nor did they provide me with a free copy of the program – I tested using the free trial version available to everyone. They have had no editorial input on the following review.
Detailed Review of Snagit
Note: The screenshots from here on are taken using the Windows version of Snagit unless otherwise noted.
In order to start using Snagit, you are required to log in or sign up for a TechSmith account. Thanks to the OAuth standard, I was able to set up a new account using my Google account information in just a few clicks. TechSmith took the opportunity to ask me about how I planned to use the software, but I presume this is just for their internal usage.
Once that setup is all done, you’re ready to start capturing!
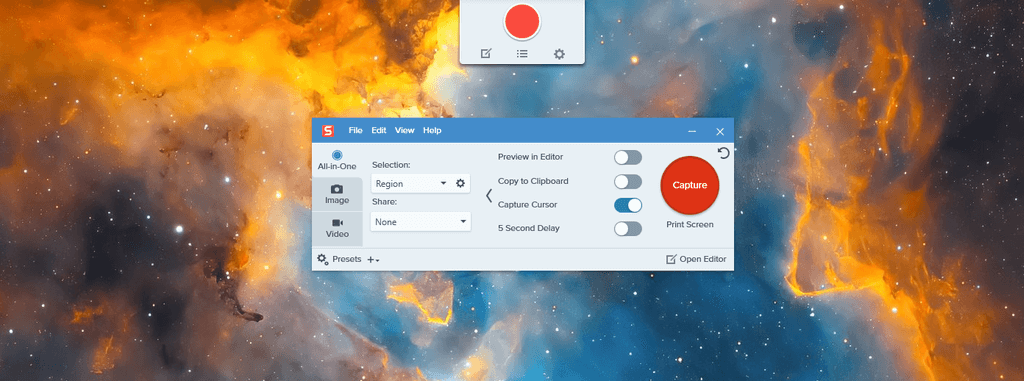
Snagit is broken down into three main sections – the All-in-One capture tab, the Image capture tab, and the Video capture tab. Most of the time, you’re probably going to be working with the All-in-One capture tab since it’s the most flexible (as you’d guess from the name).
The latest Windows version also includes a helpful widget that tucks away in the top center of your screen, ready for quick usage, although I find that the keyboard shortcut is a better choice for actually starting the capture process, so I don’t use the widget.
Unfortunately, one of the paradoxes of a screen capture program is that it’s impossible to capture the screen capture process itself because the program doesn’t want its helpful screen overlays to be captured and ruin your final product. This means I’m a bit limited with what I can actually show you, but we’ll go over everything that’s available!
All-in-One Capture Mode
As I mentioned above, this is the most helpful mode. The options are quite self-explanatory, and most of the magic happens once you actually click the Capture button. You can also use the Print Screen key to trigger your pre-configured capture process while Snagit is running in the background or click the area that says ‘Print Screen’ to set a different keyboard shortcut.
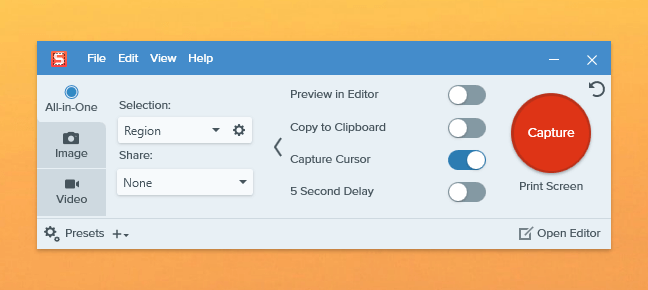
The Selection setting determines what area of the screen will be captured: a region you define with your mouse, an open window, or your entire screen.
The Share section is simple to use, offering a range of locations where your files can be automatically uploaded. You can even set up multiple share locations at once, for example, saving a file to your computer as well as automatically uploading it to your Google Drive account.
Much like the process of configuring my TechSmith account using my Google credentials, setting up Google Drive access was smooth and trouble-free.
When it comes time to actually start a capture, the All-in-One mode really shines. Your first capture includes a great on-screen tutorial overlay about how to use the region selection tool, which allows you to quickly define a specific area of the screen to capture.
You can also simply click to highlight active windows or even smaller subsections of active windows, such as toolbars and control panels, although your mileage will vary depending on which program you’re capturing.
This is a huge help for anyone who is particularly picky about having their screenshot edges nice and clean (such as yours truly), making the process much simpler and easier than peering closely at the screen to make sure the pixels line up.
Once you’ve determined the capture area, you can either choose to snap a simple picture or take a video of that area, complete with system audio and voiceover options. You can even create a ‘panoramic capture,’ allowing you to scroll through content that won’t fit on your screen at once and automatically stitch it together into a single image.
If you’ve ever needed to capture scrolling websites or large photographs that won’t fit on the screen at 100% zoom, you’re going to love how much time you save with this option.
Image Capture Mode
Image capture mode works almost exactly the same way as All-in-One capture mode, except that you can’t capture video (obviously), and you also get the option to apply certain effects to your image.
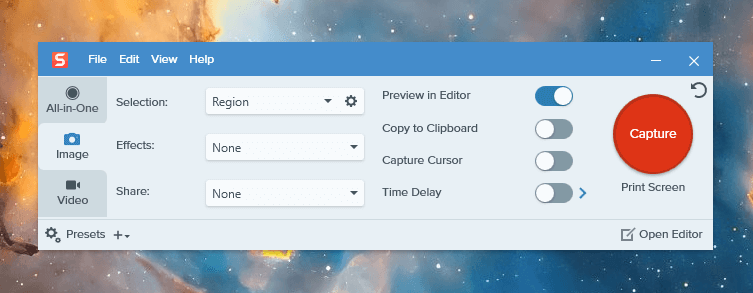
I’m not entirely convinced how useful most of the effects options would be, but there are a couple that could be pretty useful, such as Capture Info, Watermark, and Image Resolution. The others are primarily cosmetic adjustments, but they’re still more efficient than adding the effects in later by hand.
Video Capture Mode
Video capture mode is also not very different from AiO mode, with the exception that it allows you to record directly from your webcam in order to help you build your Youtube celebrity status.
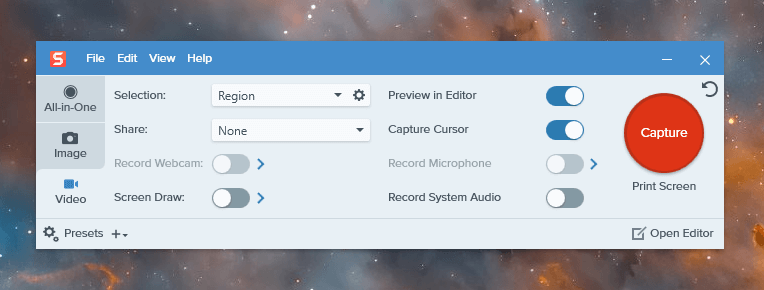
That’s not really an aspiration of mine, so I don’t have a webcam and didn’t test this feature, but screen capturing video worked like a charm.
Snagit Editor
Once you’ve actually taken your screen capture, your results are automatically opened in the included image editor. Unfortunately, if you’re doing video screen captures, this only allows you to review the video you created, but the editor is much more capable when it comes to working with images.
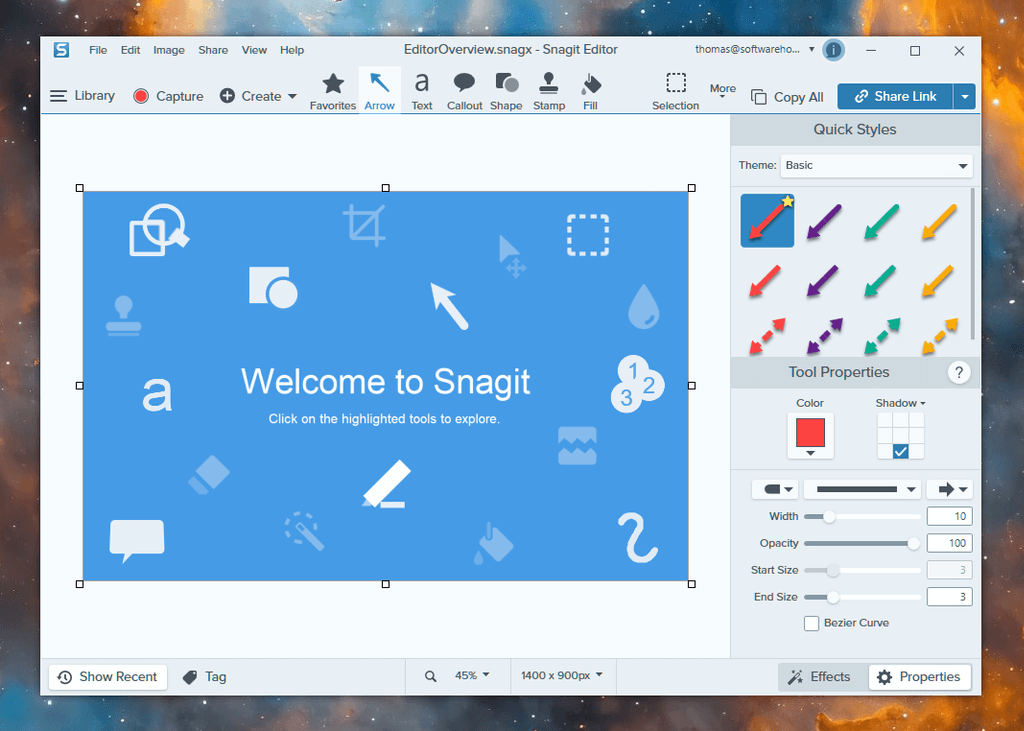
You can add all sorts of arrows, text overlays, and other helpful drawings that will help you explain yourself without having to write incredibly long explanations. It’s much faster and easier than trying to use Photoshop or some other image editors for the same purpose.
In addition to the arrows, highlights, mouse clicks, and speech bubbles, there’s a huge range of other stamps that can be applied, including emojis. You can also download additional stamps and color palettes from TechSmith.
The editor also allows you to add in any of the image effects you might have neglected during the capture process, with the exception of Capture Info and Image Resolution, which naturally need to be applied while the capture is actually happening.
Once it’s all done, you just click the ‘Share Link’ button in the top right to automatically upload your screenshot to TechSmith’s servers and get a shareable link. Alternatively, you can click the small arrow next to it to open a dropdown menu and upload it to your choice of service – or just save it as a file on your computer.
TechSmith Fuse
TechSmith has developed a great mobile companion app for Android and iOS that works with two of their most popular software packages, Snagit and their video editor Camtasia.
While it’s a bit more useful for Camtasia, so you can use your mobile device as a media source, it’s not a bad way to get screenshots of mobile apps and other content into the Snagit Editor. Connecting your mobile app to your installation on the computer is a simple process, thanks to the QR code and these handy instructions.
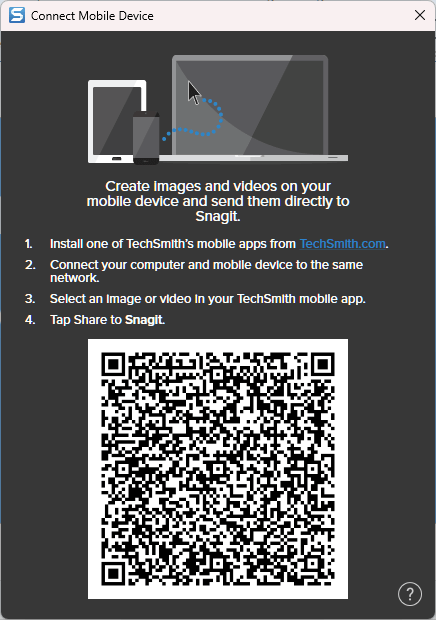
I was able to connect with no issues at all and transfer images directly into the Snagit Editor, where I could annotate them to my heart’s content.
It’s a bit faster than simply copying the files to your computer from your mobile device, and it doesn’t require a wired connection to work, but it really is more useful for transferring mobile videos to Camtasia than working with Snagit.
Still, if you’re a mobile app developer or making tutorials for working with mobile devices, it could be a real productivity booster.
The Reasons Behind The Ratings
Features: 5/5
No matter what you want to capture, Snagit will handle it quickly and easily. You can capture the whole screen, certain sections of running programs, or a custom area all with just a few clicks, and then automatically share them on a range of popular online services. You can annotate your image captures with highlights, text overlays, and a library of preset visual effects to help you make your point more clearly.
Price: 4/5
The only downside to Snagit is the price, as it is a little more expensive than I’d want to pay for a screen capture app. Getting a basic video editor for the same price that includes screen recording functionality is possible, although it won’t have TechSmith’s attention to detail or quality support.
Ease of Use: 5/5
Snagit is extremely easy to use, and TechSmith has gone above and beyond to make the learning process as fast and smooth as possible. There are helpful tutorials scattered throughout the program during your first use, and you can always revisit them later. Attention to small details in the user interface makes it even easier to use, and if you ever get stuck, there’s help only a click away.
Support: 5/5
TechSmith’s support is always impressive, and they continue that tradition with Snagit. There is a complete tutorial available online, as well as a set of support articles and an active community forum for other Snagit users. If these can’t answer your question, it’s a simple process to send in a support ticket to the developers – although the program is so well-developed that I never found the need to contact them.
Snagit Alternatives
TechSmith Jing (Free, Windows/Mac)
TechSmith Capture (formerly Jing) is actually the first TechSmith product I ever used, and I created a number of Photoshop tutorial videos with it for my junior designers. It’s quite limited in terms of its options, and TechSmith is no longer supporting or developing it. The only thing that makes it better than the Print Screen key is the ability to record video, but if you just want an extremely basic image and video capture program this may provide what you need.
Greenshot (Free, Windows only)
Greenshot is a free, open-source screen capture program, but it can only capture still images and not video. It can turn screen-captured text into editable text using optical character recognition, hide certain areas of an image that might contain personal data, and add in basic annotations. It can also share your files with a range of online services, but it’s not quite as feature-rich as Snagit.
ShareX (Free, Windows only)
ShareX is also free and open-source, and it has an impressive feature set that might even be more capable than Snagit. The main drawback to using it is that it’s not nearly as well designed or as easy to use. It is constantly being developed by the community, but there isn’t the same degree of support or tutorial information as you get from a company such as TechSmith. If you’re comfortable diving in at the deep end, this is a feature-packed alternative to Snagit.
Skitch (Free, Mac/iPad/iPhone)
Skitch from Evernote is a great alternative to Snagit for Mac, and it’s free. With Skitch, you can take basic screenshots, even timed screen snaps and window screens from specific apps. It also allows you to add custom callouts, pixelate sensitive parts of the screenshot, and much more. However, compared to Snagit, Skitch is still limited in features as it doesn’t offer the ability to take video screenshots, capture scrolling windows, etc.
Final Verdict
TechSmith Snagit is a great program for anyone who finds themselves struggling with the Print Screen key (for Windows) or Shift Command 4 (for Mac) and basic image editors, whether you’re pointing out layout issues on a website design or making complex tutorial videos.
It’s very lightweight, flexible, and capable, and sharing your created content is extremely easy thanks to its productivity-boosting automatic upload features. The only downside is that it’s a bit on the expensive side, but most of the free alternatives offer fewer features and no helpful support.
So, have you tried Snagit? How do you like this Snagit review? Leave a comment below.
Great! thanks for sharing your knowledge about Snagit. This is very helpful. Besides, you can utilize the tool that I’m using right now named Acethinker Free Screen Recorder Online, this is one of the great recorders wherein you can record all the activities on your computer screen without any hassle.
Thanks for the Snagit review, Thomas! My name is Rachael and I manage PR & Influencer marketing here at TechSmith. Want to join our early access to products program? Drop me an email- I’d be happy to send you review NFR keys and we have a release in the works for Camtasia if you’re interested!