
Whether you’re an aspiring YouTube creator, completing a project on your Mac, or simply trying to show someone your end of things, screen recording is an essential feature. Sometimes a screenshot just isn’t going to cut it, and it’s not like there’s a dedicated print screen key for recording your screen.

However, Mac users have plenty of options for doing screen recording. We’ve listed the best options here.
Using a PC as well? Also read: How to Record Screen on Windows
Table of Contents
1. Quicktime
- Pros: Built into your Mac, easy to use
- Cons: No editing tools, only saves as MOV
Quicktime is an application made by Apple. Normally, it’s used to play movies on your Mac. However, Quicktime has several other uses, one of which is creating screen recordings.
Quicktime comes preinstalled on your Mac, so you don’t need to install anything new in order to use it. Just open Finder, go to the Applications folder and choose Quicktime (or search for Quicktime in Spotlight).
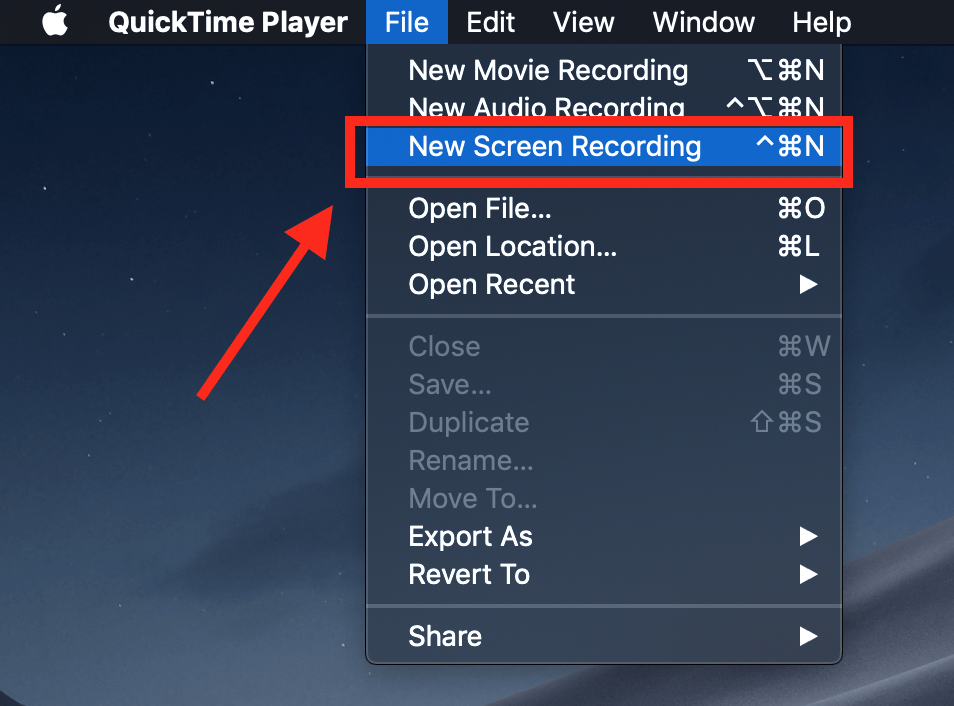
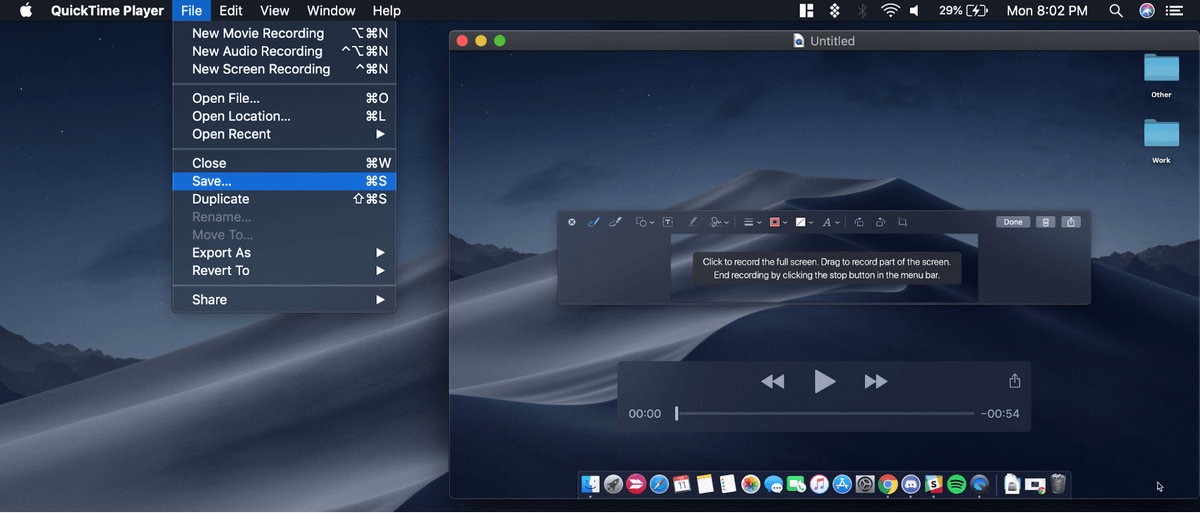
Once you open Quicktime, choose File > New Screen Recording.
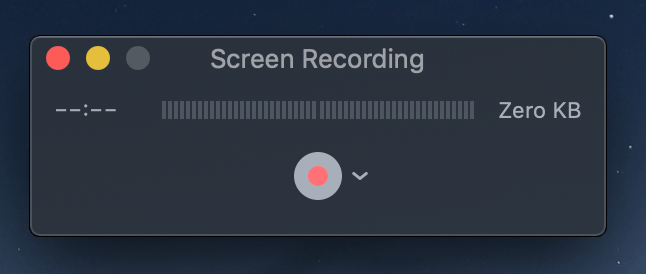
This will open a small box with a red button. In order to start recording, click the red dot. You will be prompted to select either all or part of your screen.
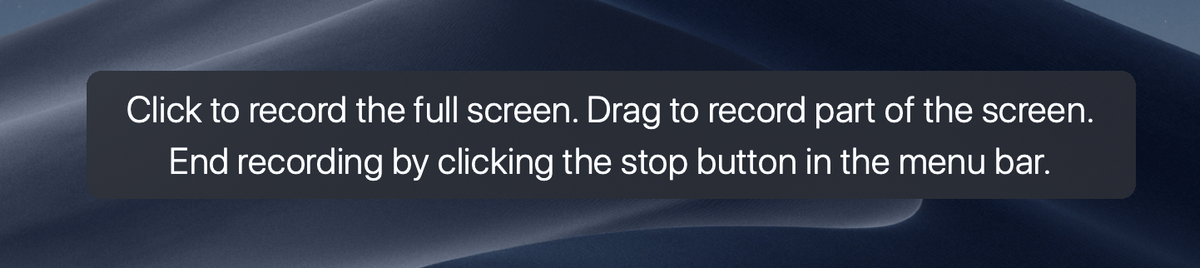
If you want to record the whole screen, just click anywhere and the recording will start. If you only want to record part of the screen, like a specific window, click and drag your mouse to make a rectangle over the desired area.
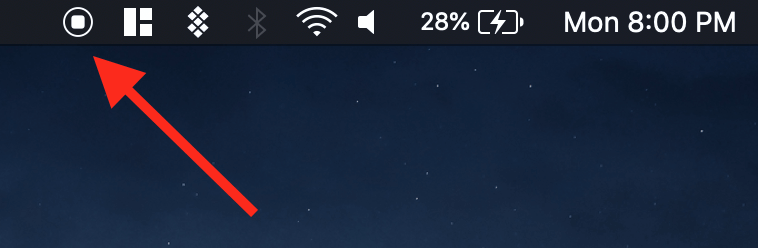
Once you start recording, you will see a small stop icon in the menu bar on your Mac. If you click it, the recording will stop and you will be able to review your screen capture.
Once you’ve stopped recording, you will see a video player with your screen capture. You can save it by going to File > Save. Quicktime only saves files as MOV (a format native to Apple), but you can use a conversion program if you would prefer an MP4 or another format.
2. macOS Mojave Hotkeys
- Pros: Built into Mac and extremely simple. You don’t have to open any additional tools and can use them on the fly
- Cons: Very simple, no editing tools, will only save MOV files
If you’re running macOS Mojave, you can use a combination of hotkeys to start a screen recording. Just press shift + command + 5 keys and you will see a dotted outline appear.
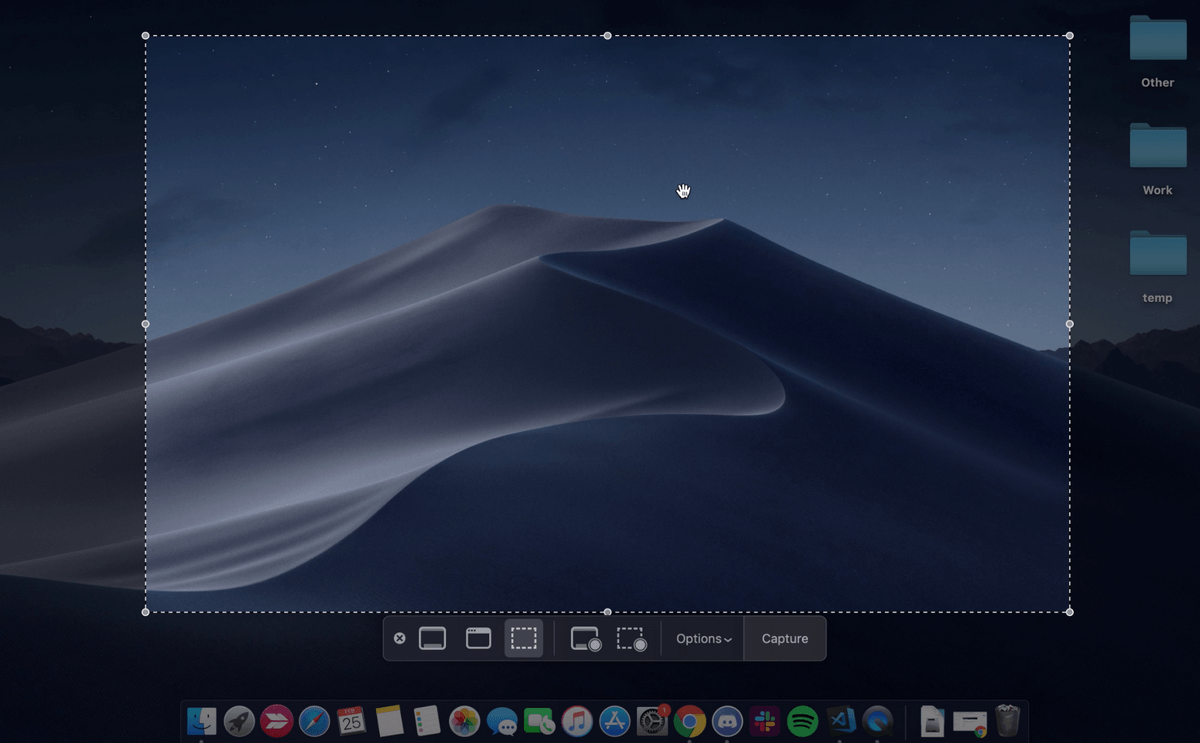
Once you see this screen, you’ll press one of the two recording options along the bottom bar — either “Record Entire Screen” or “Record Selection”. Once you press one of these, the “Capture” button will turn into a “Record” button, and you can begin your screen capture.
When you start recording, sections that are not being recorded will be faded. Only the recording area will be highlighted (if you are recording the whole screen, you won’t notice a difference).
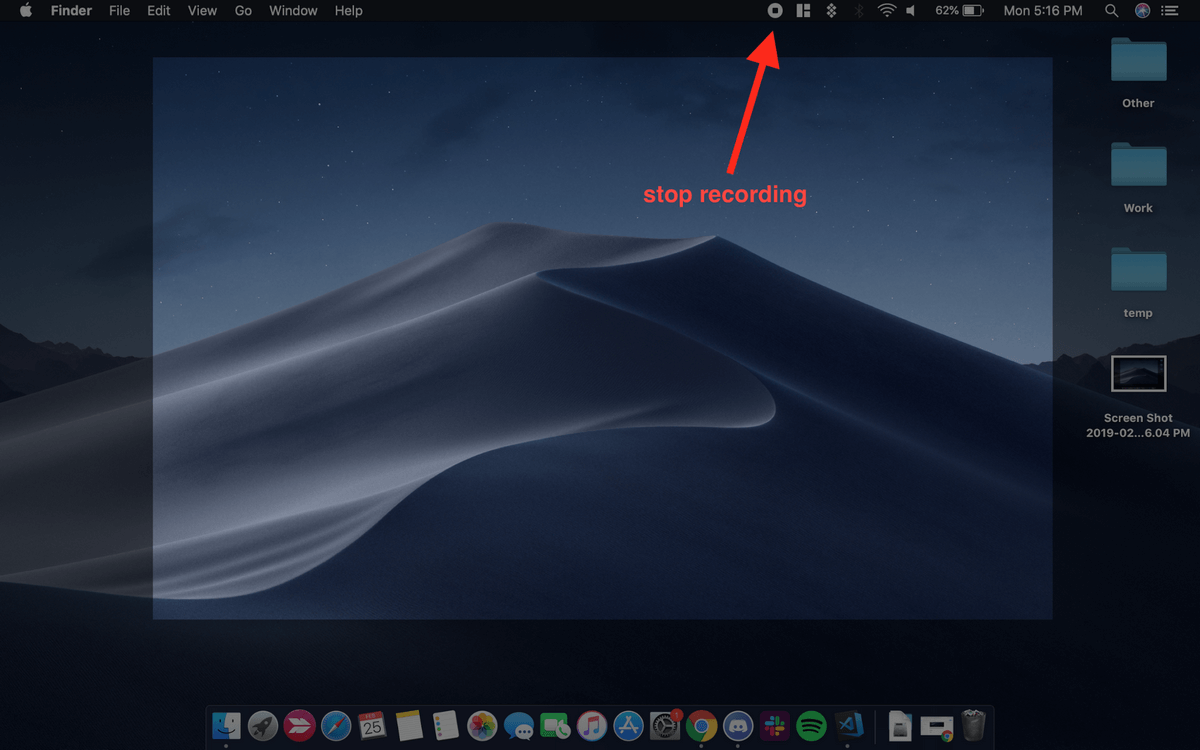
The stop button is located in the menu bar. When you are done recording, just press the circular stop button.
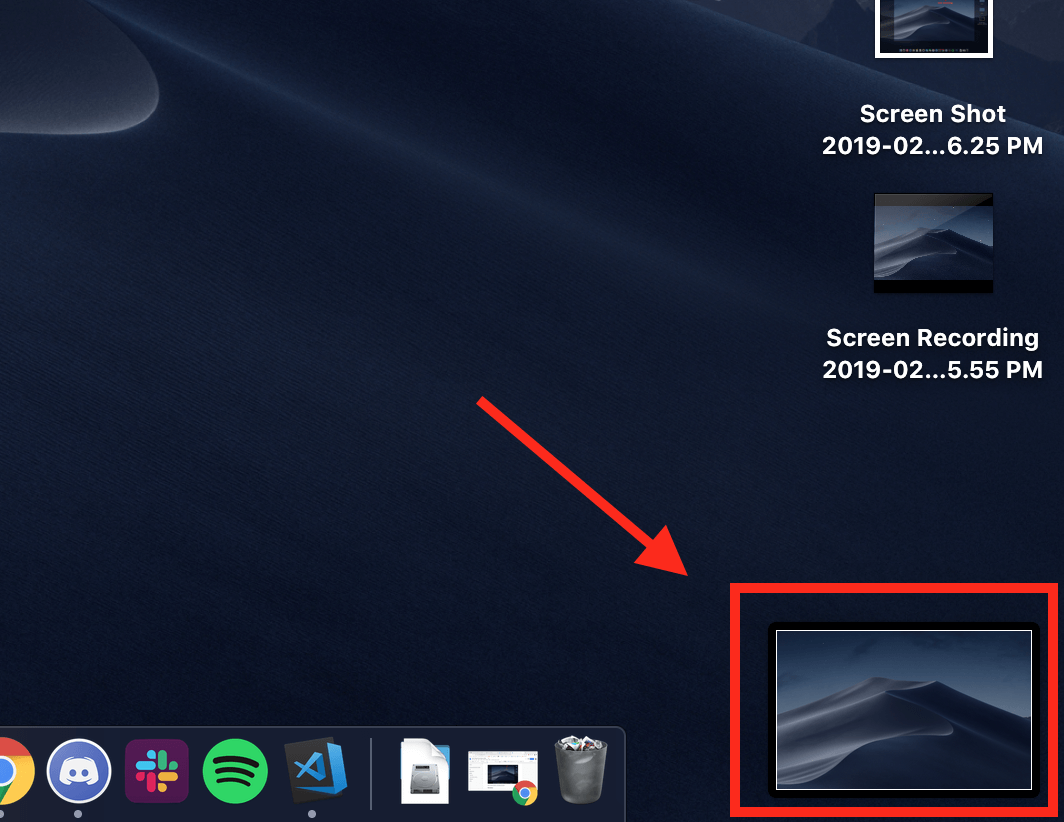
Once you finish recording, a new window will appear in the bottom-right corner of your screen. Click on this tiny window to open your clip. Didn’t click before it disappeared? Don’t worry! The screen recording is automatically saved to the desktop by default, so you can just open it from there.
Don’t double-click on your recording to open it — this will send you to Quicktime. Instead, click once to highlight it and then press the spacebar. This will open a preview window as shown below.
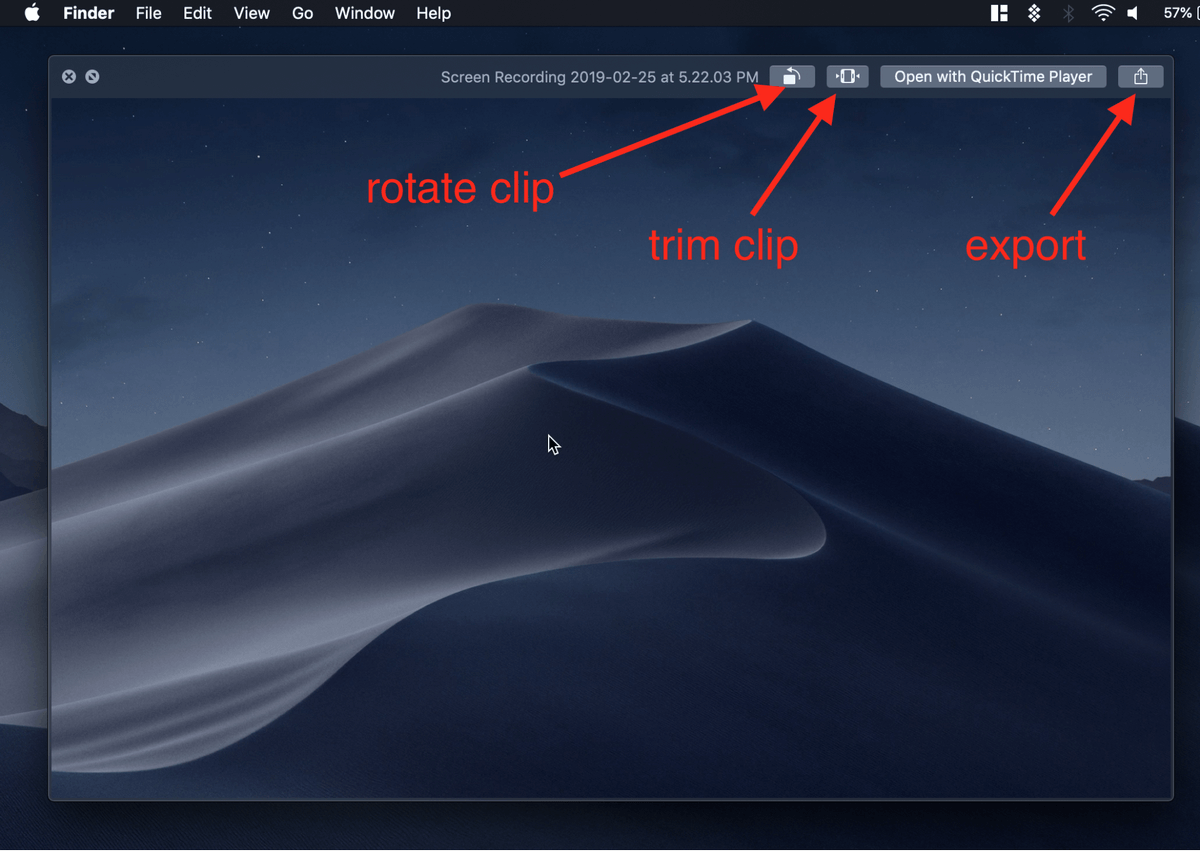
In this preview, you can rotate or trim the clip, as well as share it (the clip is automatically saved as a MOV file).
3. ScreenFlow
- Pros: Great software that’s easy to use with lots of options, good choice for education and how-to videos
- Cons: Cost prohibitive for occasional use
If you want to do more than a simple recording, the built-in Mac tools aren’t the best. For a good amount of video editing options and recording tricks, ScreenFlow is a great choice.
ScreenFlow (review) is designed for both screen recording and video editing, so you can do everything in one place. It includes extra features like callouts, special pointers, a multi-layered editing timeline, and other options that are great for marketing or educational videos.
To use it, start by getting ScreenFlow. It is a paid app, though it offers a 30-day free trial.
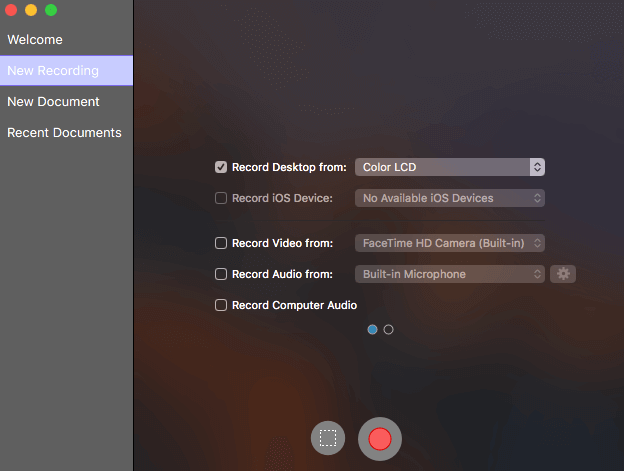
Next, download and install the software. When you first open it, you will see an introductory screen. On the left-hand side, click “New Recording”. On the following screen, you’ll need to pick which monitor (if you have multiple) to record on. If you want to include video as well then you can choose the camera input.
After that, press the red record button or the rectangular box to begin recording (the former captures the whole screen, while the latter lets you pick only a section of the screen to record).
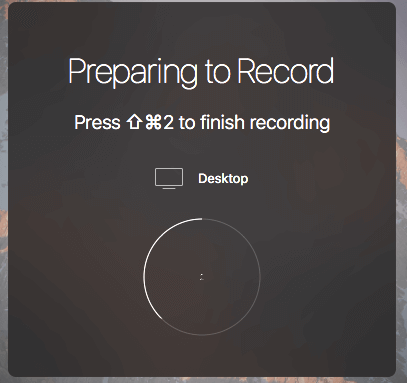
ScreenFlow will count down from five before it begins recording. When you are done, you can press shift + command + 2 keys to stop recording or use the stop recording button in the menu bar.
Your final video is automatically added to the media library of your current ScreenFlow “Document” (project). From there, you can drag it into the editor and make adjustments like trimming the clip or adding annotations.
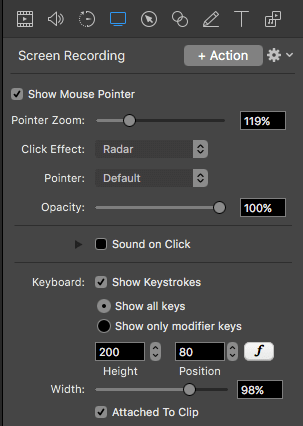
When editing your clip, ScreenFlow offers a lot of options. You can add mouse-click effects, callouts, annotations, and other media to help better convey your message.
When you’re done editing, you can export your final video to WMV, MOV, and MP4, or choose one of the more technical alternatives.
4. Camtasia
- Pros: Full-featured video editor that’s great for professionals who want to make high-quality videos
- Cons: Expensive
Another great third-party recording program is Camtasia. This very powerful software is a combination video editor and screen recorder, so it offers a range of features that are great for making high-quality videos.
First, you’ll need to get Camtasia. It is a paid program; if you’re not sure about buying it, Camtasia offers a free trial.
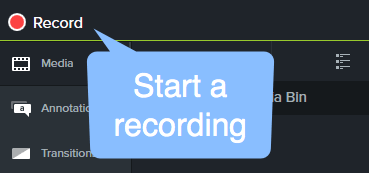
Then, download and install the software. Once you’re ready to go, you can use the “record” tool to start screencasting.
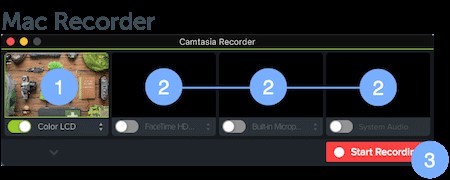
Camtasia will also allow you to choose your preferences for recording, such as which monitor and camera you want to use, or a microphone if you want to use audio in your screen recording.
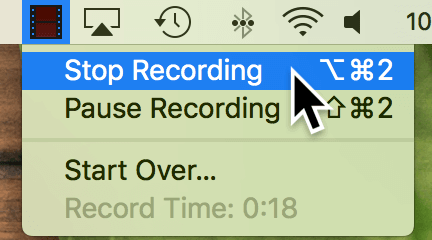
When you’re finished recording, click the Stop button in the menu bar to end the session or press command + shift + 2 keys.
The media file of the screen recording will show up in Camtasia’s media bin for your current project. Once you add it to your project, you can use all of Camtasia’s extensive editing tools to take your recording to the next level. The program includes everything including audio, transitions, effects, and annotations.
If you want to learn more about the software, check out our full Camtasia review here.
5. Snagit
- Pros: Best if you need to frequently make screen recordings and annotated screenshots
- Cons: The video editor only supports trimming, limiting versatility
Last but not least, Snagit (review) is a great choice for those who need to frequently take both annotated screenshots and screen recordings, perhaps in a work setting. It is less suited to making recordings for wide-scale consumption, such as Youtube videos, because the built-in video editor has extremely limited functionality.
However, it offers a good variety of tools and has a very easy-to-use interface. It is built specifically for taking screenshots and screen recordings, so you can get good mileage out of it.
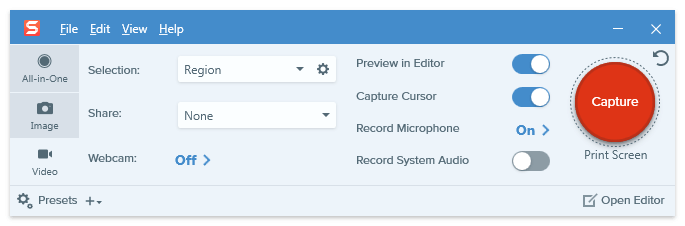
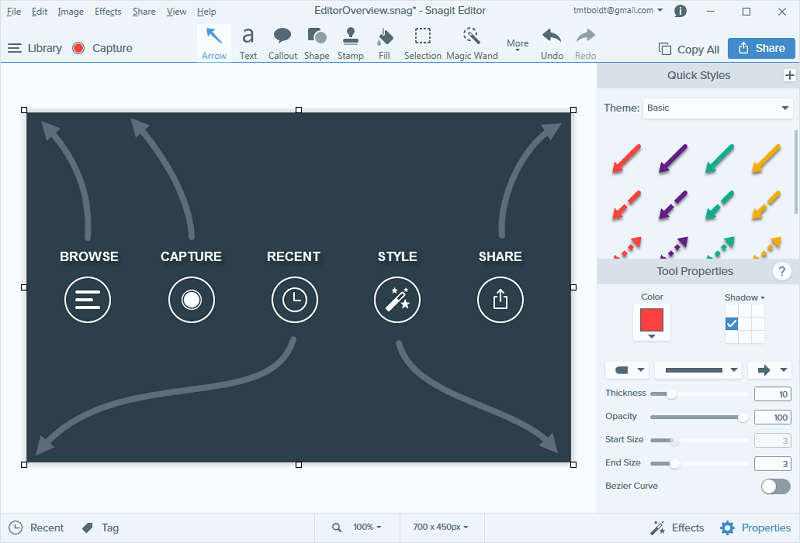
To use Snagit, just choose Video on the left-hand side of the window and pick your recording settings. You can choose to include your webcam as a source of video as well, which is useful if you’re explaining something or doing a demonstration.
When you’re ready, press the Capture button.
Once you’re finished recording or capturing the editor will appear, complete with instructions for how to use it.
You can add media, apply different filters, create helpful notations, and export your file if you capture an image.
However, there are no such functions available for a video. This is Snagit’s main shortcoming: You can only trim recorded videos and cannot add any annotations. This makes the software more suited to someone who uses the feature only in small doses rather than someone who produces lengthy videos.
Other Alternatives to Record Screen on Mac
Not sure about any of the screen recording options we’ve provided so far? There are a few other applications available that may fit your situation better. Here are a few:
6. Filmora Scrn
Filmora Scrn is a dedicated screen recording program that supports key features like recording your screen and webcam, multiple export options, and editing.
It has a very clean interface but is a paid app, so it may not be the best choice for everyone. You can get Filmora here or learn more from our Filmora review here.
7. Microsoft Powerpoint
If you own a copy of Microsoft Powerpoint on your Mac, you can use the popular presentation software to make a quick recording. Just choose Insert > Screen Recording and use the Select Area tool to select which part of the screen will be recorded.
Some older versions of Powerpoint for Mac may not support audio for your screen recording file, while newer versions may have additional features and entirely different layouts. You can learn more here.
8. Youtube Live Streaming
If you have a YouTube channel, then YouTube makes it easy for you to create screen recordings. You can use the Creator Studio’s live stream feature as detailed in this tutorial, but remember that your recording will be publically viewable (unless it is set to “Unlisted”) so it may not be a good fit for all users.
9. OBS Studio
This is an advanced application dedicated to screen recording and live streaming. It is much higher-end than most users will need: You can change specialized settings such as the bit rate, audio sampling rate, hotkeys, etc. It is extremely full-featured.
As an open-source program, it is free and doesn’t watermark or time limit your work. You can get OBS Studio from their website. It is highly recommended that you also read some tutorials for setting it up and effectively using the software, such as our roundup review of the best screen recording software.
Final Words
There’re tons of options out there if you want to record the screen on your Mac. Ranging from built-for-the-pros apps to programs designed for occasional use, tools built into your Mac or obtained from the App Store can definitely get the job done.
If we missed any of your favorites, feel free to leave a comment and let us know.