
At some point in your photography journey, you will switch to using RAW files. These files contain much more information than a JPEG file and give you far more flexibility when editing the image.
Hey there! I’m Cara and I’d been photographing for a couple of years before I fully understood the power of RAW files. But once I did, there was no going back. I can get so much more out of an image that I’ve taken in RAW. Plus, the extra leeway to fix errors is always nice.
However, when you’re staring at your dull, lifeless RAW images, you might doubt the usefulness of this file type. But that’s because you haven’t yet learned how to edit RAW photos in Lightroom. So let me show you!
Note: the screenshots below are taken from the Windows version of Lightroom Classic. If you are using the Mac version, they will look slightly different.
Table of Contents
RAW vs JPEG vs What You See
Have you noticed that your RAW files look different after importing into Lightroom? They don’t look the same as what you saw on the back of your camera. Instead, they look lifeless and dull. That’s disappointing when you think you’re getting a better image!
Let’s understand what’s going on here.
A RAW file contains more information than a JPEG file. That’s why it is so much bigger. The same image that was about 33 MB as a RAW file will only be about 11 MB as a JPEG.
This extra information includes more details and a wider dynamic range. It is what allows you to brighten shadows and bring down highlights, yet still have details in those altered areas. You don’t have as much freedom with JPEG images.
However, a RAW file shows up as a flat image with virtually no depth to it. You have to bring it into an editing program and tell it what information to keep and what information to discard. This is what puts dimension in the image.
Here’s an example of a RAW file followed by the final edited image exported as a JPEG.
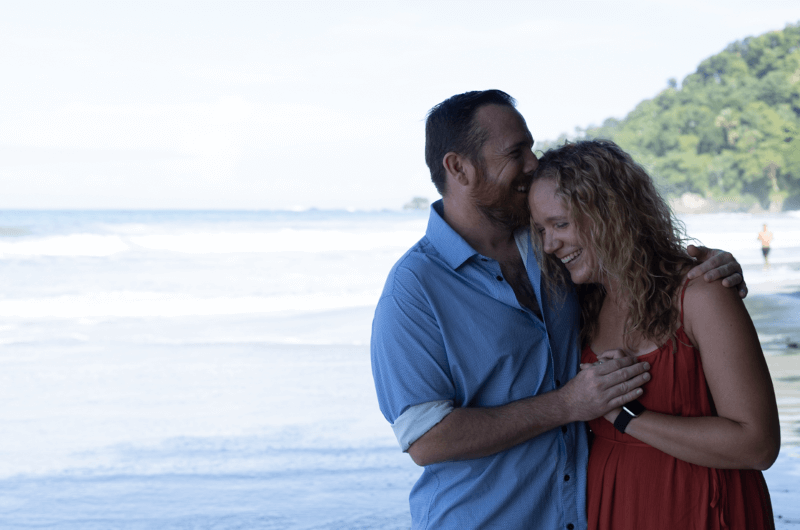
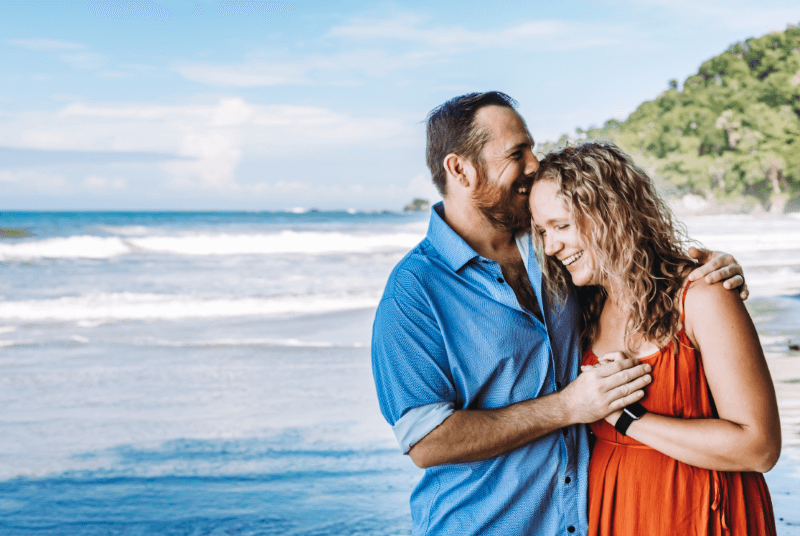
Whew! What a difference!
To give you a better representation of your images, your camera will automatically show you a JPEG preview when you are shooting in RAW. How the camera chooses to create the JPEG image varies from camera to camera.
Thus, what you see on the back of your camera will not exactly match the RAW image you import into Lightroom.
Note: this JPEG preview will not always give you an accurate understanding of the details included in the RAW file. That is why it is helpful to learn how to read and use your histogram.
Editing RAW Files in Lightroom
So the RAW file gives you the raw materials to work with. However, if you want to create a masterpiece, you have to know how to edit RAW photos in Lightroom.
But…there are dozens of settings that you can tweak in Lightroom with millions of combinations that you can apply to your images. That’s why different photographers can edit the same image and end up with drastically different results.
I’m going to do my best to give you the basics here. Through practice and experimentation, you’ll develop your own style of editing that will make your images uniquely yours!
Step 1: Import your RAW images
To import your images, go to the Library module. Click Import down in the lower left corner of your screen.
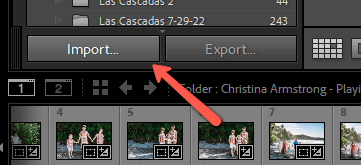
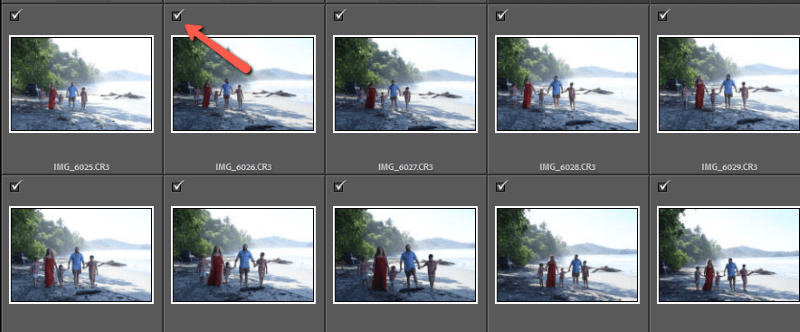
Choose the Source on the left side, which will usually be a memory card.
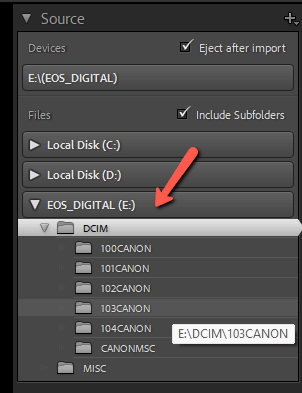
Make sure there are check marks on all the images you want to import.
On the right, choose the file you want to import them into. Click Import.
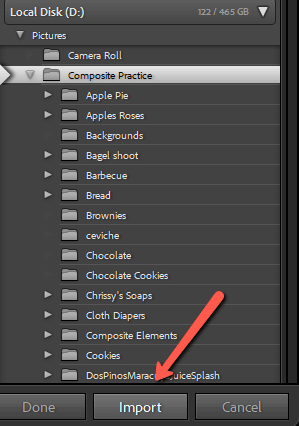
Lightroom will bring in the images and automatically put them into your current workspace.
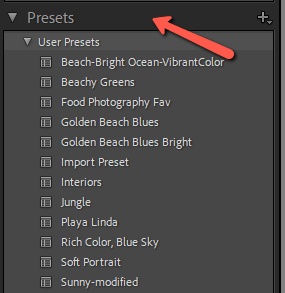
Step 2: Add a preset
Presets are an excellent time-saving tool in Lightroom. You can save edits that work for a lot of images as a preset and apply them all with one click to a new photo. You can use Lightroom’s included presets, download and install presets, or create your own.
Pick your preset from the Presets panel on the left side of your workspace in the Develop module.
From there you can make the final tweaks to your image.
But for this tutorial, we want to go through all the steps. So let’s keep going.
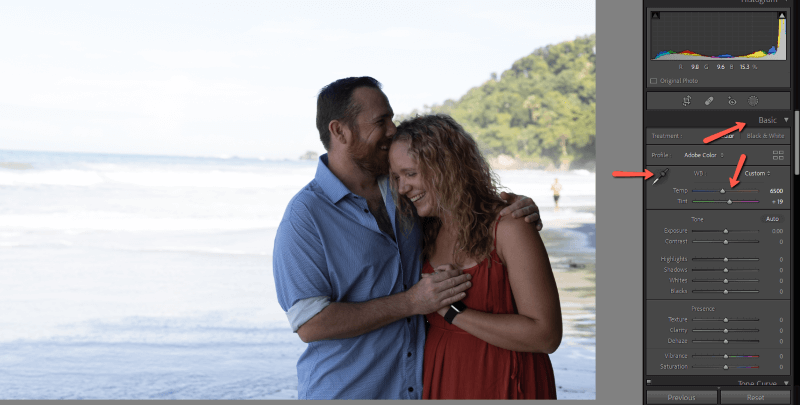
Step 3: Consider the color
You should always try to choose the correct white balance in the camera. However, shooting in RAW means you don’t have to nail it 100%. You have a lot of freedom to adjust it later.
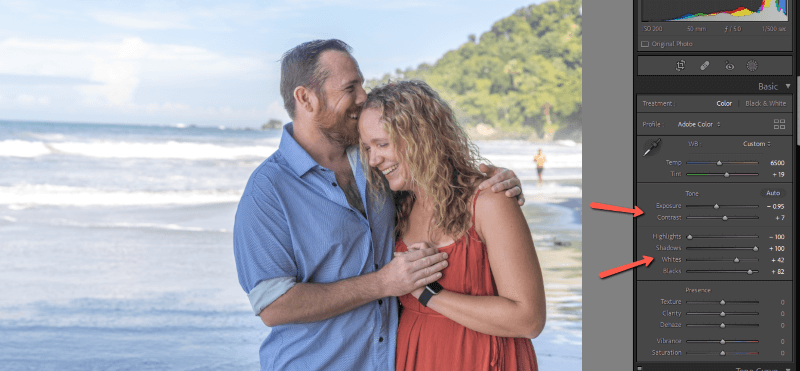
Open the Basic panel on the right side of your workspace in the Develop module.
Set the white balance by clicking on the eyedropper and clicking on something white in the image. If there is nothing white you can use, you can slide the Temp and Tint sliders to make your adjustments.
Step 4: Adjust the lighting
Moving down in the Basic panel, you have options for adjusting the Exposure, Contrast, Highlights, Shadows, Whites, and Blacks.
This is where you start to add dimension to your image. It’s all about the contrast between the lights, midtones, and darks, as well as where the light falls in the image.
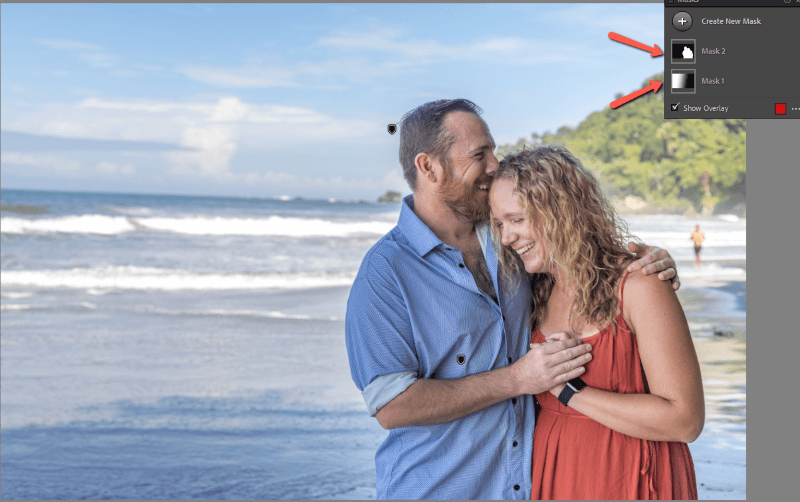
You can also affect the lighting with Lightroom’s powerful AI masking tools. I shoot a lot in bright conditions on the beach, so this technique is helpful for me to bring extra light to my subject even when the background is really bright.
Here I’ve asked Lightroom to Select Subject and I brought the exposure up on the couple. I also added a Linear Gradient to darken the bright ocean on the right. Learn more about masking in this tutorial.
Step 5: Adjust presence
There is a set of tools at the bottom of the Basic panel called Presence. These have to do with the detail in the image.
For images of people, I don’t usually use these too much. However, the Texture and Clarity sliders are great for enhancing images of animals, food, or other subjects where you want to emphasize the detail.
We don’t usually want to emphasize wrinkles and such, though you can use negative clarity to soften skin. For this image, I’ve added Dehaze (learn more here) and brought down the Vibrance and Saturation a tiny bit because I’ll push them later using the Tone Curve.
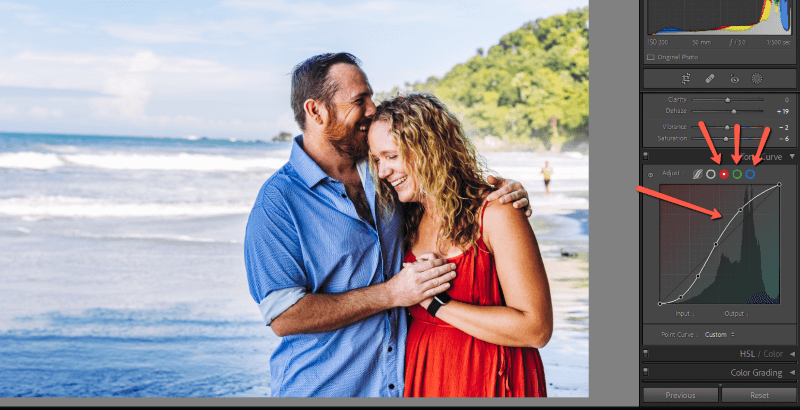
Step 6: Make it pop
Every photographer has their special trick that makes their images uniquely theirs. For me, it’s the Tone Curve. This tool allows you to adjust the Lights, Darks, and Midtones of an image independently of each other.
This is different than the sliders in the Basic panel. Working with the Highlights slider will still affect the Shadows to a certain extent. But not when you use the Tone Curve.
You can also adjust the Reds, Greens, and Blues in the image independently from each other. I used this same curve for all three channels.
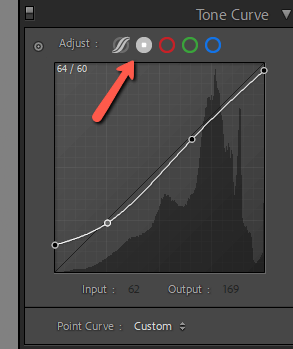
Here’s the setting I used for the Point Curve, which you access through the gray circle.
Step 7: Adjust the color
The colors are a touch too strong or not quite the right hue after the adjustments I’ve made. The HSL panel allows me to fix this easily.
You can adjust the Hue, Saturation, and Luminance of each color independently.
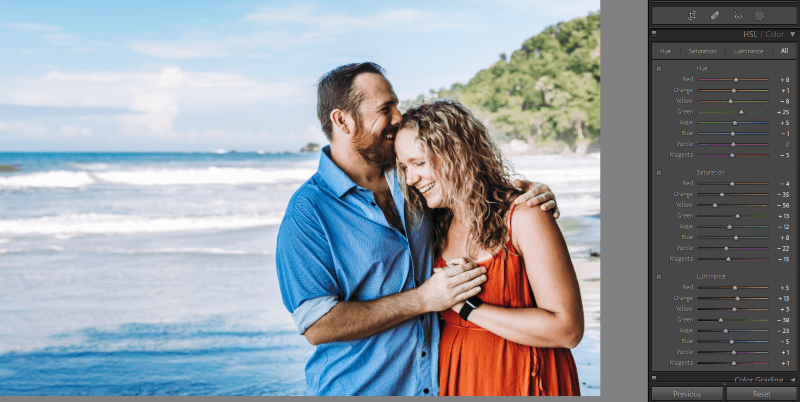
You can also use Color Grading if you want to add an extra special touch on top.
Step 8: Crop and straighten
Composition is something that you should really try to nail on the camera. You can’t change angles or add more space to the photo after you’ve taken it!
However, you can crop in tighter or straighten images and small tweaks in these areas are common.
Use the Transform panel for images that require advanced straightening. I usually only use this for real estate images where the walls don’t line up quite right.
Step 9: Finishing touches
Zoom in to 100% to check your image for grain or noise and fix the grain in the image. You can make adjustments in the Detail panel if needed.
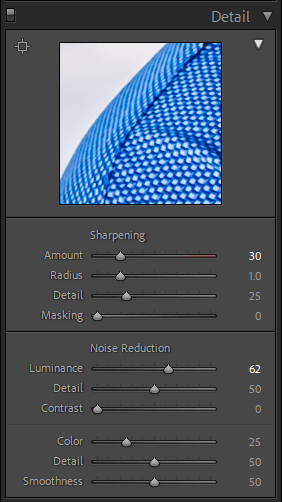
In the Effects panel, you can add a dark or light vignette if you like. And that’s about it!
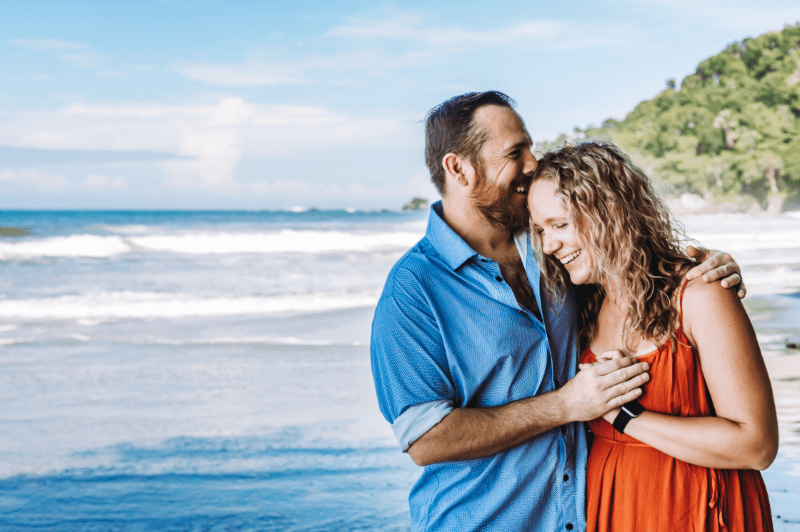
Here’s our final image!
It will take a bit of time to create your own editing style. Buying presets and learning from them is a great way to figure out how the tools behave and how they interact with one another. That’s how I discovered my Tone Curve trick.
Just start experimenting and don’t give up. You’ll be turning out amazing images in no time.
Curious about how to export your final images from Lightroom without losing quality? Check out the tutorial here!