
What do you think about the Dehaze option in Lightroom? You’ve probably at least tried it and perhaps been left wondering how this slider is useful because your photo became over-edited so quickly.
Hey there! I’m Cara and I’ll admit it took me a while to learn how to use the Dehaze tool properly as well. I love bold, beautiful colors in my images and I am not a fan of the airy, hazy look that some people love. Because of this, the Dehaze tool is my friend.
However, I’ll be the first to admit that overusing the tool looks pretty terrible. Let’s take a look here at what it does and how you can put it to work for you!
Note: the screenshots below are taken from the Windows version of Lightroom Classic. If you are using the Mac version, they will look slightly different.
Table of Contents
What Does Dehaze Do in Lightroom?
The main point of the Dehaze tool is to remove atmospheric haze that sometimes appears in photos.
For example, low fog might be obscuring some of the details in the background of your image. Dehaze removes the fog (with varying degrees of success depending on the image). It can also do the opposite and add fog or haze to an image if you give it a negative value.
It works basically by adding contrast and saturation to the image. However, the contrast in Dehaze works differently than it does in the Contrast tool.
The Contrast tool brightens whites and darkens blacks. Dehaze targets the middle grays of an image. This adds contrast to those boring middle areas without crushing the blacks or blowing out the highlights as the Contrast tool can sometimes do.
Let’s look at this tool in action.
Note: not all versions of Lightroom has the Dehaze tool, so if the Dehaze Tool doesn’t show on your screen and you’re wondering why the tool is missing, check if your Lightroom version is updated.
The Dehaze feature was introduced in 2015, so if you have Lightroom 6 or above, you should find the Dehaze Tool in your Lightroom.
How to Use the Dehaze Tool in Lightroom?
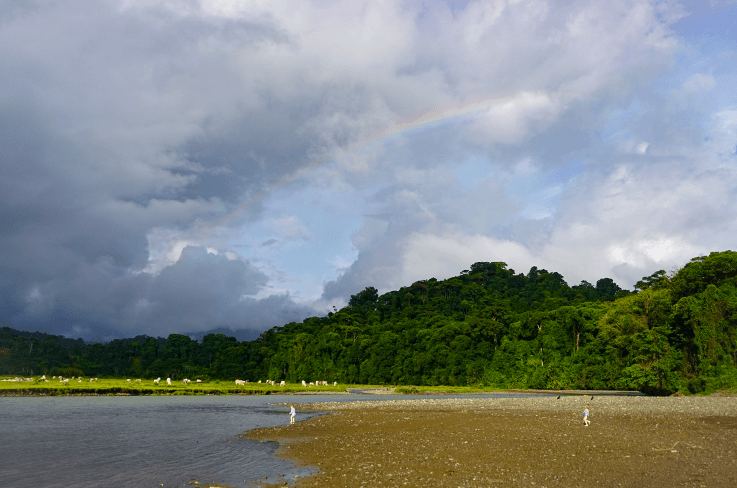
Open an image in Lightroom and go to the Develop module by pressing D on the keyboard. I’ve got this cool image of a rainbow I took down by the river one day.
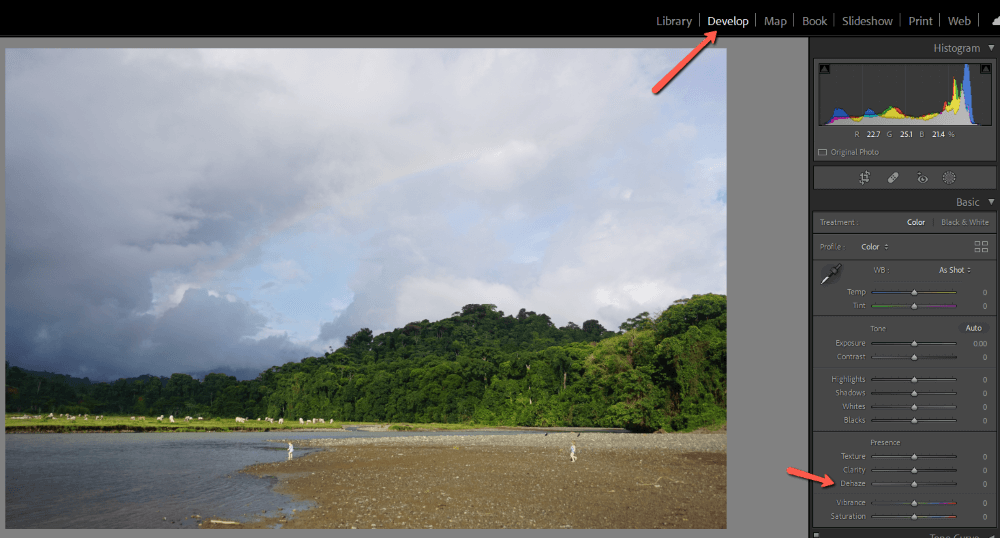
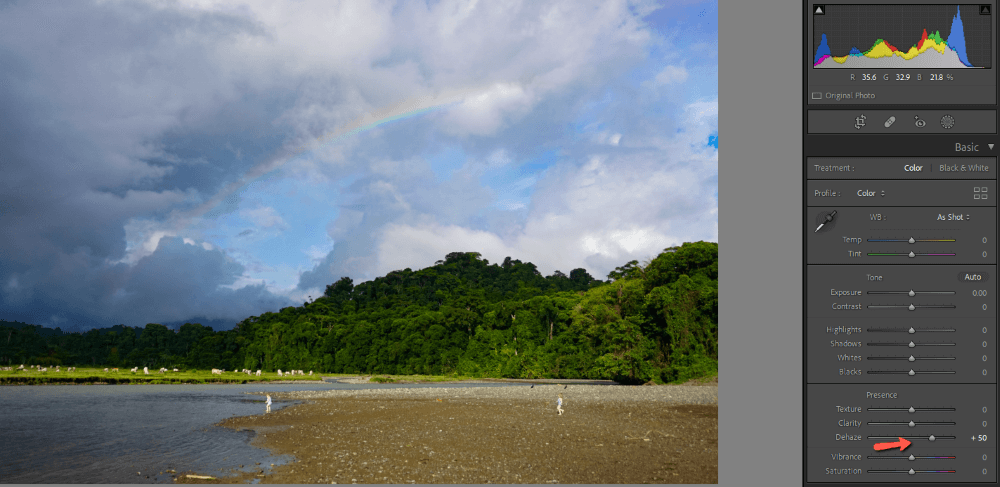
The Dehaze slider appears near the bottom of the Basic panel. You can remove the haze from the clouds and hopefully brighten that rainbow by bumping up the Dehaze slider.
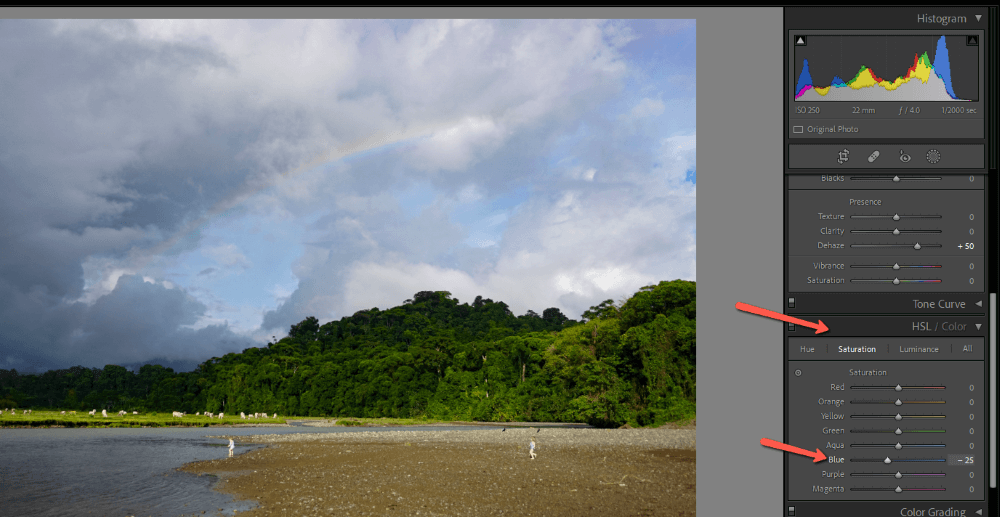
Here it is at +50. The rainbow is considerably more obvious, though the blue sky now looks unnatural.
We can fix that by bringing down the Blue saturation in the HSL panel.
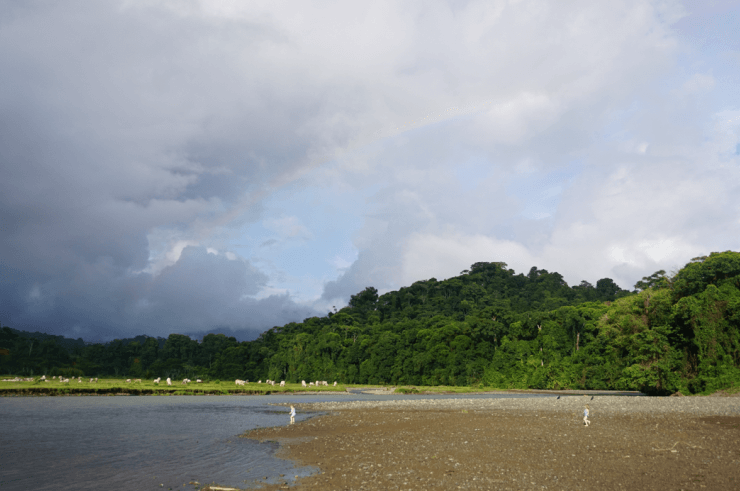
Here’s the before and after. Quite a difference!
Interesting Applications of the Dehaze Tool
So let’s think carefully about this. If Dehaze saturates and adds contrast to the mid-tones, how can we use that in other applications?
Night Photography
You know how sometimes you have to crank that ISO up to get a decent night shot? Unfortunately, that usually means that the spaces between the stars look kind of gray instead of black.
You may have also noticed that if you try to use the noise reduction tool on a night sky it looks…terrible. It messes with the stars and just doesn’t look good.
Since the Dehaze tool is all about adjusting those mid-tone grays, give it a try instead!
Black and White Photography
Contrast is essential in black and white photography. But have you ever been frustrated by the whites blowing out or the blacks disappearing into a black hole?
Remember, the Dehaze tool targets the mid-tone grays. So you’ve just found your secret weapon for adjusting the mid-range contrast in your black and white photos!
Remove Condensation Haze
Have you ever taken a photo only to realize there was condensation on your lens and it left a haze on your image? Of course, acclimating your lens so there is no condensation is the preferred choice. However, the Dehaze tool can help you save an image if needed.
Get Creative with the Dehaze Tool
Play around with the Dehaze tool yourself to understand what it can do. Can you think of other out-of-the-box applications for this tool? Let us know in the comments!
Curious to learn more about Lightroom? Speed up your editing process by learning how to create your own presets!