
Lightroom users rejoiced when Adobe rolled out the sophisticated masking feature update in the fall of 2021. Though Photoshop still offers a ton of other features, this update narrowed the gap significantly for photographers who prefer to use Lightroom for editing photos.
Hello! I’m Cara and though I use Photoshop for other projects, I still prefer to edit photos in Lightroom. Thus, I was one of those photographers who was delighted by the powerful new masking features in Lightroom.
Curious about masking and how you can use it for your images? Let’s explore!
Table of Contents
What is Masking in Lightroom?
Masking allows you to pinpoint and apply edits to certain parts of the image. Though there was a masking ability in Lightroom before, the update makes the feature significantly easier to use.
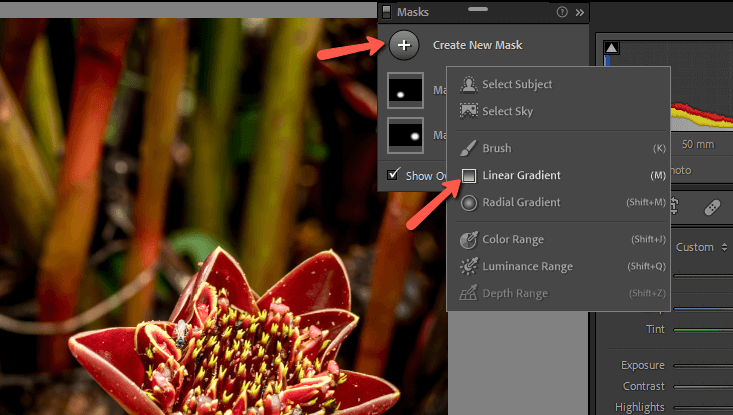
Lightroom can read and automatically select the subject or the sky, an amazing time-saving feature. Plus, you can use linear and radial gradients or the brush tool to apply specific edits.
You can even make automatic selections according to color, luminance, or depth of field.
Confused about what all this stuff is? Let’s keep going and break it all down.
How to Mask in Lightroom?
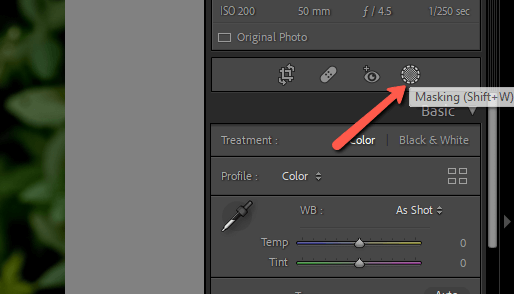
First, let’s access the masking panel. Click on the masking icon in the small toolbar just above the Basic panel. You can also use the masking shortcut Shift + W. Check out a complete list of the most useful Lightroom shortcuts here.
Note: the screenshots below are taken from the Windows version of Lightroom Classic. If you are using the Mac version, they will look slightly different.
The masking panel will slide down, giving you access to each of the masking features.
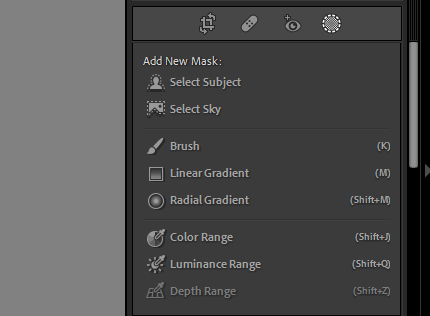
Let’s go through them one by one.
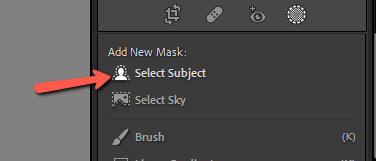
Select Subject
When you choose this option, Lightroom will analyze the photo and do its best to select the subject. Just click the button and watch the magic happen.
The masks panel will open automatically and display a white-on-black preview of your new mask. If you’ve used photoshop this will look familiar to you.
To the right, a new adjustment panel will appear. Any of the adjustments you make in this panel will only be applied to the masked-off area of the image.
Within the image itself, a mask overlay gives you a visual to see what areas of the image the mask is affecting. To toggle the overlay on and off, check or uncheck the Show Overlay box.
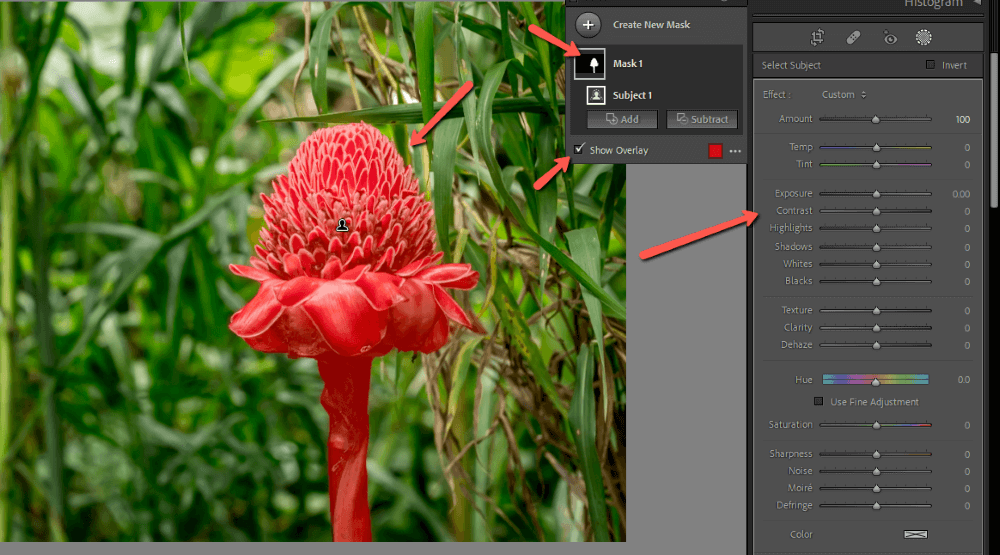
The default color for the overlay is red, but you can change this color if you need. Click the color swatch in the bottom right corner of the masks panel. Then choose whatever color you want from the color panel. You can also slide the opacity bar up or down as needed.

If the mask overlay isn’t showing, make sure there is a checkmark in the Show Overlay box. If the box is checked, open the color panel. The overlay may be using a color that is hard to see on the subject (e.g. red overlay on a red flower is nearly invisible).
Finally, make sure the Opacity slider is on the higher end. Zero opacity is invisible and low opacity may be hard to see on certain images.
Select Sky
The Select Sky option works just like the Select Subject one. Choose an image with a sky, then click the button.
Lightroom will analyze the photo and make the selection, saving you a ton of time. The sky is often much brighter than the landscape, which makes editing outdoor photos a challenge. This tool makes it easy to apply adjustments to the sky and landscape independently.
Check out how it selected this sky, even with those trees and fine details. This would be extremely time-consuming/frustrating to do by hand.
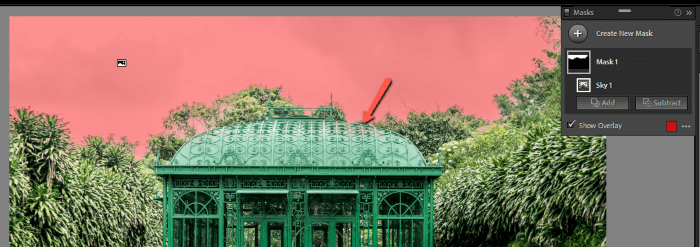
It’s not perfect, you can see that a small portion of the roof is also selected. However, you can make adjustments to the masks, which I’ll show you in a bit.
Brush
The next masking tool is the brush. This one gives you complete control to paint over specific parts of the image. Click on Brush in the masking panel or go directly to it by tapping K on the keyboard.
A blank mask opens in the Masks panel and the Brush settings appear on the right. You can choose the size of the brush in the Brush settings panel or press the left bracket [ key to make it smaller or the right bracket ] key to make it larger.
Feather softens the effect near the edges so you can better blend it with the rest of the image. Flow and Density control how strongly the effect is applied.
Note: Flow and Density must have values higher than zero for the effect to be applied. If either one is turned down, it will take several brush strokes for the overlay to appear and it may look like the tool isn’t working.
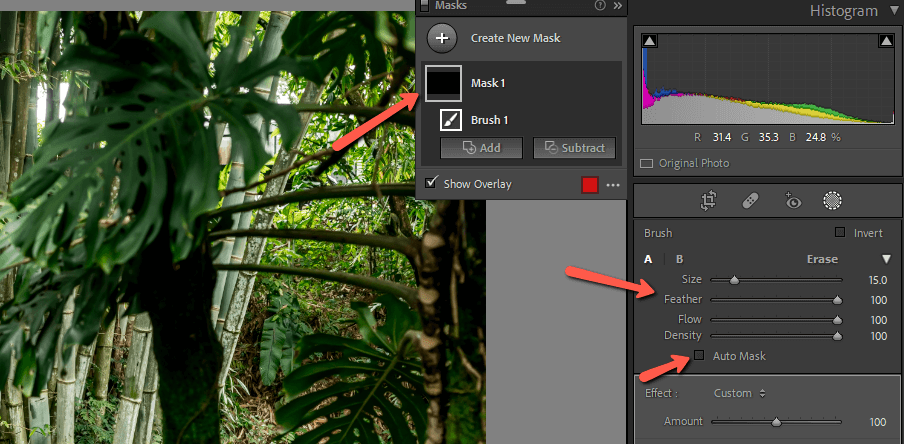
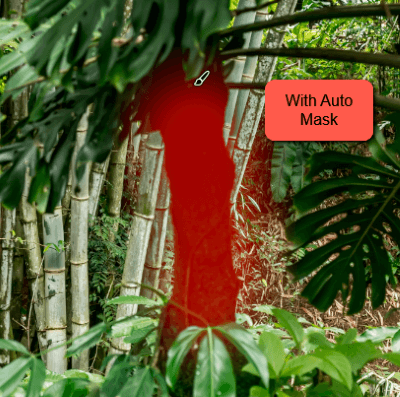
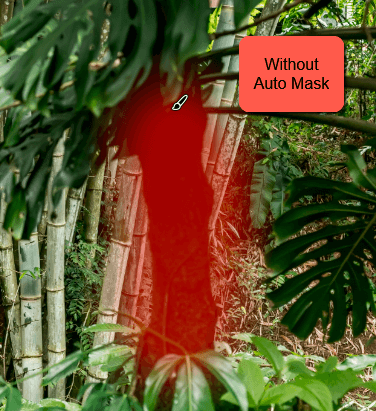
With the Lightroom Auto Mask feature, Lightroom will help you apply the mask to specific elements in the image. Toggle this on or off by checking the Auto Mask box in the Brush settings panel.
Notice the spillage outside the tree trunk in the second picture?
Linear Gradient
The Linear Gradient tool allows you to apply a mask as a gradient from any direction into the image. I use this a lot to even out the lighting in an image.
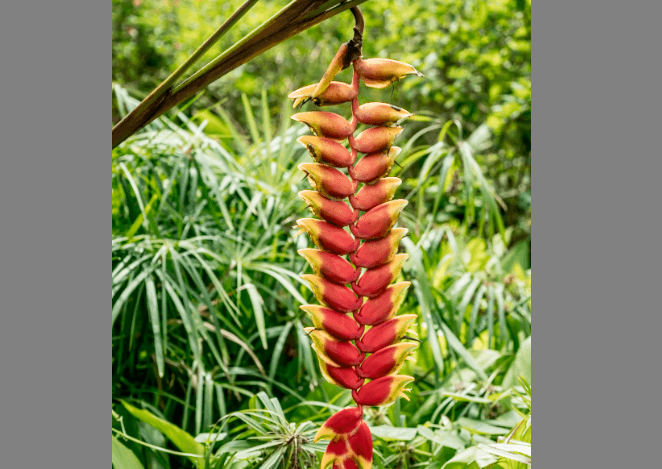
For example, in this image, the light is coming from the right and its brightness is distracting from this heliconia flower. Choose Linear Gradient from the masking menu or use the keyboard shortcut M to directly open this tool.
Click and drag into the image where you would like to place the gradient. The overlay shows you where your edits will be applied and you can adjust the gradient as needed.
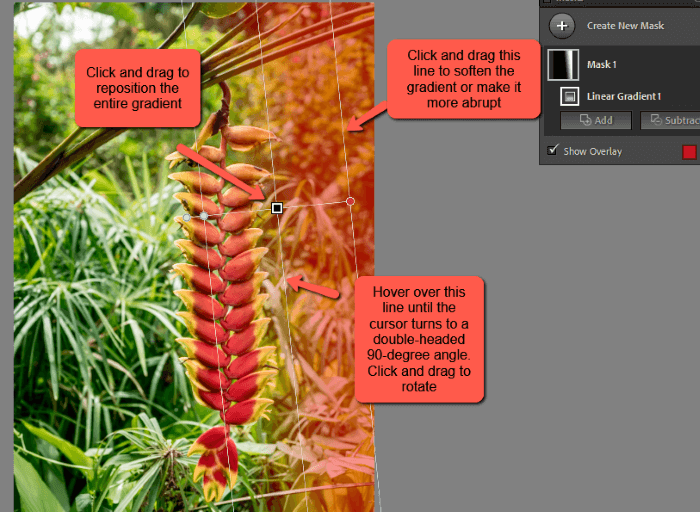
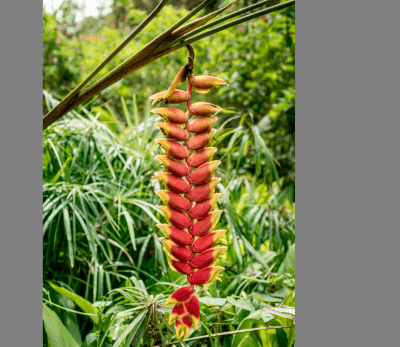
Bring down the brightness a touch and now the viewer’s attention is more securely drawn to the flower instead of that bright background.
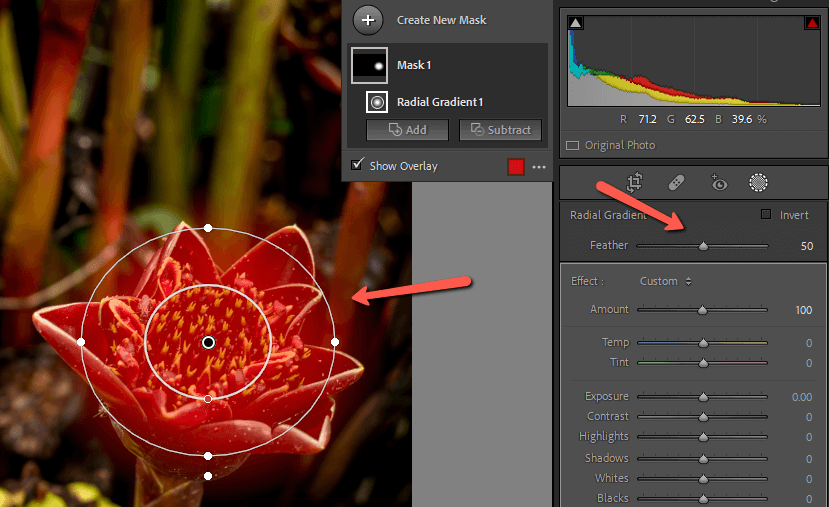
Radial Gradient
The Radial Gradient tool is similar to the linear gradient except that it is a circle or oval instead of a straight line.
Click and drag to draw the gradient. Use the handles to reshape and resize the gradient. Click and drag the black dot in the center to move the entire gradient to a new position. Control the amount of feathering (blending) with the Feather slider on the right.
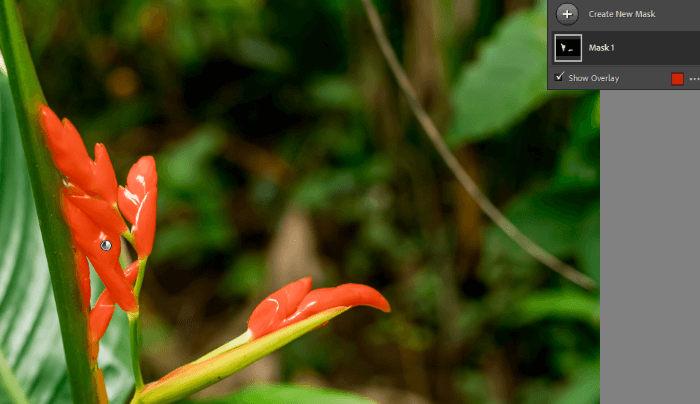
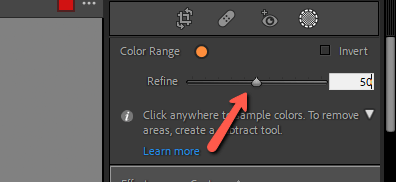
Color Range
The Color Range tool lets you create masks by color. When you click on this tool or use the shortcut Shift + J the cursor will turn into an eye dropper icon. Click on the color you want to select.
This flower is actually orange but it looks red because of the red overlay. All it took was one click on the orange part of the flower.
Use the Refine slider on the right to tell Lightroom how closely to stick to the selected color. A bigger number means more colors will be included, a smaller number means fewer.
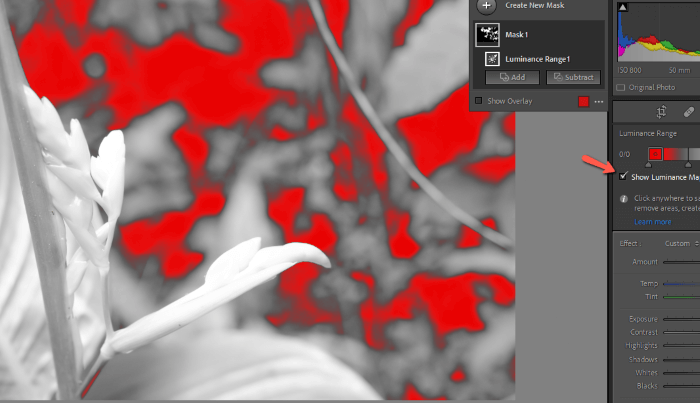
Luminance Range
The Luminance Range tool works like the color range tool but with lights and darks. Sample a spot and Lightroom will select everything in the image with a similar luminance value. Again, you can adjust the range with the slider on the right.
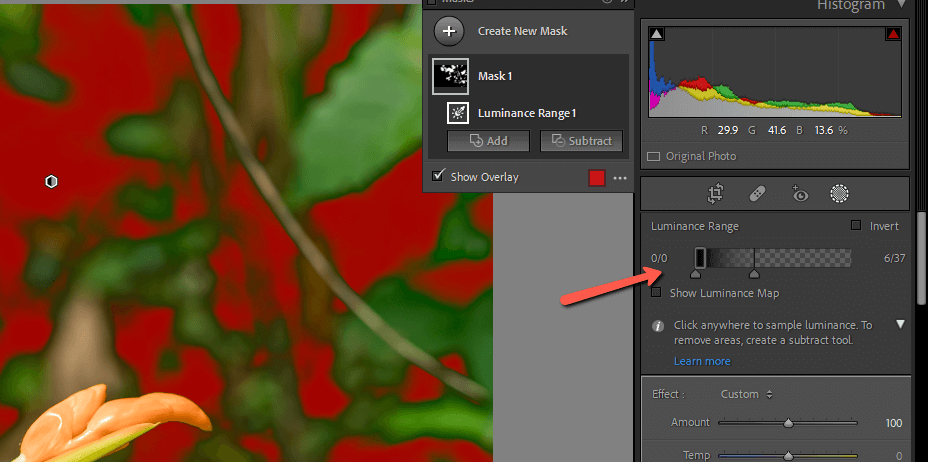
If you’re having trouble seeing the luminance in an image, check the Show Luminance Map box for a visual representation of the lights and darks.
Depth Range
The Depth Range feature works the same as the other two range tools. It selects every point in the image with the same depth of field as the sampled point.
However, it is usually grayed out. It only works with images that have a depth map. You can get this depth map by shooting with Lightroom’s built-in camera with the Depth Capture feature enabled or by using Portrait mode on a recent iPhone.
Adjusting Masks in Lightroom
There are times when Lightroom’s automatic selections won’t be perfect. It might grab a little of the subject’s surroundings or fail to select a small part of the subject. Or perhaps you don’t want your linear gradient to affect your subject the same way it’s affecting the background
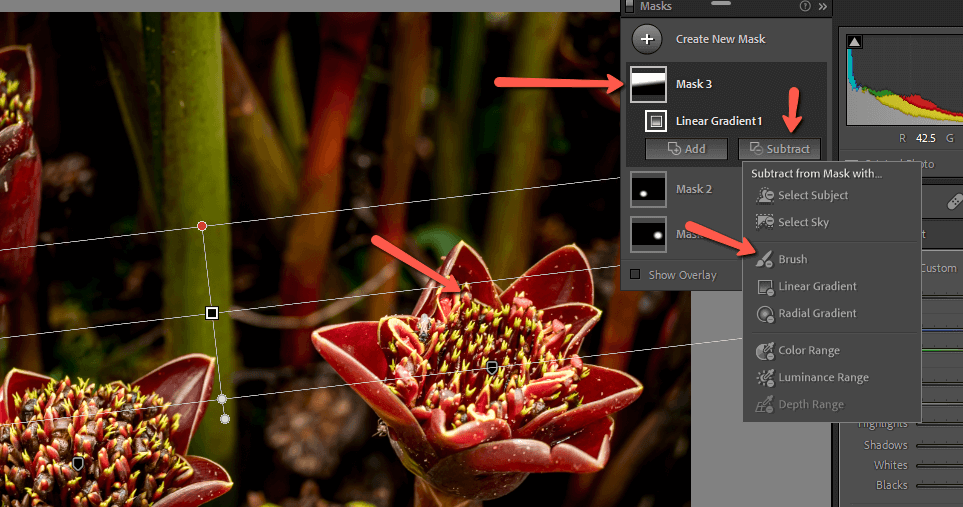
This is easily fixed by adding or subtracting from the mask. When you select a mask in the Masks panel, you’ll see two buttons – Add and Subtract.
Clicking on either will open all the masking tool options. Choose which option you want to use. I usually use the brush to make small adjustments.
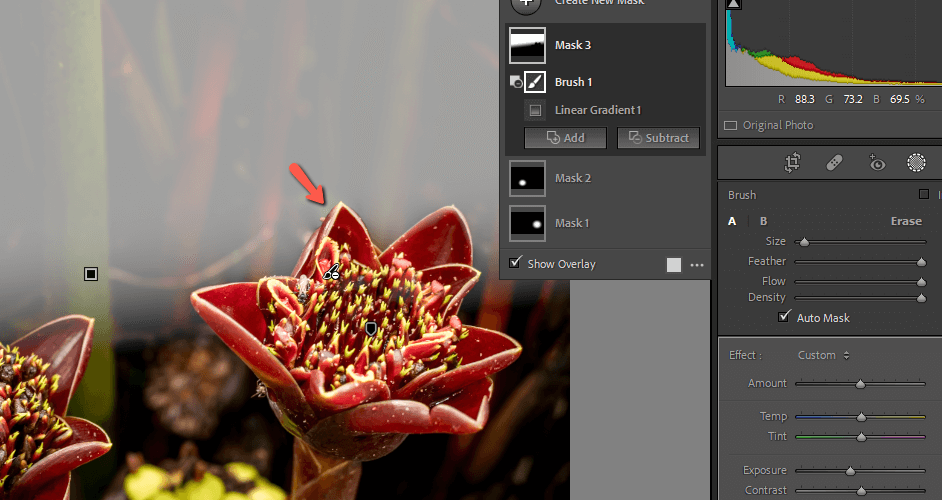
In this image, I want the gradient to affect the background but not the flower. To remove the effects of the gradient from the flower, let’s click Subtract and choose the Brush tool.
I couldn’t see well with the red overlay, so I switched to white and turned on the Auto Mask. Then I painted on the flower to remove the gradient. If you accidentally remove too much, hold the Alt or Option key to temporarily toggle from subtract to add or vice versa.
Inverting Masks in Lightroom
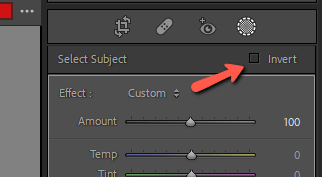
What if you want to apply changes to everything except a certain part of the image?
For example, what if you wanted to blur the background but keep the subject in focus? You could use the Select Subject feature, then invert the mask. Simply check the box right under the toolbar. It looks a little different for each of the masking tools, but it’s there.
Adding Multiple Masks in Lightroom
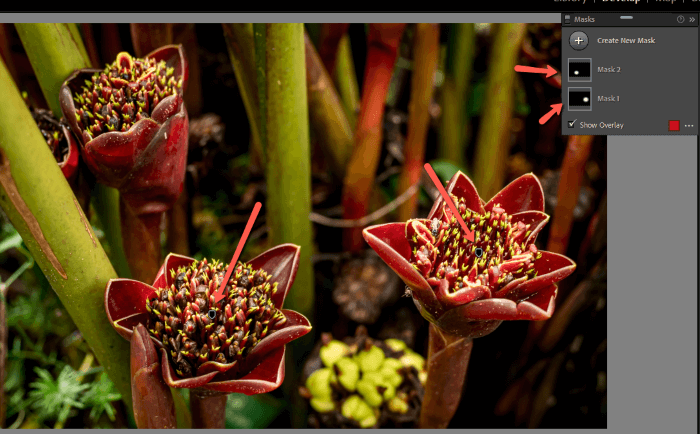
What if you want to add multiple effects? Can you use more than one mask? Absolutely!
In this example, I’ve already added two radial masks, one to each of the flowers in the foreground. This allows me to control the light on each flower independently. I also want to darken the background, so I’ll add a linear gradient.
Note: the little black tags on the flowers indicate the presence of a mask.
Click Create New Mask at the top of the Masks panel. The masking tools will appear and let’s choose Linear Gradient.
Here you can see that the third mask is applied.

Whew! That was a lot of information. However, I promise you that understanding masks is one of those things that will take your photography to the next level!
Curious to learn more cool stuff in Lightroom? Check out how to use Soft Proofing for printing perfect images every time!