
Can you smooth skin in Lightroom? Photoshop is the king of photo manipulation, but when it comes to editing lots of images, Lightroom is faster. So many photographers wonder, is there an easy way to smooth skin in Lightroom?
Hey there! I’m Cara and though I use both programs in my photography work, I definitely prefer Lightroom for the bulk of my editing.
If I wanted to do some serious skin work, Photoshop offers more tools to really perfect it. But for a quick application, such as fixing uneven skin tone, Lightroom has an awesome option too – the Brush Mask!
Let me show you how it works!
Table of Contents
5 Steps to Smooth Skin in Lightroom Using Brush Mask
Lightroom has some powerful masking features which make smoothing skin an easy task. I love using the brush mask to touch up my skin in Lightroom. Here’s how I do it.
Step 1: Open the Brush Mask and Choose the Settings
To apply the effect, we’ll use the brush mask option.
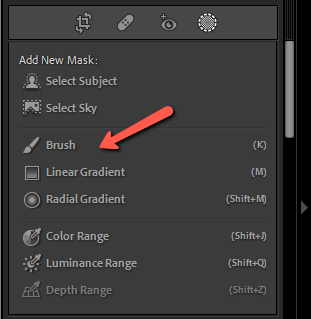
Open the masking panel by clicking the circle icon on the right side of the toolbar to the right of your workspace. Or press Shift + W on the keyboard to open it.

Choose the Brush option from the list. Alternatively, you can jump directly to the brush by pressing the keyboard shortcut K.
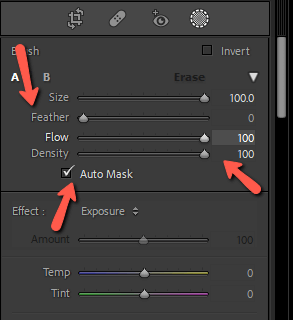
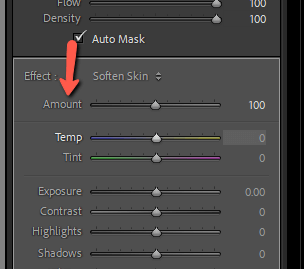
The Brush Settings will now appear. For the fast and dirty version of skin smoothing, choose a big brush and reduce the feathering to 0. Put Flow and Density at 100. Make sure that the Auto Mask box is checked.
Step 2: Choose the “Soften Skin” Preset in Lightroom
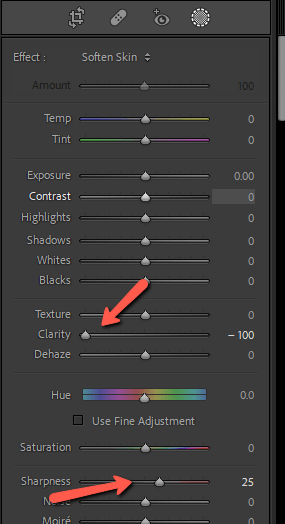
The brush settings are ready, now we need the right slider settings to soften the skin. Well, Lightroom has that all taken care of with a handy “Soften Skin” preset.
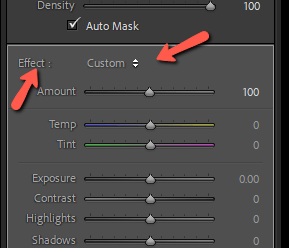
Just under the brush settings, you’ll see where it says Effect. To the right, it will say “Custom” or whatever the name is of the last preset you used. Click on the little up and down arrows to the right of that.
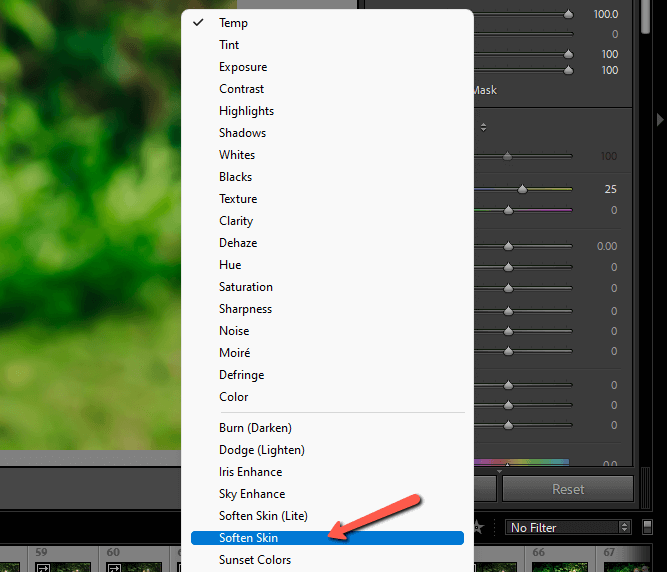
This will open a list of brush effect presets. There are some default presets that come with Lightroom, plus you can make and save your own.
In this list, you’ll find Soften Skin and Soften Skin (Lite). Let’s choose the Soften Skin one for now. This effect is almost always too strong, but I’ll show you how to dial it back in just a moment.
Now we see that the Clarity slider jumped to zero and Sharpness jumped up to 25.
Step 3: Apply the Mask
Let’s apply this to an image to see what happens.
To avoid the hassle of painstakingly painting over the skin, let’s zoom out to make the image smaller.
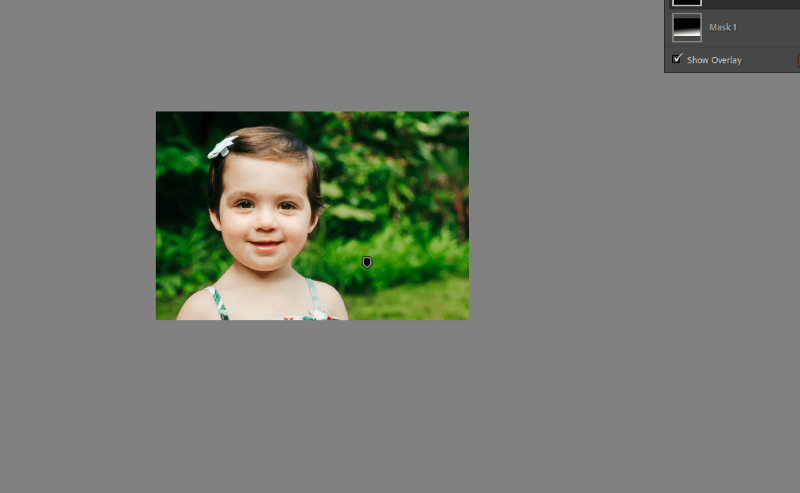
Make the diameter of the brush big enough to cover all the skin. You can use the Size slider on the right or the right bracket ] key to make it bigger. Place the center dot of the brush on an area of the skin and click once.
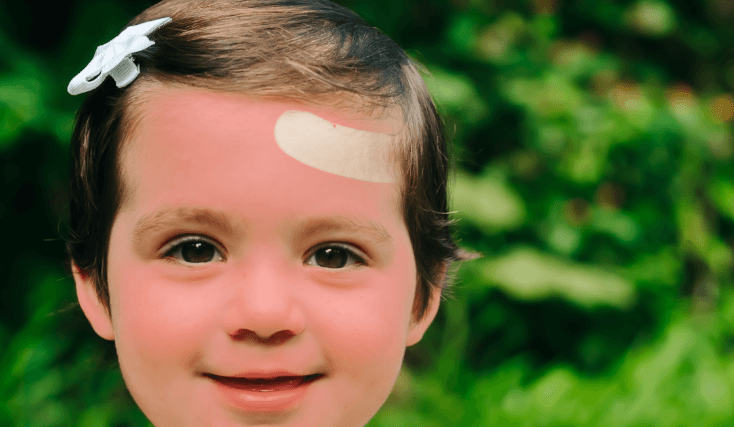
Lightroom will do its best to select all the similarly colored pixels that fall within the diameter of the brush. The red overlay shows us what parts of the image Lightroom automatically selected. It did a pretty good job!
Step 4: Subtract Unwanted Parts of the Mask
Sometimes parts other than the skin will get caught up in the mask. This will happen if there are other elements in the image with colors similar to the skin you selected.
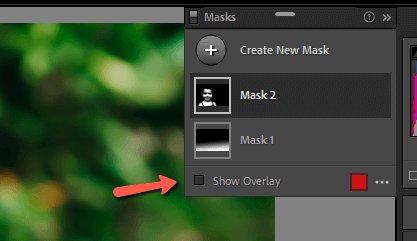
To remove those areas from the mask, click on the mask in the Masks panel. Choose the Subtract button and select the Brush.
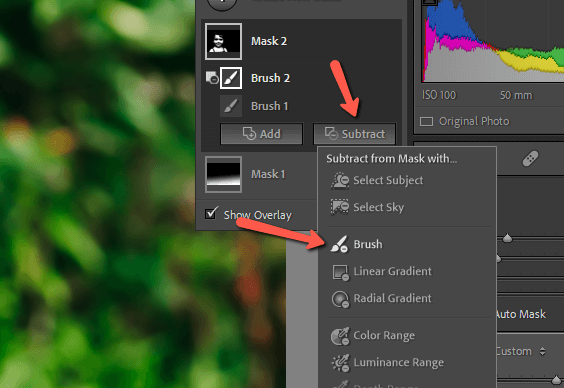
Now, paint over the areas you don’t what to be included in the mask.
In my case, the mask is actually quite good, so I’ll undo this example. Remember that you can toggle the overlay by checking or unchecking the Show Overlay box at the bottom of the Masks panel.
Step 5: Adjust the Effect (If Needed)
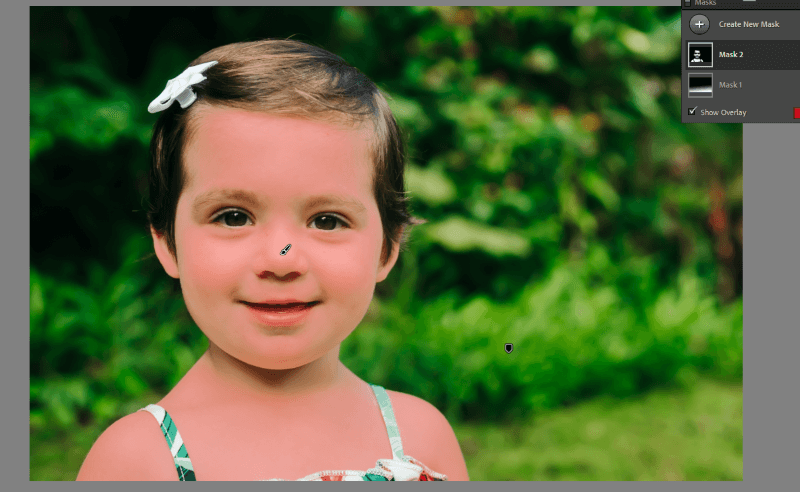
I’ve turned off the overlay so we can see how this Soften Skin preset looks. Before is on the left, and after is on the right.
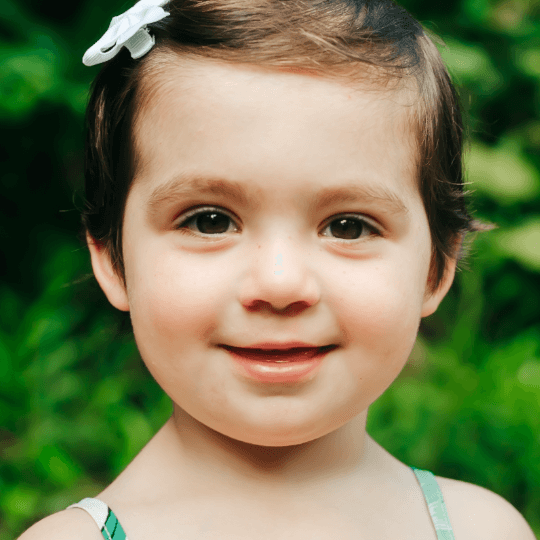

It might be hard to tell in these pictures, but the effect doesn’t touch her eyes, hair, or the background. However, it heavily softened her skin.
A little too much, so now let’s look at how to dial it back.
You might assume that to ease off the effect, we simply move the sliders. However, then we’d have to adjust each slider individually. To adjust all the sliders proportionately, there’s an easier way.
Notice that this Amount slider appeared when we created the mask. This is the amount of the effect. Drag this slider up or down to increase or decrease all the sliders in proportion to one another. Awesome!
I brought my amount slider down to about 50. Now she’s got beautifully soft skin that isn’t so heavy it looks fake.

Gotta love how Lightroom makes it so easy to make your subjects look amazing! Wondering about other Lightroom features? Check out how to blur the background in Lightroom here!