
Do you nail your compositions 100% of the time in-camera? Are your pictures always perfectly straight and your subject perfectly positioned according to the rule of thirds (or whatever compositional rule you’re using)?
Hello! I’m Cara and while there may be some magical photographers out there who take these perfect images, I’m not one of them. So I use the crop tool to strengthen my compositions or change the aspect ratio of my images.
Are you curious about how to use the Crop tool in Lightroom? Let me show you all the secrets!
Note: the screenshots below are taken from the Windows version of Lightroom Classic. If you are using the Mac version, they will look slightly different.
Table of Contents
Where is the Crop Tool in Lightroom
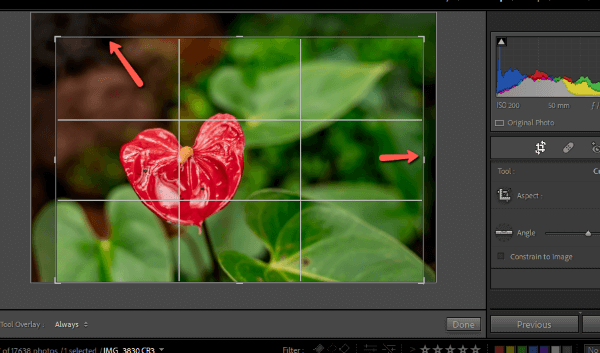
The Crop tool is found in the Develop module in the little toolbar between the Histogram and the Basic panels.
You can quickly access the tool by using the Crop Tool keyboard shortcut R. This shortcut works in any of the modules.
How to Crop and Straighten an Image in Lightroom
You can free crop or use some crop options to crop or straighten images. Follow the quick steps below.
Step 1: With the tool active, click and drag the handles to resize or crop the image. By default, the aspect ratio is fixed, which means that the long and short sides will change in proportion to each other.
Step 2: Click and drag within the crop rectangle to reposition the crop within the image. Press Enter when you’re happy with the positioning.
Step 3: Press Esc to dismiss the tool if you change your mind and don’t want to make changes. This will reset the crop to whatever it was when you opened the tool, including if there had already been a crop applied.
If you want to reset the crop to the original, press Ctrl + Alt + R or Command + Option + R.
Changing the Aspect Ratio
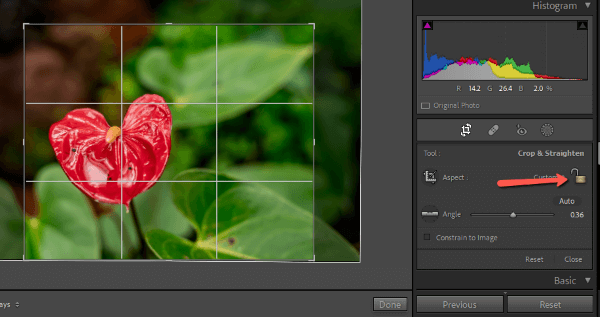
What if you want to change the aspect ratio of your image? By default, the tool has locked the photo’s original aspect ratio.
Click the icon that looks like a padlock on the right side of the crop panel to open it. When the lock is open, you are free to change the aspect ratio as you please. If you want to lock in your new aspect ratio, press the lock again to close it.
Alternatively, you can press A on the keyboard to toggle the aspect ratio lock on or off.
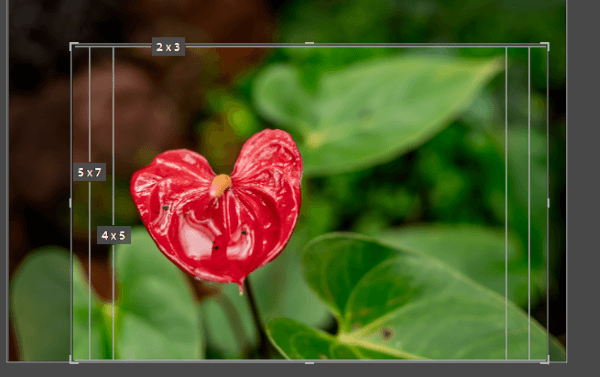
What if you want a square crop for Instagram (1 x 1) or another common aspect ratio like 5 x 7, or 8 x 10? To the left of the lock, you’ll see a set of up and down arrows next to the word Original or Custom depending on if you’ve made changes already.
Click on the word to open the aspect ratio menu where you can choose the one you want from the list.
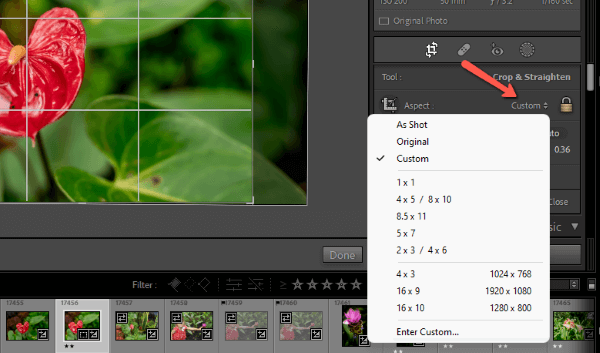
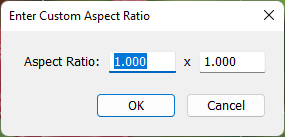
You can also choose a custom aspect ratio through the Enter Custom command at the bottom of the menu. Enter the values you want to use in the box that appears.
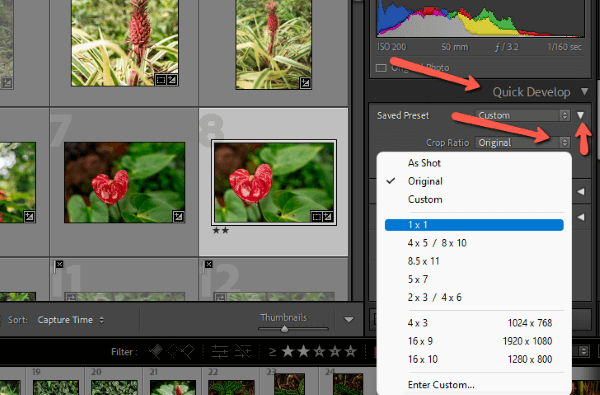
If you want to apply a different aspect ratio en masse, press G to go to Grid view in the Library module. Choose the images you want to change to a different aspect ratio.
Open the Quick Develop panel and click the triangle to the right of Saved Preset. Click the arrows to the right of the Crop Ratio box. Choose the aspect ratio you want to apply from the menu.
Change the Orientation
What if you decide you like the other orientation better? Press X to toggle between horizontal and vertical orientation.
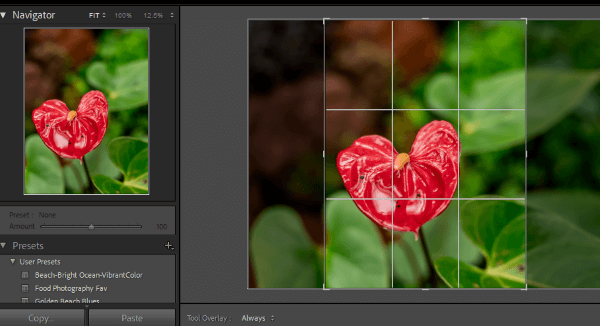
Crop Overlays
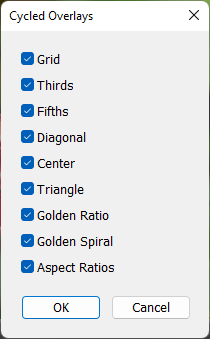
There are various crop overlays that help you with composition. The default is the rule of thirds, but obviously, we don’t always want to use the same rule. Cycle through the crop over options by pressing O. There are several options, including an overlay showing different aspect ratios.
A complete list of the overlays can be found in the Tools menu up in the toolbar. Go to Crop Guide Overlay and you’ll see the list displayed.
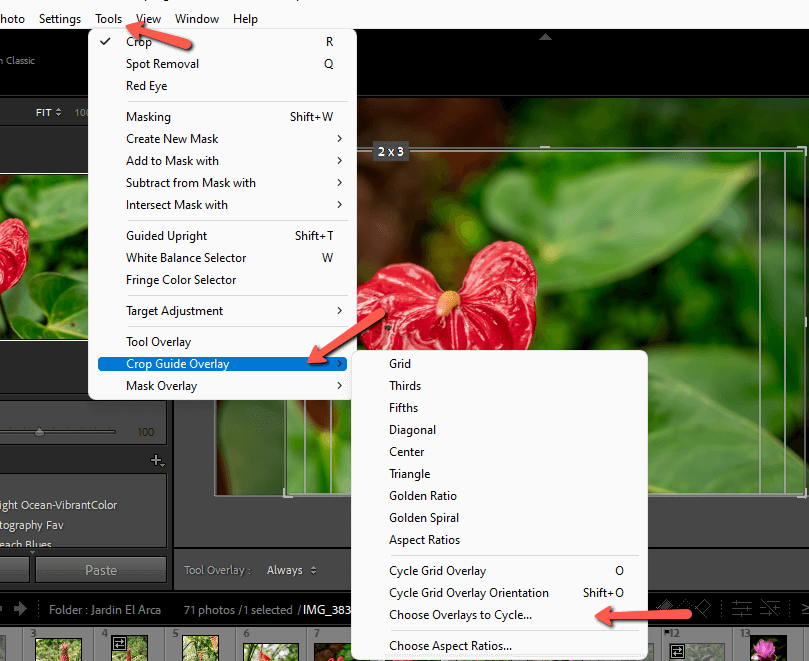
If you want to customize which overlays will cycle through when pressing O, click Choose Overlays to Cycle. Then pick the overlays you want to include.
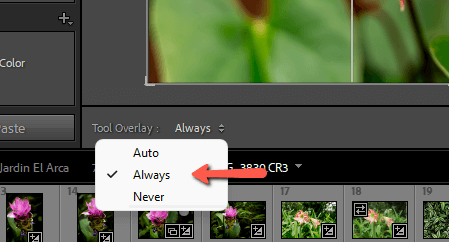
If the overlay is not visible check the Tool Overlay feature at the bottom left of the image. Make sure it is set to Always. If you only want the overlay to show when you click and hold the mouse on the image, set it to Auto. Click Never if you want it out of the way for good.
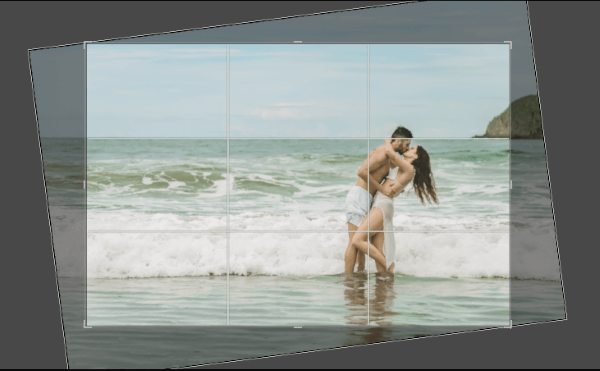
Straighten an Image
What if your horizon isn’t quite right? Straightening is pretty straightforward in the crop tool. Hover your mouse outside the image and you’ll see it turn into a two-sided arrow bent at a 90-degree angle. Click and drag to rotate the image.
You can also jump to a straight horizon with the Auto tool, though this works best if there is a defined horizon in the image.

A third way is to use the angle tool. Click the ruler to the left of the word Angle. Then click at two points along the horizontal (or whatever horizontal line you’re following). When you drop the second point, the image will jump straight.

Crop Like a Pro!
How many new things did you learn about the crop tool? Even if you already knew the basics, there is so much about this cool tool that you might not have known.
Curious about other features in Lightroom? Check out the mysterious Dehaze tool and how to use it here!