
There are thousands of ways to edit portraits in Lightroom. That’s part of the beauty of the program. Every photographer can add their own “special sauce” to their images to create something unique.
Hello! I’m Cara and I’ll admit that it took me a few years to get a handle on editing portraits in Lightroom. There are a lot of sliders and numbers to change and they all affect an image in different ways, some of which are hard to decipher.
But, we’ve all got to start somewhere. Today I’m going to show you a basic process for how to edit portraits in Lightroom.
You don’t necessarily have to follow all the steps, because different images require different edits, but you can definitely learn them all and customize from there to fit your image.
Let’s get started!
Note: the screenshots below are taken from the Windows version of Lightroom Classic. If you are using the Mac version, they will look slightly different.
Table of Contents
- Step 1: Import Your Image into Lightroom
- Step 2: Add a Preset
- Step 3: Adjust the White Balance
- Step 4: Exposure, Highlights, Shadows, Etc.
- Step 5: My Secret Sauce
- Step 6: Adjust the Colors
- Step 7: Adjust the Crop
- Step 8: Detail Adjustment
- Step 9: Skin Touchup
- Step 10: Whiten Teeth, Darken Lips, Brighten Eyes
Step 1: Import Your Image into Lightroom
The first step is to bring your portrait into Lightroom. In the Library module, click the Import button in the lower left corner of your workspace, right above the filmstrip.
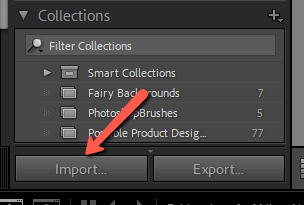
On the left side of your screen, choose the source, usually a memory card or a folder on your computer. Select the image(s) you want to import and click Import on the lower right side of your screen.
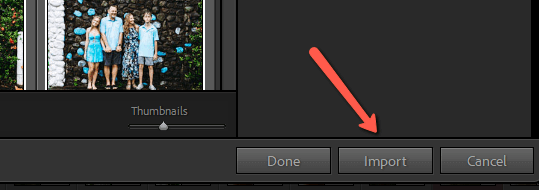
When it finishes importing, Lightroom will jump to the normal workspace with the filmstrip at the bottom. Click Develop to open the editing panels.
Step 2: Add a Preset
Presets give you a starting point to work with when editing. You might choose to use one of Lightroom’s included presets or perhaps you have bought or created your own. (See our tutorials on how to add or install presets or how to create your own preset for more information).
If you don’t have a preset, skip to Step 3 to continue editing manually.
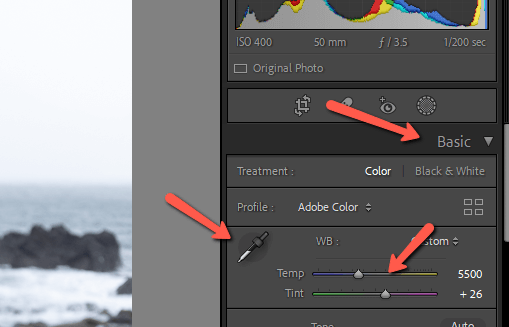
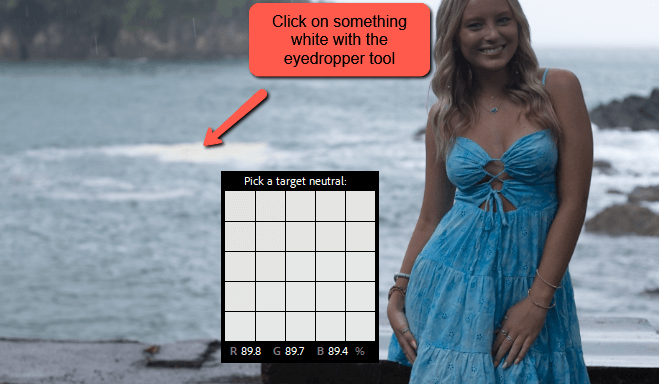
Step 3: Adjust the White Balance
Accurate white balance is key to getting the skin tones right in an image. Of course, you should have set the white balance in your camera to the ideal setting when you took the image. But if you didn’t or it still needs a tweak, you can do this in Lightroom.
Open the Basic panel on the right side of your workspace. The white balance tool is conveniently located at the top.
The easiest way to set the white balance is to click the eye-dropper and click somewhere in the image that should be white. If you don’t have that option, you can slide the Temp and Tint sliders until you see accurate results.
Step 4: Exposure, Highlights, Shadows, Etc.
The next step is to get the lighting right in the image. You can make general adjustments with the Exposure and Contrast sliders. Tweak the Highlights and Shadows individually with the corresponding sliders. Play with the White and Blacks as well until you get a satisfactory result.

If you need to make some advanced lighting adjustments, Lightroom’s powerful AI masking feature is super helpful. You can select the subject, and the sky, or use radial and linear masks to brighten or darken specific parts of the image.
Step 5: My Secret Sauce
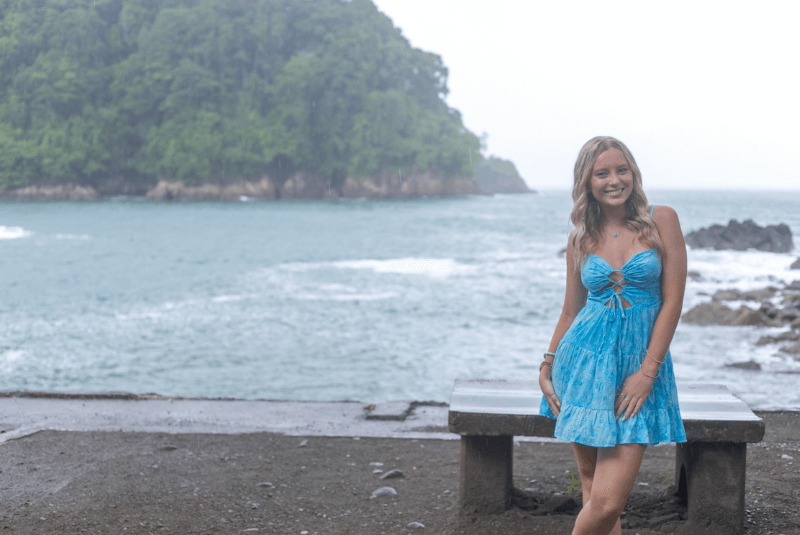
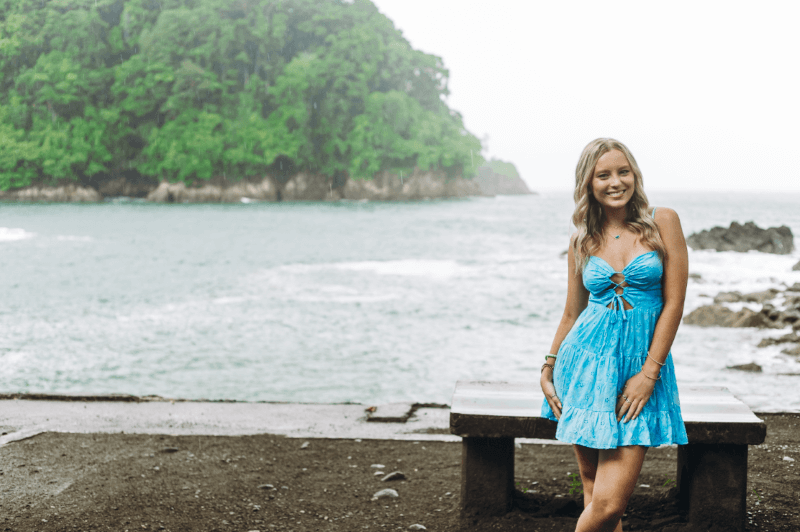
At this point, most photographers will add some color to the image. See how it’s a little bland?
Sometimes, this is done with the Vibrance and Saturation sliders.
If you use these options, be careful not to go overboard. It’s super easy to push the Saturation too much and the image looks over-edited. The Vibrance option is a little more subtle and more intelligent, but still, use it with care.
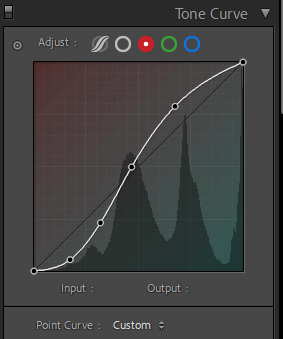
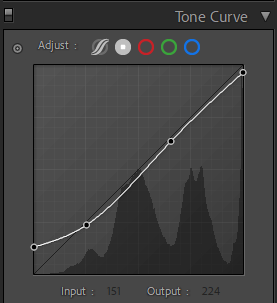
I prefer to use the Tone Curve tool, it’s my “secret sauce,” so to speak. I adjusted each of the Red, Green, and Blue channels similarly. The second image is my Point Curve.
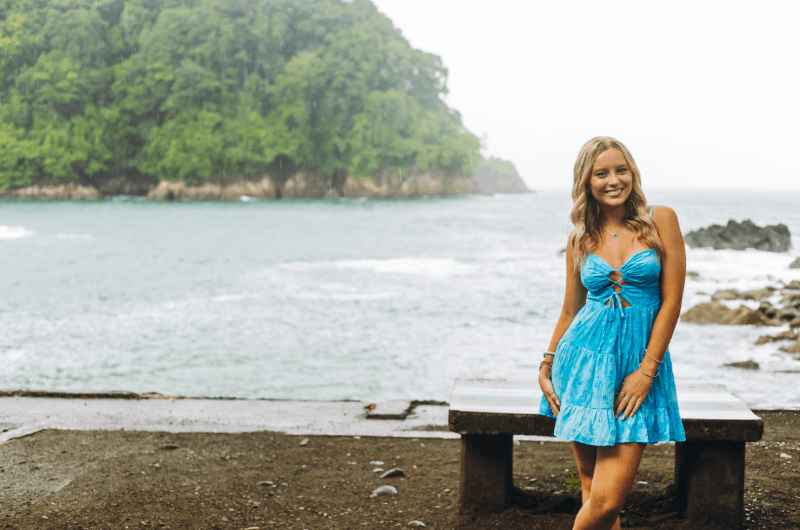
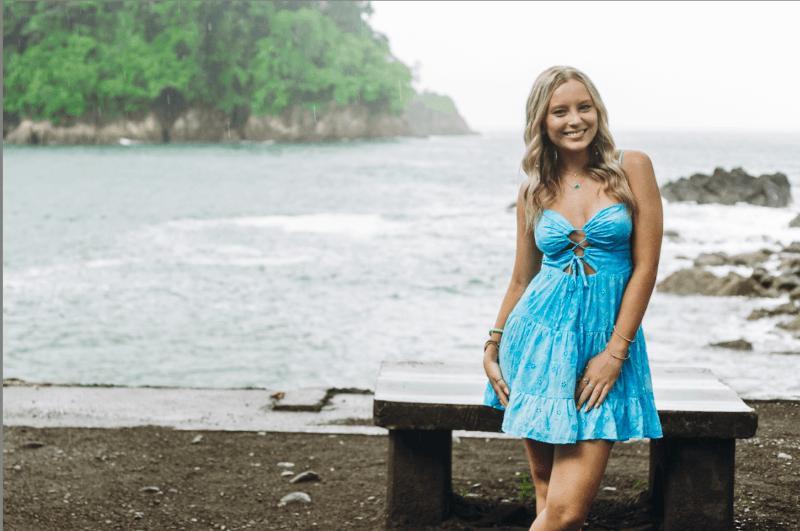
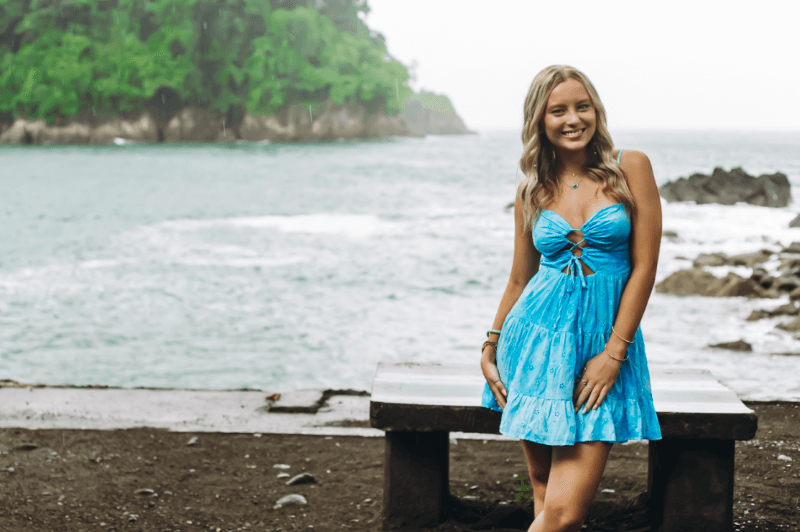
Here’s my result:
Step 6: Adjust the Colors
Tweaking the Tone Curve can sometimes be a little strong with some colors. Here, her skin has gone a little too orange. But I like the vibrance of the image overall, so I don’t want to mess with the white balance again.
Instead, let’s go into the HSL/Color panel and make some adjustments. You can access the Hue, Saturation, and Luminance panels separately by choosing the corresponding option at the top. To see them all as I have here, click All.
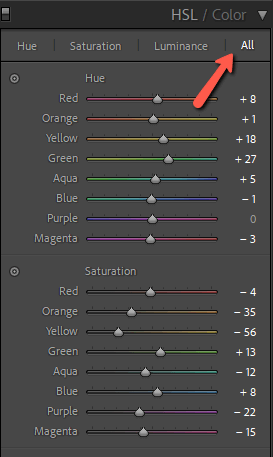
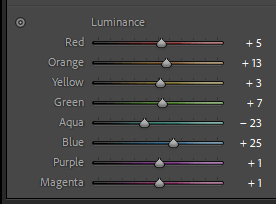
It’s coming together!
Step 7: Adjust the Crop
At this point, we’ve got most of the major edits out of the way. It’s time to fine-tune the portrait to really make it shine.
We’ll start with the crop.
Before cropping your image, think about your composition. What is the story you’re trying to tell with the image? I’ve got this lovely girl here, but I’ve also got a lovely backdrop. I want to keep more of the background in the image to display her surroundings.
However, I think there is more background than is needed and she’s a little small in the frame. So I’ll crop in like this. Check out how to use the crop tool here.
Step 8: Detail Adjustment
Zoom into 100% on your image to check the noise. I purposefully underexposed the girl in my image because I didn’t want the sky to be blown out behind her.
You can use the noise reduction tools in the Detail panel to fix the grain in your image as needed.

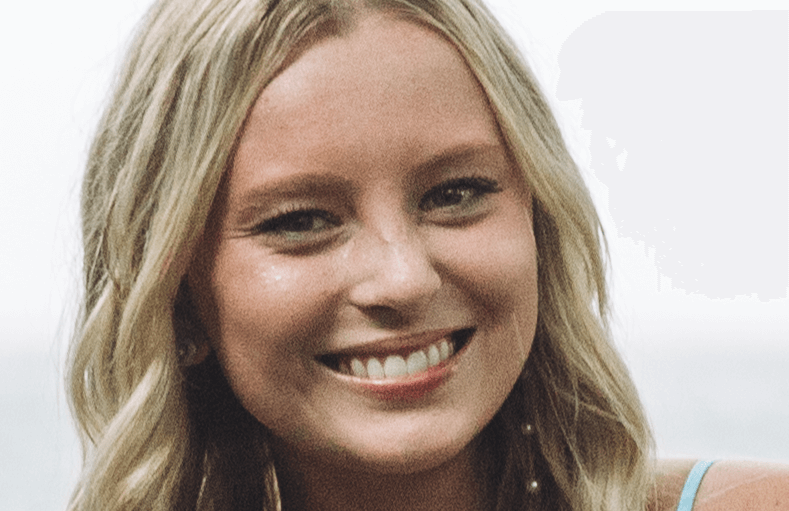
Step 9: Skin Touchup
Few of us have the flawless skin we wish we had, but in Lightroom skin can look amazing! Create a brush mask with the clarity pulled down to gently soften the subject’s skin. Check out an in-depth tutorial on skin-softening here.
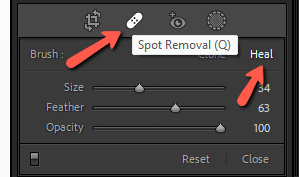
You can also use the Spot Removal tool to remove blemishes like pimples from the subject’s skin.
Choose the tool from the toolbar above the Basic panel. Set it to Heal and I usually put the Feather somewhere in the middle to help it blend better. Adjust the size to be just larger than the blemish and click to remove.
Step 10: Whiten Teeth, Darken Lips, Brighten Eyes
Some subjects look fabulous the way they are, others could use a tiny bit of touchup. It’s easy to use the masking tools to brighten/whiten the subject’s teeth to get that brilliant smile we all love. Check out how to whiten teeth here.
You can use the same technique to add a touch of color to their lips as well. Just bring up the saturation to make them more vibrant.
To brighten the eyes, simply add a pair of radial gradients to the eyes and bring up the exposure a touch. Keep this subtle! Obvious edits will ruin your photo.
And there we have it!
You won’t follow this same exact formula for every portrait you edit. Not every photo will require all the steps. However, this gives you a good starting point to work from.
Curious about more advanced edits you can try? Check out split toning and how to use it in Lightroom to take your photos to the next level!