
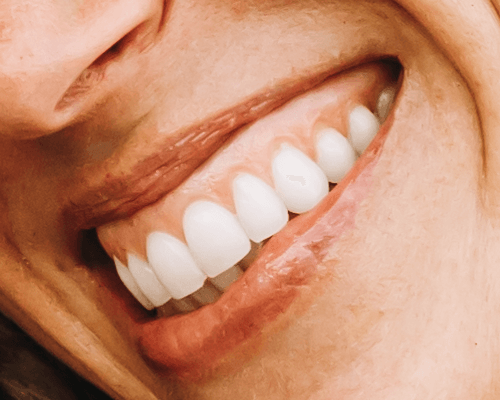
Everybody loves a bright white, Hollywood smile but unfortunately, we don’t all have one. Fortunately, Lightroom makes it easy for everyone to have white teeth in pictures!
Hello! I’m Cara and in my work as a professional photographer, I like to keep portraits natural. I don’t do Photoshop tummy tucks or change the size/shape of people’s eyes.
However, it doesn’t hurt to brighten up the teeth a tiny bit. Plus, it’s super simple to do in Lightroom and worth the few minutes of effort.
Before jumping into the steps, it’s important to know how white you should whiten the teeth so that it looks natural.
Table of Contents
A Note About White Balance
Before we get started, I want to remind you about your white balance. Make sure to adjust this before whitening the teeth. Some pictures may only require a tweak to the white balance to brighten up the teeth.
What if you’re having trouble determining if it’s a white balance issue or the actual color of the subject’s teeth? Take a look at the whites of their eyes. If the teeth don’t match, it’s likely that the subject’s teeth are discolored.
4 Steps to Whiten Teeth in Lightroom
We will be using the masking feature to make teeth whiter in Lightroom. Let me show you how it works in the four steps below.
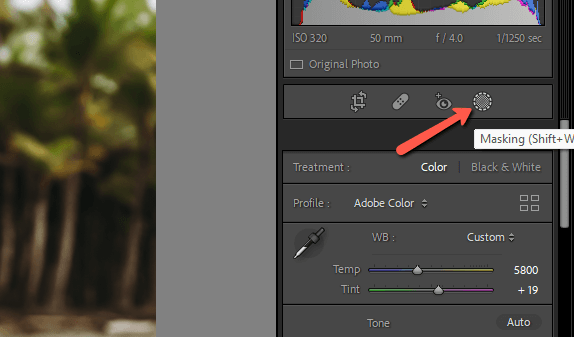
Step 1: Open a Brush Mask and Choose Your Settings
Press Shift + W on the keyboard. Alternatively, click on the circular masking icon on the right side of the toolbar above the Basic editing panel on the right.
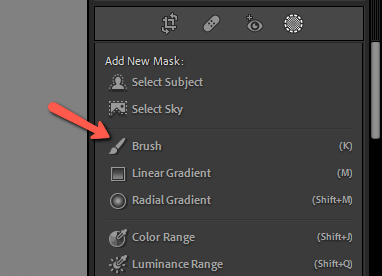
Choose the Brush option from the menu that opens. You can also press K on the keyboard to jump directly to the tool.
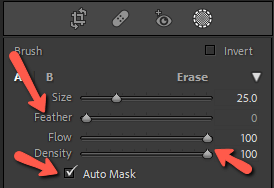
Set the brush settings as follows. The Feather should be down to zero and both the Flow and Density at 100. Make sure that the box is checked for the Auto Mask.
Step 2: Add the Mask
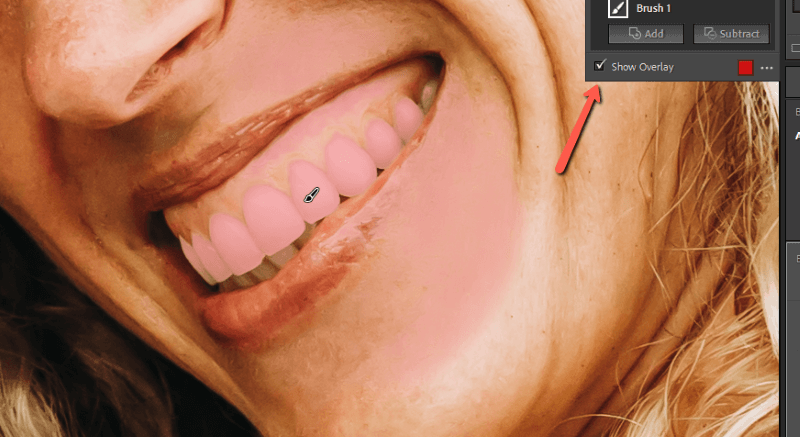
Zoom in on your subject’s teeth so you can see what you’re doing.
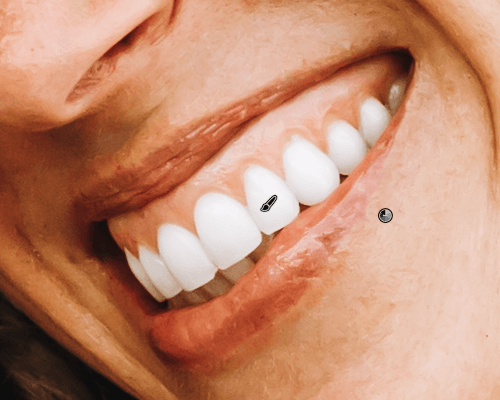
Make the brush big enough so all the teeth fit within the circle. Make sure the center dot is located over one of the teeth and click once.
Lightroom’s default red overlay should appear to show you what has been selected. If you don’t see it, check the Show Overlay box in the Masks panel.
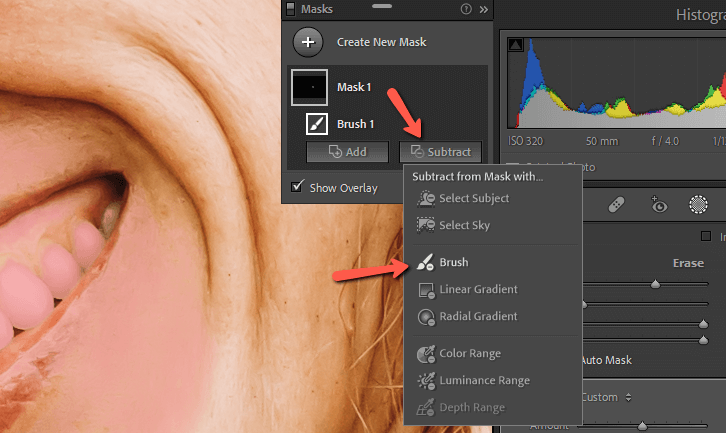
As you can see, some of the skin may get selected if it is bright enough. It’s simple enough to remove it.
With the mask selected in the masks panel, you’ll see an option to add or subtract. Click the Subtract button and the list of mask options will open again. If you just have a couple of little spots to clean up, choose the Brush option.
Since my initial selection over-selected quite a bit of her skin, I’m going to grab the Color Range tool instead. This tool selects all the pixels most similar to whatever you click on in the image.
In this case, it will be subtracting everything from my selection that is the same color as what I click on.

Click the Color Range and your cursor will turn into an eye dropper. Click somewhere on her skin and watch the magic happen!
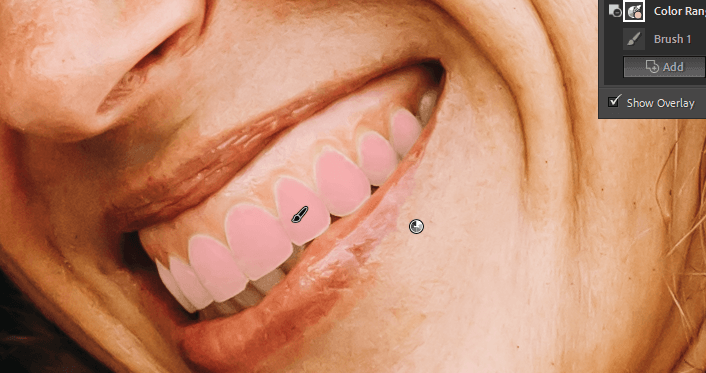
With one click, the mask is now limited to her teeth. There is a hairline around the edges of her teeth, which we can fix by clicking the Add button, choosing the brush, and painting in those missed areas.
Step 3: Choose the Teeth Whitening Preset
The mask allows us to apply edits to a specific part of the image. But what edits need to be applied to whiten her teeth?
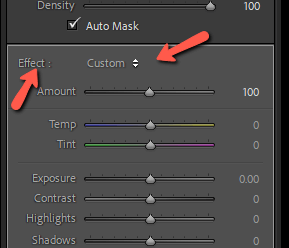
Lightroom makes it easy by providing a handy preset built-in to the program. To the right of the Effect tag near the top of the editing panel for the mask, you’ll see a word or phrase and a set of up and down arrows.
If you haven’t used the presets, it will say “Custom” here. If you have used a preset, the name of your last used preset will be here.
Click the arrows to open the menu and scroll down to the Teeth Whitening preset.
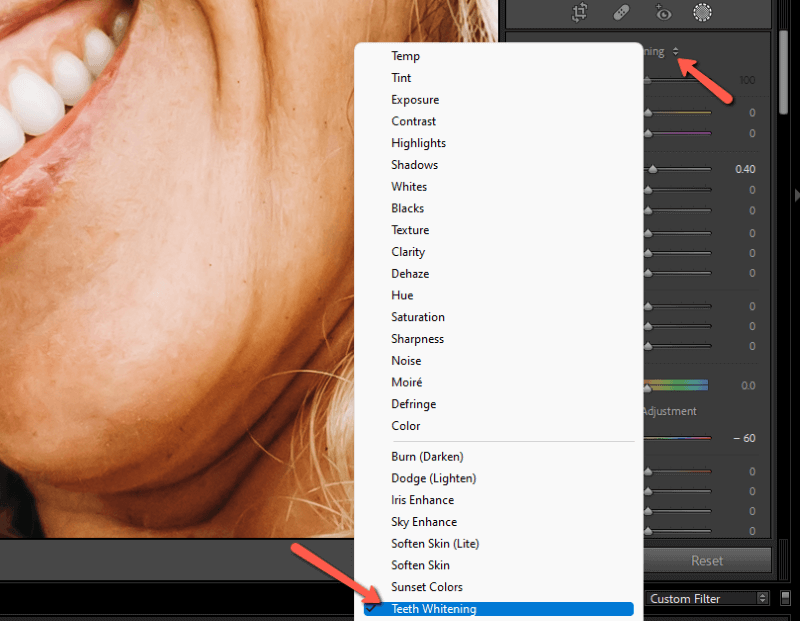
When you click this, the sliders will jump to their preset positions. The Exposure bumps up and the Saturation moves down.
Check out the before and after here. The difference is subtle but it sure makes a difference in the final photograph! This is especially true if you’re going for a beauty shot style.
Step 4: Adjusting the Effect
This will not always be necessary, but if you find the effect is too strong, you can easily dial it back. But don’t just start messing with the exposure bar. Use the Amount bar instead. This will change all settings proportionately to one another.
You’ll find this bar at the top of the masking adjustment panel, right under where you chose the effect. The default option is 100. Slide it to the right or type in a number bigger than 100 and you’ll increase the effect. Sliding to the left or typing a number smaller than 100 decreases it.

Play around until you find the perfect amount of tooth whitening. If only getting your teeth whitened in real life were as easy!
Curious to find out what other wonders await you in Lightroom? Find out what the dehaze slider does and how to use it here!
This was insanely helpful, I had no prior Lightroom experience and I am editing my graduation pictures by myself. Thank you!!!