

Disk Drill
Summary
Have you ever lost some important files, and the person you asked for help just gives you a lecture about the importance of backups? Frustrating, isn’t it. Backups are important, but it’s too late now. What you really need is a solution that can get your missing files back.
That’s what Disk Drill promises to do, and it works. There’s no guarantee that you’ll be able to recover every file. Hard drives can become damaged or corrupted beyond repair, and data will eventually be overwritten and permanently lost.
Fortunately, the free version of Disk Drill will show you whether your files can be recovered before you spend your money. If it can recover your crucial files, it’s definitely worth the cost of purchase.
What I Like: Clean, easy-to-use interface. Clear introductions when using new features. Display of time elapsed and time remaining during scans. Ability to pause a scan and save to resume in the future.
What I Don’t Like: Creating a recovery drive was more complicated than expected. Scanning for lost files can be time-consuming.
What is Disk Drill?
Disk Drill is designed to help you recover lost files on your Mac or Windows computer. You may be missing crucial files because you accidentally deleted them, formatted the wrong drive, or your drive became corrupt.
Additionally, you can use the program to free up space on your drives. When you delete a file or format a drive, the data isn’t actually removed from the drive. What is removed is the directory information that tells the operating system the name of the file and where to find the data. In time, as you save new files, the data will be overwritten.
Disk Drill uses a variety of techniques to search and examine that old data on your drive, identify the types of files it can find, and help you recover them. It may just save you from disaster. It also offers some space-saving tools, though not with as many options as a dedicated Mac cleanup app.
Is Disk Drill a virus?
No, it isn’t. I ran and installed Disk Drill on my iMac. A scan using Bitdefender found no viruses or malicious code.
Is Disk Drill safe to use?
Yes, it is safe to use. There are a few times you need to exercise care when using the program. When creating a boot drive, you’ll be asked to format the drive. Be sure to select the correct drive, because all the data on that drive will be lost.
When cleaning up space on your drive, Disk Drill will show you a list of large files, unused files, and duplicates. Don’t just assume these files can be safely deleted — carefully check first. Other than these common-sense warnings, Disk Drill is completely safe. It didn’t crash or become unresponsive at all during my use of the program.
Is Disk Drill really free?
The Disk Drill website bills the product as “free Mac data recovery software”. Is it really free? No, not if you’re downloading the software to recover missing files. To do that you’ll need the Pro version.
It’s true that you can recover some files for free. But only if you have already been running Disk Drill, and have activated the data protection features before the files were lost.
What good is the Basic version, then? Evaluation. It will allow you to scan for missing files, and then preview them to make sure they’re intact. If you’re successful, the Pro version should be able to recover the files, so your purchase won’t be wasted.
How much does Disk Drill cost?
The Pro version costs $89, and gives one user a license for up to three computers. Lifetime upgrades cost an additional $29. An Enterprise version is also available.
You may also get Disk Drill from Setapp, a free 7-day trial, and then $9.99 per month.
Disk Drill Basic vs. Disk Drill Pro
To expand on what I said above, if you’re looking for a free data recovery program (for personal use only), Disk Drill Basic is an option—as long as you’re proactive. By enabling the app’s recovery protection features, you’ll be able to restore lost files in the future, for free.
Disk Drill has two features that protect your data, and they recommend you use both:
- Recover Vault saves the metadata of deleted files (including file name and location), which makes the files easy to recover if the data has not been overwritten by new files.
- Guaranteed Recovery saves a complete copy of every file you delete, which means you don’t save space when you delete them, but guarantees you can recover them even if you have emptied the Trash.
If you haven’t been using those recovery protection features before losing your files, you’ll need the Pro version. And as I said, the free version will allow you to make sure your files can be recovered before you spend any money.
All other features, including drive cleanup, are available on both the Basic and Pro versions of Disk Drill.
Table of Contents
Why Trust Me?
My name is Adrian Try. I’ve been using computers since 1988, and Macs full time since 2009. I provided tech support professionally for many years, and from time to time would hear from someone who couldn’t open a crucial file, formatted the wrong drive, or lost all their files when a computer or drive died. They always sounded desperate!
This application offers exactly that sort of help. Over the last week or so I’ve been testing a licensed version of Disk Drill Pro on a variety of drives, including the internal SSD of my iMac, an external spinning drive, and a USB Flash drive. I ran every scan and thoroughly tested every feature.
In this review, I’ll share what I like and dislike about Disk Drill. The content in the quick summary box above serves as a short version of my findings and conclusions. Read on for the details!
Disclosure: The CleverFiles team offered us an NFR code of Disk Drill Pro for testing purposes. They, however, have no influence or editorial input on the content of this review.
Disk Drill Review: What’s In It For You?
Disk Drill is about recovering missing files and more, and the following five sections will cover each feature in detail, where I first explore what the app offers and then share my personal take.
The program is available for both Mac and Windows, and the screenshots and descriptions below are taken from the Mac version.
1. Recover Lost Files from External Media
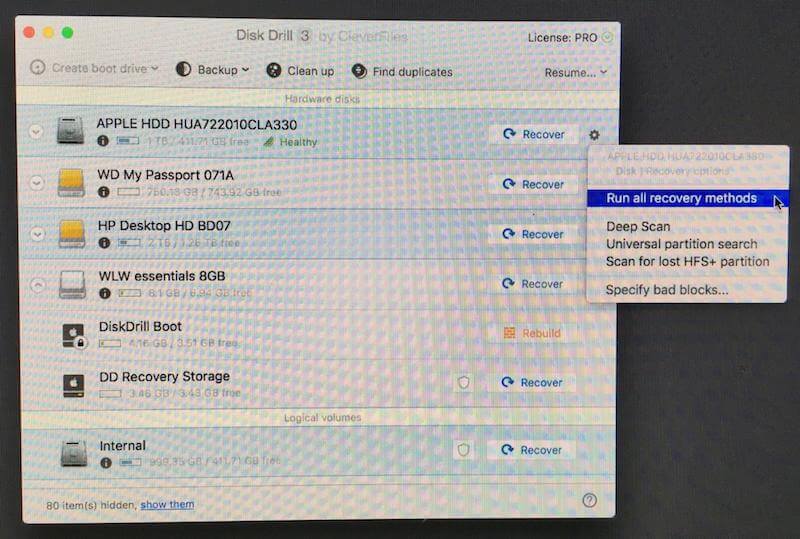
I use an external 2TB HP hard drive to keep my iMac backed up via Time Machine. Several months ago I formatted the drive, and I’m curious to see if Disk Drill can find and recover any of the files that were previously on the drive.
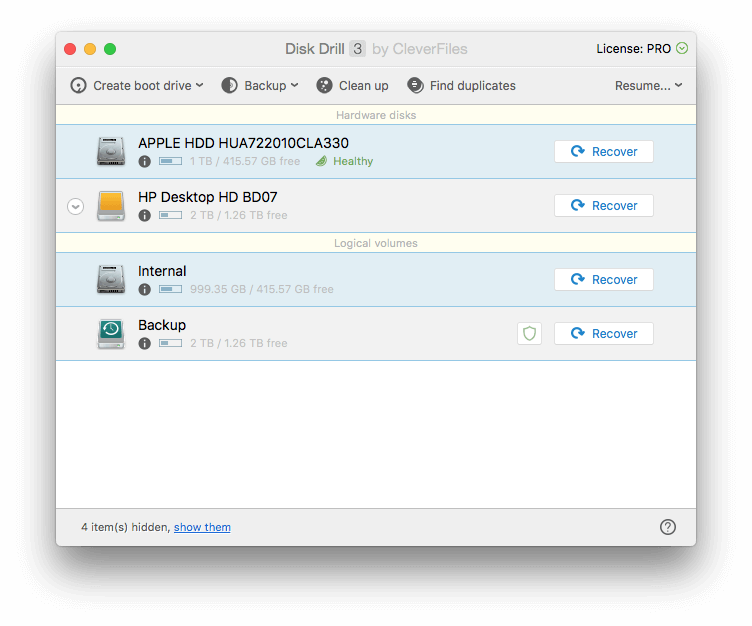
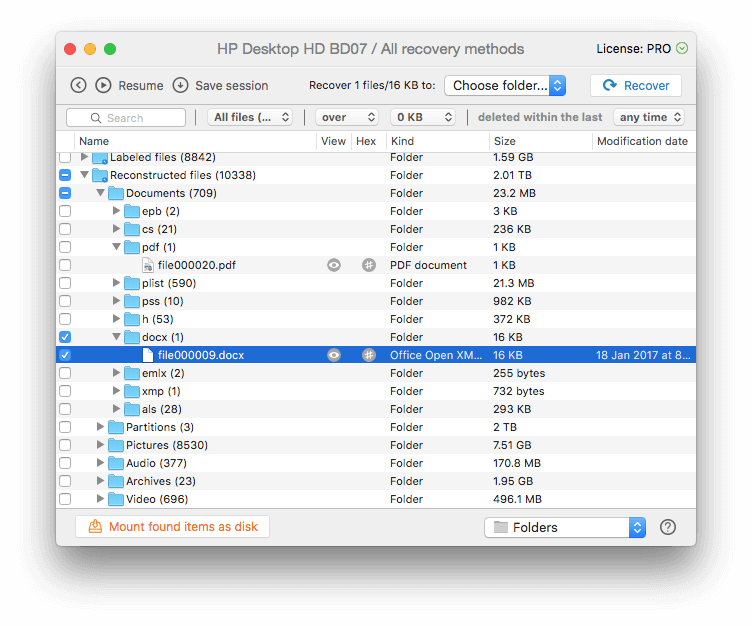
I click the Recover button next to “HP Desktop HD BD07”, and the app immediately starts looking for the remnants of files left on the drive. After almost 10 minutes, thousands of files have been found, though there’s still 26 hours of scanning to go before the entire drive has been checked. I don’t really want to wait that long, so I started examining the files that have been found so far.
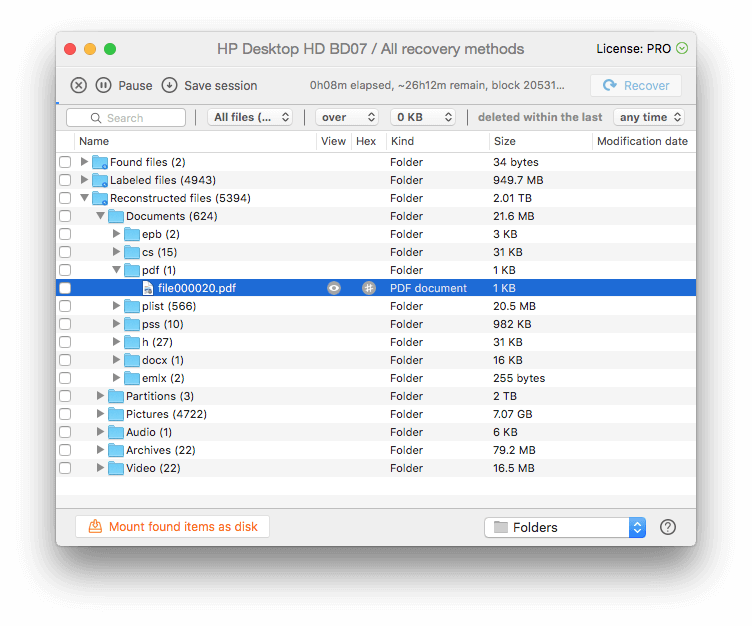
The Reconstructed Files section lists the files that are no longer listed in a folder — they were deleted or formatted, but have been discovered and identified somewhere on the drive.
One PDF file has been found. Since it is no longer listed in a folder, the filename has been lost. Disk Drill has recognized it is a PDF from the contents of the file.
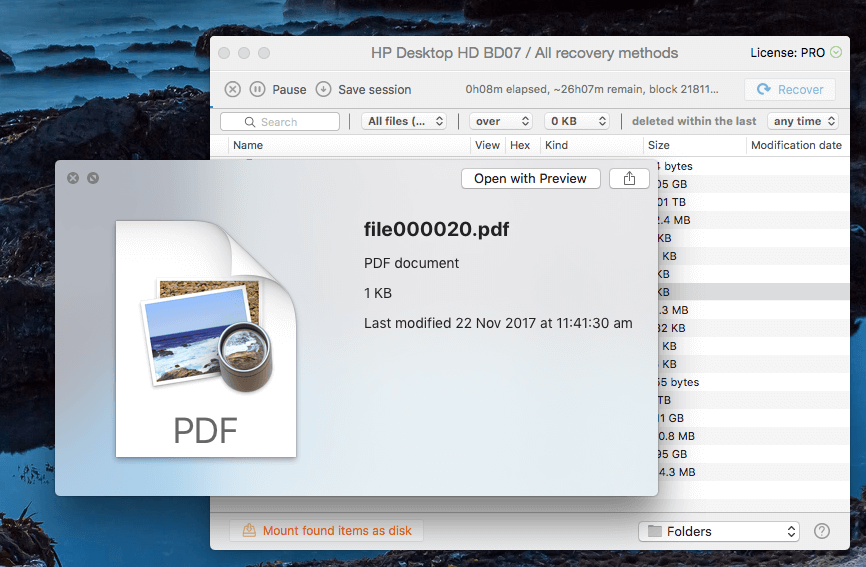
The fact that the file is only 1KB in size doesn’t look promising — it’s too small. There’s a good chance that much of the original file has been overwritten since the drive format. I click on the Quick Look icon to see if there is anything there.
There’s nothing to view, so the file can’t be restored, and I move on. I look at the recovered DOCX files instead.
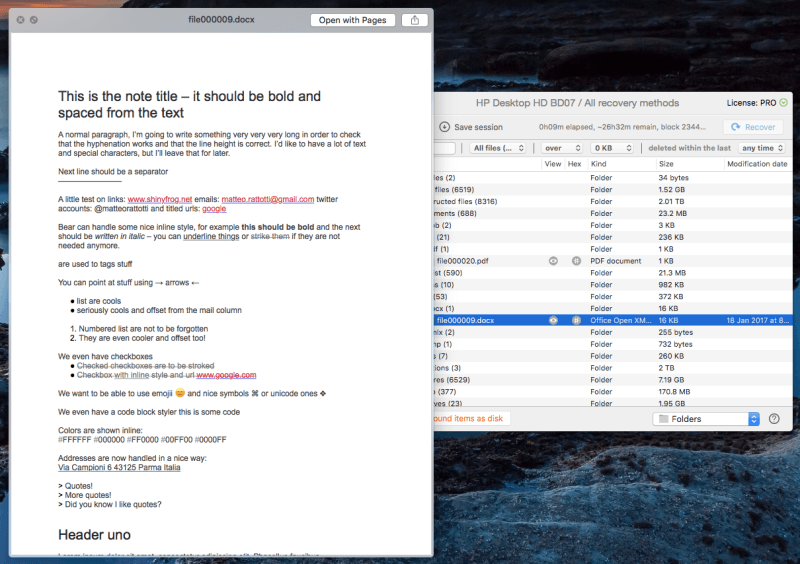
This one can be viewed. Although the original filename has been lost, I can tell this is a document that came from Shiny Frog, the people who create the excellent Bear note taking app.
Since the file can be viewed, it can be recovered.
I selected the file, but was surprised that the Recover button was grayed out. Do I really have to wait 27 hours? I tried hitting the Pause button. Perfect!
I notice that Disk Drill will allow me to save the session, so that if I want to scan the rest of the drive in the future, I don’t have to start from scratch again. That’s a very useful feature — scans can take a very long time. Just make sure you don’t write to the drive in the meantime, or you risk overwriting the data you are trying to get back.
I clicked Recover, and was asked where to save the recovered file. I chose the desktop.
The recovery is successful. I find a folder called “Reconstructed files” on my desktop. It contains the recovered Word document, which can be successfully viewed and opened.
My personal take: Recovering files from an external drive is simple, though potentially time-consuming. The pause and save for later features are handy, and I’m glad I didn’t have to wait for the scan to conclude to recover files that had already been found.
2. Recover Lost Files from Your Mac Hard Drive
To scan for lost files on your Mac or PC’s internal drive, it’s best practice to boot from a different drive before doing the scan. That’s not just because macOS High Sierra’s system security won’t allow apps like Disk Drill to access your startup drive, it’s also because using the drive may actually overwrite and destroy the data you’re trying to rescue.
To scan your Mac startup drive, the app gives you three options:
- Temporarily disable file system protection
- Create a recovery boot drive
- Connect another Mac.
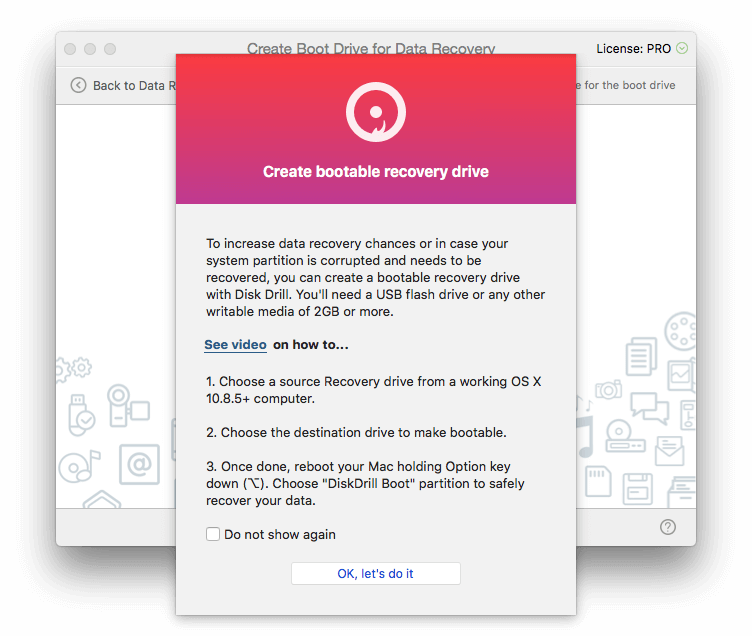
I opt to create a Disk Drill boot drive. It’s best practice, and it will be handy to have a rescue drive in the future. I insert a USB stick and click Create boot drive at the top left of the window.
To make the USB drive bootable, Disk Drill needs access to my macOS recovery partition. Unfortunately, I don’t have one. When I installed High Sierra (using the default options), my recovery partition must have been removed.
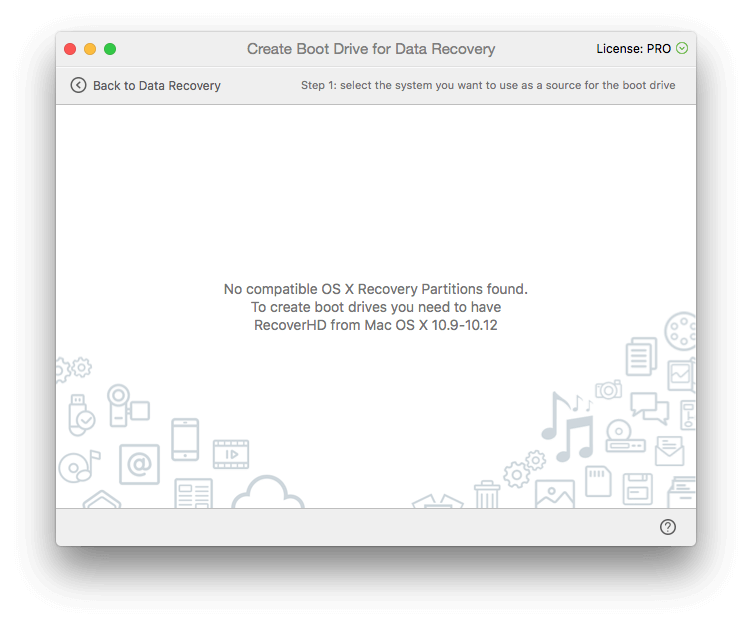
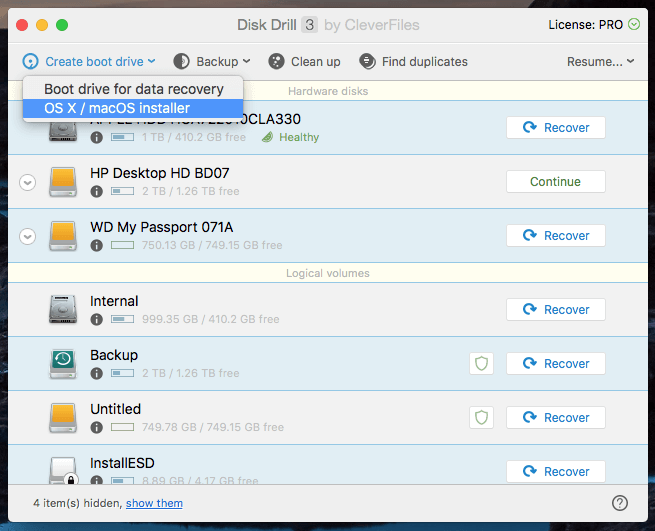
So before I can create a rescue disk, I’ll use Disk Drill to create a macOS installer drive. I insert a second external drive, and click the option to create an OS X / macOS installer.
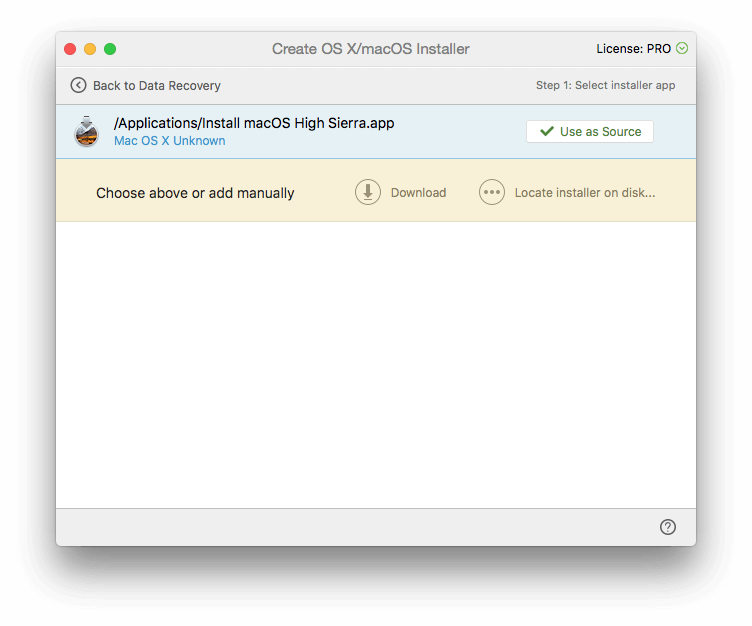
I need to locate the macOS installer. I download High Sierra from the Mac App Store, interrupt the installation, and locate the Install macOS High Sierra icon in the Applications folder.
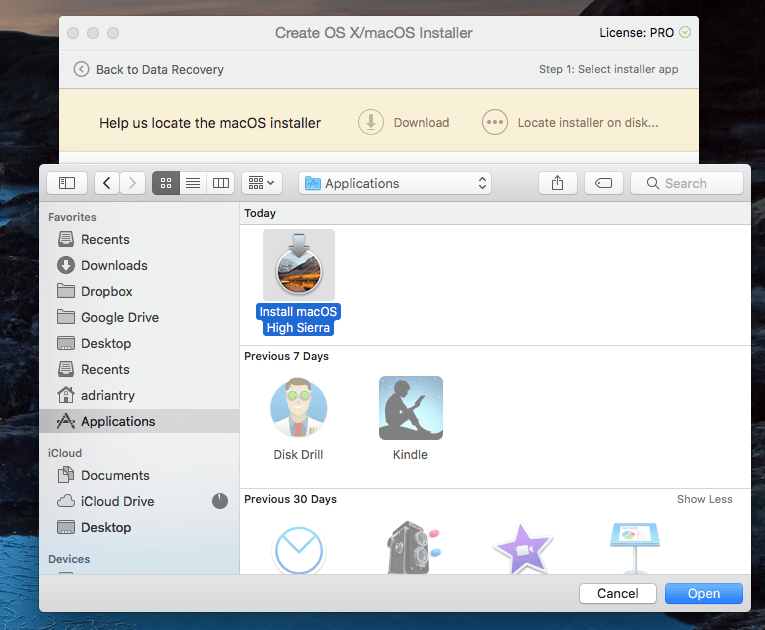
I click on Use as Source.
Next I opt to make my WD My Passport drive bootable. I’m warned that all data will be erased. I double check that I’ve selected the correct drive. I definitely don’t want to erase the wrong one.

Now my macOS installation disk is created, I can go on to make my Disk Drill boot disk. I choose my 8GB USB stick, and click Make Bootable. Again I double check I’ve selected the correct drive.
Now that my boot disk has been created, I restart my Mac and hold down the Option key during boot. I select DiskDrill Boot when given a selection of bootable drives.
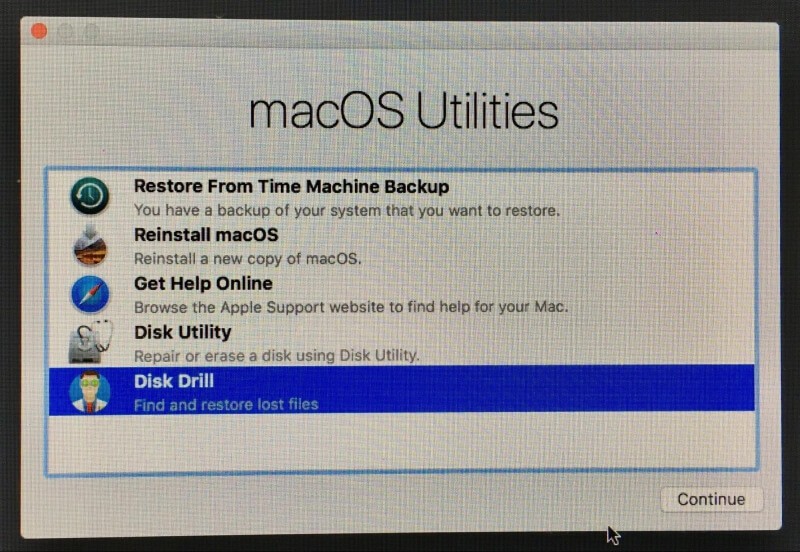
A menu is displayed and I select Disk Drill.
From here the procedure is the same as in Section 1 above.

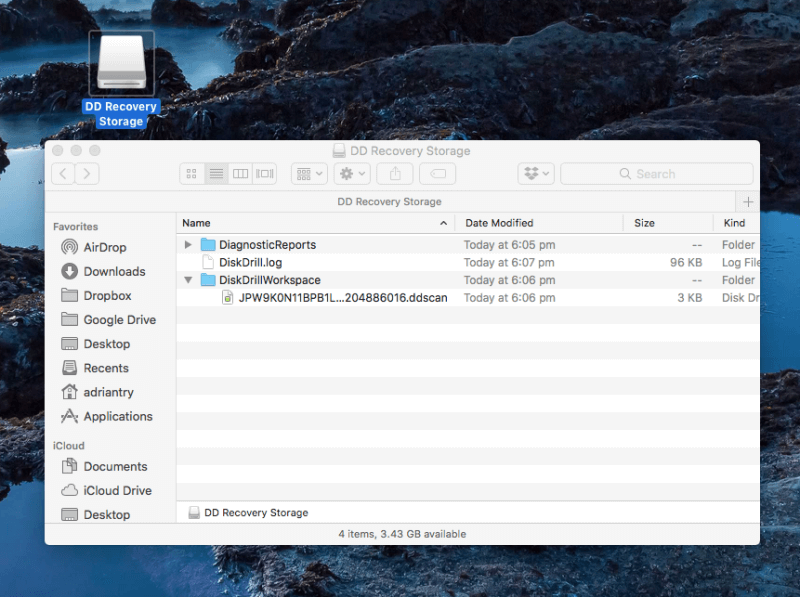
Once I’m finished I restart my computer, and find the recovered files in a disk image on my desktop.
My personal take: Creating a recovery drive was more difficult than expected because I didn’t have a recovery partition. Even Disk Drill’s video tutorial assumed there would be one. Fortunately, I was able to use Disk Drill to create a macOS installation drive, which I could use in turn to create a rescue boot drive. Once created, the rescue drive worked perfectly.
3. Free Up Wasted Space on Your Mac Hard Drive
Disk Drill will help you clean your Mac drive by identifying large files and unused files. These are not files that should necessarily be deleted, but they are files that can potentially make a difference to your available space. So think carefully before deleting.
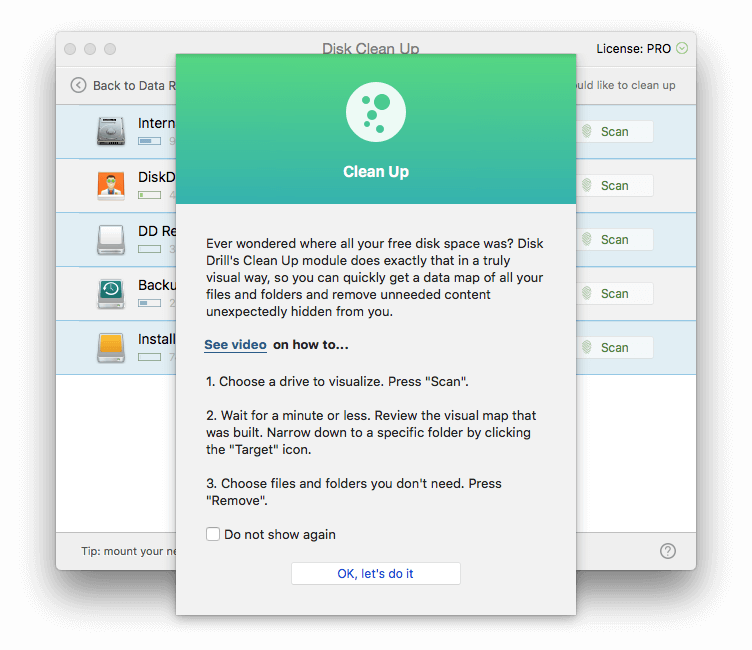
I start by clicking the Clean up button at the top of the window. An introduction to the feature appears.
I want to clean up my internal hard drive, so I click the Scan button next to “Internal”. Disk Drill starts to scan my drive for files, and the results start to display immediately.
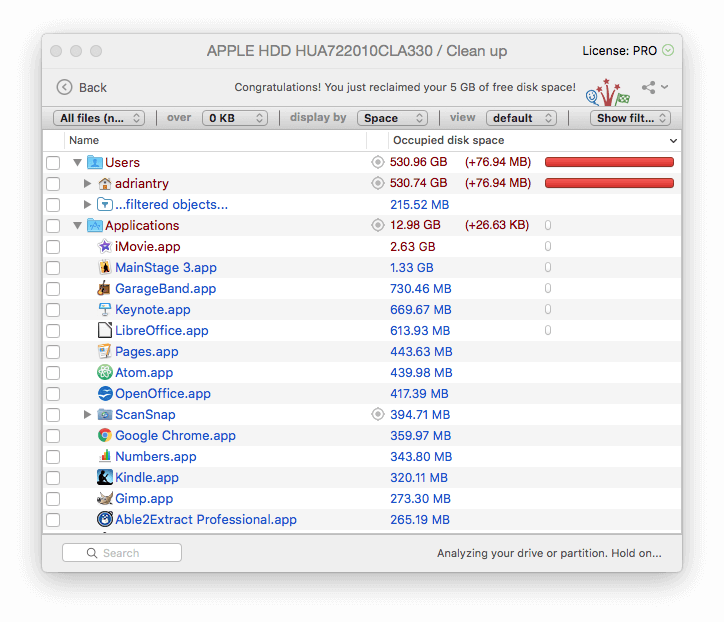
Under the Applications folder, there are some quite large files displayed. The largest is the app for installing High Sierra I just downloaded, which is taking up 5GB of space. I no longer need it, so I selected the file, and clicked the Remove button.
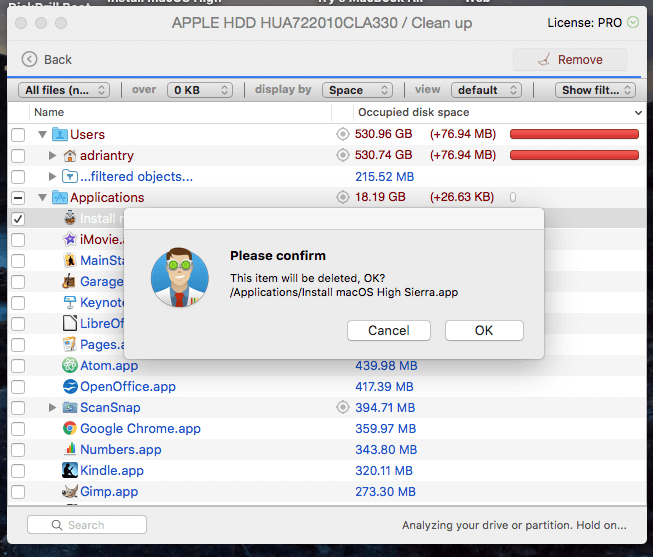
I’m asked for a password, and the file is gone. I’m 5GB richer!
My personal take: When making space on a drive, one quick way is to delete large files that you no longer need. Disk Drill will locate files that are large and not regularly used. It’s up to you to decide whether you can safely delete them.
4. Find and Remove Duplicate Files
Duplicate files also take up disk space unnecessarily, and Disk Drill helps you find those too. I wanted to make sure I had at least one duplicate file to test for my test, so I opened my Downloads folder, and duplicated the Disk Drill installation file.
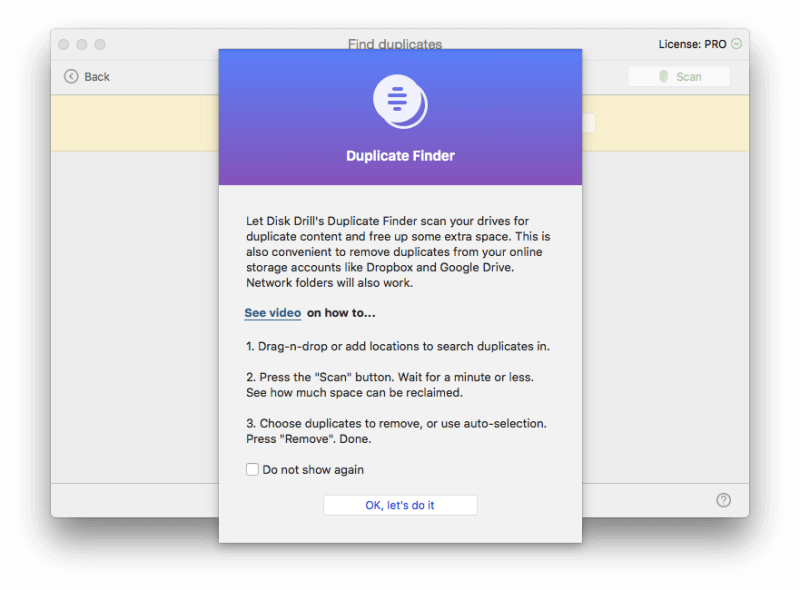
Then in Disk Drill I clicked the Find duplicates button, and an introduction to the feature appeared.
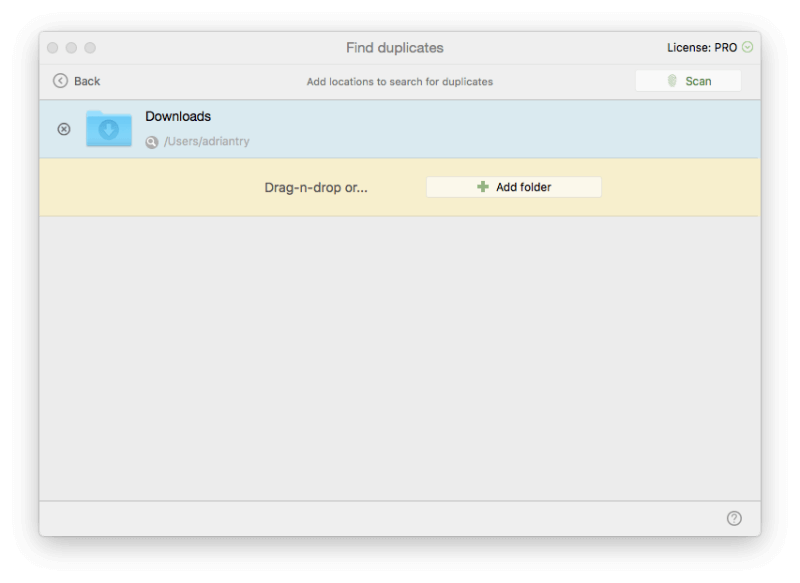
I dragged my Downloads folder onto the screen, and clicked Scan.
Disk Drill found not one, but two, duplicate files. It looks like I downloaded the Quiver free trial more than once.
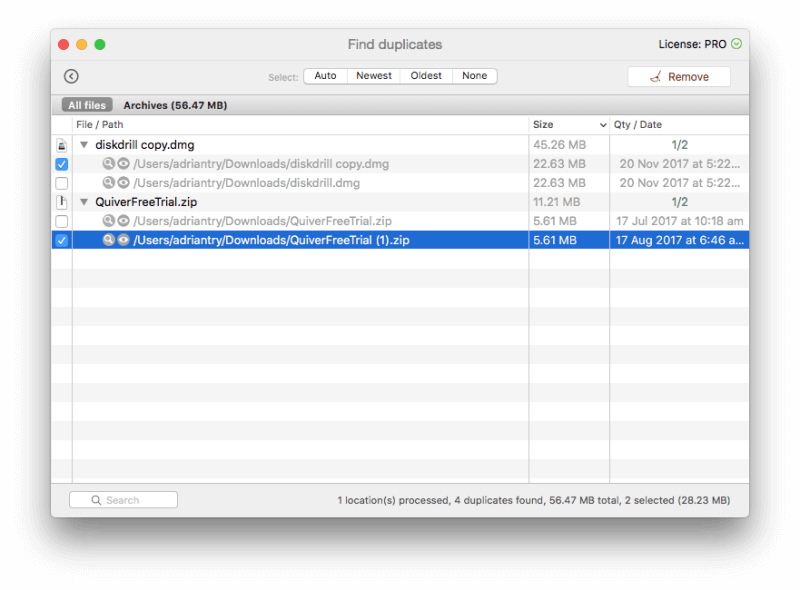
I selected both duplicates, then click Remove.
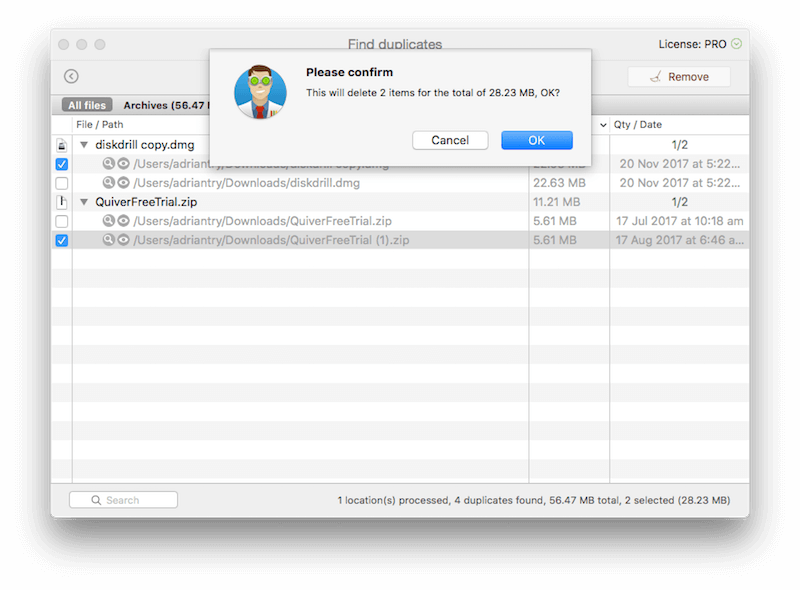
I confirm, and the duplicates are gone.
My personal take: Deleting unnecessary duplicate files is another good way to clean up your drive. Disk Drill can quickly identify duplicates in any folder that you specify, even if the file names are different.
5. Backup and Clone Drives and Partitions for Future Recovery
Disk Drill allows you to clone your hard drives, so you have an exact copy of not just your current files, but also the remnants of files that are missing. That way you can perform recovery operations in the future, which is especially useful for a drive that’s on its last legs.
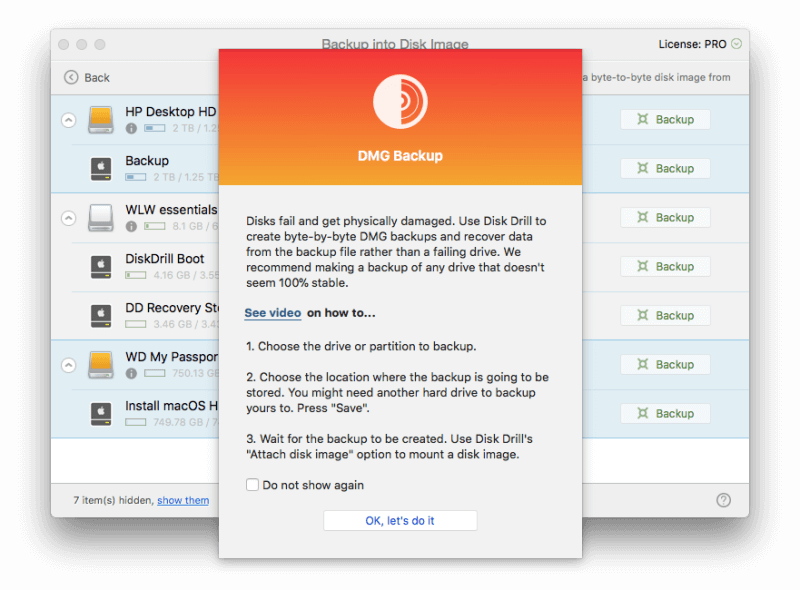
I clicked the Backup button and selected “Backup into DMG image…”, and an introduction to the feature appeared here…
My internal hard drive doesn’t appear on the list. To back up my boot drive, I have to boot from the Disk Drill rescue drive I created, and have an external disk large enough to hold the backup.
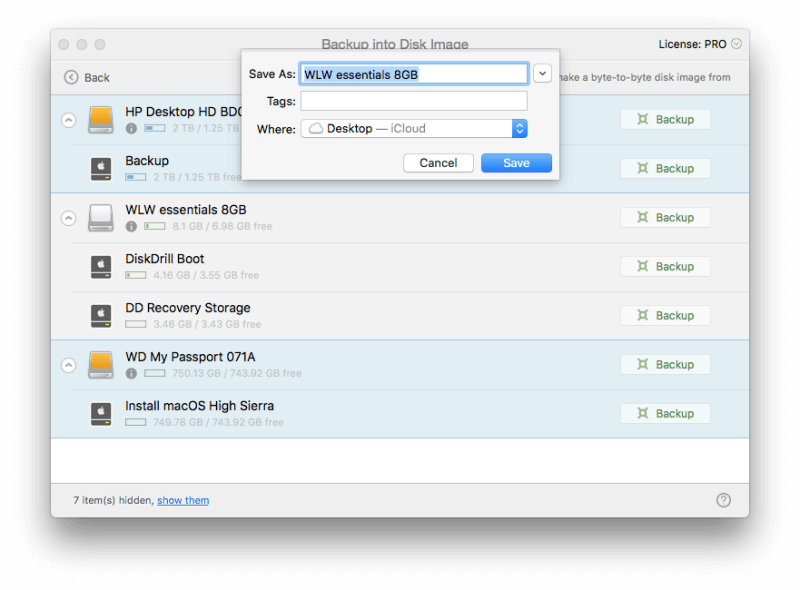
I decide to back up my 8GB external drive, so click the relevant Backup button. I selected the Desktop as the destination for my backup, then clicked Save.
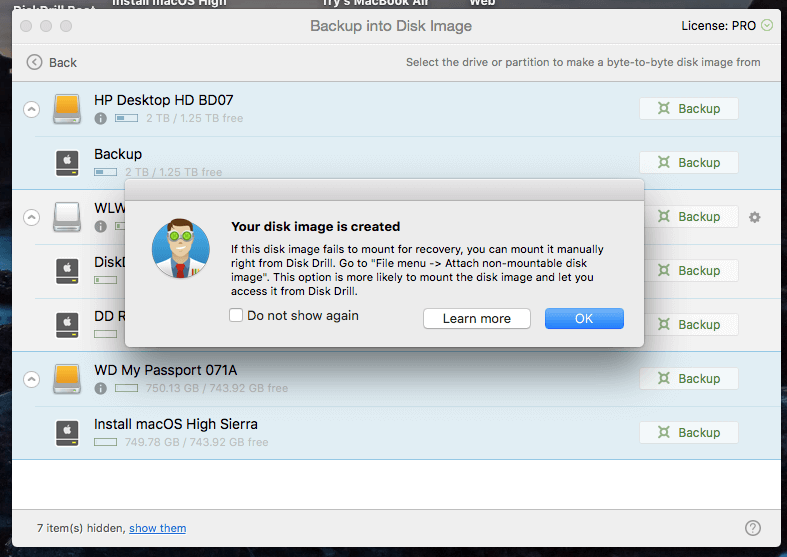
The backup commenced, and took around 10 minutes to complete.
My personal take: Creating a clone of your drive allows you to run restore operations in the future, and removes some of the risk of rescuable data being overwritten.
Reasons Behind My Review Ratings
Effectiveness: 4.5/5
Disk Drill successfully recovered lost files on my iMac and an external drive, including files that had been lost after formatting. The program is also able to help you find files that may help you free up hard drive space.
Price: 4/5
Disk Drill has a similar price point to many of its competitors. Although it is not cheap, you may find it worth every cent if it can recover your valuable files, and the trial version of the software will show you what it can recover before you lay out any money.
Ease of Use: 4.5/5
The program has an easy-to-use interface, and initially pops up a help screen for every feature, including a link to a tutorial video. The only problem I had was where the application assumed I should have a recovery partition when creating a boot disk, and didn’t offer an alternative when I didn’t.
Support: 4/5
The Disk Drill website provides a comprehensive FAQ and knowledge base for both Mac and Windows, as well as a detailed collection of tutorials. Technical support can be contacted either via email or a web form, but not via phone or live chat.
Alternatives to Disk Drill
Time Machine: Regular computer backups are essential, and make recovering from disasters much easier. Get started using Apple’s built-in Time Machine. Of course, you need to perform a backup before you have a disaster. But if you did that, you probably wouldn’t be reading this review! It’s a good thing you can use Disk Drill or one of these alternatives.
Prosoft Data Rescue: Recovers Mac and Windows files that were accidentally deleted, or drives that were accidentally formatted from $99.
Stellar Mac Data Recovery: This $99 program scans for and recovers deleted files from your Mac.
Wondershare Recoverit: Recovers lost or deleted files from your Mac for $79.95, and a Windows version is also available.
EaseUS Data Recovery Wizard Pro: Restores lost and deleted files from $89.99. Windows and Mac versions are available.
Free Alternatives: We list some useful free alternatives in our free data recovery software roundup as well as our best Mac data recovery apps guide. In general, these are not as useful or as easy to use as the apps you pay for.
Conclusion
Losing files can be disastrous. Besides important work documents, our computers also hold our irreplaceable personal photos and other memories. One mistake or failure, and you can lose everything. Make sure you keep backups!
If you have lost important files, the trial version of Disk Drill will let you know if they can be recovered. If you can get them back, the time and money you spend will be worth it.
So, do you find this Disk Drill review helpful? Does the app recover your files? Leave a comment and let us know.
Thank you for is article. It was really helpful especially understanding what reconstructed files were. I have downloaded the free version to see what I can recover if I purchase which is a nice option and have been impressed with the results so far. I like the tutorials they provide but have not found the explanation of ‘reconstructed’ and until I found your article. Thanks for the helpful review!
Nice Job!
Hi, Adrian,
I tried to use the “free” version of Disk Drill, but it doesn’t work.
I am stopped even on the first step when I try to create a recovery boot drive – I get a message that it is not free to do it inside setapp? Interesting what about outside of it?
So, I can’t even do the scan and see if I can recover any files.
And I deleted hundreds of files in a very stupid way. I deleted the files in the Recent folder, thinking that I am just clearing a list of files, not the files themselves and then emptied the Trash. And I don’t have a Time Machine enabled or any backup.
Hi Boriana, if you have a lapsed version of Setapp on your computer Disk Drill won’t work. You’d need to pay for SetApp first. In any case, the free version of Disk Drill won’t be able to recover your files, and other data recovery apps also require payment before they’ll rescue them. The cheapest way to achieve that is actually to pay for SetApp for just a month. That will be around $10, depending on which country you live in while paying for one of the other apps will be at least $70. I can’t guarantee that it will succeed, but it’s your best chance. And don’t forget to set up a backup plan once this is over!
I thought your presentation was first rate. I am a clarinetist, half assed pianist, was a cyclist before I fell on my ass and then turned 85, and a non tech geek but heavy user (former Journal editor). Only one question: when disk drill removes duplicates, where do they go? It does not seem they are in the trash on my Imac using high sierra. Many thanks.
Hi Barry, you seem like an interesting guy! Disk Drill bypasses the trash and just deletes them.