
Stellar Data Recovery Pro for Mac
Summary
Stellar Data Recovery for Mac is an app designed for when you’ve deleted or lost files out of your flash drive or Mac machine, and you didn’t have a backup. During my test, the app successfully located all the pictures I had erased from a 32GB Lexar drive (Scenario 1), and it also found many recoverable files from my internal Mac hard drive (Scenario 2).
Therefore, I think it’s a powerful Mac data rescue software that works to do what it has to offer. But it’s not perfect, as I found that the disk scanning process tends to be very time-consuming, especially if your Mac has one large volume (most users do). Also, due to the nature of data recovery, it’s likely that you may not be able to retrieve all your lost data unless you act quickly before those files get overwritten.
Note that once you find files missing from your Mac or an external drive, stop what you’re doing (to avoid generating new data that might overwrite your old files), then give Stellar Mac Data Recovery a try. Of course, do this only when you don’t have a backup to use.
What I Like: It offers many recovery modes to deal with different data loss scenarios. The app supports a large number of file formats and various storage media. Preview allows you to gauge whether files are recoverable or not. The “Create Image” feature is useful and convenient.
What I Don’t Like: The scanning process is time-consuming in some recovery modes. The “Resume Recovery” feature is buggy (more details below). It’s a bit pricey.
Have you ever experienced this: you were looking for some files on your Mac computer, only to find that they have been trashed, and you wondered whether there was a way to recover them? Losing valuable data can be upsetting, even devastating especially when you don’t have a Time Machine backup at hand. Fortunately, there are data recovery software that could help.
Stellar Data Recovery for Mac is one of the popular solutions in the market. In this review, I’ll show you its pros and cons, so you get an idea of whether the app is worth trying or not. If you decide to try, this article also serves as a tutorial to guide you through the recovery process.
What can you do with Stellar Data Recovery?
Formerly known as Stellar Phoenix Macintosh Data Recovery, it is a Mac application designed and developed to recover deleted or lost files from a Mac hard drive, CD/DVD discs, or from a removable disk/card in a digital device.
Stellar claims it’s capable of reclaiming lost data from all Mac models including iMac, MacBook Pro/Air, Mac Mini, and Mac Pro. In the new version, Stellar says it supports Time Machine backup hard drive recovery.
For those of you who are new to data recovery, you might be surprised to know that files you delete from a Mac computer or an external drive may be recoverable. It doesn’t matter whether you lose the data due to emptying your Mac Trash, formatting a flash drive, or memory card corruption. Most likely, your files saved in the storage are still retrievable. What you need is a recovery program such as Time Machine or third-party recovery software.
Is Stellar Data Recovery safe?
Yes, the program is 100% safe to run on a Mac. Malwarebytes doesn’t report any threats or malicious files while the app is running on my MacBook Pro. Also, the software is a stand-alone app that’s not bundled with any other malicious apps or processes.
The app is secure as well, meaning it won’t do any damage to your hard drive regardless of the operations you perform. This is because Stellar Mac Data Recovery performs read-only procedures thus it won’t write any additional data to your storage device.
Another security feature I like about Stellar is: the app allows you to create an image of the storage media. That means you can scan the disk image to recover data in case the original device is not available (for example, if you are helping a customer or a friend to recover data). This will speed up the scanning process if your storage device has bad sectors. You can do so via the “Create Image” feature in the program. See the screenshot below.
Is Stellar Data Recovery a scam?
No, it isn’t. The software is developed and signatured by Stellar Information Technology Ltd., a legitimate company that has been in business for over two decades.
The company is headquartered in India and has an office in the United States with a physical address: 48 Bridge St, Metuchen, NJ, USA according to the Better Business Bureaus (BBB) profile here.
Is Stellar Data Recovery for Mac free?
No, it isn’t. As I said, the trial version is free to download and try. But eventually, you’ll need to get a license code to activate the full version in order to save your deleted files.
How to activate Stellar Data Recovery?
For those who are looking for working codes to activate the software, sorry to disappoint you as I’m not going to share any keycode here as it’s a violation of the copyright.
An app like this should take a team of engineers hundreds of hours to put together. It’s like a steal if you want to get it for free. My suggestion for you is to take full advantage of the trial version. If it finds your lost files after a scan, go ahead and purchase the software.
There may be sites that claim to offer active codes to register the software, I doubt they’ll deliver the promise. Good luck with browsing those sites full of flash ads, which I always hate.
Time Machine vs. Stellar Data Recovery
Time Machine is a built-in utility distributed with Apple macOS-based computers. The software is designed to work with an external storage device to back up all data stored on a Mac machine. When necessary, it allows users to restore individual files or the entire Mac system. See this guide on how to back up Mac to an external drive using Time Machine.
Time Machine differs from other third-party Mac data rescue tools in that it can only restore lost data unless you have a timely backup, while third-party tools may recover your data without one. Third-party recovery software uses sophisticated algorithms to scan your Mac hard drive (or external storage) and retrieve data once found.
Another difference is that Time Machine only works to backup and restore data stored in your internal Mac hard drive, while third-party data recovery apps also support recovery from an external hard drive, camera memory card, USB flash drive, etc. In short, third-party recovery software is a backup plan for when you haven’t set up Time Machine, or it fails to restore your desired files due to other reasons.
Table of Contents
Stellar Data Recovery for Mac: Detailed Review & Tests
Disclaimer: the review below is a fair reflection of what Stellar Mac Data Recovery claims to offer and the results I got after using the program. It is not intended to serve as an official or professional examination of the software. Because Stellar Data Recovery for Mac is a powerful app that actually includes a handful of smaller features, it’s unrealistic yet impossible for me to test all the features since I’m unable to prepare those data loss scenarios.
My testing principle is: I try my best to mimic common data loss scenarios, i.e. deleting a list of photos from a 32GB Lexar flash drive – similar to a situation when you accidentally deleted some photos from a digital camera and wanted them back. Likewise, I emptied the Trash on my Mac hoping to test Stellar’s recovery capabilities on internal Mac hard drives.
Download and Installation
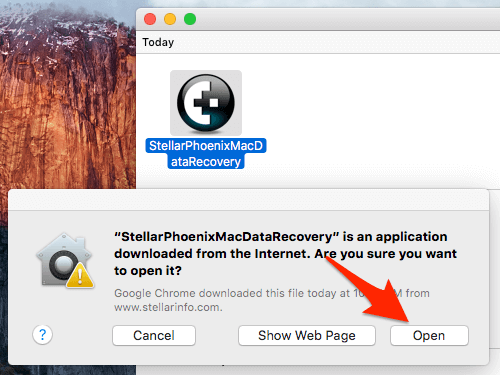
Step 1: After downloading the application to your Mac, drag it to the Applications folder. Double-click on the software icon. You’ll see a message window pop up asking for permission. Choose “Open” and you’ll be prompted to input user login password.
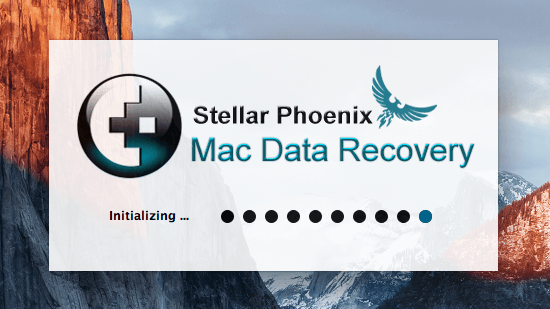
Step 2: Browse and read the license agreement. Click “I Agree” to continue. Stellar Mac Data Recovery initializes…
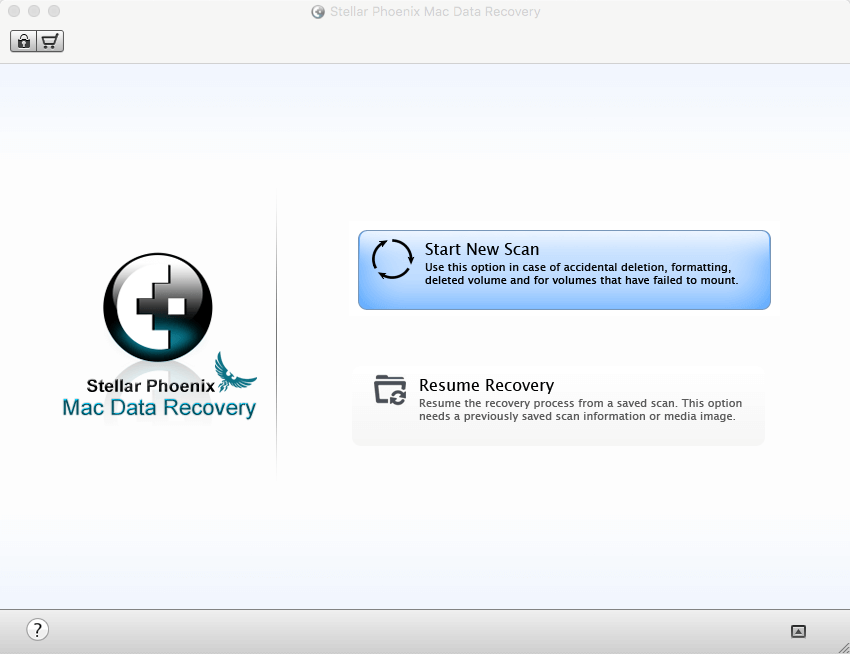
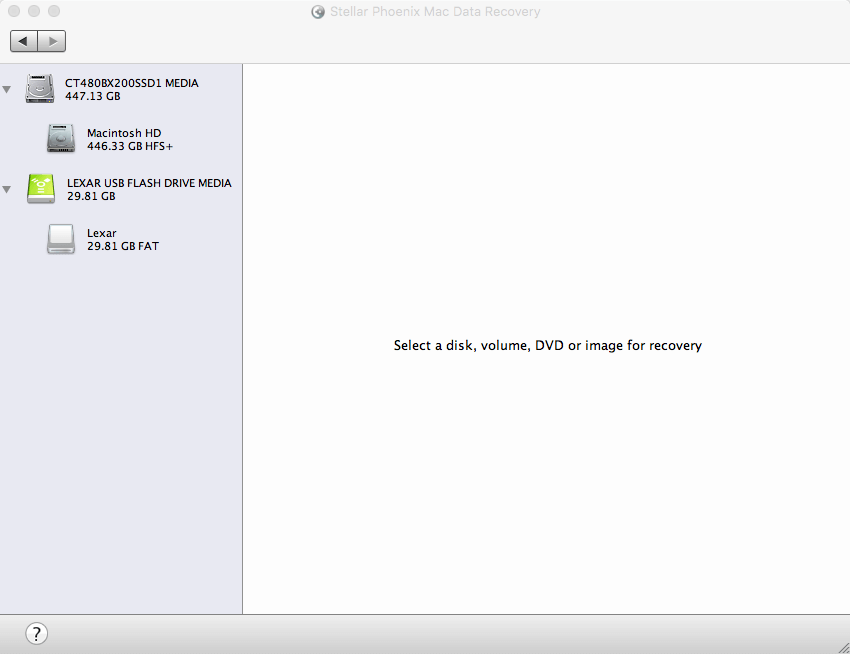
Step 3: Finally, the program launches. Here’s how its main interface looks.
Two main user scenarios for data recovery software are recovering data from Mac’s internal drive (HDD or SSD), and recovering data from an external drive. I’m here to use my Macintosh HD and a Lexar flash drive as the testing media.
After connecting my Lexar drive, Stellar shows the disk on the left panel immediately, together with information like disk volume and the file system associated with the disk drive.
Scenario 1: Recovering Data from an External Storage Media
Preparation: I first transferred 75 pictures from my Mac to my Lexar USB drive, then deleted them from the disk. I wanted to see if Stellar Data Recovery would find them.
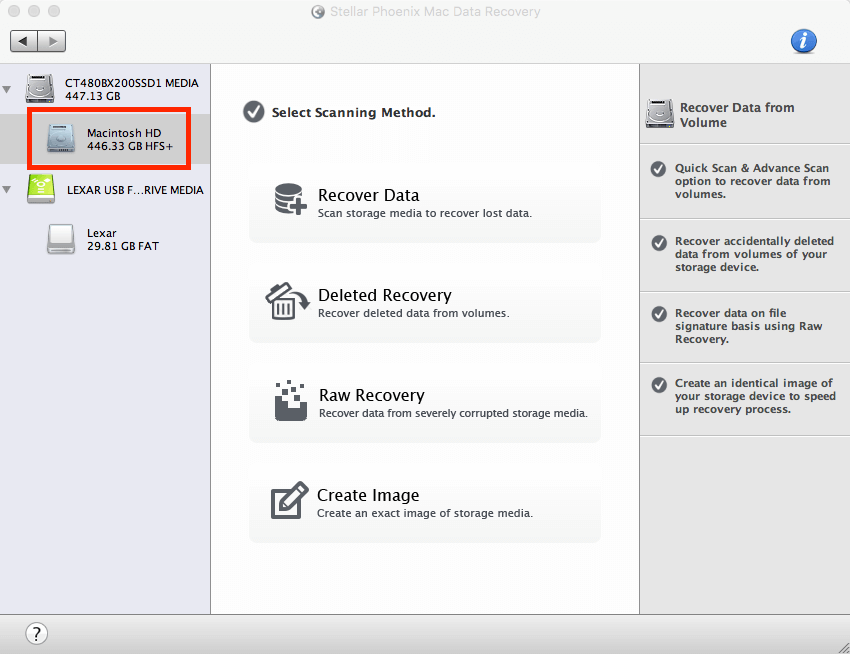
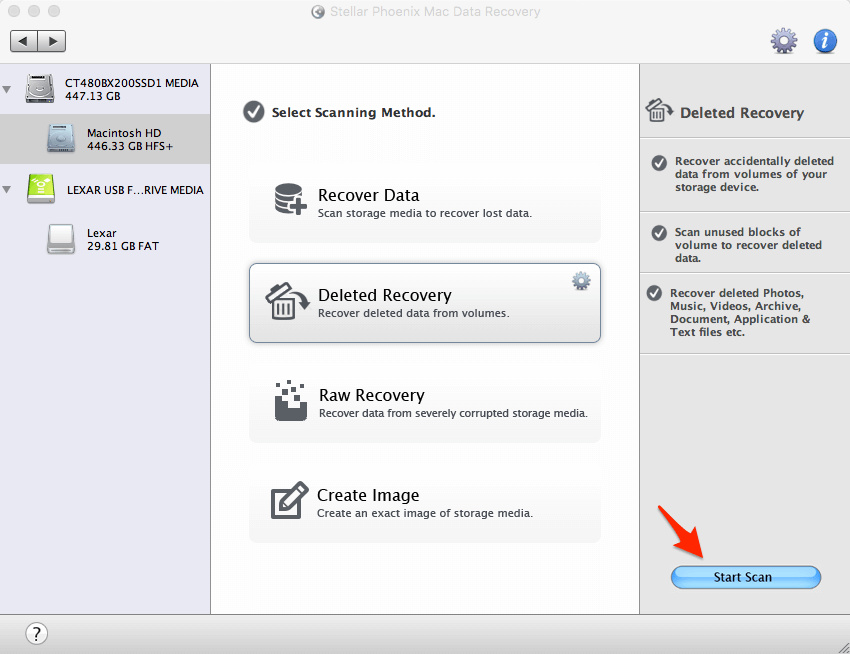
Step 1: I highlighted the Lexar drive. The program asked me to select a scanning method. As you can see, there are four options listed:
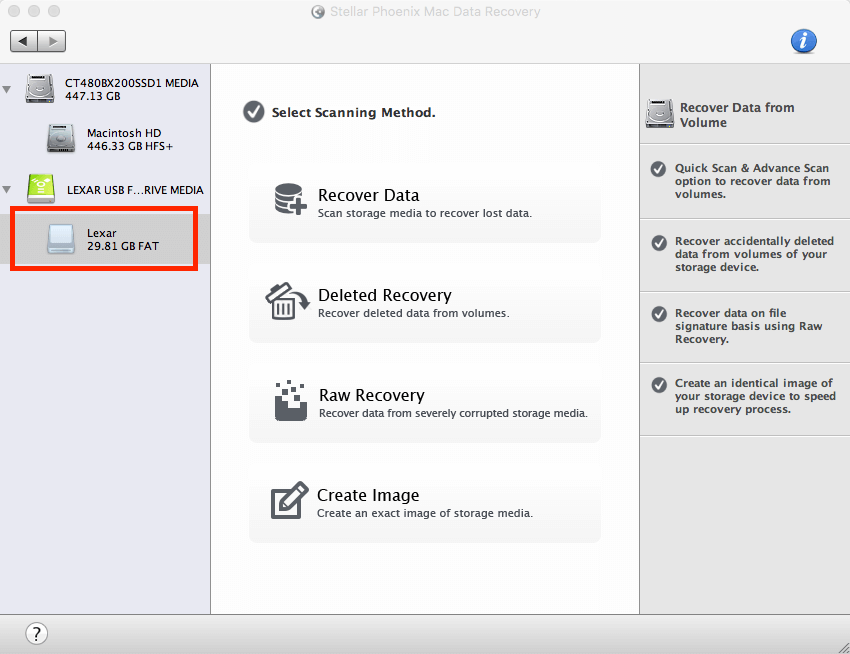
- Recover Data: Good for scanning storage media to recover lost data — but you don’t know how the data is lost.
- Deleted Recovery: Good for recovering accidentally deleted files like photos, music, videos, archives, documents, etc. from a storage media that is still working properly.
- Raw Recovery: Good for recovering data from severely corrupted storage media — for example, when your camera SD card is corrupted or external hard drive crashes.
- Create Image: Used to create an exact image of a storage drive. This can be used when the device isn’t available during the scanning process.
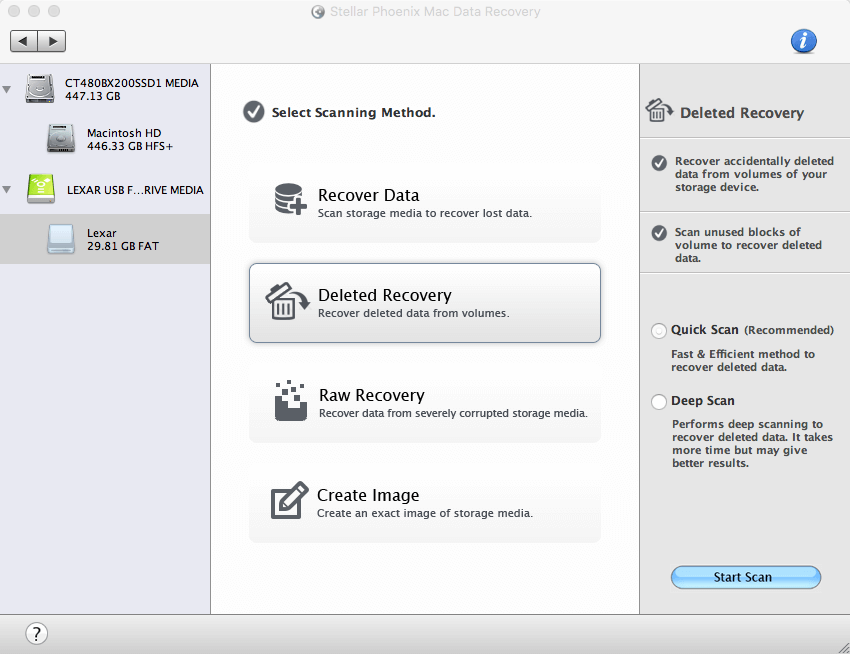
Step 2: I selected the Deleted Recovery mode, then Quick Scan, and hit the “Start Scan” button to continue. Pro tip: You can also choose Deep Scan if Quick Scan didn’t find your deleted photos. But remember that Deep Scan takes more time to complete.
Step 3: Scan…the process was very quick. It only took the software about 20 seconds to finish scanning my 32GB Lexar drive — seems very efficient!
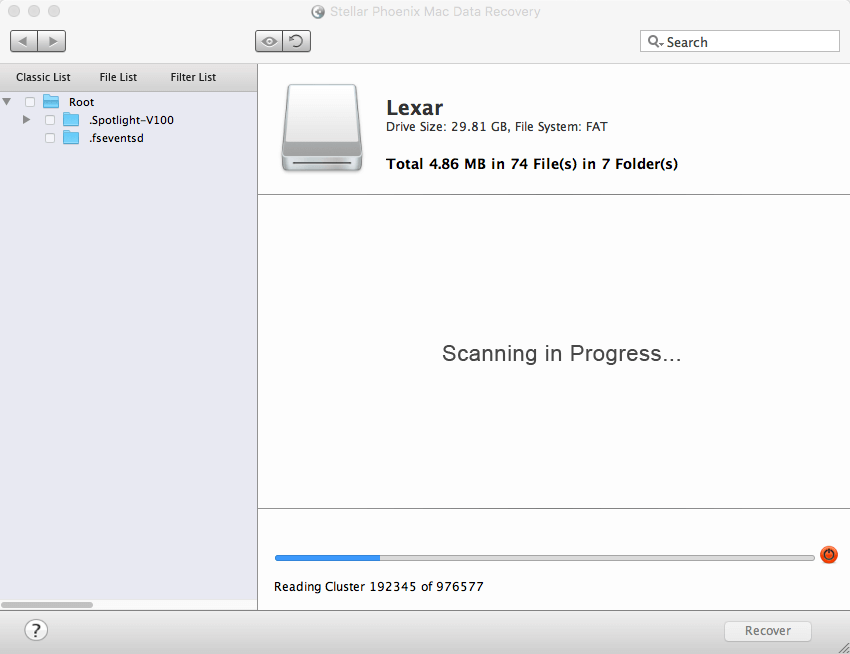
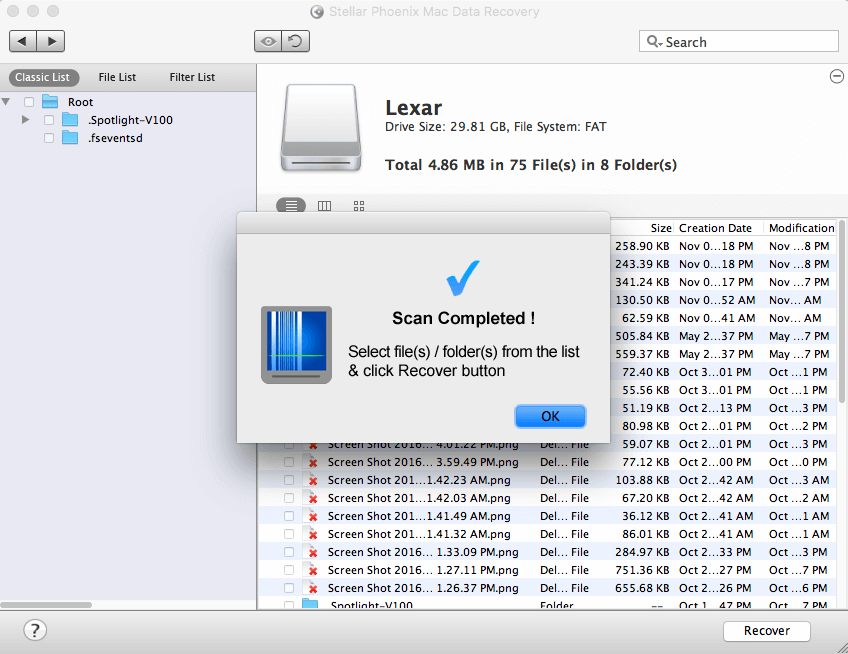
Step 4: Boom…scan completed! It says “Total 4.85 MB in 75 files in 8 folders.” Looks good. But wait, are they really the photos I deleted?
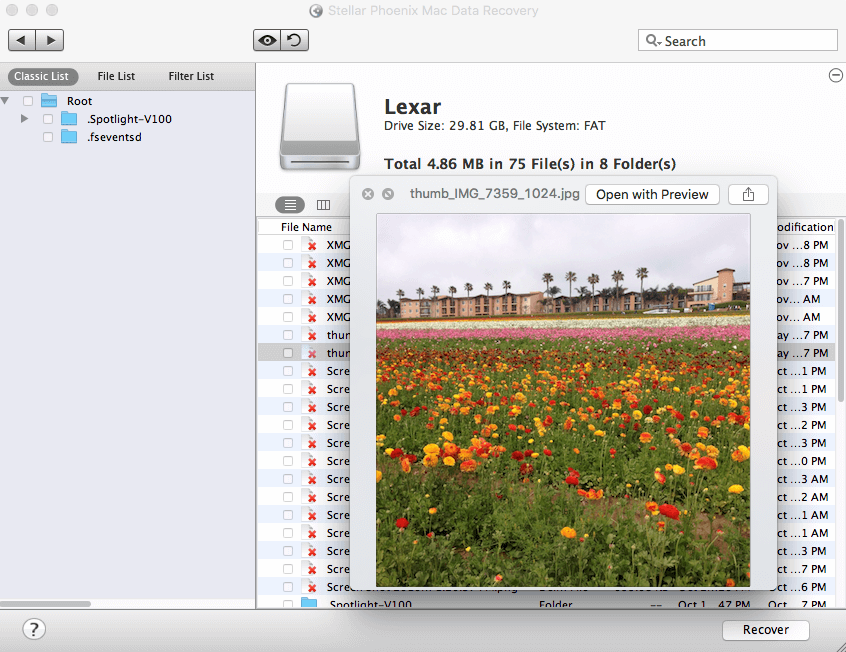
Step 5: As I said in the summary above, one thing I like about the app is its file preview ability. To check whether the found items are what I deleted, I double-clicked each file to preview the content. And yep, they are all there.
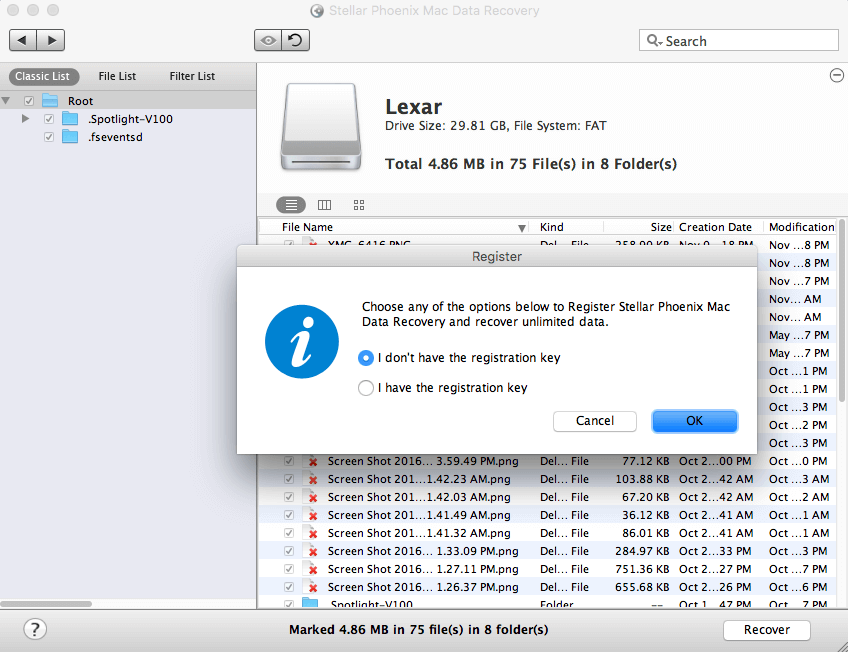
Step 6: Well, you can preview the photos, but to save them you’ll need a registration key. How to get it? You have to buy from Stellar official store, and a key will be delivered to your email instantly.
My personal take: The “Deleted Recovery” mode is very powerful, and it successfully located the 75 pictures I deleted from a 32GB Lexar flash drive — 100% recovery rate. Thus I believe this is the first recovery mode you should try, if you have accidentally erased some files off a digital camera card, external drive, or other storage devices. The scanning process is lighting fast, and chances of recovery are high as long as you act quickly.
Scenario 2: Recovering Data from Internal Mac Hard Drive
Stellar claims on its official website that the app is able to identify 122 different file types. In the following test, I’m trying to figure out what types of files it can retrieve from my Mac (solid-state drive with a single volume of 450 GB in size). Before I did so, I emptied the Trash on purpose.
Step 1: To start with, I opened the software, and then highlighted the Macintosh HD it detected.
Step 2: It asked me to select a scanning method. There are four options there (which I have introduced in Scenario 1). I chose “Deleted Recovery” to proceed. Pro tip: If you formatted a Mac partition, select “Recover Data”; if one of your Mac partitions is corrupted or lost, select “Raw Recovery.”
Step 3: Now’s the time-consuming part. Since my Mac has only one partition with 450GB in capacity, it took Stellar Data Recovery about an hour to finish only 30% (see the progress bar). I estimated it would take more than three hours to complete the entire scanning.
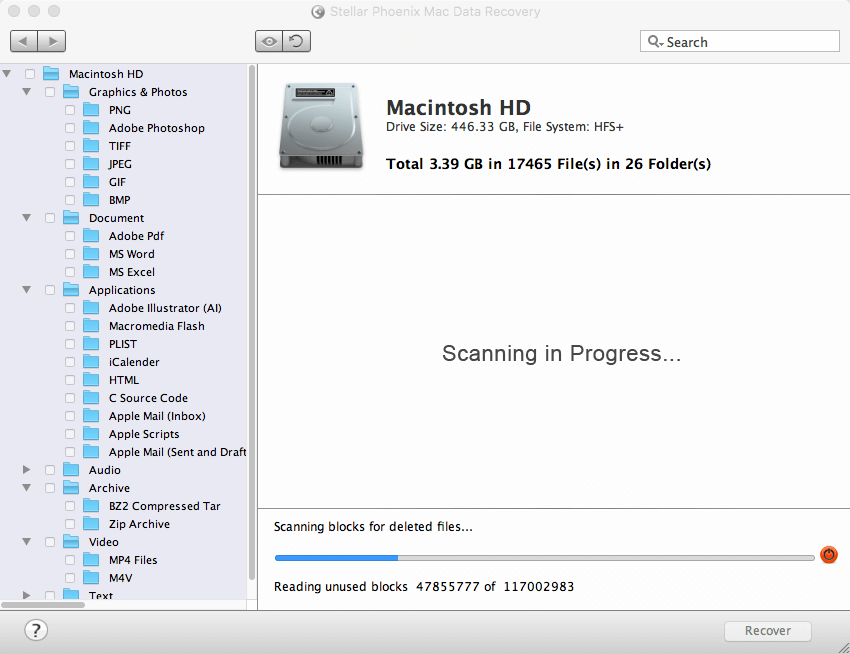
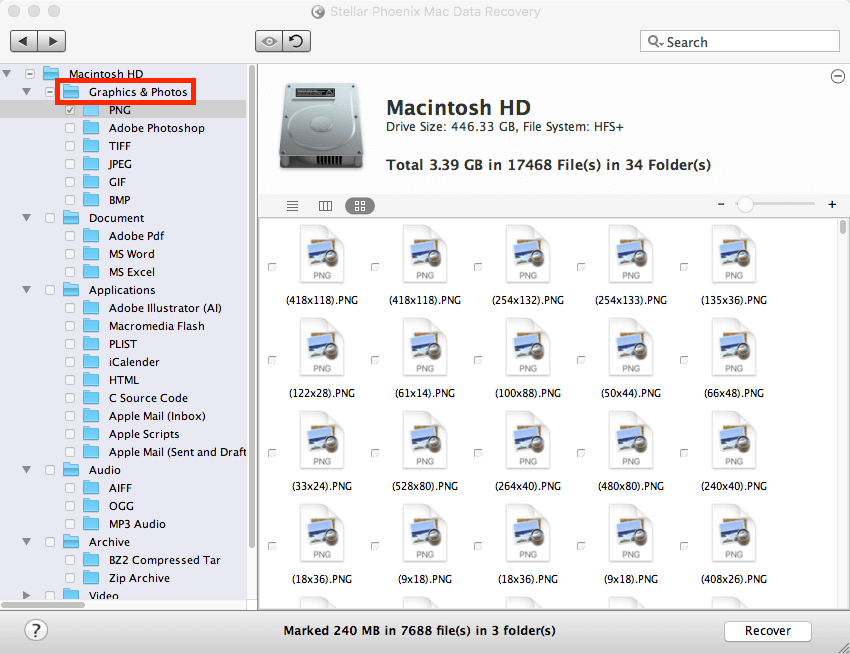
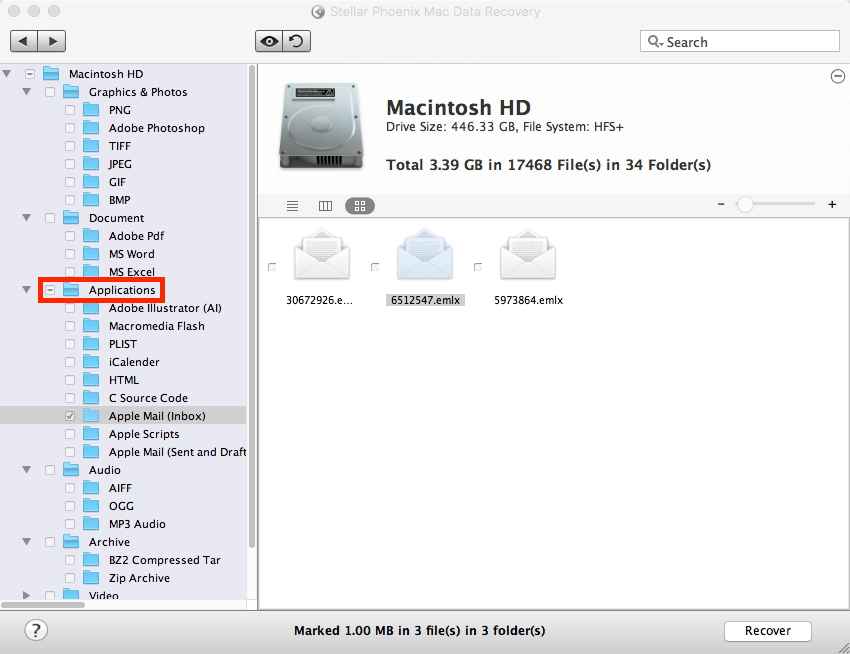
Step 4: Since it has already found 3.39GB of data, I decided to stop the scan to get an idea of what these files look like.
– Graphics & Photos: all found items were categorized into six different folders based on file types, i.e. PNG, Adobe Photoshop, TIFF, JPEG, GIF, BMP…all pre-viewable.
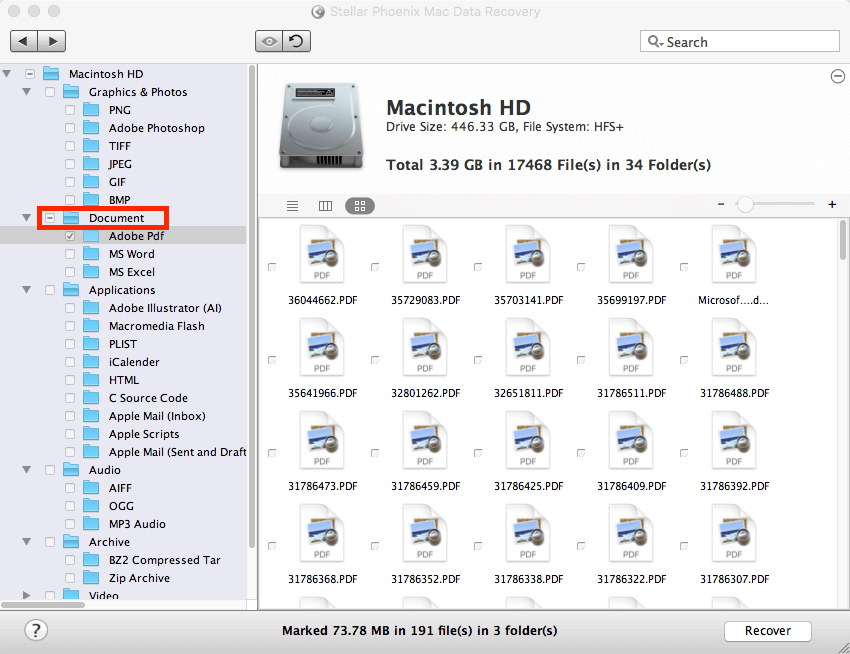
– Documents: the three folders included Adobe PDF, MS Word, MS Excel. To my surprise, I could also preview partial content in these documents. Bonus!
– Applications: The emails were what interested me, as I’d deleted some from the Apple Mail app. Aside from those, the program also found a list of application files including Adobe Illustrator, iCalendar, etc.
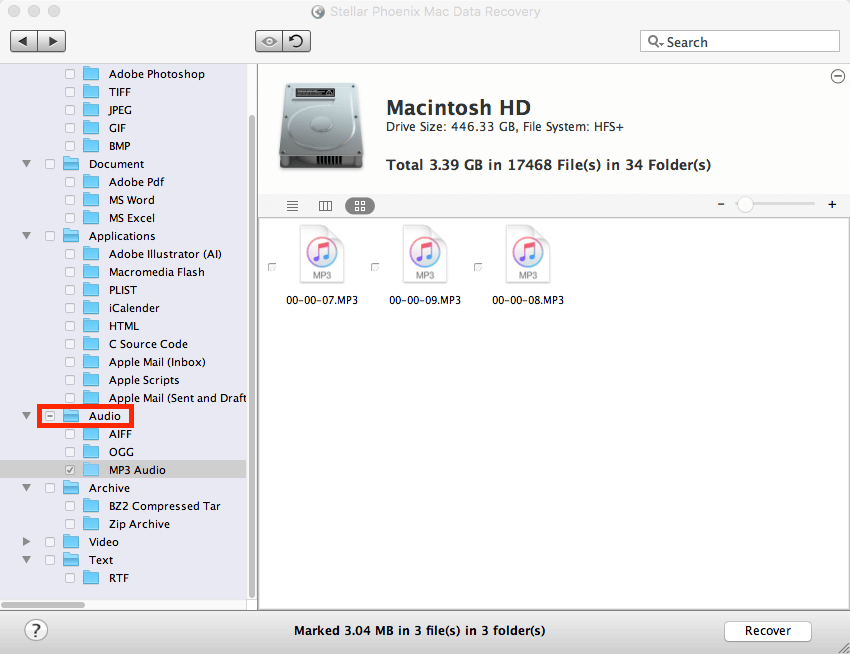
– Audio: These were mostly songs I’d deleted in AIFF, OGG, MP3 formats.
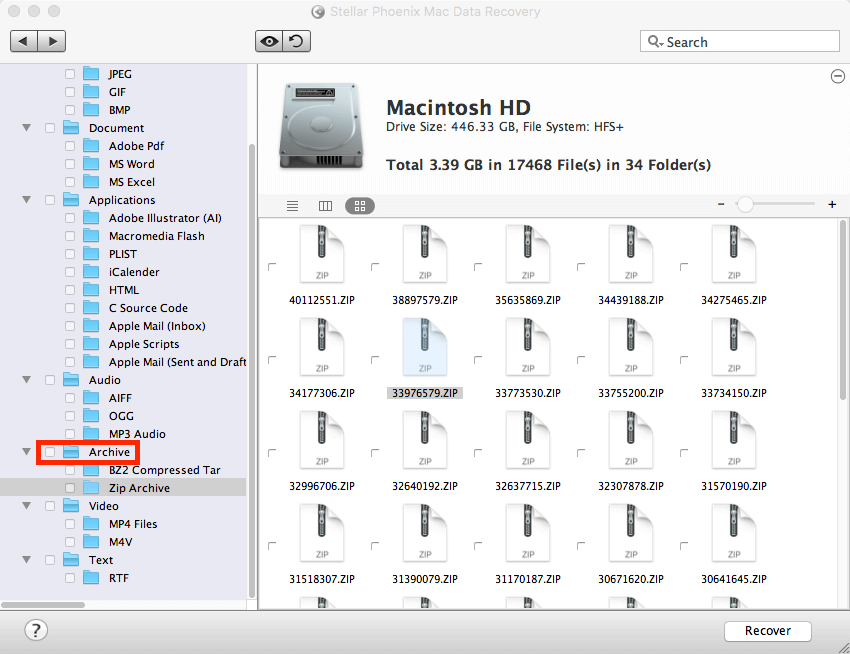
– Archives: BZ2 Compressed Tar and Zip archives were found.
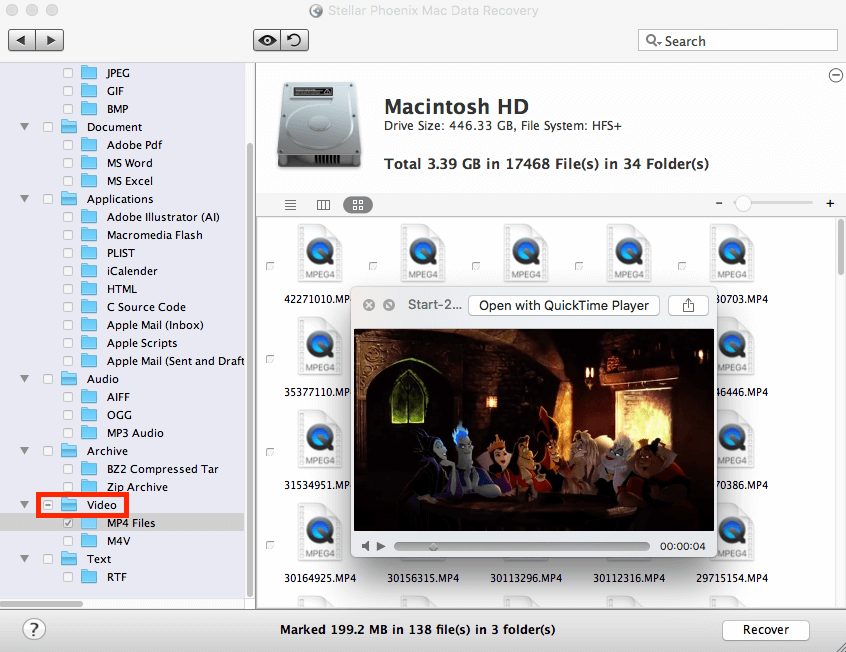
– Video: It found some .MP4 and .M4V files. Another surprise, I could preview videos as well. Double-click one, and it automatically played via QuickTime app.
– Text: Many RTF files. They can be previewed as well.
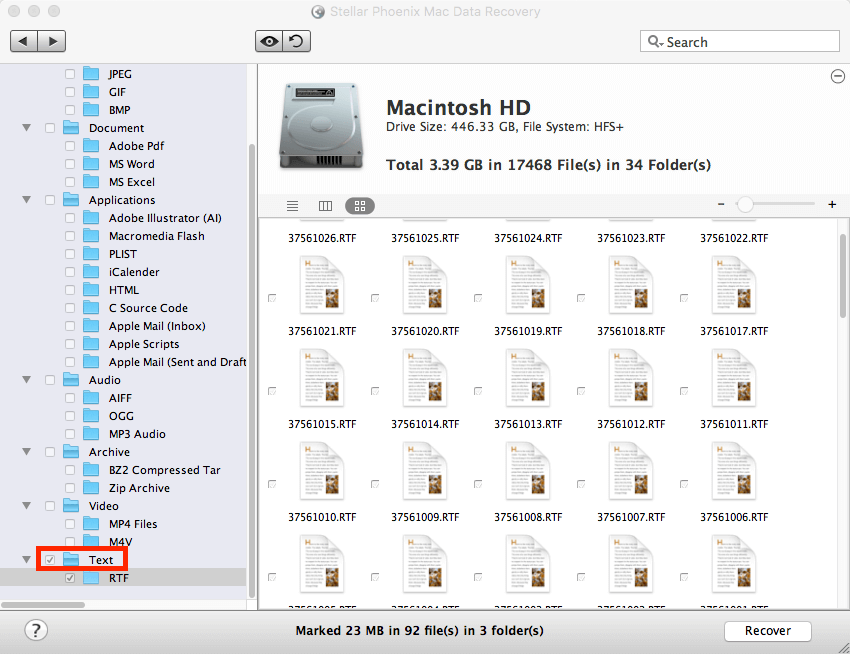
My personal take: Stellar Data Recovery for Mac did a pretty good job in identifying many types of files deleted from my Mac. They included the types of photos, videos, audio, documents, apps, etc. that I deal with almost daily. In this regard, I think it’s very powerful. Another perk is the software allows me to preview the content in these files. This feature saves me time gauging whether the files are what I actually deleted. One thing that I’m not quite satisfied with is the scanning process, which is very time-intensive. But another feature that I appreciate is “Resume Recovery,” which is designed to save scan results if you’re partway through, then resume the process when it’s convenient for you. See Scenario 3 below for more details.
Scenario 3: Resume Recovery
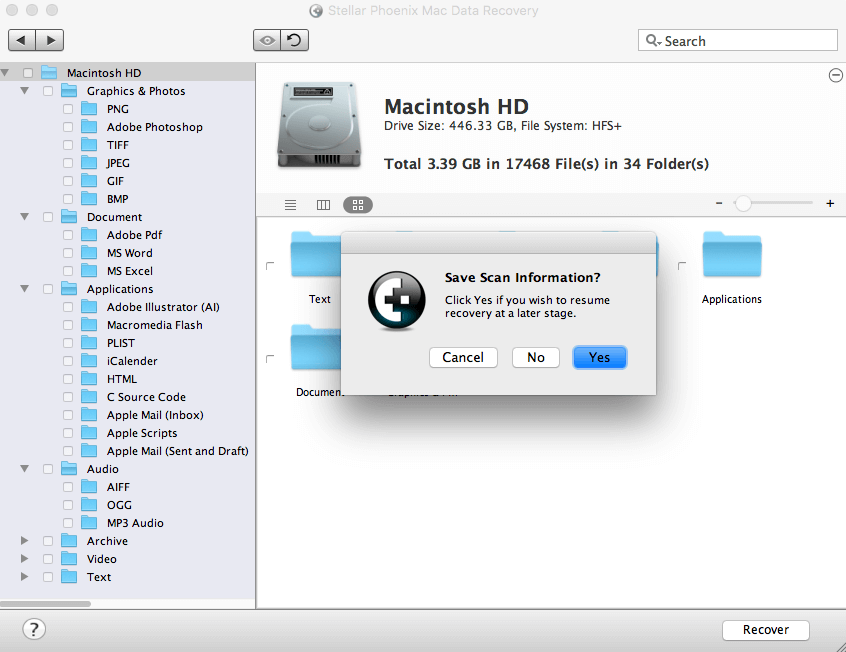
Step 1: I clicked the back button. A new window popped up asking me if I wanted to save the scan information. After selecting Yes, it directed me to choose a destination to save the scanning process. Note: here it shows a “Total 3.39 GB in 17468 Files in 34 Folders.”
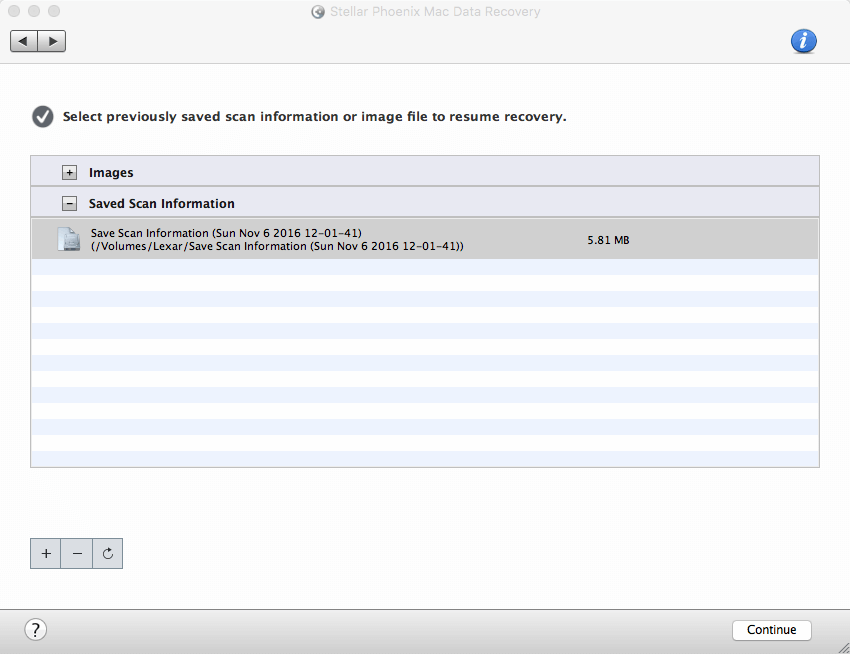
Step 2: I then went back to the main screen and selected “Resume Recovery.” It loaded the saved scan result to continue.
Step 3: Soon, the “Scan Completed!” message appeared. However, it only loaded 1.61 GB of data. Remember initially it showed 3.39 GB? Surely some parts of the results were missing.
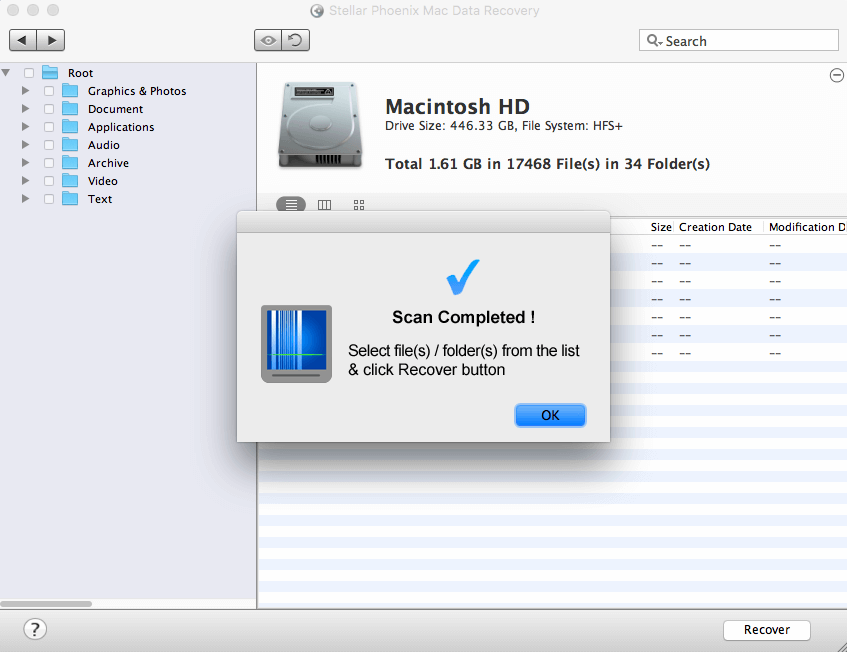
My personal take: It’s nice to see Stellar offering this Resume Recovery mechanism so we can scan the Mac drive whenever we want. Like I said, if your Mac has a big size partition, the scanning process tends to time consuming. It’s boring simply waiting for the program to finish the entire scan, especially on a large drive. Therefore, the Resume Recovery feature is very useful. However, during my test, Resume Recovery didn’t cover all the results from the previous scan result. It only returned “Total 1.61 GB in 17468 Files in 34 Folders”, while previously it was “Total 3.39 GB in 17468 Files in 34 Folders”. Where was the missing 1.78 GB data? I have to wonder.
Limitations of The App
First of all, Mac file recovery software isn’t universal. It can’t recover files that have been written over. For example, if you deleted files from a digital camera and continued using the same memory card to save new photographs, the storage space your initial files occupied could have been overwritten. If that happens, it’s impossible for third-party data recovery software to retrieve any data. So, you have to act as soon as possible to maximize the chances of recovery.
Another scenario that Stellar Data Recovery software probably won’t help is: If your Mac is using a TRIM-enabled SSD (Solid State Drive), chances to recover deleted files are slim to none. This is due to the difference between how TRIM-enabled SSDs and traditional HDDs manage files. Simply put, deleting a file using normal methods like emptying Trash will result in a TRIM command being sent, and a solid-state drive will eventually remove the data for good. Hence, it’s extremely difficult for any recovery software to scan and collect the lost data. That’s also why SSDs matter when you attempt to permanently delete files on Mac.
Also, Stellar Macintosh Data Recovery doesn’t support data recovery from storage media enabled by iOS or Android. It only supports HFS+, FAT, NTFS based storage devices. That means you can’t use it to recover data from iPhones, iPads, or Android devices. Instead, you may have to use third-party apps like PhoneRescue which I reviewed earlier.
Is Stellar Data Recovery for Mac Worth It?
The software managed to recover all of my deleted photos on a Lexar USB drive and found a large variety of recoverable items on my internal Macintosh HD. But it isn’t perfect, as I pointed out above. Priced at $149, it certainly isn’t cheap, but if you have accidentally removed an important file on your Mac or a precious photo from your camera, you know that something is priceless.
Also, don’t forget the price that data loss causes — I mean, anxiety, panic, etc. In this regard, it’s good to have a data rescue app like Stellar that can at least give you some hope, even if it’s not 100% guaranteed.
Compared to professional data recovery services which could cost you a few hundred or thousand dollars, Stellar Mac data recovery app isn’t expensive at all. Don’t forget that the app offers a free trial you can take advantage of. It’ll scan your drive, preview found items, and check to see if your lost files are still recoverable.
Therefore, I think the program is worth it. Once again, make sure you download the demo version for a try first. Only consider purchasing the license when you are sure your data is recoverable.
Conclusion
We live in the digital age; it’s sometimes easy to accidentally delete files from our devices with a few clicks or taps. And once that precious data is gone, it can be a nightmare if you don’t have it backed up.
Fortunately, a Mac app like Stellar Data Recovery for Mac may assist you in getting back that lost information — as long as you take proper precautions and act quickly. The software isn’t perfect. I found a few bugs during my test; the scanning process tends to be long if your Mac has a large volume. But, the software does live up to what it aims to do — bringing back the data you deleted or lost from the dead. The program is safe, easy to use, and offers a free feature-limited demo. I’d be happy to put the app into my rescue list, just in case.
The last thing I want to remind you about is the importance of data backup. It may sound old-school, and you probably hear it all the time. But it’s still the most effective and efficient way to prevent data loss disasters. Think about that feeling: “Oh no, I deleted something by mistake! Oh yes, I have a copy saved on my external hard drive…” So, you get my point. Backup is always king.
I purchased a version of Stellar Phoenix Mac Data recovery in 2015.
Stellar has release a new version of their software that works on the latest OS, and no longer provides capability support. I would have been happy with an upgrade pricing option as an existing customer, however I was referred by the support team to re-purchase the full price version of the new software.
The product works, but it will only work for you until Stellar release a new version or until you update your OSX.
Great Software! I upgraded my professional version to a technician version after 2-years to repair the corrupted multiple jpeg file. Used twice on your recommendation. Worked well for me.
Why is my data recovery process from iPhone stuck at “you need to connect external drive for backup?” I have already more than enough space on the iPhone, the laptop and even attached an external USB with free space. Yet the stellar app doesn’t move ahead. Why?
I spent $70 on Stella drive toolbox thinking it would run on my Sierra 10.12, the web site said it would but after I downloaded it and found it would not run I emailed Stella and this is what they told me.
Stellar Support via e3dfd8w8ev8anzji.vlki.9-hfsreak.ap1.bnc.salesforce.com
1:37 AM (26 minutes ago)
to me
Hi,
Thank you for contacting Stellar Data Recovery.
We would like to inform you that Stellar Drive Toolbox is not compatible on Mac OS Sierra. Please downgrade the Mac OS or use this software on other system.
Feel free to contact us for any further assistance.
Warm Regards,
Kartik
Data Recovery Associate
Stellar Data Recovery
I have ask them for my money back and waiting on their reply!
thanks for your time
Gerald
Hi Gerald, you’re right. Stellar Drive Toolbox isn’t compatible with macOS Sierra (specifically, the last version update was in 2015). I think they will issue refund for you. By the way, this review article is all about Stellar Mac Data Recovery, and version 7.1 does support Sierra. Let me know if you have any additional questions.
Hi,
Stellar now has released v10 of their Mac Data Recovery with power packed features including “create bootable drive”.
It will be great to update your review accordingly.
Thanks
Namzi