
Panic strikes. You deleted the wrong file. You formatted the wrong drive. That important file that was there last week now isn’t. Your Mac computer died at the worst possible time…
If you relate, then this software roundup is for you. Let me introduce you to a genre of Mac data recovery apps that promises to rescue you and get your data back. We explore which recovers your data most effectively.
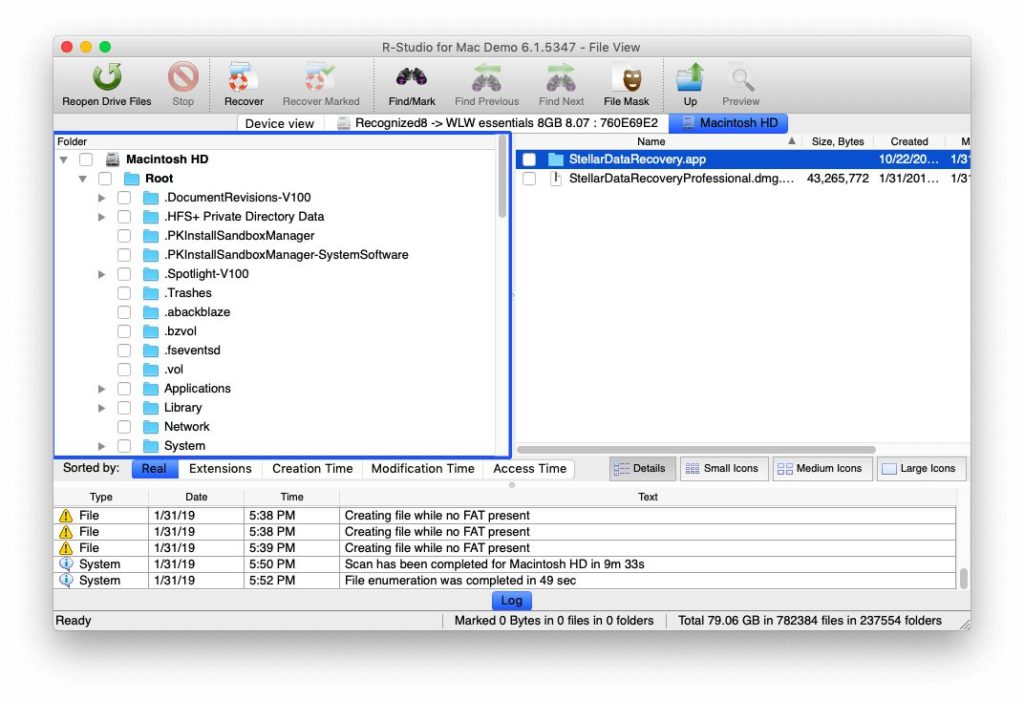
The one that consistently gives the best results is also the hardest to use. But if you’re serious about getting your data back and are willing to read the manual, R-Studio is the app you want.
But for most users, I recommend Stellar Data Recovery for Mac. It’s the easiest app we cover, and in most areas boasts results that are pretty close to R-Studio.
Table of Contents
Why Trust Me for This Guide
My name is Adrian Try and I’ve worked in IT for quite a while, and exclusively with Macs for the last ten years. With the jobs I’ve had, you’d imagine I have plenty of experience recovering lost data.
- From 1989-1995 I spent five years teaching software classes, managing training rooms, and supporting office staff.
- From 2004-2005 I spent two years doing similar work on a smaller scale.
- From 2007-2010 I spent four years running my own computer support business, solving the IT problems of businesses and individuals.
- And for two years I was the IT manager of an organization, supporting up to 100 office staff and an internet cafe.
Believe me, I’ve seen a lot of computer problems! But throughout all of those years, I’ve only had to run data recovery software four or five times when crucial data was lost in a disaster caused by computer failure or human error. I was successful about half of the time.
That’s not a lot of experience, so I wanted access to the opinions of those with a significant amount of experience using these apps: those who specialize in data recovery. I hunted for test results of industry experts who ran the best Mac data recovery apps through their paces.
Who Should Get This
If you like to play it safe and perform regular backups (as you should), you may like to run data recovery software as well. Running it before you encounter data may well make it easier to get your data back. In addition, it will monitor the health of your hard drive, and prompt you to act before your drive dies.
But maybe you haven’t been playing it safe, and you just lost some important or sentimental files from your computer. Then these apps are for you. In most cases, if you run a trial version of the software, you’ll find out whether your data can be recovered before you spend any money.
Easiest to Use: Stellar Data Recovery for Mac
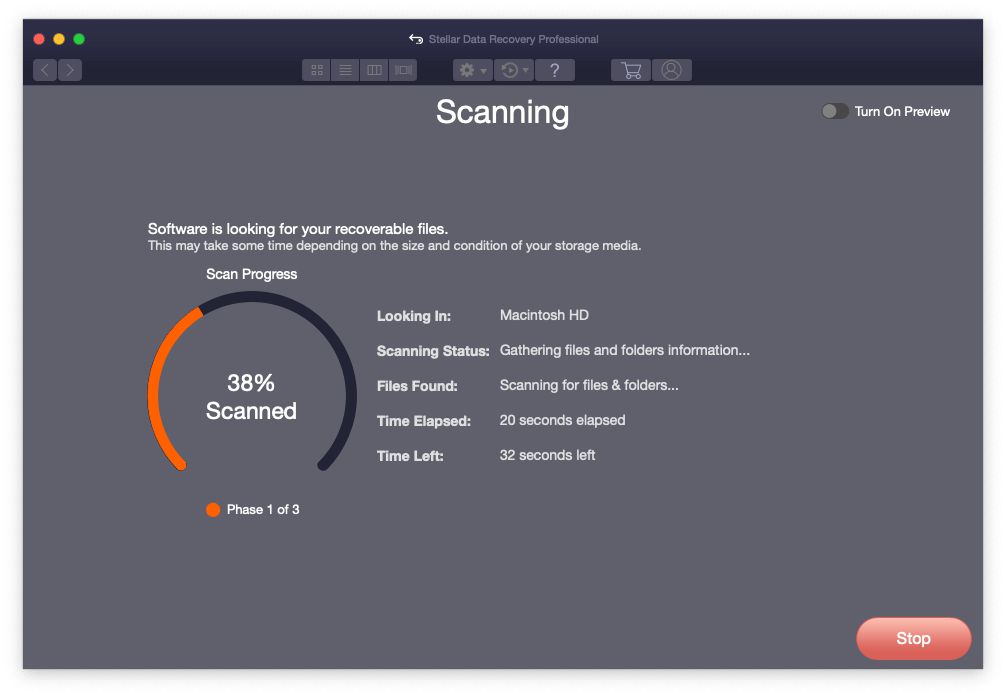
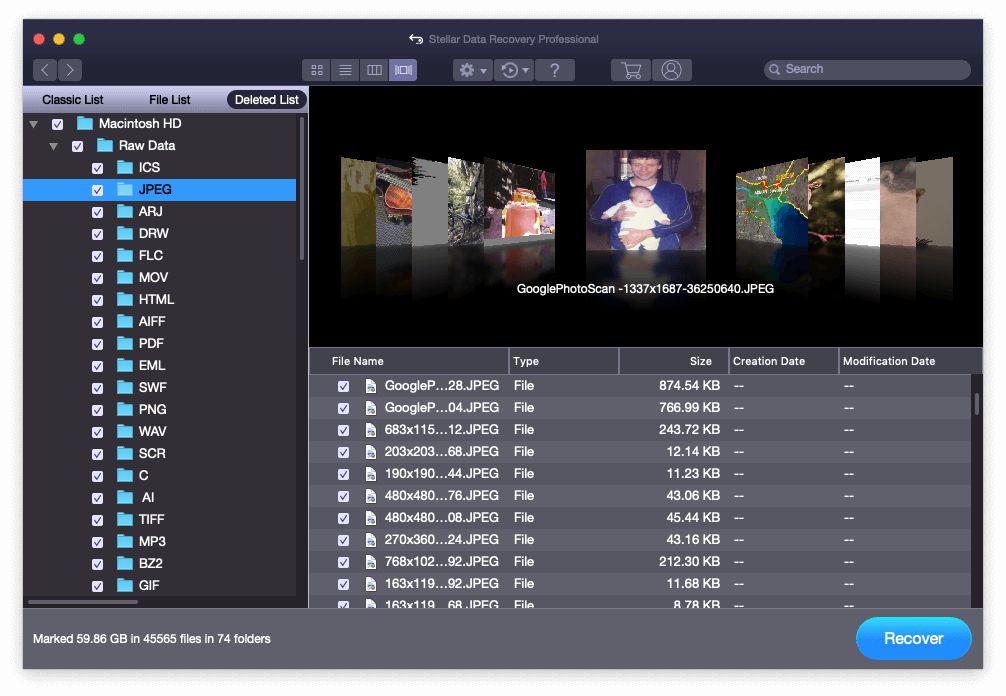
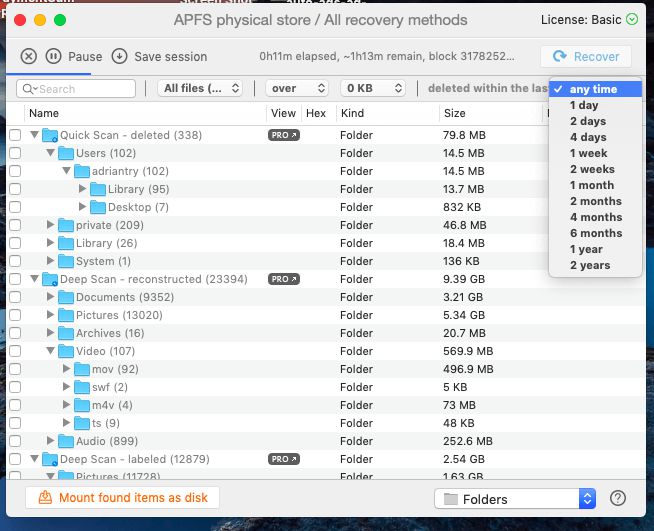
Stellar Mac Data Recovery has an attractive interface that’s a breeze to use. In a deep scan, it is able to locate more recoverable files than many of its competitors. It passed all of our tests and did well in the industry tests that we consulted.
Features at a glance:
- Disk imaging: Yes
- Pause and resume scans: Yes, but is not always available
- Preview files: Yes but not during scans
- Bootable recovery disk: Yes
- SMART monitoring: Yes
Stellar Data Recovery has a good balance between ease of use and successful data recovery, and we’re not the only ones who like it. Because of its easy-to-use interface, PCMagazine recommends it for beginners: “Stellar Phoenix Mac Data Recovery offers an easy on-ramp to Mac data recovery.”
G2 Crowd rate customer satisfaction for the Windows version as a high 4.8 out of 5, but there are some negative reviews about the app on Amazon. One user complained about slow scans, another about the app freezing. Several users complained that the app couldn’t recover the files, and were offered a refund by Stellar. There were some extremely positive reviews as well, so the app sounds very promising, but is not perfect.
Ease of Use: This is one of the easiest-to-use recovery apps out there, and when I compare my experiences using version 9.0 with our review of version 7.1, they’ve taken it even further in the last two versions. Personally, I wonder if they’ve tried to make it too easy!
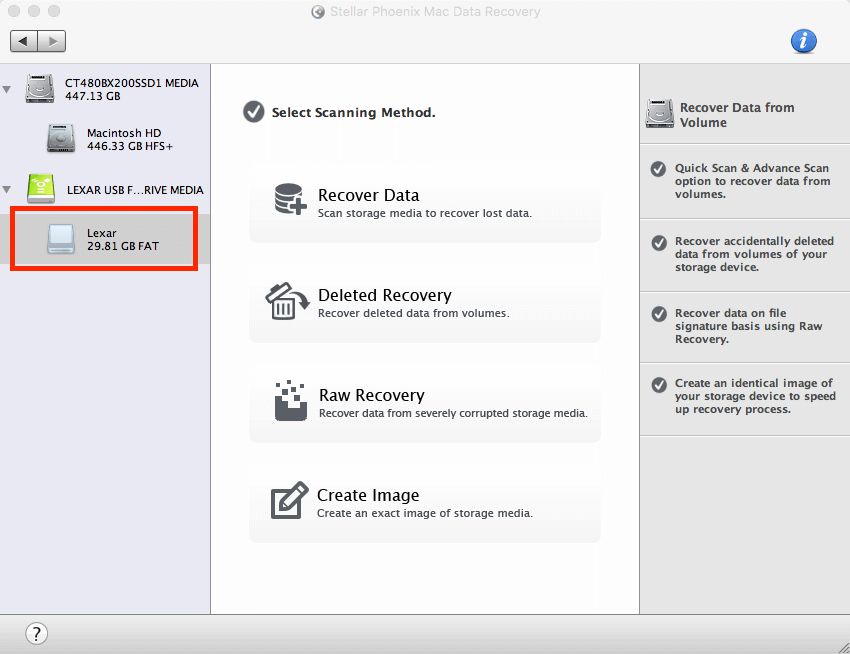
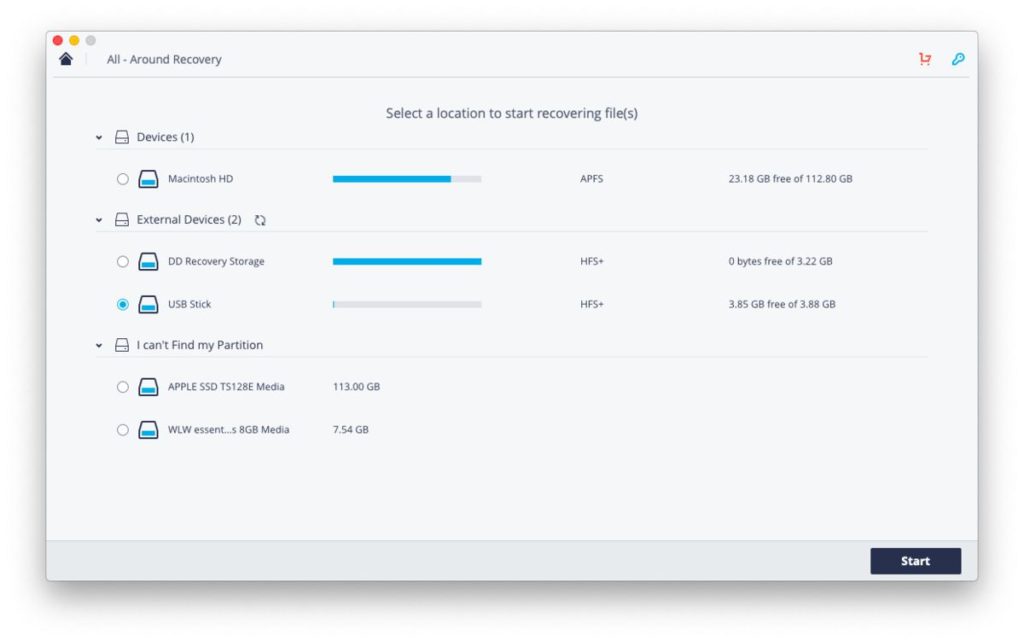
Let me demonstrate what I mean. This screenshot from version 7.1 offers a number of options, depending on the type of recovery you want to achieve.
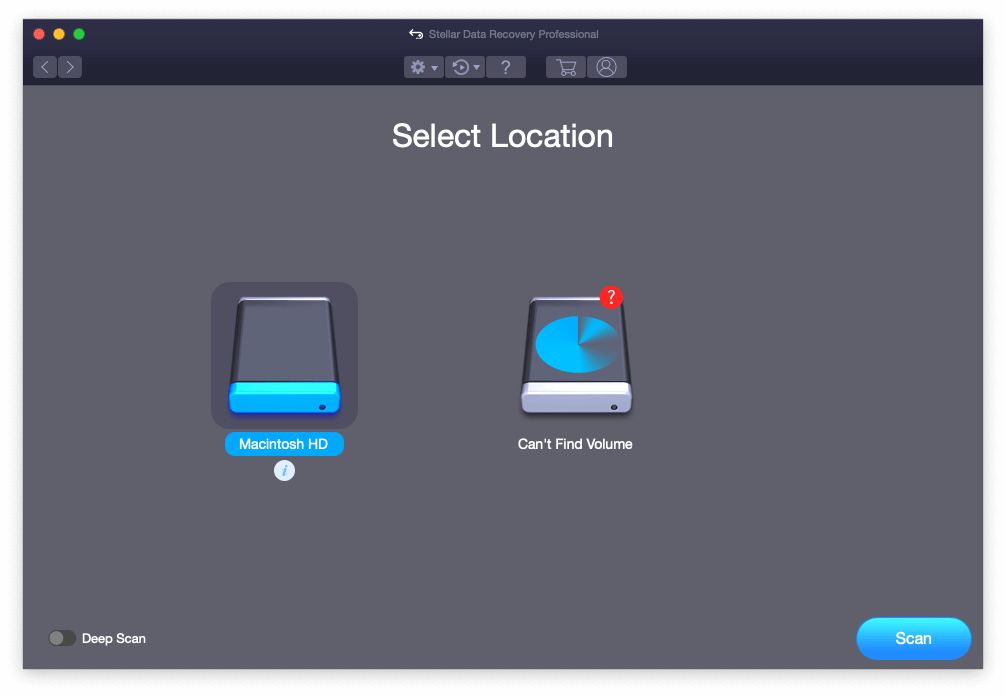
Version 9.0 doesn’t. It gives you a choice of drives, with a big “Scan” button, and the option of making it a deep scan.
That’s much simpler, but it makes me feel I’m missing out on some choices. But that’s just me, and in reality, I’m probably not missing out on anything. For beginners, it’s a step forward: what to do next is very clear. Version 7.1’s options of “Deleted Recovery” and “Raw Recovery” may be unclear to some users, and lead to choice paralysis.
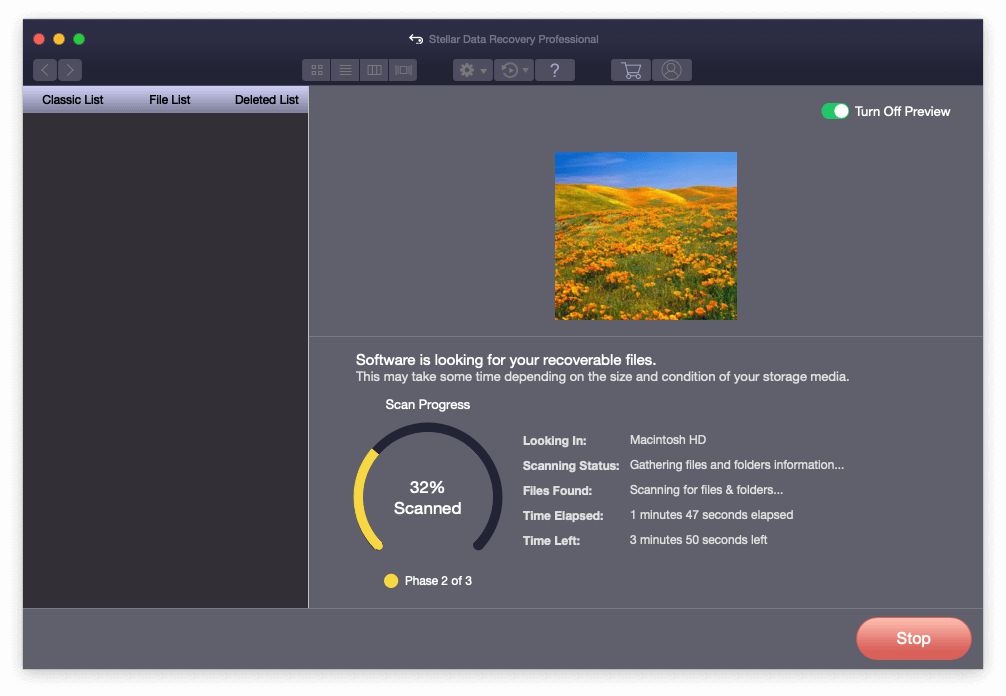
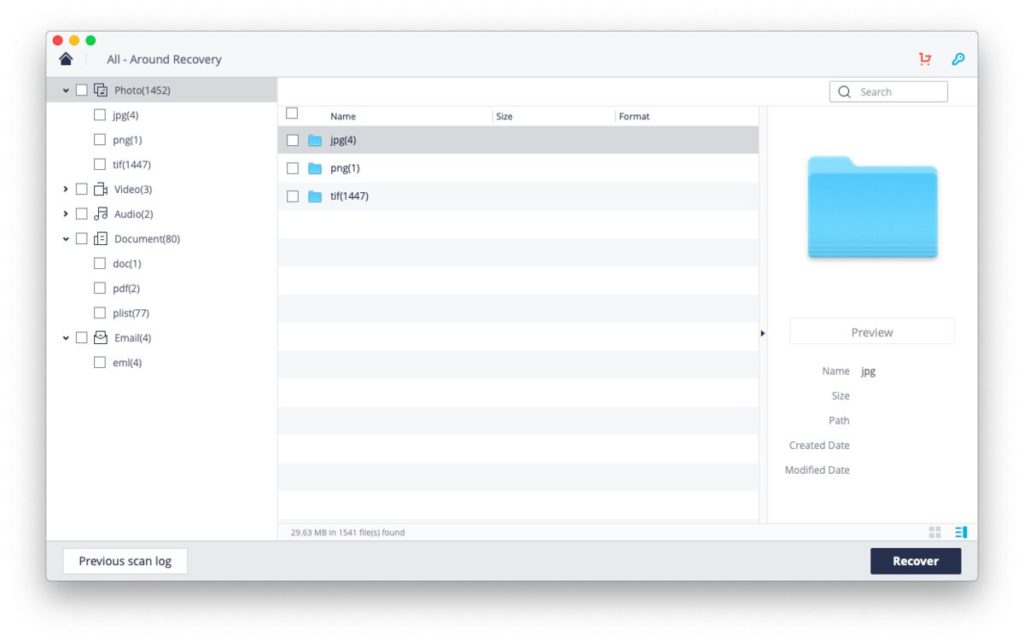
Once the scan is complete, I found the app’s search option made it easy to find the file I wanted out of the thousands found. That is, as long as the app was able to recover the original name of the file.
Features: This app includes most of the features you’ll need, including disk imaging, a bootable recovery disk, and file preview. But you won’t be able to preview files until the scan finishes, unlike some other apps.
In his test of version 7.1, JP found that the “Resume Recovery” feature may be buggy, so I thought I’d see if the feature had improved in version 9.0. Any time I attempted to pause a scan, I received the message, “Scan cannot be resumed from the current stage.” So I was unable to test the feature—it was unavailable every time I tried, and I tried a lot. The app did offer to save the scan results for future use at the end of each scan, however.

Effectiveness: Despite being easy to use, Stellar Data Recovery performs very well. In his testing of the app for our review, JP found the app powerful at recovering deleted files and identifying many types of recoverable files from his Mac.
How does it compare with R-Studio, a powerful competitor rated by many to be the most powerful? According to DigiLabs Inc, Stellar has better help and better phone and email support than R-Studio, and performed just as well in many (but not all) tests, though was sometimes much slower. These tests were done on the Windows versions, but are consistent with my test on the Mac versions.
It seems all recovery apps perform well with quick scans on a spinning hard drive, successfully recovering recently deleted files in just seconds. But when performing a quick scan on an SD card, only Stellar and R-Studio managed to recover all of the files, and also had the fastest scan times.
Deep scans split up the field further. When attempting to recover files whose directory information had been overwritten, each app succeeded with 8 out of the 10 files. However, Stellar and R-Studio’s scans were twice as quick, and unlike the other apps, JPG files were given the correct names from information found in the files’ metadata.
There were a number of tests where R-Studio’s results were significantly better. When recovering a large 7.5GB file, only Stellar and R-Tools placed the file in the right folder with the original name. However, Stellar’s file was only 40MB, so the entire file was not recovered. R-Tools recovered the entire file successfully.
And when recovering from a formatted Windows hard drive, R-Tools was the only app able to recover all files. The other apps did recover some files, with Stellar showing the worst results.
My conclusion? Stellar Data Recovery for Mac is one of the easiest apps to use and boasts better recovery results than most of the competition. By clicking a few simple buttons, you’ll have a solid chance of recovering your files. However, if maximum data recovery is your absolute priority, R-Studio may be the better choice for you, but at the cost of ease of use.
Most Powerful: R-Studio for Mac
R-Studio for Mac is a powerful data recovery tool developed for experienced data recovery professionals. It offers all the features an expert would expect, along with a proven track record of successful data recovery. Flexible parameter settings give absolute control over the recovery process. If you’re an experienced Mac user willing to open the manual when necessary and prefer to use the best-in-class tool for the job, this may be the best app for you.
Features at a glance:
- Disk imaging: Yes
- Pause and resume scans: Yes
- Preview files: Yes but not during scans
- Bootable recovery disk: Yes
- SMART monitoring: Yes
R-Studio’s is widely accepted as the most powerful data recovery app available for Mac, Windows, and Linux. The Data Recovery Digest put seven leading apps through a barrage of tests last year, and R-Studio came out on top. Their conclusion? “An excellent combination of file recovery features and performance. Shows the best results in almost every category. A must-have for any data recovery professional.”
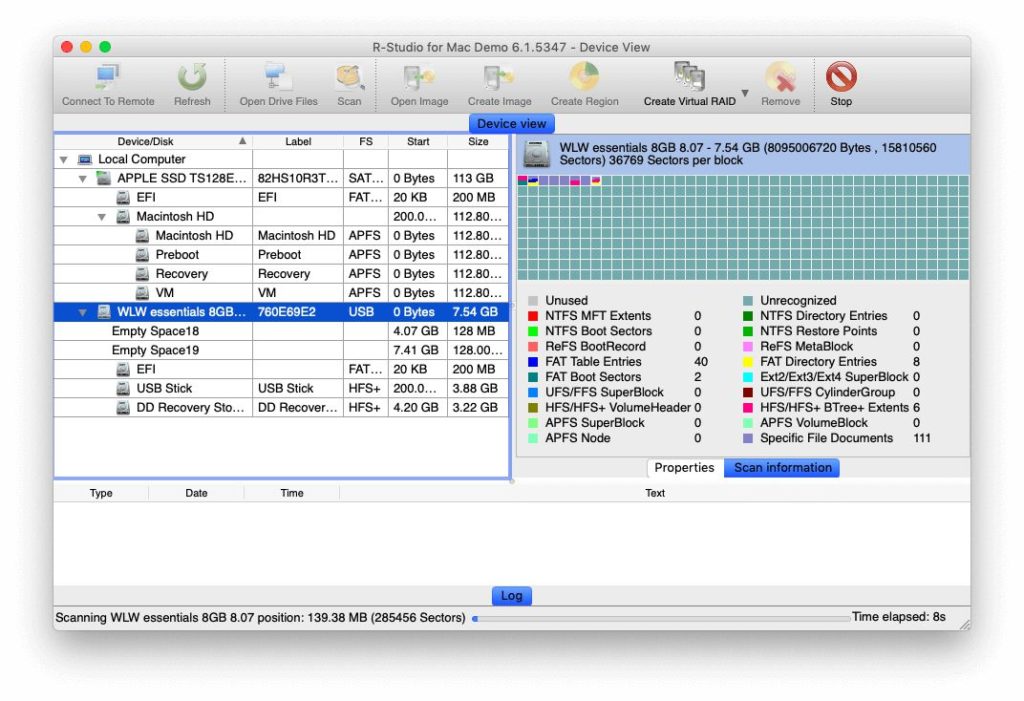
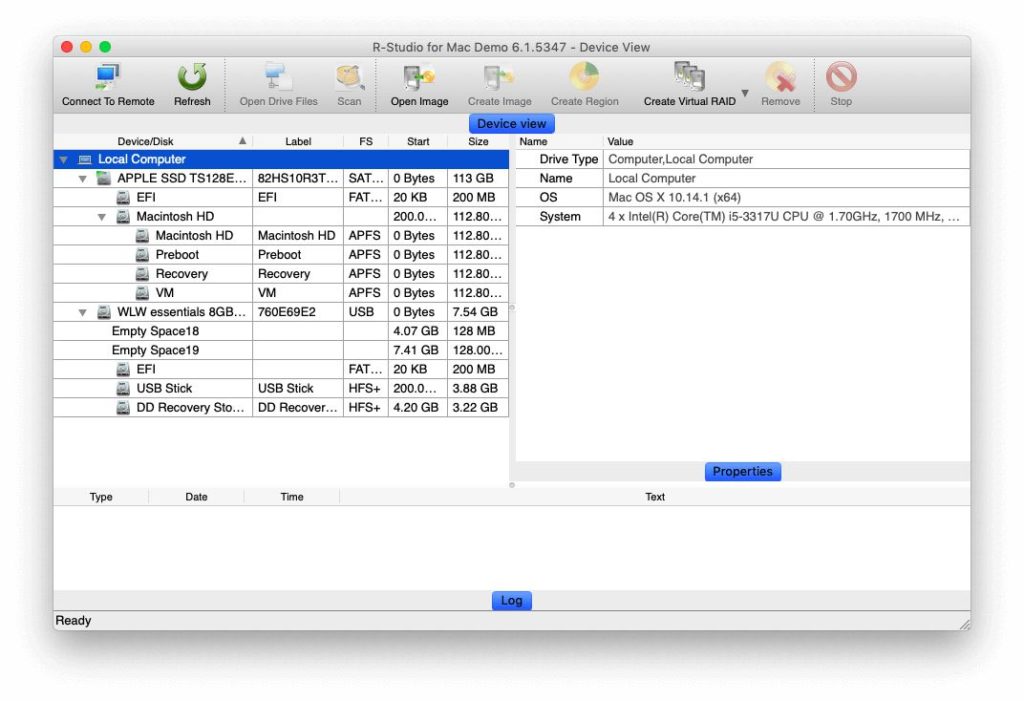
Ease of Use: The Data Recovery Software Review rate’s R-Studio’s ease of use as “complex”. Given that it’s designed for experts, that’s no surprise. But I didn’t find the app as hard to use as you’d expect. I’d describe the interface as “quirky”—there are some unusual interface choices in there that take some getting used to. You’re offered plenty of options, and the developers have decided to put as much helpful information on the screen as possible, rather than hiding it in case it overwhelms beginners.
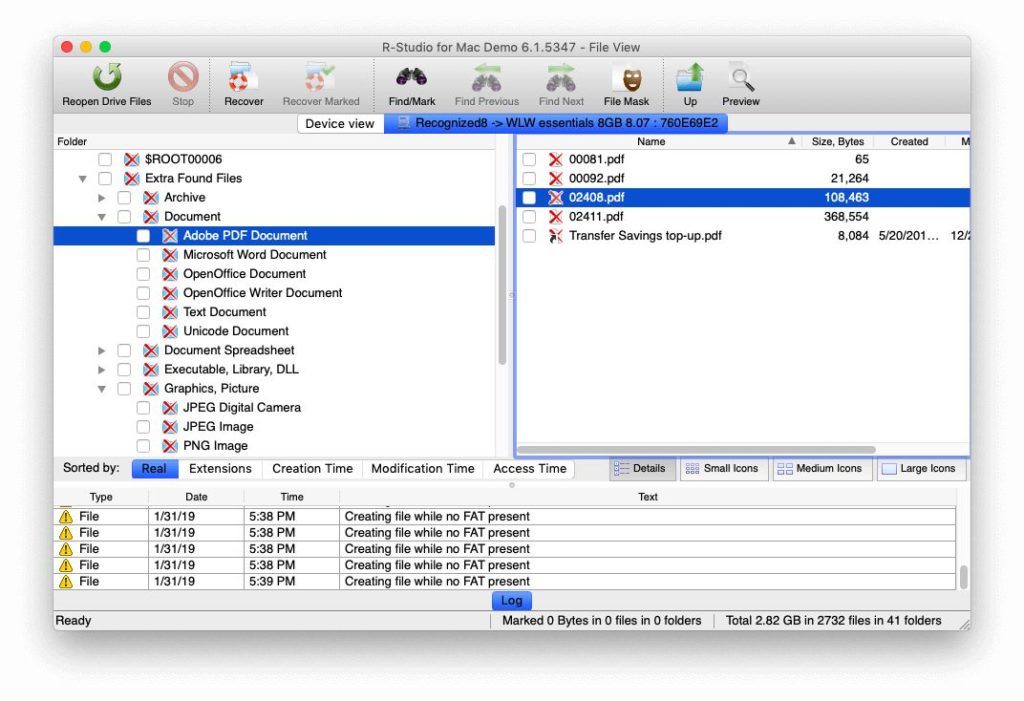
Features: This is a feature-filled app, and includes advanced features not offered by the competition. It supports pretty much all file systems, and can recover data from local disks, removable disks, heavily corrupted disks, unbeatable disks, and network clients. The developers list a good overview of the features here.
Effectiveness: In industry tests, R-Studio consistently produced the best results. And although it has a reputation for slow scans, it often completed scans faster than the competition.
For example, Data Recovery Digest’s tested the Windows versions of R-Studio, Data Rescue and five other apps. Here are the results of all of their tests:
- R-Studio was the highest-rated app for recovering deleted files. It received a score of 5.5, which it shared with the Windows app Do Your Data Recovery.
- R-Studio was the highest-rated app for recovering files from an emptied recycle bin ratings. It received a score of 5.5, which it shared with the Windows app Active File Recovery.
- R-Studio was the highest rated app for recovering files after a disk reformat. It received a score of 5.3.
- R-Studio was the highest-rated app for recovering a damaged partition. It received a score of 5.8, which it shared with the Windows apps Active File Recovery and DMDE.
- R-Studio was a highly rated app for recovering a deleted partition, with a score of 5.5. But DMDE was the winner here, with a score of 6.0.
- R-Studio was the highest-rated app for RAID recovery. It received a score of 5.9.
The results are consistent across tests run by independent industry experts. If you are looking for the app likely to recover the maximum amount of data, choose R-Tools.
Other Paid Mac Data Recovery Software
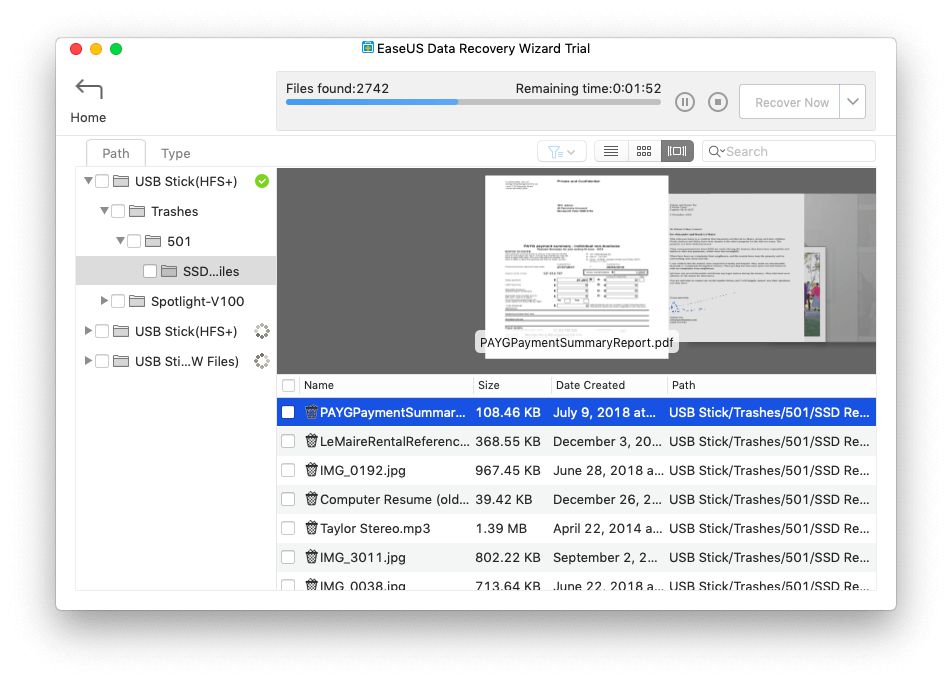
1. EaseUS Data Recovery Wizard for Mac
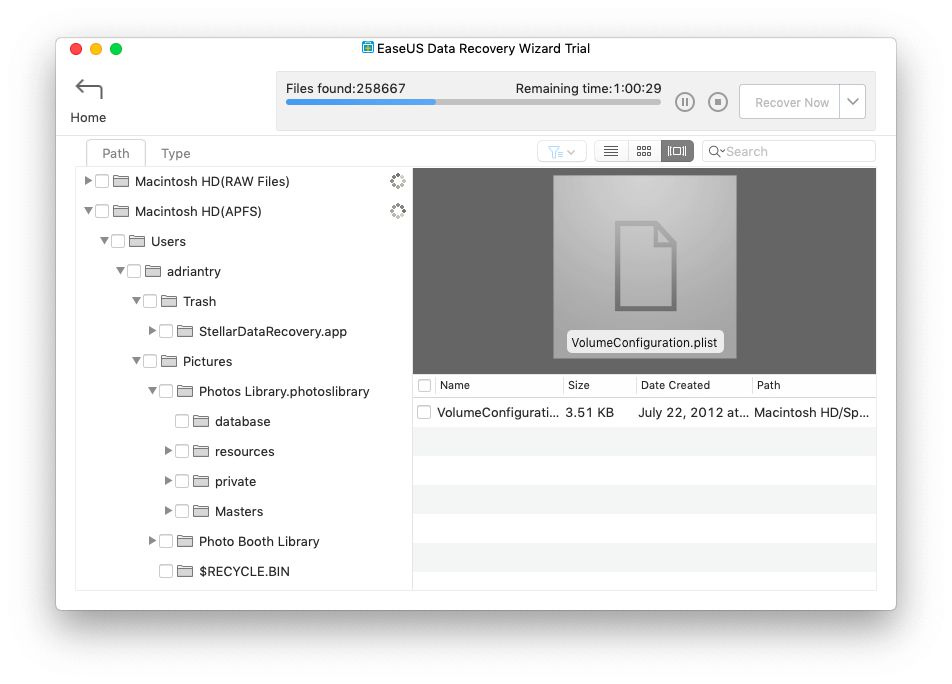
EaseUS Data Recovery Wizard is an easy-to-use app for Mac and Windows that also performs quite well in industry tests. It lacks disk imaging and a recovery disk, useful features that are offered by our winners. We have reviewed the Windows version of EaseUS here, but keep in mind that it has some differences from the Mac version.
Features at a glance:
- Disk imaging: No
- Pause and resume scans: Yes
- Preview files: Yes but not during scans
- Bootable recovery disk: No
- SMART monitoring: Yes
In our SoftwareHow review, my colleague Victor Corda found that the scans tended to be slow, but successful. In the tests he ran, the app was able to recover the data each time, and he concluded that this is one of the best recovery apps he has run.
Others agree, including the Computer Fixperts, who made the app their second choice for data recovery. But there are quite a few negative reviews on Amazon, including users complaining it doesn’t work as expected. Not all of those should be regarded though, including a user who purchased the app to clone a drive, a feature it doesn’t claim to have.
Industry tests suggest that the app performs well. ThinkMobiles tested the free versions of seven data recovery apps, including EaseUS. It recovered all deleted files from a USB flash drive and achieved this in a medium amount of time compared with the other apps. A deep scan located more recoverable files than the others tested, though the test didn’t include our winners. In my own test, it was one of the best performers.
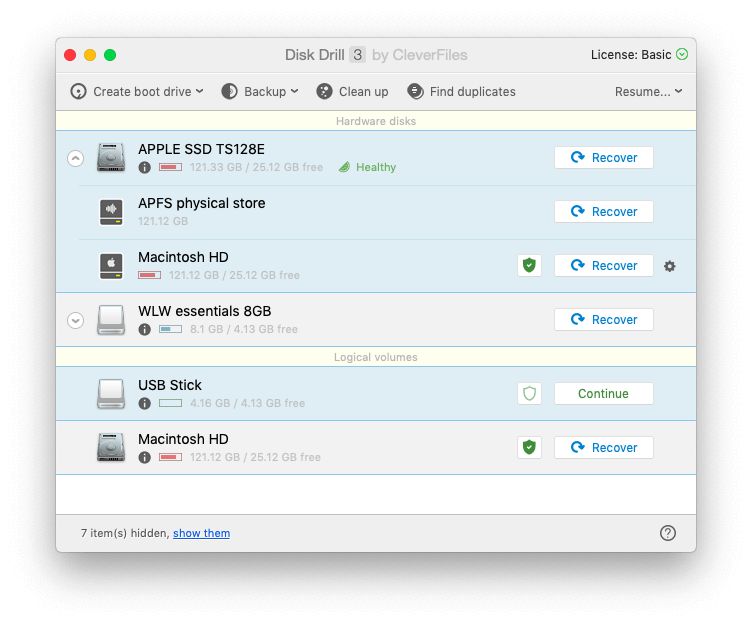
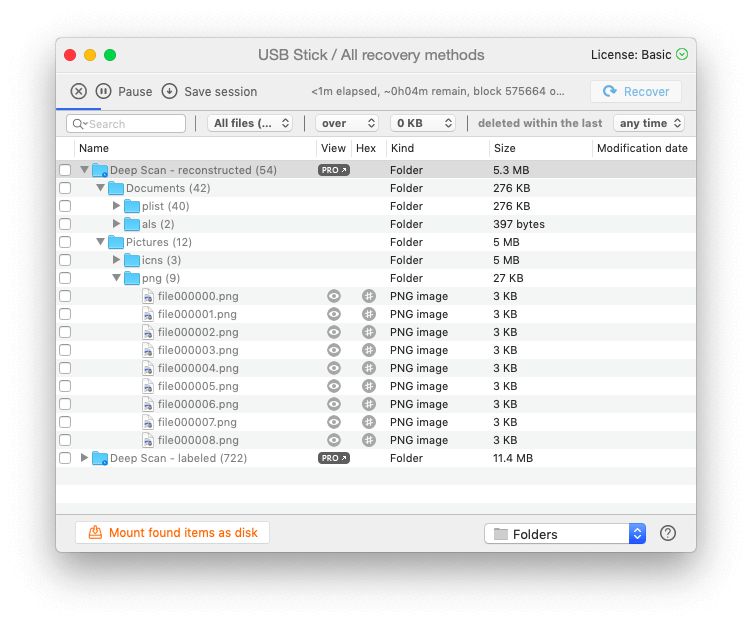
2. CleverFiles Disk Drill Pro for Mac
Disk Drill is the data recovery app I enjoyed using most—its interface suits me. It has a good balance between features and ease of use, and it allows you to preview and recover files before the scan is complete.
But when I started to look at comparative tests, I discovered that it doesn’t perform as well as our winners. That surprised me—when I tested the app during my review, I successfully recovered every file that was lost.
Features at a glance:
- Disk imaging: Yes
- Pause and resume scans: Yes
- Preview files: Yes
- Bootable recovery disk: Yes
- SMART monitoring: Yes
I mentioned the ThinkMobiles data recovery test when covering the last two apps. They performed quite well. Disk Drill, however, did not.
While it did manage to recover all 50 deleted files, it discovered relatively few recoverable files when deep scanning a hard drive. Scan times were slow—almost as slow as MiniTool’s, the slowest app to be tested. By way of comparison, EaseUS and MiniTool were able to locate 38,638 and 29,805 recoverable files each. Disk Drill only found 6,676.
I wanted another opinion, so I ran my own test on a USB Flash drive. There EaseUS and MiniTool found 3,055 and 3,044 files each, while Disk Drill found just 1,621. All three apps took just four minutes to complete the scan.
As a result of these findings, I can’t recommend Disk Drill as a winner. While it includes all the features you need, and you’re likely to recover all your deleted files in a quick scan, more thorough scans are less promising.
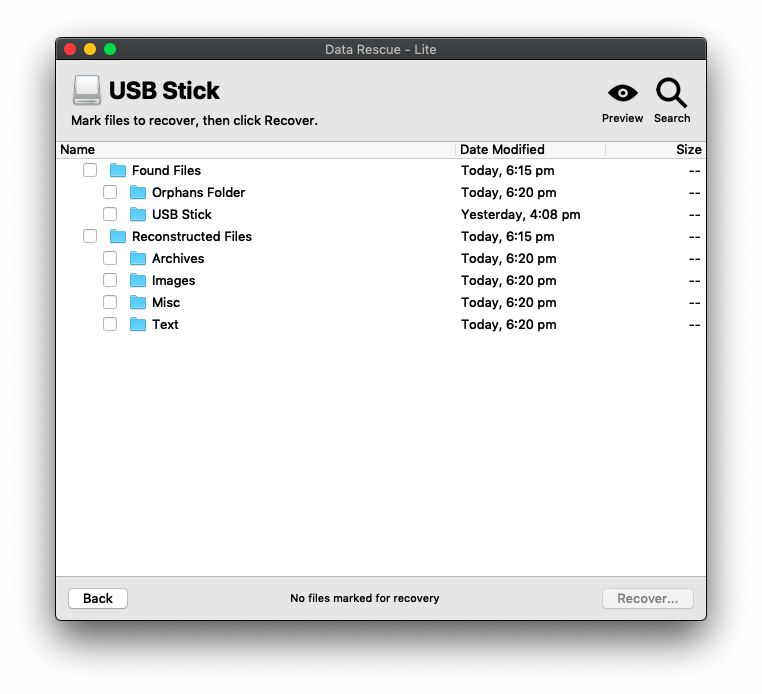
3. Prosoft Data Rescue for Mac

Data Rescue Mac is an easy-to-use data recovery app that performed well in the tests I performed. However, like Disk Drill, when I started to consult industry tests, Data Rescue’s performance doesn’t stand up to many of its competitors. I reached the same conclusion when retesting all the apps for this review. While it is easy to use, and includes clear feature descriptions, and all of the features you need, I can’t recommend this app if your goal is to recover the maximum data.
Features at a glance:
- Disk imaging: Yes
- Pause and resume scans: No, but you can save completed scans
- Preview files: Yes
- Bootable recovery disk: Yes
- SMART monitoring: No
Data Rescue is a very popular app. It has good reviews on Amazon, and other “best of” comparisons rate it very highly, including PCMagazine. I had a high opinion of the app myself, and like all of the apps here, it may well recover the files you need.
However, testing done by Data Recovery Digest and DigiLab Inc demonstrates that, compared with our winners, the app doesn’t locate as many recoverable files after a deep scan.

In their tests, the app had the lowest rating each time. They tested recovering deleted files, recovering files from an emptied recycle bin, recovering a formatted disk, recovering a damaged or deleted partition, and RAID recovery.
DigiLab’s tests were a little more promising. Data Rescue performed well in quite a few, but in others, it could not recover the data, and often its scans were slowest. In my own test, it is the only app that couldn’t recover the files I deleted from the USB flash drive, and it could only find 1878 files compared to EaseUS’s 3055 and Stellar’s 3225.
For an app that’s so widely recommended, these are sobering facts. While it may well recover the files you need, your chances will be increased by using one of our winners instead.
Wondershare Recoverit is a little slow, and compares with Disk Drill and Data Rescue when locating recoverable files: reasonable, but not great.
We found the app is not ideal. Not all files could be previewed, making it harder to locate files. The Mac version of the app froze while he was using it, and he found the “remaining time” indicator wasn’t accurate.
In my test, the app was able to recover the files I deleted, but only located 1541 files, the second worst result, and second slowest scan. Only Remo Recover (below) did worse.
5. Remo Recover Mac Pro Edition
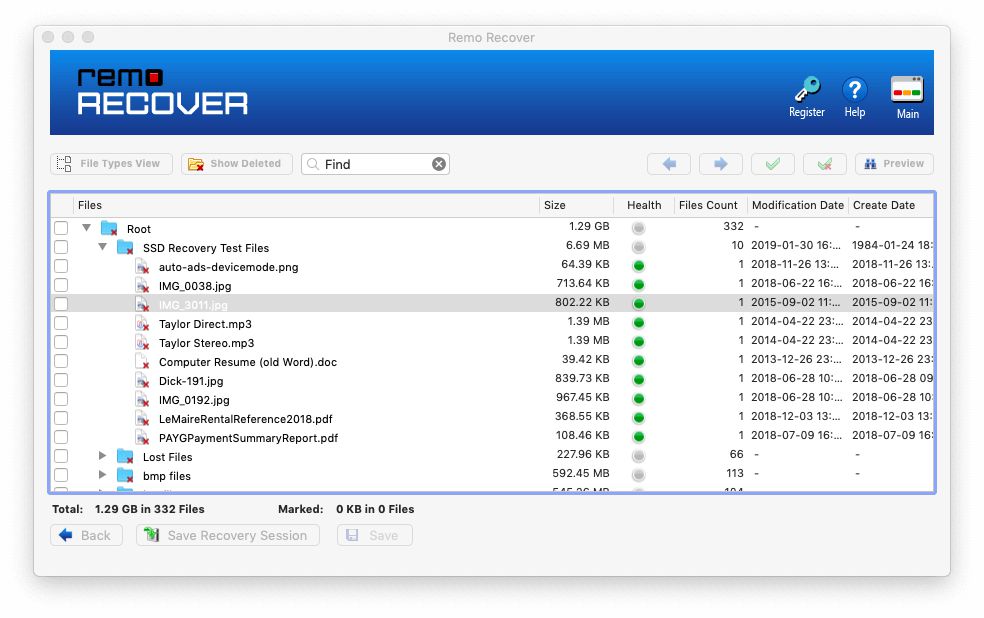
Remo Recover Mac looks to be the least promising of the apps included in this Mac data recovery review. Scans are slow, locating files is difficult, and the app crashed while I was using it.
In my test, the app did recover all of the files I had deleted, but after a long 10-minute scan could only find 322 recoverable files on my USB flash drive. By comparison, Stellar Data Recovery found 3225. I cannot recommend this slow, expensive, unstable app.
6. Alsoft DiskWarrior for Mac
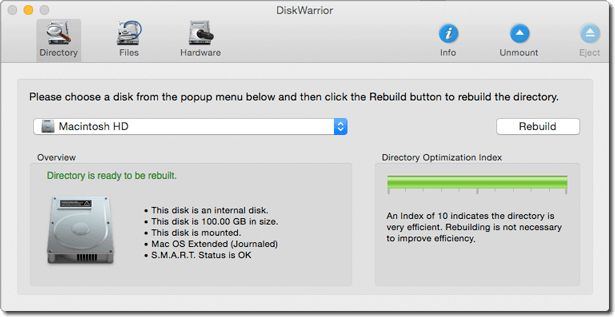
Alsoft DiskWarrior looks like a promising app. Unfortunately, it’s a little expensive and doesn’t offer a trial version, so I didn’t test it. It wasn’t included in any of the industry tests we could find, either.
Feedback on Amazon is very positive, and PCMagazine made it their Editors’ Choice for Mac, awarding it 4.5/5 stars, the same score as they gave Stellar Phoenix for Windows. It sounds like a promising app.
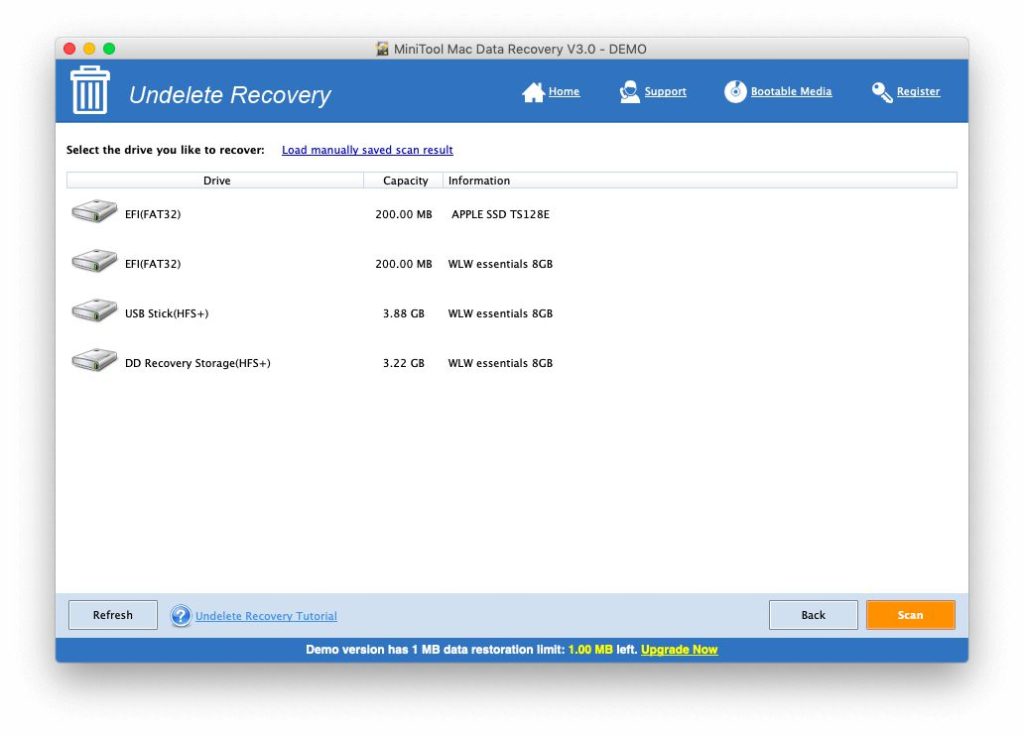
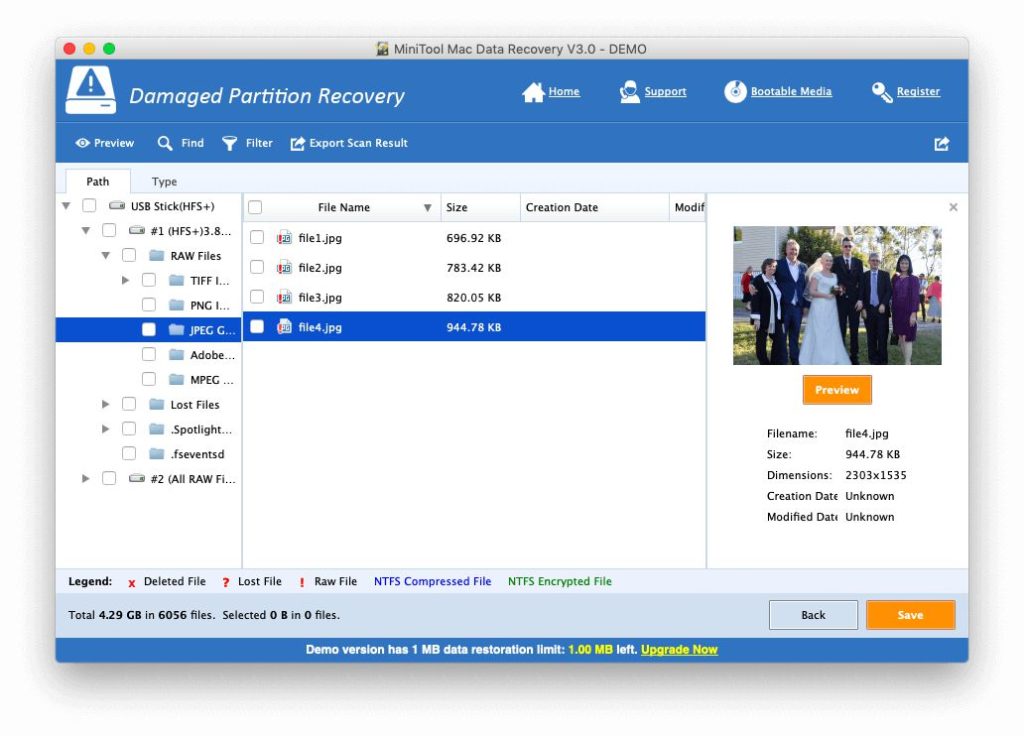
7. MiniTool Mac Data Recovery
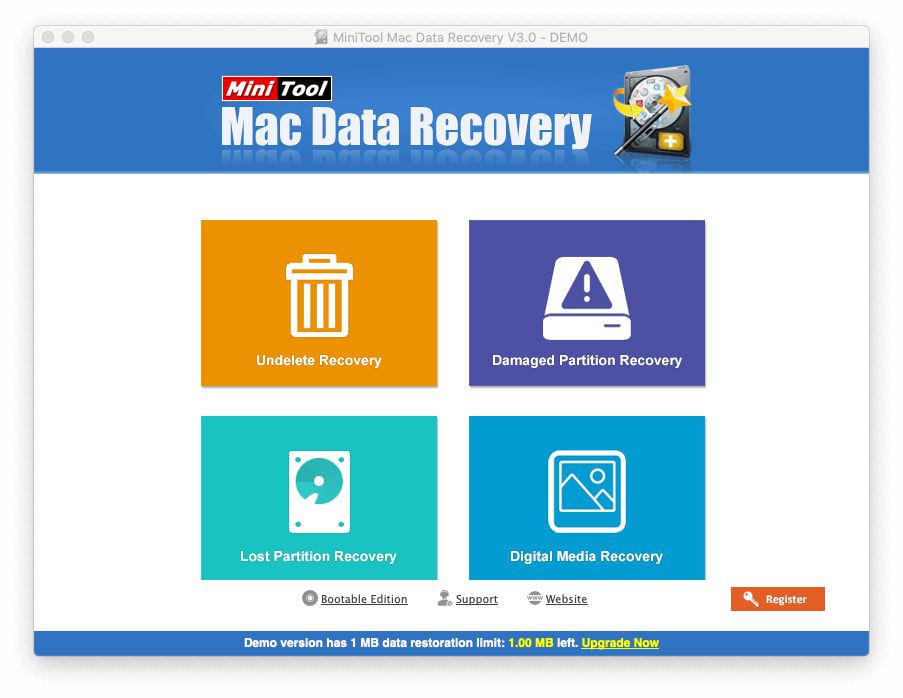
MiniTool Mac Data Recovery is another easy-to-use app that produces good results. Customers report high satisfaction, and the app is available for Mac and Windows. I found the download process problematic: the website kept automatically downloading the Windows version even though I’m on a Mac.
Features at a glance:
- Disk imaging: Yes
- Pause and resume scans: No, but you can save completed scans
- Preview files: Yes
- Bootable recovery disk: Yes, but is a separate app
- SMART monitoring: No
The app did not perform quite as well as EaseUS in the ThinkMobiles test. It recovered most of the deleted files (49 out of 50), and located 77% of the files that EaseUS found, but took longer than any other app to do so. But these results are significantly better than those achieved by Disk Drill (below).

In my own test, MiniTool scanned the USB flash drive with one of the fastest speeds and outperformed much of the competition in the number of recoverable files it found.
Some Free Mac Data Recovery Software
There are some reasonable free data recovery software available for Mac and Windows, and we introduce them to you in another roundup. Here are some free apps for Mac, but we can’t recommend them if you’re looking for something easy to use.
PhotoRec is a free and open-source application by CGSecurity that can recover lost files, including video and documents from hard drives, and photos from digital camera memory. It’s a command-line app, so lacks in the usability area, but works well.
TestDisk for Mac is another free and open-source application by CGSecurity. Rather than recovering lost files, this one can recover lost partitions, and make non-booting disks bootable again. It, too, is a command-line app.
How We Tested & Picked Mac Data Recovery Apps
Mac data recovery apps are not all the same. They vary in their usability and features offered, and may employ different recovery strategies, so often differ in the number of recoverable files they can locate. As we compare the competition, we’ll try to help you make the best decision about which one will suit you best. Here’s what we looked at when evaluating:
How easy is it to use the software?
Data recovery is tricky, so some apps focus on ease of use. They minimize what you need to know and the number of choices you need to make to recover files. These suit most people. Other apps are a little more difficult to use but may deliver better results. They’re more suitable for data recovery specialists and power users.
Which recovery features are included?
Most scanning apps let you do quick and deep scans for lost files. Some apps offer a list of more specific scans that may save you time by not scanning for everything. Besides scanning for lost files, here are some key features we looked for:
- Disk imaging: Create a backup of your files and recoverable data.
- Pause and resume scans: Scans can be slow, so it’s handy to be able to save the state of a scan so you can continue from where you left off in the future.
- Preview files: Gives you a quick way to identify any recovered files if the file name has been lost.
- Bootable recovery disk: When trying to restore your Mac’s main drive, it’s best practice to boot from a recovery drive so you don’t overwrite your data.
- SMART reporting: “Self-Monitoring, Analysis and Reporting Technology” gives early warning of drive failure.
Apple’s new APFS file system is relatively new. Even recently, not all recovery apps supported it. Thankfully, most Mac recovery apps now do.
How effective is the software?
Apps use various strategies to discover lost files on your drive. As a result, some apps may be more effective than others at finding files that can be recovered. How do you determine which are most effective? Lots of testing. In this review, I took three categories of tests into account:
- Informal tests performed when we reviewed a number of data recovery software. They’re not absolutely thorough or consistent across each app, but demonstrate the success or failure of our scans.
- A number of recent tests done by industry experts. Unfortunately, no single test covers all of our apps, and they often test the Windows version. They demonstrate that some apps are significantly more effective than others. I’ll include links to each test below.
- To supplement the experts’ tests, I conducted a few of my own. I got a second opinion on the apps’ effectiveness while becoming more familiar with each app and its interface. In general, my test results agree with those of industry experts.
Here is the list of industry tests I refer to:
- Data Recovery Digest‘s Best Pro Data Recovery Software Review tested the Windows versions of R-Studio and Data Rescue 5 among others.
- ThinkMobile‘s Testing 7 Best Free Data Recovery Tools tested the free Windows versions of Disk Drill, EaseUS, MiniTool, and others.
- DigiLab Inc‘s Data Recovery Software Review and Comparative Analysis Report reviews the Windows version of Prosoft Data Rescue PC3, R-Studio 7.7, Stellar Phoenix Windows Data Recovery Professional 6.0 and more. (Note: this is published on the website of R-Tools Technology, one of our winners.)
- Computer Fixperts‘ Best Data Recovery Software for Windows & Mac summarized their experience using Stellar Data Recovery, EaseUS, and others.
- Data Recovery Software Review‘s Data Recovery Software Comparison tested EaseUS, R-Studio, Stellar Phoenix, and others.
While all apps performed about equally with quick scans, deep scans split up the field. Some apps I’d shortlisted as winners—Prosoft Data Rescue and CleverFiles Disk Drill—found significantly fewer files to recover than our winners. More on that later.
For my own test, I copied a folder of 10 files (PDFs, Word Doc, MP3s) to a 4GB USB stick, then deleted it. Each app—except Prosoft Data Rescue—was successful.
I also noted the total number of recoverable files found by each app on the drive:
- MiniTool: 6056 files, 4 minutes
- Stellar: 3225 files, 8 minutes
- EaseUS: 3055 files, 4 minutes
- R-Studio: 2336 files, 4 minutes
- Data Rescue: 1878 files, 5 minutes
- Disk Drill: 1621 files, 4 minutes
- Wondershare: 1541 files, 9 minutes
- Remo: 322 files, 10 minutes
MindTool’s huge 6056 files include 3044 documents and media files (which is what the other apps are listing), and 2995 “other” files. This brings the result down close to the other top runners.
How fast are the scans?
I’d rather have a successful slow scan than an unsuccessful fast scan, but deep scans are time-consuming, so any time saved is a bonus. I didn’t look for a clear winner here, and slower scans don’t guarantee better results, but you’ll find some observations about scanning speeds below.
Value for Money
Here are the costs of each app we mention in this Mac data recovery software review, sorted from cheapest to most expensive:
- MiniTool Mac Data Recovery V3.0 Personal: $79
- Wondershare Recoverit Pro for Mac: $79.95
- R-Studio for Mac 6.1: $79.99
- CleverFiles Disk Drill Pro for Mac: $89
- EaseUS Data Recovery Wizard for Mac 11.8: $98.95
- Stellar Data Recovery 9.0 for Mac Professional: $99 lifetime (or $79.99/year)
- Prosoft Data Rescue 5 for Mac Standard: $99
- Alsoft DiskWarrior for Mac: $119
- Remo Recover Mac – Pro Edition: $179.97
What You Need to Know about Mac Data Recovery
How does data recovery work?
If it’s gone, how can you get it back? The fact is, when you delete a file or format a drive, the data remains. It’s just that the computer’s file system no longer keeps track of it. As you continue using your computer, the data will eventually be overwritten.
Data recovery software can use this knowledge to help you get your files back, using strategies like these:
- They quickly scan for remnants of information in your folder structure and may be able to recover files that have been recently deleted, including the filename and location.
- They can also check the leftover data on your drive sector-by-sector, and using pattern-recognition strategies, may be able to identify whether it’s from a Word file, a PDF, a JPG, or another common file type. But the app won’t know what the file was called, or where it was stored.
Data recovery is your last line of defense
Computers can lose information because of human error, hardware failure, apps crashing, viruses and other malware, evil hackers, natural disasters, or just bad luck. Sounds ominous, doesn’t it! So we plan for the worst.
If you’re wise, you’ll regularly back up your data to multiple locations (find out which Mac data backup software is best for you), and run anti-malware software as well as other security-related apps. You may even use a UPS (uninterruptible power supply) to give yourself enough time to save your work when the power goes out.
So when disaster strikes, chances are you’re covered. Check your backups. Check the trash on your Mac. You’ve planned for this.
It’s those rare times when all of your preparation fails that you turn to Mac data recovery software. It’s your last line of defense. Hopefully, you won’t need it often, but it’s good to know it’s there.
Data recovery may cost you a lot of time and effort
Mac data recovery apps can run quick scans (which may take just minutes or even seconds) to recover data that was lost in a number of ways. These are handy, and worth trying, but can’t recover data from every situation. You may need to run a deep scan.
These can take many hours, or even days or weeks. Your entire drive needs to be examined carefully to locate as many recoverable files as possible. On a large drive, that may be thousands or even hundreds of thousands!
That means finding the right file can be like looking for a needle in a haystack. Most apps include a search feature, but that only helps if the filename was recovered. You may need to go file by file and preview each one until you find the file you are looking for.
Data recovery is not guaranteed
Your file may be irretrievably corrupt, or that sector of your hard drive may be damaged and unreadable. However, Mac data recovery apps use a number of strategies to maximize your chance of success. And that begins before disaster strikes. Start running data recovery now, and it will take steps to protect your data, and warn you when drives are about to fail.
It’s possible to unintentionally write over your data while trying to recover it. So don’t save anything to that drive. When trying to recover data from your Mac’s main drive, that means booting from an external drive while attempting recovery. Many of the apps we cover give you this option.
If you fail to recover the data on your own, you can call an expert. That can be costly but is justified if your data is valuable. Just be aware that the steps you take on your own may actually make their job harder, so try to make this decision as early as possible.
Hard drives vs SSDs
Solid-state drives are now very common in Macs. Yet in certain situations, data can’t be recovered from an SSD. TRIM technology increases SSD efficiency and service life by clearing disk sectors that aren’t being used, so it’s often turned on by default. But this makes it impossible to recover files from the Trash after it has been emptied. I tested this with every app we cover in this review and failed with each one.
So it’s time to make a decision: TRIM or no TRIM. If data recovering files from an emptied Mac Trash is more important to you than the speed and efficiency of your drive, you can turn TRIM off. Alternatively, become more careful and conservative about emptying the Trash—maybe check what’s in it first.
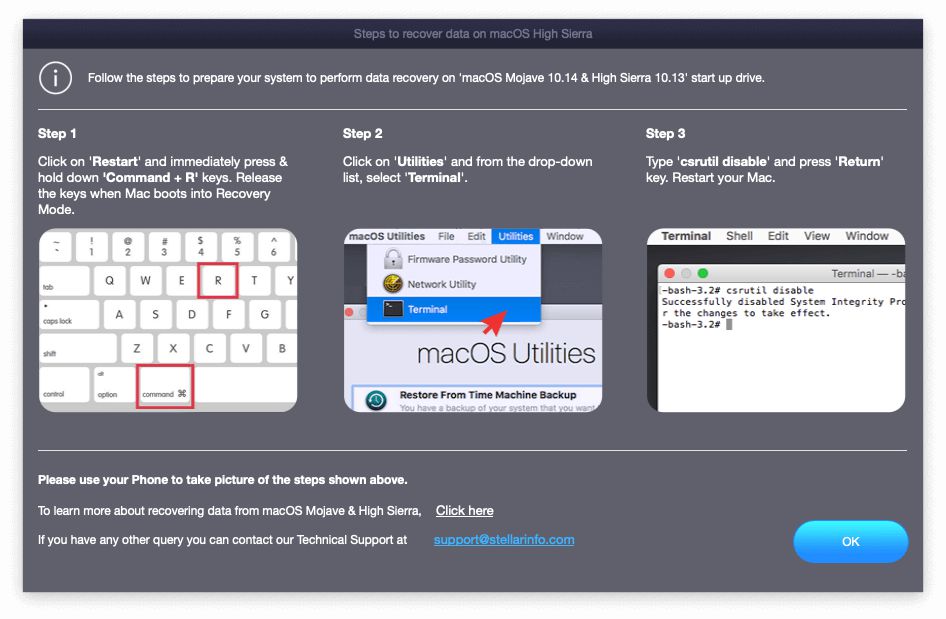
Recovering Lost Data under macOS 10.13 High Sierra and Later
As a security feature in recent versions of macOS, users are stopped from accessing the built-in system drive by any app. This is called “System Integrity Protection”. Unfortunately, it stops Mac data recovery apps from being able to do their job.
This can be disabled from System Preferences, and most data recovery apps will explain this when they are first opened. For example, when first running Stellar Data Recovery for Mac, I was shown the following message.
Steps to take before you attempt data recovery
Once you realize you have lost data, you need to act fast. The longer you wait, the more likely it is that your data will be overwritten and lost forever. If necessary, turn off the computer until you can attempt recovery.
The first thing you should do is create a disk image of your drive. This type of backup includes all of the lost data from the original drive and is a safeguard. Many recovery apps include the ability to create disk images. From there, begin to run scans on the drive (or the image), starting with a quick scan, then a deep scan if it’s not successful.
What are the files that Stellar / EaseUS find that Disk Drill / Disk Rescue cannot? Are these possibly the invisible DS_Store files created by macos? Files you don‘t have to restore. Would explain the difference in numbers.