
Procreate Pocket is almost identical to the Procreate app. Download it onto your iPhone from the app store for a one-time fee of $5.99. Once it’s downloaded on your device, open it and use the tutorial below to start drawing, editing, and sharing artwork.
I’m Carolyn and I’ve been an avid Procreate user for the last three years ever since starting my own digital illustration business. I was quick to jump on the Procreate Pocket bandwagon when I discovered its limitless capabilities and striking similarities to the original design app.
Having the full range of Procreate features accessible in your pocket (excuse the…pun?) is not only exciting but dare I say revolutionary. I’m constantly amazed at what our iPhones can do. I was happy to realize that the user interface between the apps is pretty much identical.
In this tutorial, I’ll show you the basics of how to get started on Procreate Pocket and how to navigate your way around its user interface.
Table of Contents
- Key Takeaways
- How to Get Started with Procreate Pocket
- 1. Paintbrush Tool (paintbrush icon)
- 2. Smudge Tool (index finger icon)
- 3. Eraser Tool (eraser icon)
- 4. Layers Menu (two squares icon)
- 5. Color Disc (color wheel icon)
- 1. Actions Tool (wrench icon)
- 2. Adjustments Tool (magic wand icon)
- 3. Selection Tool (S shape icon)
- 4. Transform Tool (cursor icon)
- The Sidebar
- FAQs
- Final Thoughts
Key Takeaways
- Procreate Pocket costs $5.99 to download from the app store.
- It is only compatible with Apple iPhones and not available on Android devices.
- The user interface is almost identical to that of the Procreate app for iPad.
How to Get Started with Procreate Pocket
Before I show you some of the basic tools, you need to purchase and download Procreate Pocket on your iPhone in order to follow along.
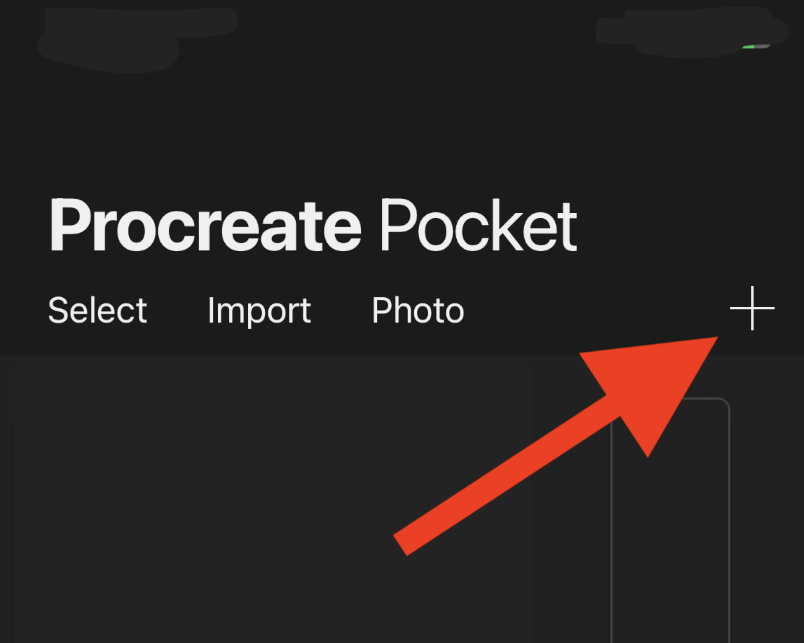
When you first open the app, you will be in your Procreate Gallery. This is where all of your artwork will be stored and it’s also where you can begin new projects by opening up a Canvas. To start a new canvas, tap on the + symbol in the top right corner of the screen.
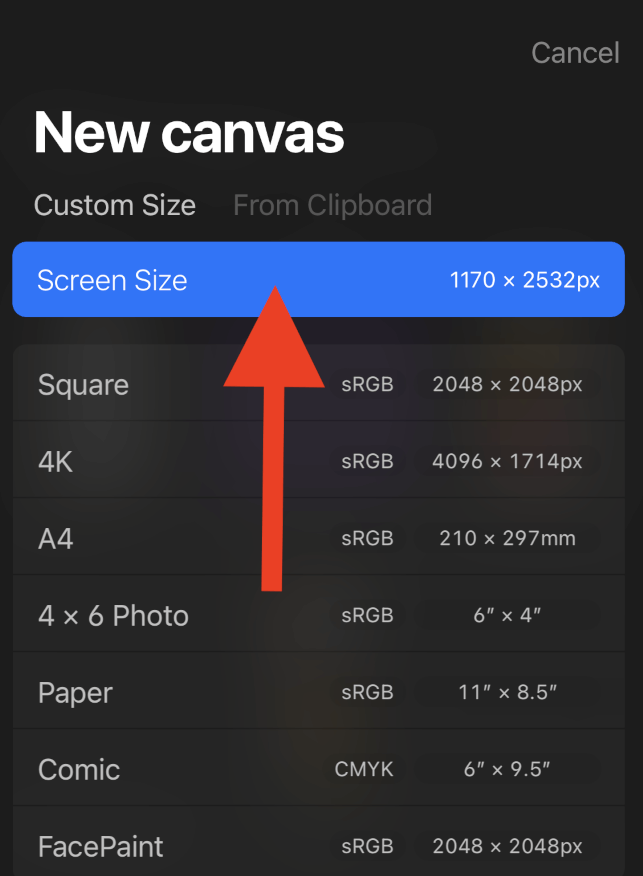
In your New Canvas menu, you will have the choice to create a custom-size canvas or choose from one of the pre-loaded options like Square, A4, Paper, etc. Once you have chosen which size you want, tap on it and it will open up a blank canvas.
In the top right corner of your new Canvas, you will see the five main functions that you will use most commonly. I have labeled them from 1 to 5 and written a brief explanation of each function below.
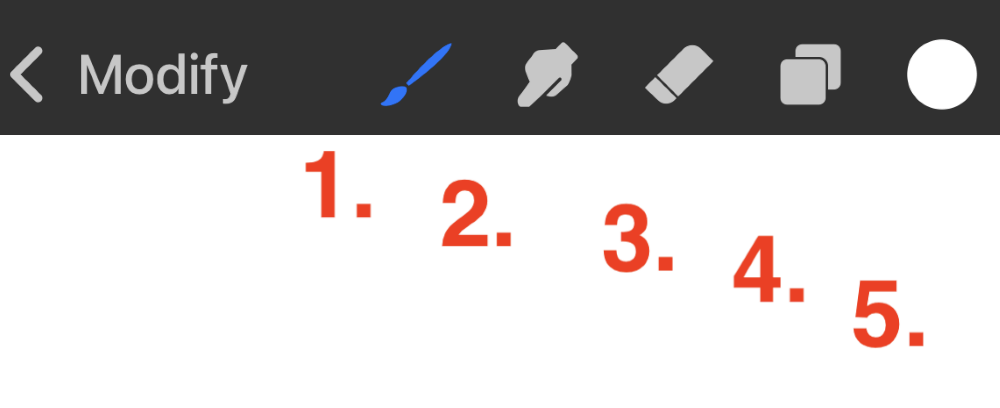
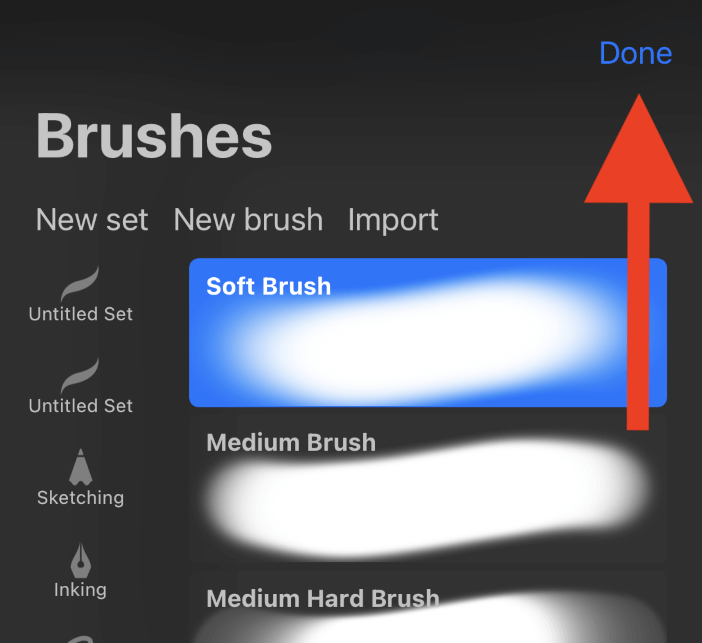
1. Paintbrush Tool (paintbrush icon)
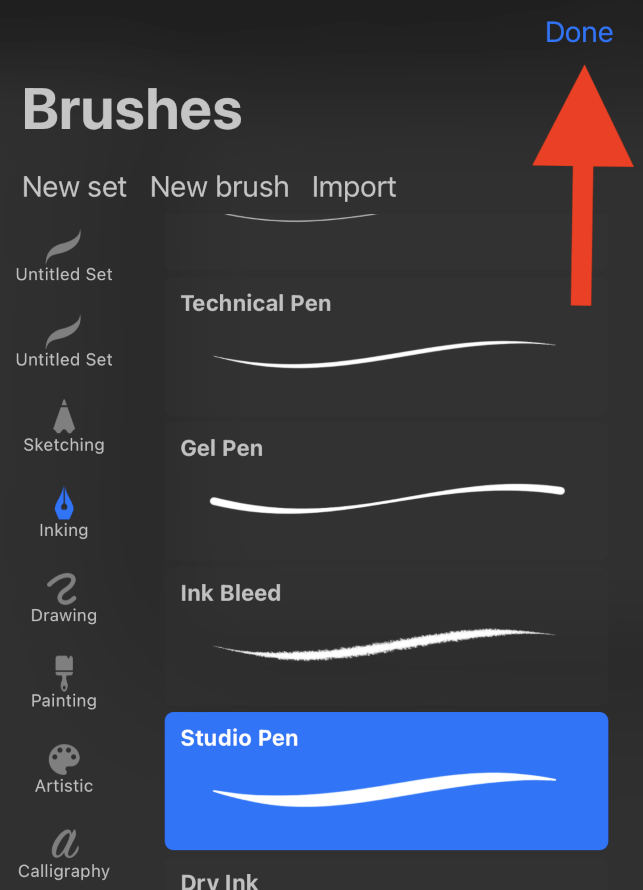
This is where you will select which Brush you want to paint with. Procreate Pocket comes with over 150 preloaded brushes to choose from that include different palette options like Inking, SprayPaints, and Luminance. To activate your desired brush, tap on it once and select Done.
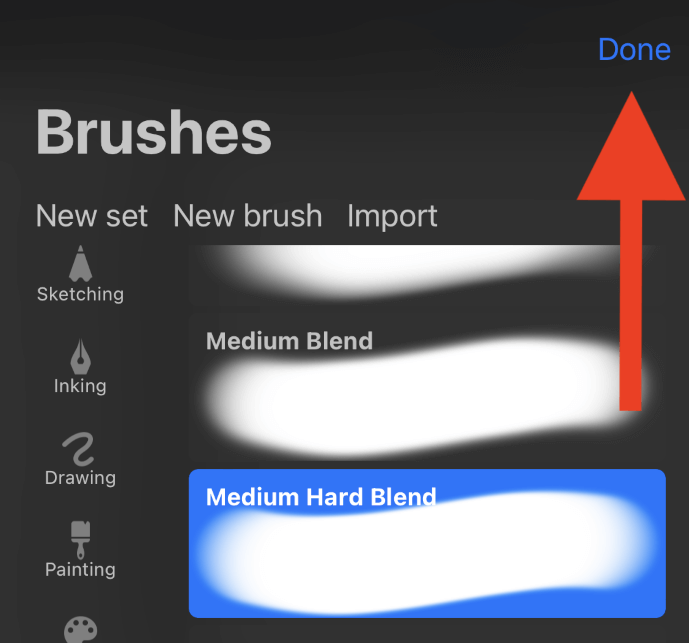
2. Smudge Tool (index finger icon)
This tool allows you to choose any brush and use it to blend existing colors in your canvas. A popular pallet to use for blending is the Airbrush palette as it allows you to blur, smudge and blend your artwork with full control. Choose a brush and tap on Done to activate it.
3. Eraser Tool (eraser icon)
This tool allows you to erase unwanted elements from your canvas. You can select any brush to do this depending on what effect you are creating. Choose the brush you would like to use by tapping on it once and then selecting Done.
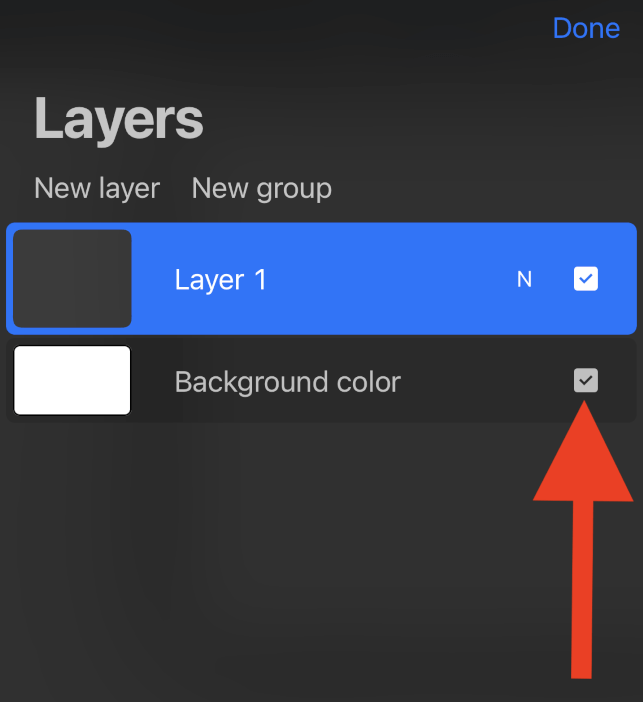
This is where you can view, add or delete any layers within your canvas. You can also deactivate a layer or your background by unticking the box to the right of the menu or duplicate a layer by swiping left. To close this menu, tap on Done.
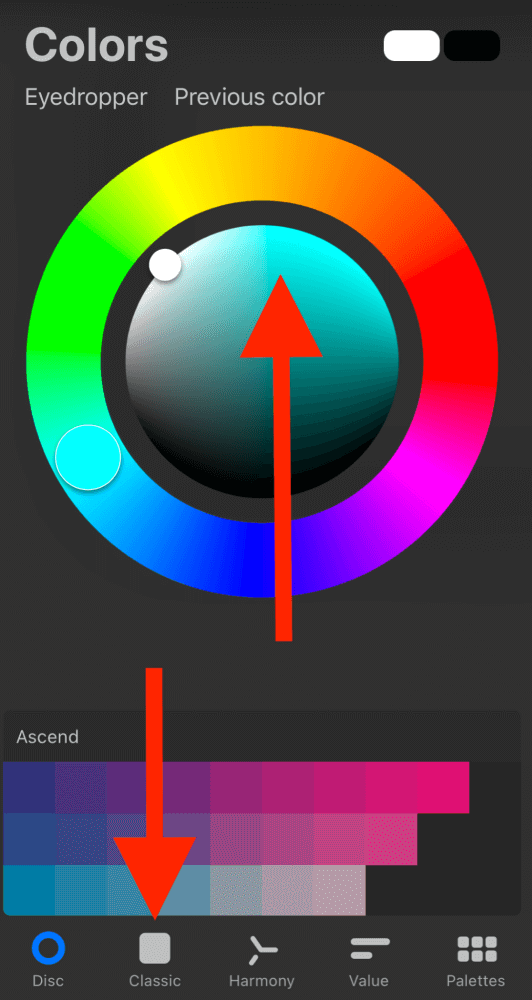
5. Color Disc (color wheel icon)
This is your Colors menu. Here you will manually select whichever color you want to use by dragging your finger or stylus around the color disc. This color will now be active on your paintbrush and if you choose to drag and drop color onto your canvas to fill it.
You also have a selection of preloaded color palettes to choose from if you don’t want to manually select a color. These can be accessed by tapping on them at the very bottom of your Colors menu screen.
Your other commonly used functions will be in the Modify menu. To open this menu, tap on Modify in the top left-hand corner of your canvas screen, and a drop-down menu will appear. Here you will have four different menu options to choose from. Here is what they offer:
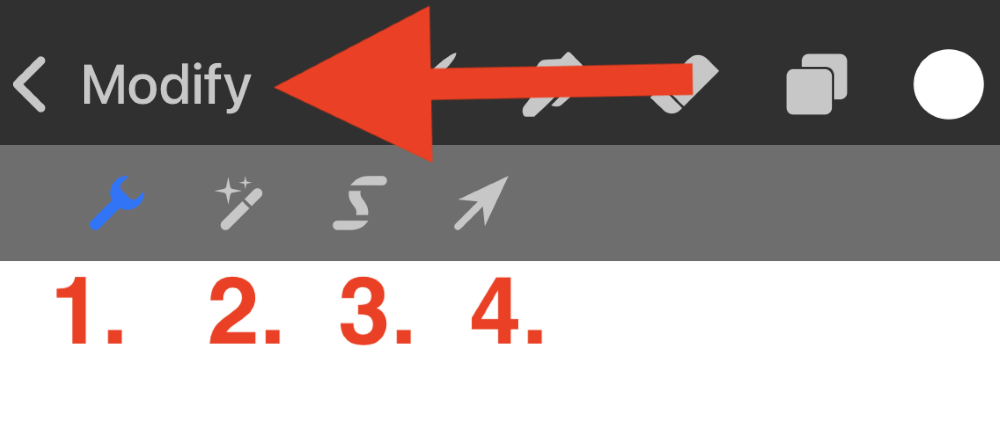
1. Actions Tool (wrench icon)
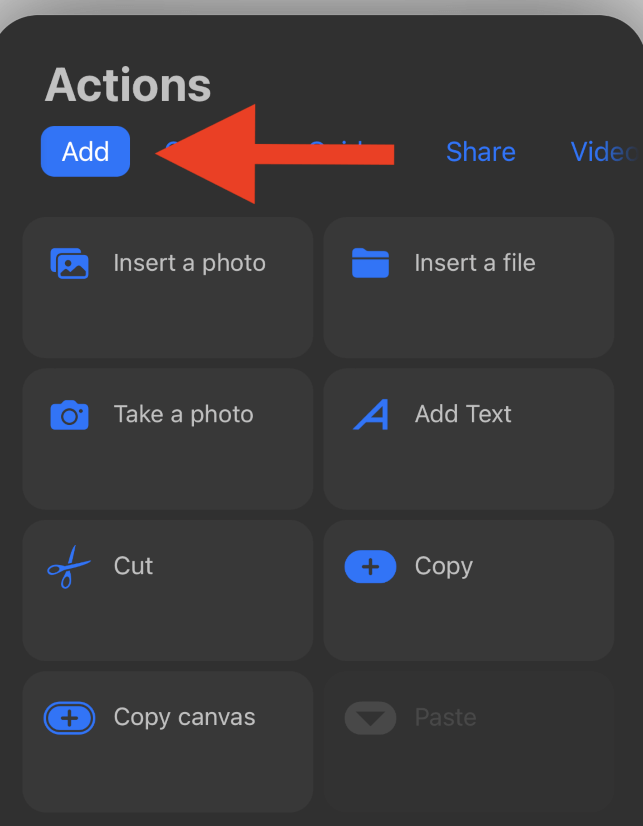
Your Actions tool menu is very commonly used as it gives you so many settings and functions to choose from. In this menu you will be to use access the following:
Add
Here is where you can Insert a Photo or File into your canvas, Add Text and also cut or copy your entire canvas or individual layers.
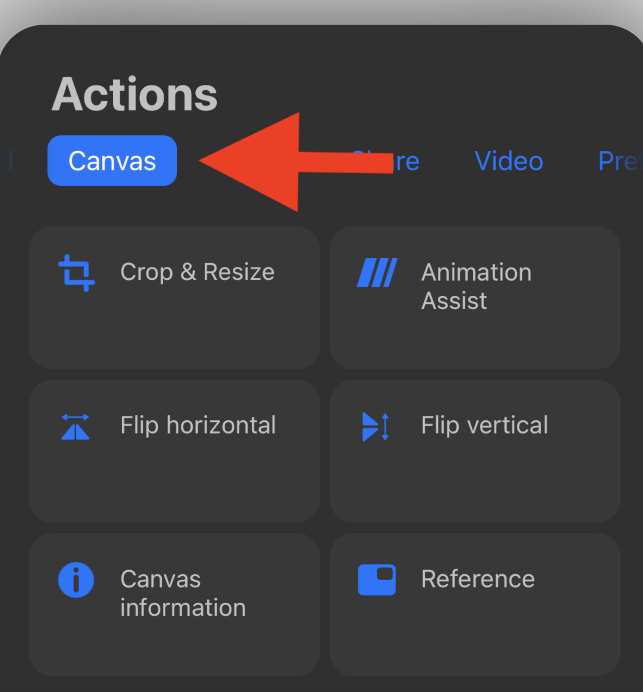
Canvas
In this menu, you can edit your canvas by cropping or resizing it. You can also view the canvas information and dimensions or activate your Animation Assist tool.
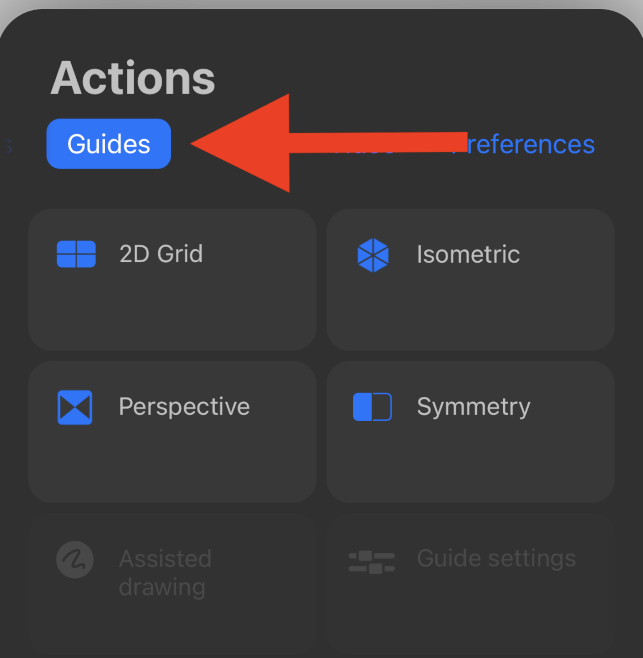
Guides
In this menu, you can activate your Drawing Guide, Symmetry Tools, and Assisted Drawing feature.
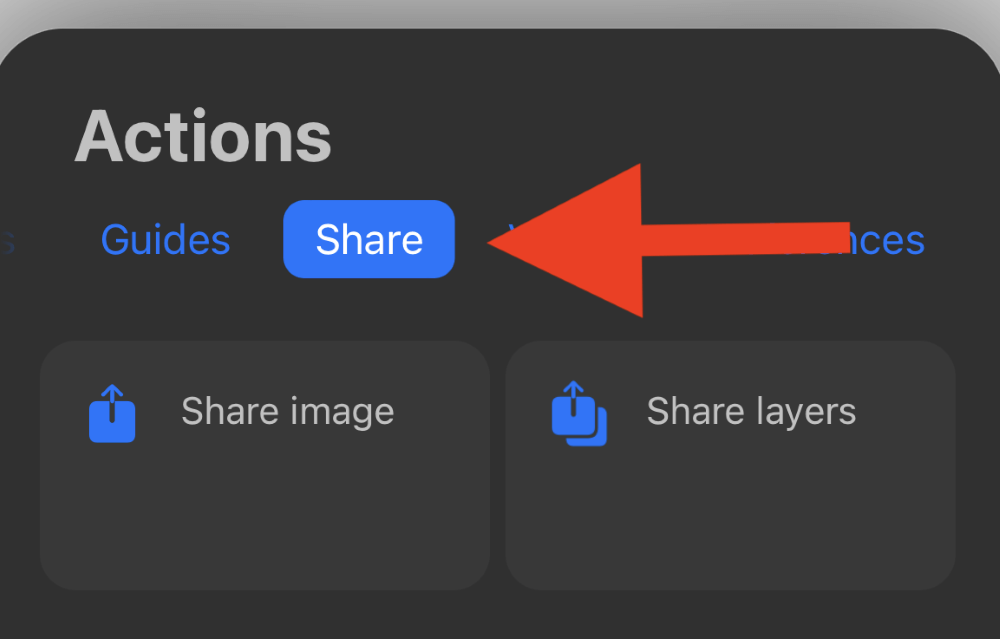
Share
Here is where you will be able to export and save your artwork by selecting the Share setting. This will allow you to export your canvas as whichever file type you choose (PNG, JPEG, PDF) and save it directly to your iPhone.
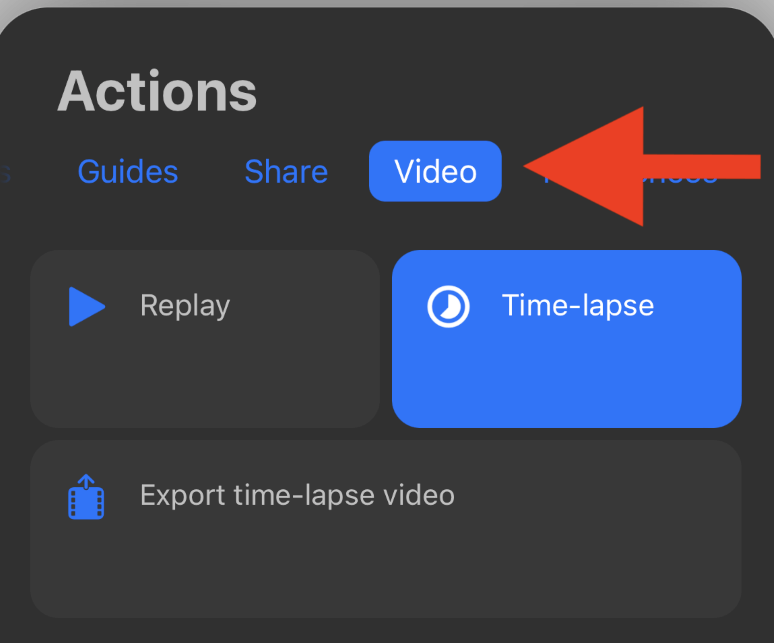
Video
Just like the Procreate app, Procreate Pocket also automatically begins a timelapse video every time you start working on a canvas. In this menu, you can view, export, and stop your timelapse video from recording.
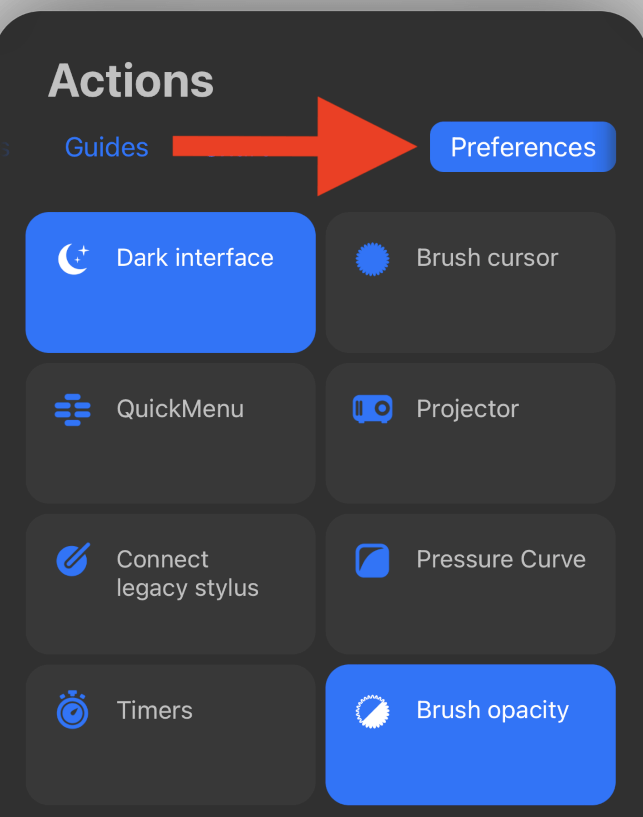
Preferences
In this menu, you can make any changes to your user interface settings, adapt your Pressure Curve, and even connect your device to an AirPlay Device or Projector.
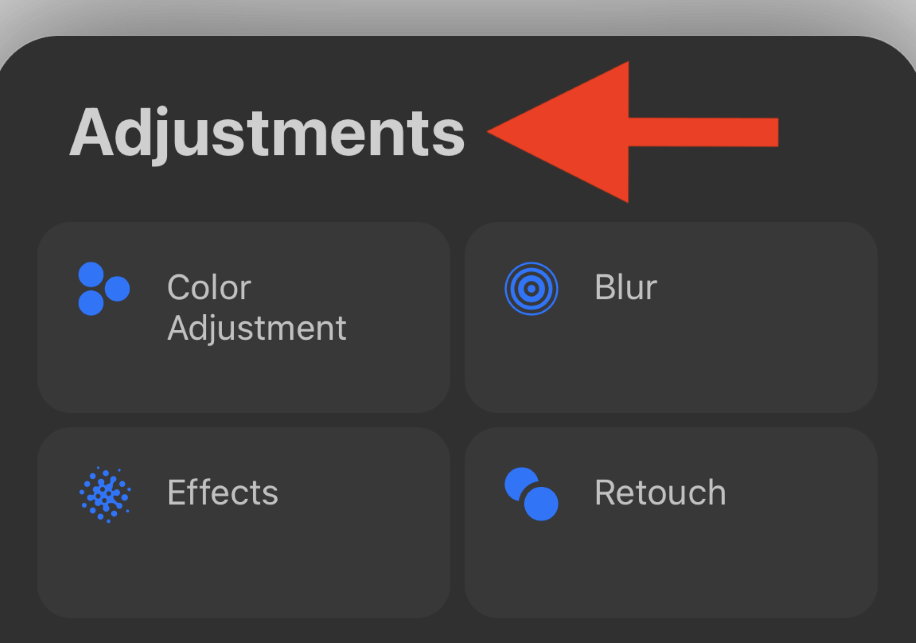
2. Adjustments Tool (magic wand icon)
In this menu, you have a wide selection of adjustments you can make to your individual layers. You can adjust the color and effects by using this tool or even blur or retouch your layer from here.
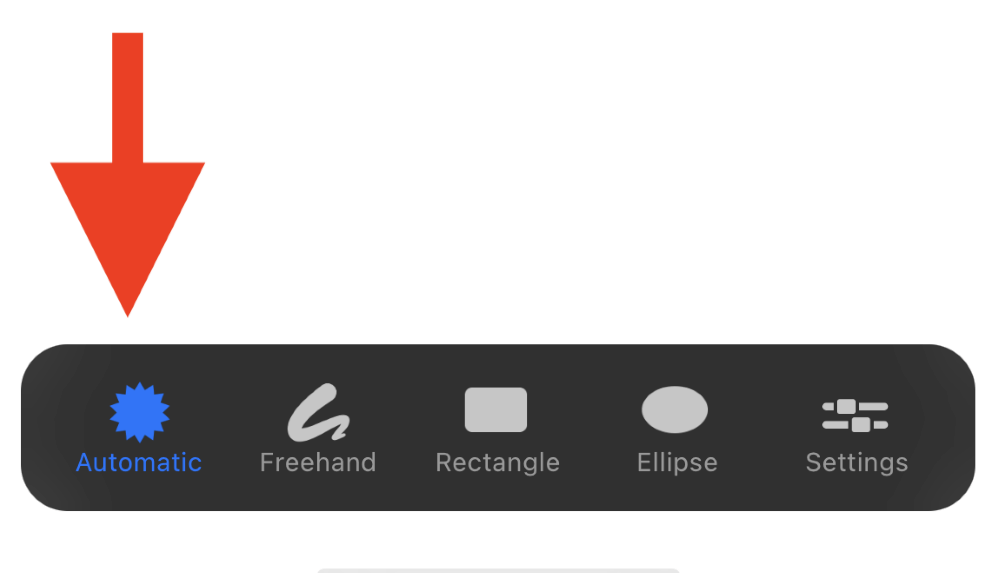
3. Selection Tool (S shape icon)
As the name suggests, this is where you can create selections of your canvas. You can either freehand draw the selection you want or use the different shape options to create more symmetrical, technical selections.
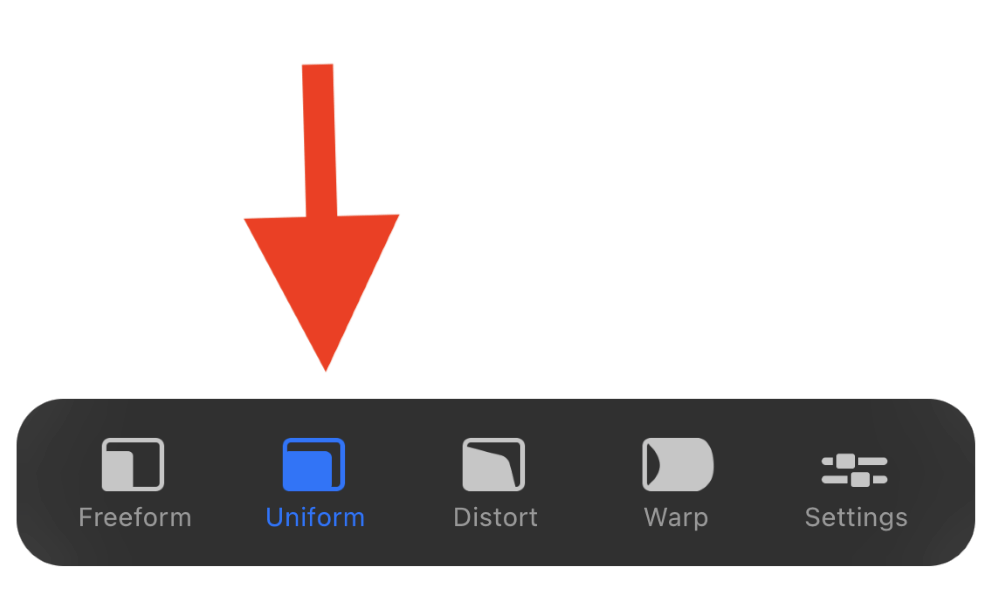
4. Transform Tool (cursor icon)
This tool will allow you to select your layers or shapes and move them around your canvas. You can choose from Freeform, Uniform, Distort or Warp depending on what effect you would like to add to the selected layer.
When finished using any of your Action Tools, simply retap on the tools’ icon to deactivate it. Similar to the Procreate app, if you want to reverse or undo any of these actions, double-finger tap on your screen to do so.
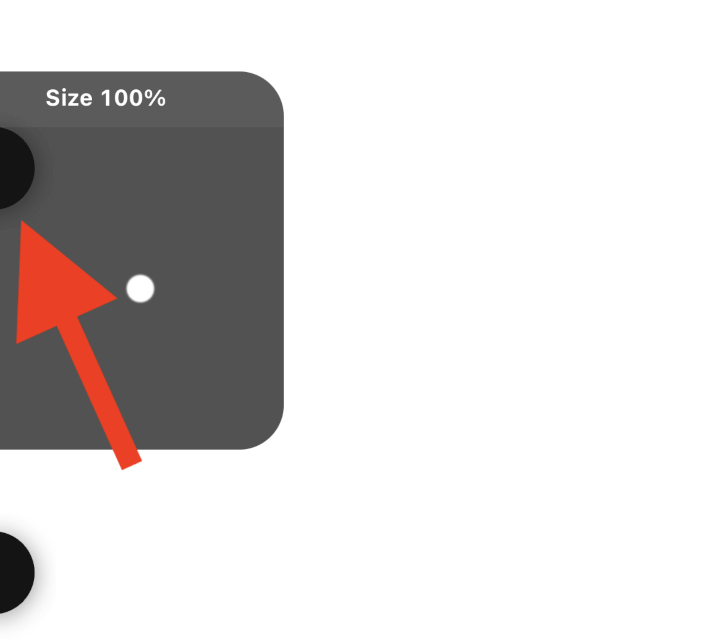
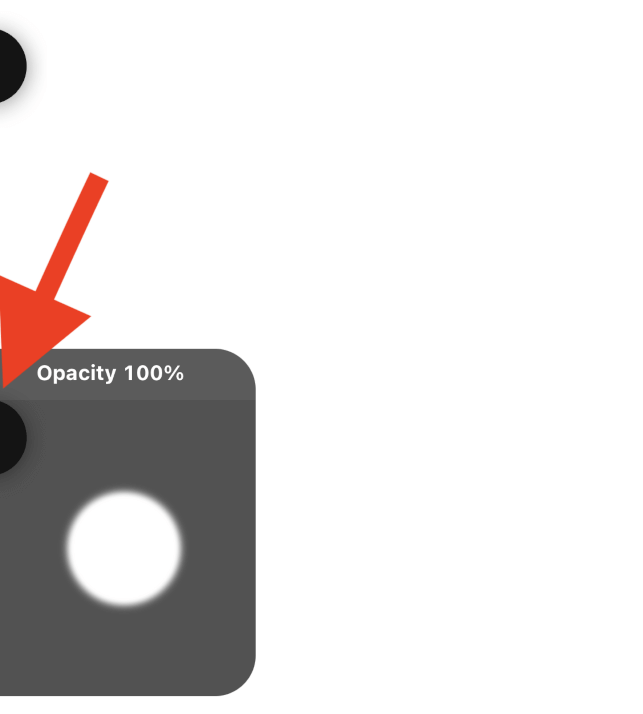
Another unique aspect of the Procreate Pocket user interface is the Sidebar. These are the two black semi-circles that appear to the very left of your screen.
Tapping on the top semi-circle and sliding up or down will adjust the size of your paintbrush.
Tapping on the bottom semi-circle and sliding up or down, will adjust the Opacity of your selected paintbrush.
FAQs
Below is a selection of your frequently asked questions about the Procreate Pocket app and its functions. I have briefly answered them for you:
Is Procreate Pocket the same as Procreate?
Not exactly but the two apps do share quite a few similarities. Procreate Pocket is specifically designed for use on iPhones while the original Procreate app is designed specifically for use on an iPad. However, they both offer almost the exact same features.
Can you use Procreate Pocket without Apple Pencil?
Yes. You can use Procreate Pocket without an Apple Pencil by using your finger on your touchscreen device instead.
How to undo in Procreate Pocket?
As Procreate Pocket does not offer an Undo button, your only option is to use the double-finger tap to erase or undo any actions within the app.
Can I download Procreate Pocket for free?
There is no free download version of the Procreate Pocket app. You must purchase it for $5.99 from the app store in order to be able to download and use it on your device. Downloading any “free” software is highly risky and can cause viruses on your device.
Final Thoughts
Similar to most movie sequels, I was slightly skeptical when the Procreate Pocket app was first released as I could not fathom an iPhone offering the same quality and choice that the original app did. But I was pleasantly surprised to discover its vast capabilities.
Now that we have covered the basics of the Procreate Pocket app’s user interface, I highly recommend delving in and starting to get used to the app. Its only downfall is the smaller screen size so it may take some extra work to get used to when creating digital artwork.
Do you have much experience using the Procreate Pocket app? Share some of your work below in the comments section.