
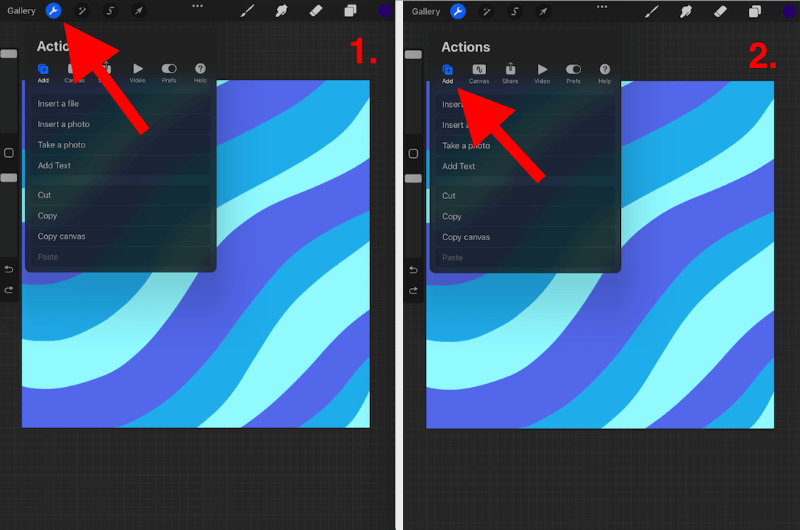
To add text in Procreate, first click on the Actions tool (wrench icon) in the top left hand corner of the screen of your open canvas. Then select ‘Add’ and then ‘Add Text’. A text box will appear and you will have the ability to type the words you need and edit their font, size and style with a few taps of the screen.
I’m Carolyn and one of the reasons I use Procreate for designing book covers and posters is their awesome text function. I’ve been adding text to design work for my clients for over three years and today I’m going to show you the ins and outs of this very useful feature.
In this post, I’ll walk you through how to not only add text to your canvas but also some handy design techniques you can use to bring your design to life and have you feeling like a professional graphic designer in no time.
All you need is your Procreate app open on your chosen device and a fresh canvas to practice on. Let’s get started.
Table of Contents
Key Takeaways
- You can add text to any canvas in Procreate.
- A layer is used every time you add text and can be selected, edited, and deleted as such.
- The text function is particularly useful for designing book covers, posters, invitations, labeling diagrams, or hand tracing lettering.
- You can also use the Add Text function the same way shown below on the Procreate Pocket app for iPhone.
How to Add Text in Procreate
Procreate introduced this function to their app in 2019. This gave the app an upper hand as users now had everything they needed to create a finished piece of design work within the app. And to top it all off, they made it incredibly user-friendly and easy to do. Thanks, Procreate team!
Follow these steps to add text to your canvas:
- Click on the Actions tool (wrench icon).
- Click on the Add tool (plus symbol).
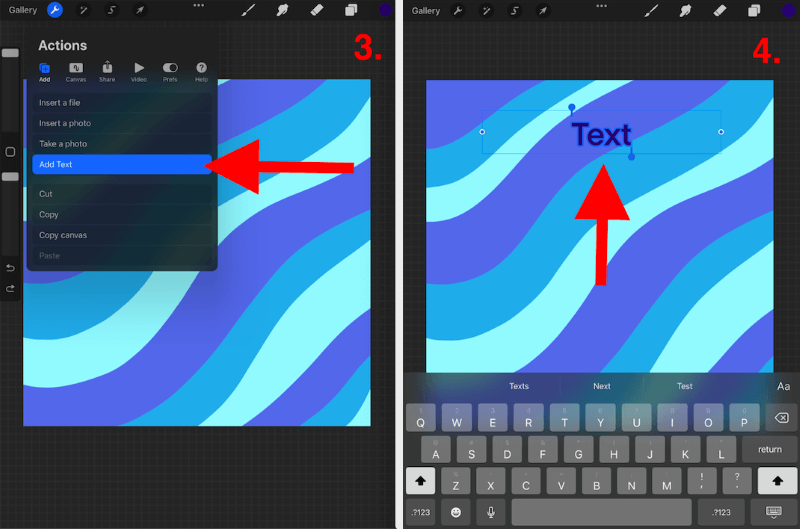
- Select Add Text.
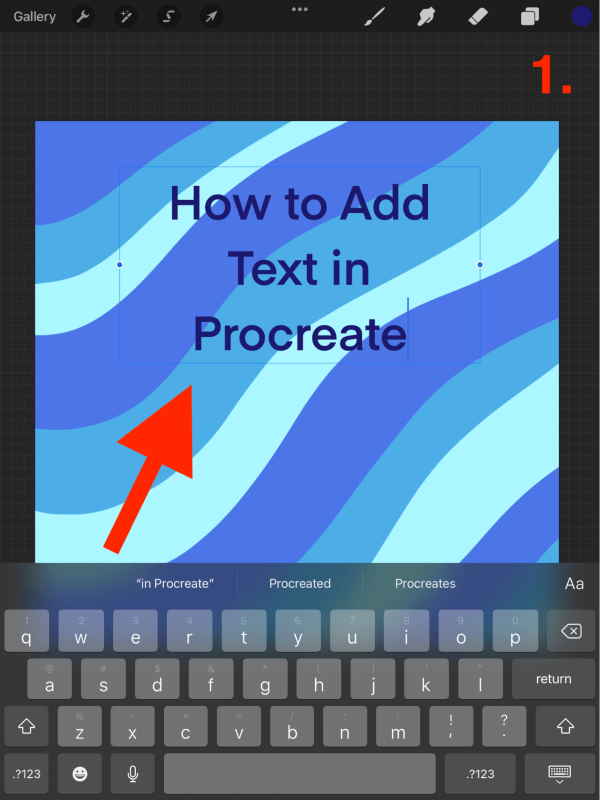
- A Text Box will appear and your keyboard will open. Type in the word/s you wish to use.
How to Edit Text in Procreate
Not only can you add text to your canvas, but Procreate has given users a number of options in order to create a variety of different styles for your text. Here are the steps to edit your text in your canvas:
Step 1: Double tap on the text you have just added, this will select and highlight your text.
Step 2: A small tool box will appear above your text. Here you have the option to:
- Clear, cut, copy, paste your text
- Align your text
- Switch your text box from horizontal to vertical
- Change the color of your text
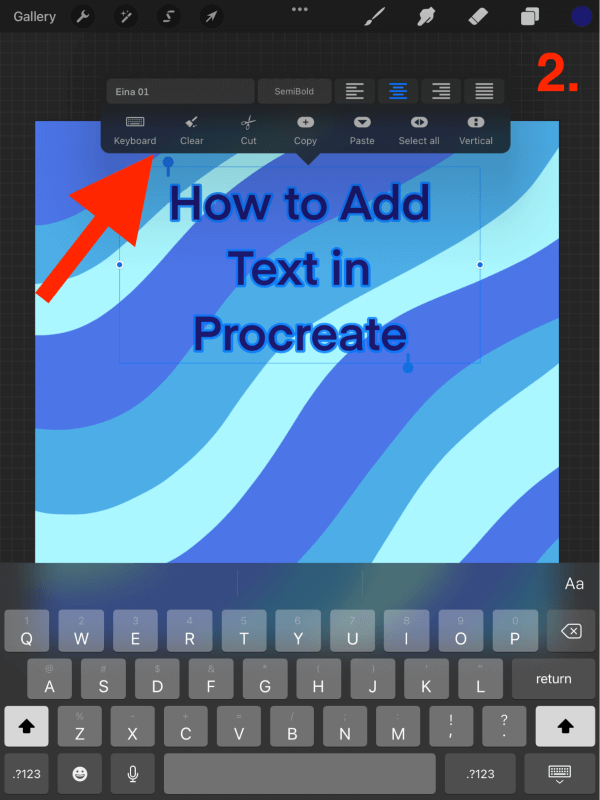
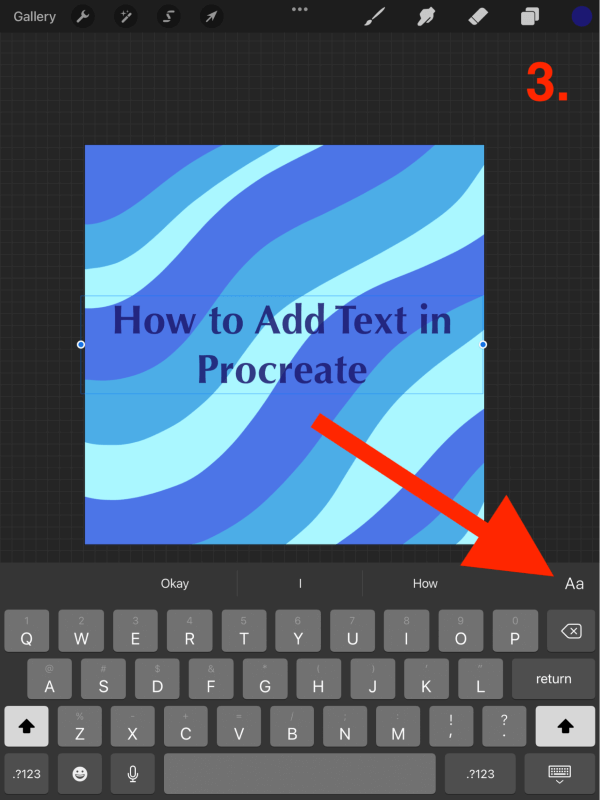
Step 3: In the top right corner of your keyboard, tap on the Aa to get a bigger view of your tool box, this gives you a better view of your font options. Here you have the option to:
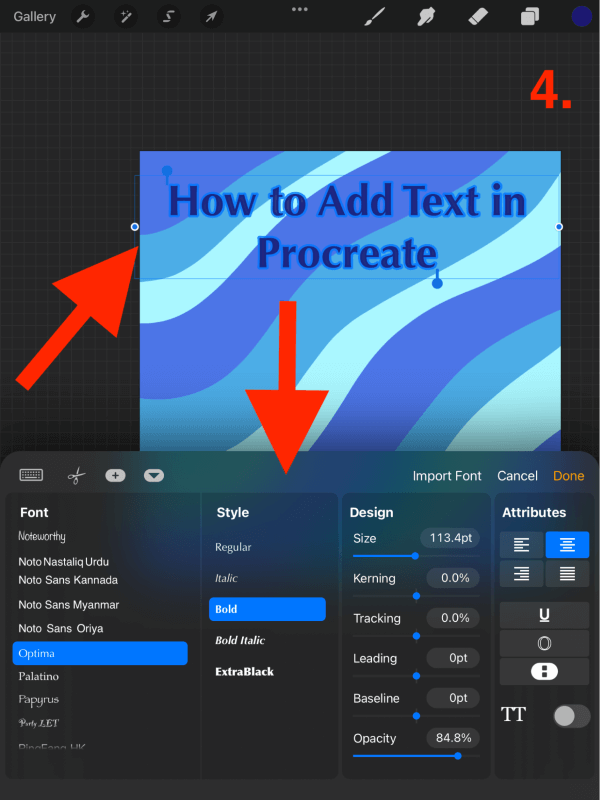
- Change your font to any of the preloaded fonts available within the app
- Change your text style (Italic, bold, etc)
- Change your text design. This is my favorite function as you have so many easy ways to create eye-catching text formats. (Size, kerning, opacity, etc)
- Change your text’s Attributes (Align, underline, capitalize letter,s etc)
Step 4: Once you have added and edited your text, you can use your finger or stylus to move the text around the canvas until you achieve the placement you want.
Procreate has also created a series of video tutorials on YouTube. This one in particular breaks down how to add and edit your text:
FAQs
Below are some common questions related to adding text in Procreate. I will briefly answer each of them.
How to Add Text in Procreate Pocket?
Great news everyone… The Procreate Pocket app is almost identical to the iPad-friendly version which means it uses the same method to add text to your canvas. You can follow the exact same steps listed above in order to add text to your canvas in Procreate Pocket too.
What If The Font I Want Isn’t Available on Procreate?
Procreate offers all of the same fonts that are available on iOS. This means you have access to almost a hundred different fonts. You also have the ability to import fonts directly from your device downloads. In order to add the font you want, all you need to do is open up your text layer, and in the top right hand corner select Import Fonts.
How Do I Delete Text in Procreate?
You can delete any text layers the same as you would delete any other layers. Open up your Layers tab and swipe left on the text layer you want to delete and tap on the red Delete icon.
Why Is Procreate Edit Text Not Working?
This is a common yet fixable issue with Procreate, especially after updating the app. On your device, go to Settings and select General. Scroll down to Shortcuts and ensure the toggle is switched to on (green). Sometimes if this flips to off, it will hide the Edit Text tab in the app. Don’t ask me why.
Several Other Tips
Now you know how to add your text in Procreate, what’s next? You would need hours, if not days, to discover all of the cool things you can do with text and lettering in the Procreate app. Don’t have days or even hours to spare? Here are some of my favorite ways to edit your text:
How to Add Shadow to Text in Procreate
This is a really simple way to make your text pop and give it some depth within your design. Here’s how:
- Ensure your text layer is Alpha-Locked. With your Layers tab open, swipe left on your text layer and select Duplicate. This will give you a copy of your text layer.
- Select the shadow color you want to use. This should be either lighter or darker than your original text to create the shadow illusion. Once you have selected your color, select your first text layer and choose the Fill Layer option. This will fill your text with your chosen color.
- Select the Transform tool (arrow icon) and ensure it’s set to Uniform in the bottom tab. Then slightly move your text to the left or right until you achieve your desired shadow effect.
How to Fill a Text Box in Procreate
You can fill your text with color or images and it’s quick and easy. Here’s how:
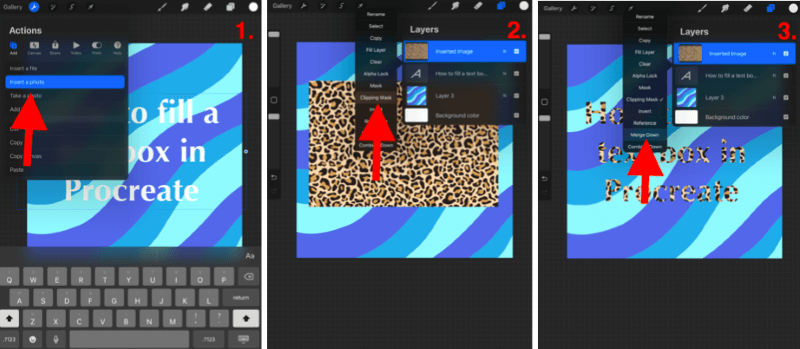
- Under the Actions tab, select Insert a photo. Choose an image from your photos and it will appear in a new layer.
- Ensure your photo layer is on top of the text layer. Select your photo layer, tap on the Clipping Mask option. This will automatically fill your text layer with your image.
- To combine these two layers in order to move your text around your image, select Merge Down. Your text layer is now filled in and ready to be moved.

Final Thoughts
The Add Text feature has really changed the game for Procreate users. It is a simple and effective way to add text to any design. This means not only can you draw and create incredible artwork, but you can use text to transform this artwork into functional designs with a purpose.
Cover image for Instagram Reels? Tick.
Wedding invitations? Tick.
Book covers? Tick.
Want to create your own crossword puzzle? Tick.
The options are endless so if you haven’t already explored this feature, I highly recommend spending a few hours researching the endless possibilities. I guarantee it will blow your mind to see what users can actually do with this feature.
Keep in mind that if there’s something you can’t quite find out how to do, there will be a tutorial online to help you. So don’t be discouraged if you don’t pick it up automatically. There is always more to learn.
Do you have a favorite technique for creating lettering on Procreate? Feel free to leave your comments below and drop any hints or tips of your own that you may have so we can all learn from each other.