
There are two ways you can draw lips in Procreate. For cartoons or caricatures, you can trace over the photograph of the person you are drawing. For freehand sketching mouths, you can use an oval split into quarters to help you perfect the lip dimensions.
I’m Carolyn and I’ve been using Procreate to run my digital illustration business for over three years. When I first started digital drawing, I specialized in portraits of people and pets, so I experimented with many different techniques to create natural-looking mouths, lips, and teeth.
Drawing lips from scratch in Procreate is a challenging task because of the nature of the subject and the simple fact that all lips are different. However, there is a technical way to get you started by being familiar with the basic proportions of the face.
Note: Screenshots are taken from Procreate on iPadOS 15.5.
Table of Contents
Key Takeaways
- You can draw lips easily in Procreate by tracing over an inserted image.
- You can freehand sketch lips in Procreate either from memory or using a photograph as a reference.
- Side view or different angles of lips can be slightly more challenging, depending on your skill level.
- It’s important to identify if the mouth you are drawing is open or closed, as teeth can also be a challenging feature to draw.
How to Trace Lips in Procreate
This is a quick way to draw lips if you are creating a portrait directly from a photograph. This is useful if your subject must resemble the original photograph and it takes the challenging part out of drawing as you are just tracing the original shapes. Here’s how:
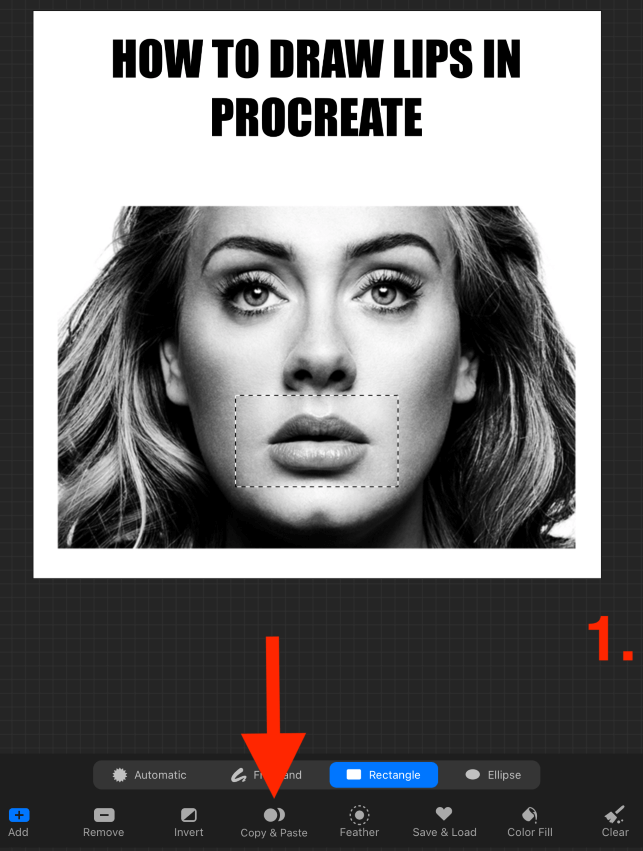
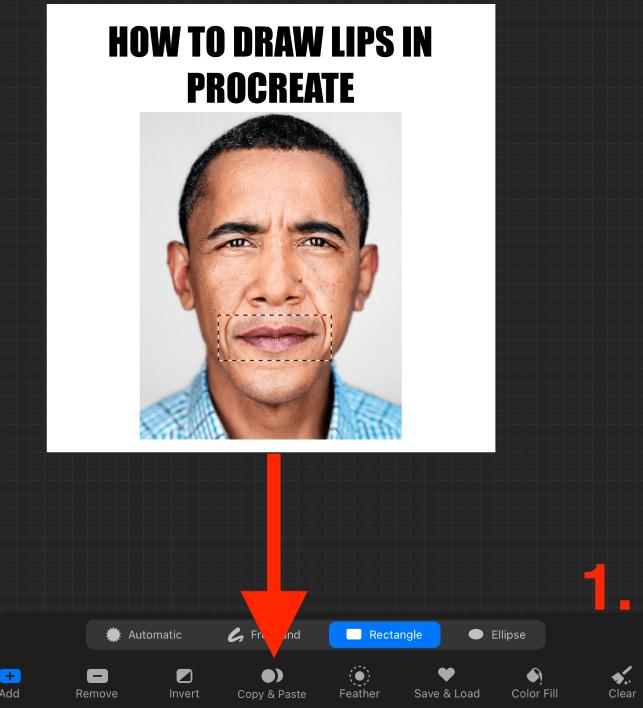
Step 1: Insert the image that you want to trace into your canvas. Use the Transform tool (cursor icon) to isolate the area around the lips and then select Copy & Paste. This will eliminate the area around your original photo so you can focus on the lips.
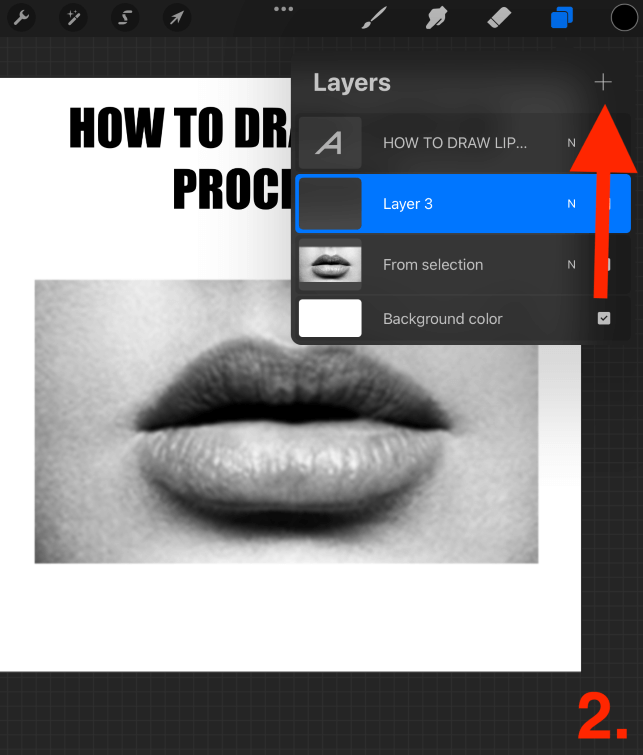
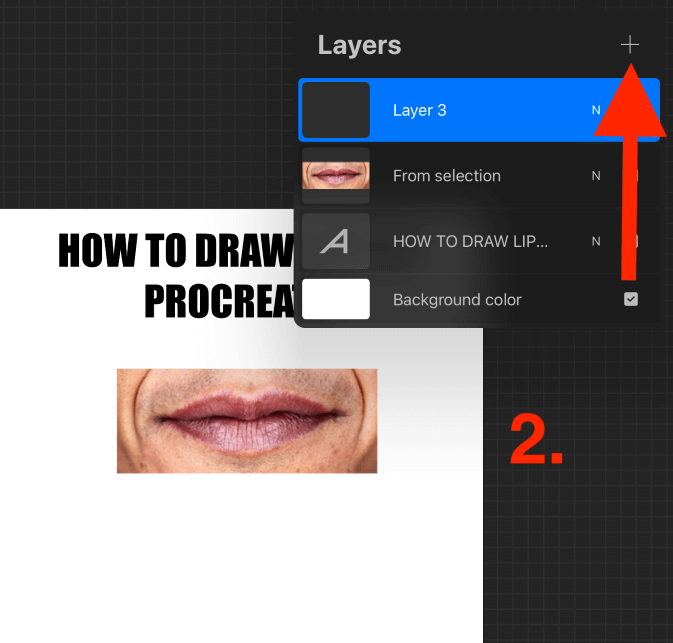
Step 2: Add a new layer on top of your photo layer by tapping on the + symbol in the top right-hand corner of your Layers menu.
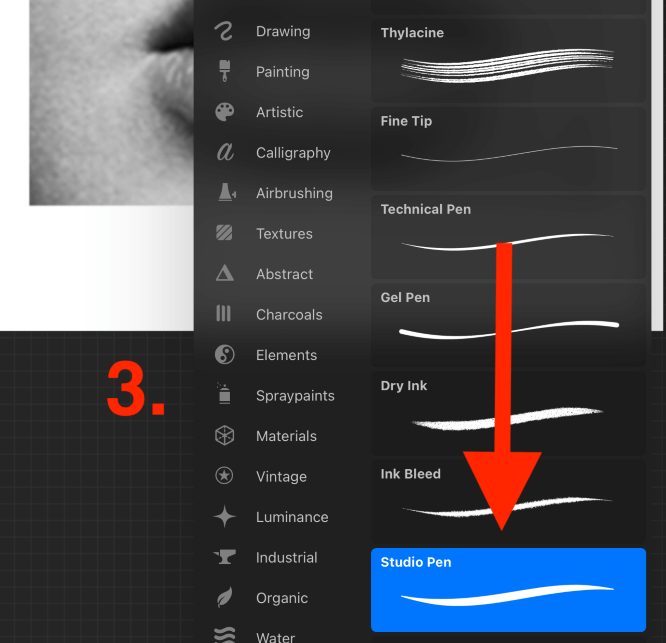
Step 3: Open the Brush Library by tapping on the paintbrush icon. Select the brush that you wish to use for your outline. My go-to brush for caricatures and portraits is the Studio Pen.
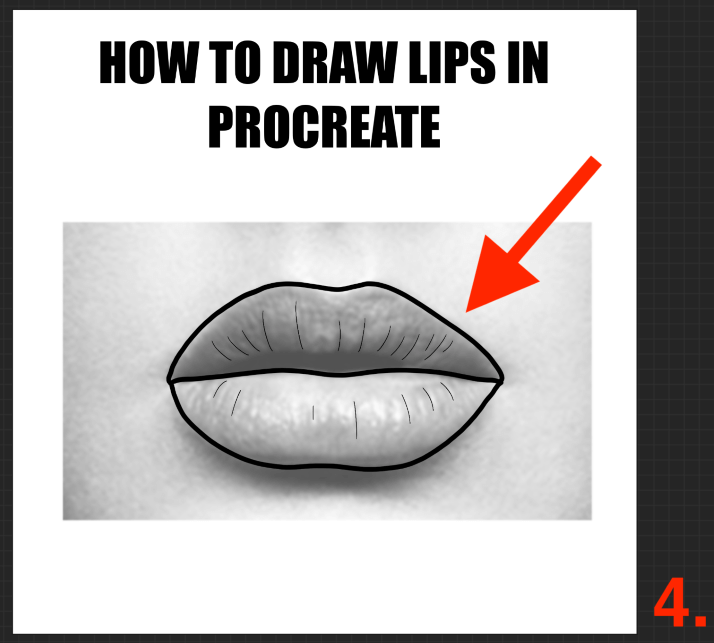
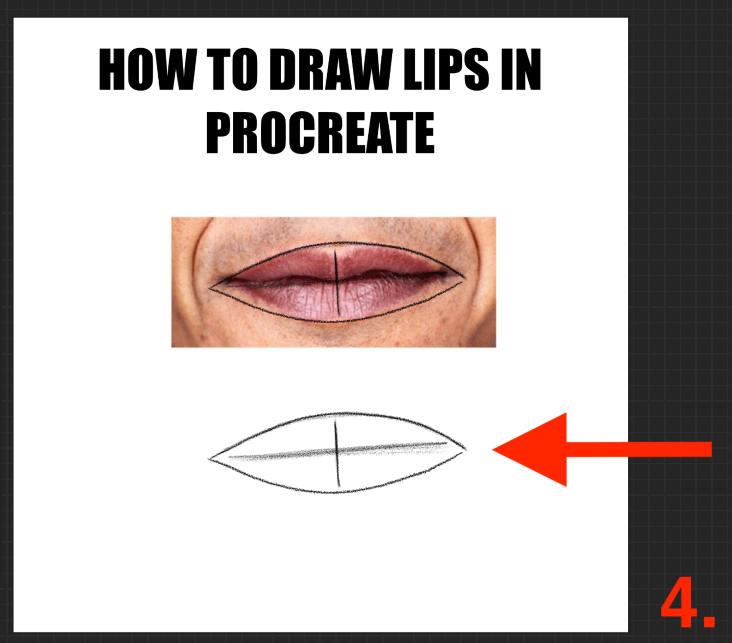
Step 4: Tracing over the image, drawing the most defining lines around the shape of the lips. The most crucial part to get right is the middle line where the two lips connect and the outer shape of the entire mouth.
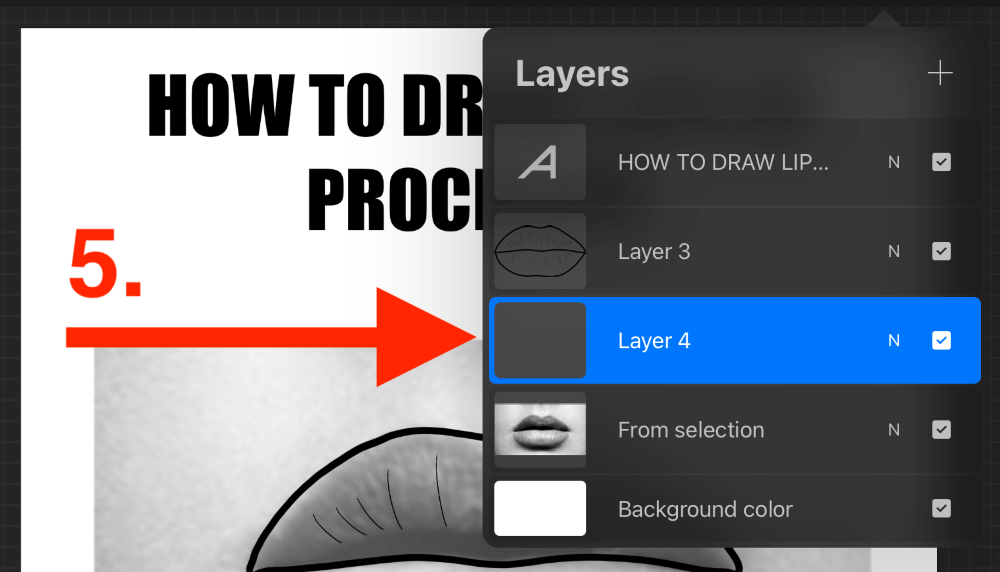
Step 5: When your outline is complete, add a new layer under your outline layer. This will be the layer for adding color to the lips.
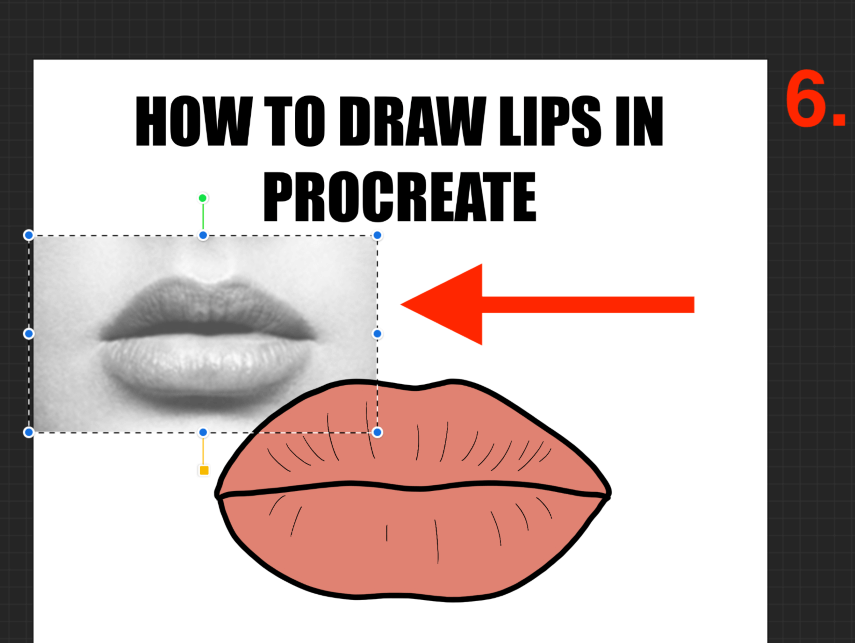
Step 6: Once you fill in the base color of your lips, initiate the Alpha Lock on the layer. Then move the image layer to somewhere visible where you can use it as a reference.
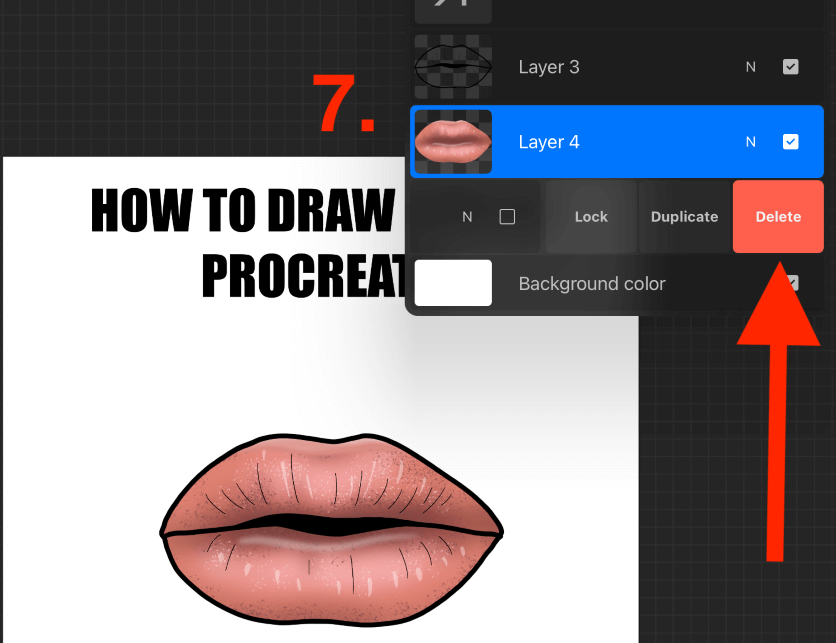
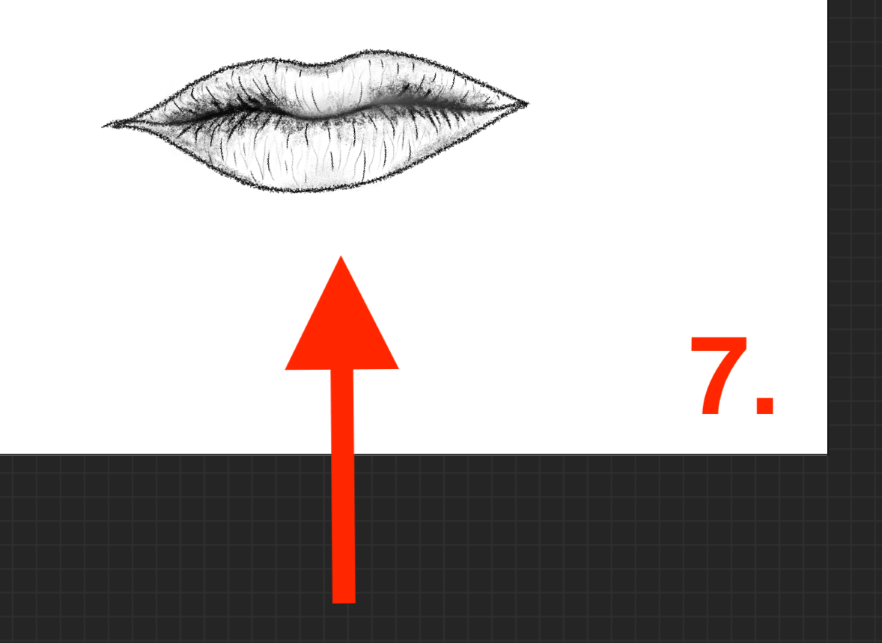
Step 7: Add in the final details of your lips like the shading and color tones. Do this by using the Blur tool, Soft brush, and Gaussian Blur. Once you are done adding the details, delete the original image layer by sliding it to the left and selecting Delete.
Pro Tip: Lower the opacity of the photograph layer to make it easier to see fine lines and details when you are tracing the image.
How to Draw Lips from Scratch in Procreate
This method is for the more confident drawer and one who wants to use their own drawing skills rather than having to rely on tracing. This is great for practicing the proportions of the face when sketching. Here’s how:
Step 1: Insert the image that you want to trace into your canvas. Use the Transform tool to isolate the area around the lips and then select Copy & Paste. This will eliminate the area around your original photo so you can focus on the lips.
Move your image somewhere visible but out of the way on your canvas so you can use it as a reference.
Step 2: Add a new layer. This will be the layer that you sketch/draw the lips.
Step 3: Open your Brush Library and select a sketching brush that you would like to use. I chose the Procreate Pencil as it most resembles a pencil.

Step 4: Start by drawing an oval shape and using a cross, split it into quarters. I did this on both the image and my canvas so you can better understand the process. This is optional.
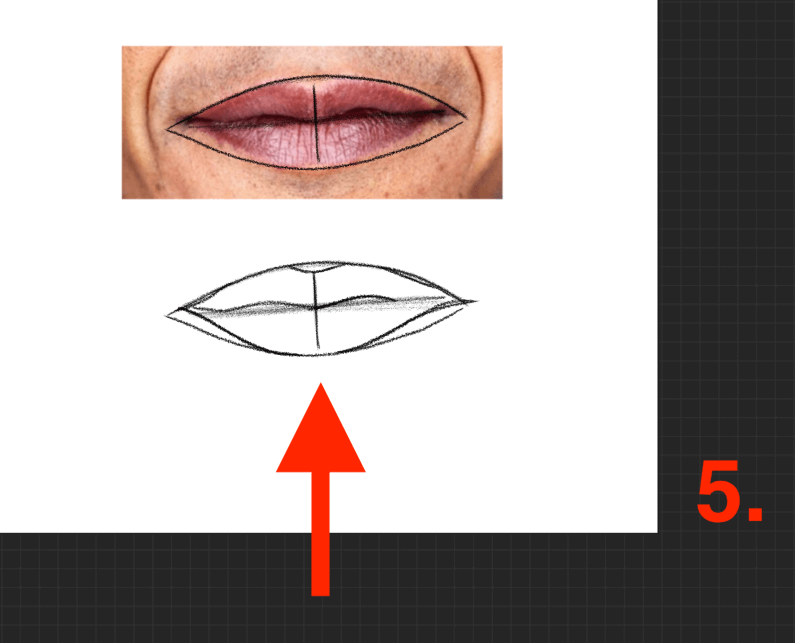
Step 5: Start defining the shape of the mouth even further by adding a bow shape in the middle of the mouth. You can use a similar bow shape to define the upper lip shape beneath the nose too.
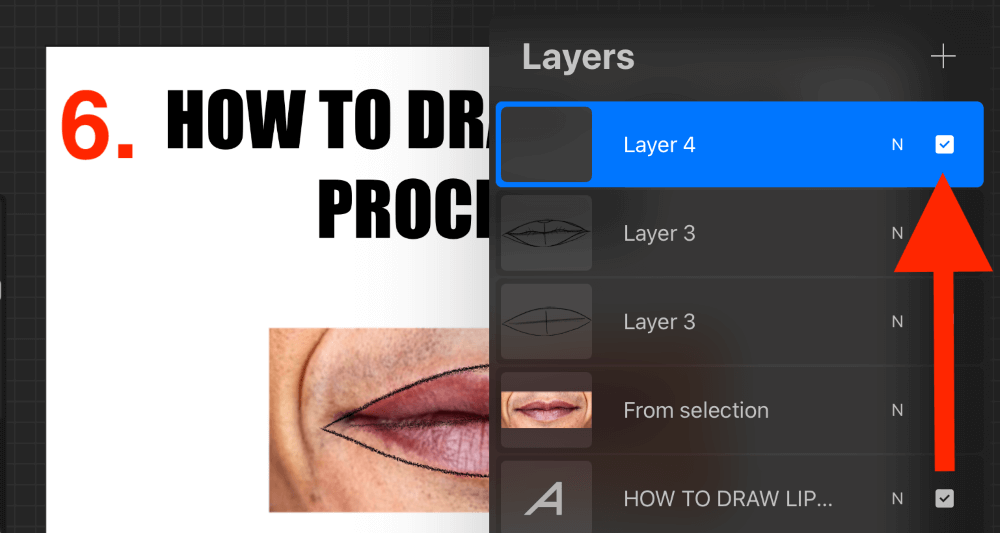
Step 6: Once you are happy with the basic shape of the lips, add a new layer on top of your rough sketch.
You can use this layer to clean up your rough sketch and add in the final details and shading of the lips. Once you are finished, you can delete the image layer and the rough sketch layer to clear up space in your Layers menu.
Pro Tip: You can also use the oval measurement when drawing the side view of lips by adjusting the cross line to one-third of the mouth instead of in the center.
FAQs
Here is a selection of your frequently asked questions about drawing lips in Procreate.
How to make lips look realistic in Procreate?
You can make lips look more realistic by adding shades and tones.
How do you draw a lip structure?
I like to use the oval method. This is by drawing a horizontal oval and drawing a cross smack bang in the middle of the oval, therefore dividing it into four equal quarters.
How to make lips glossy in Procreate?
In order to make lips look glossy or shiny in Procreate, I like to use the Studio Pen with low opacity to create white color highlights that depict the reflection of light on the lips. Try adding a couple of light white lines or highlights to your lips.
How to color lips in Procreate?
You can identify the skin tone of the person’s face. Then sliding the color disc ever so slightly towards the red or pink area will give you a more rosy version of their skin tone. This usually resembles a realistic lip color.
How to draw cartoon lips in Procreate?
When creating dramatic or caricature-like lips, start with the basic lip shape and then enhance the outline of the entire mouth and use more striking colors to achieve a more cartoon look of the lips.
Final Thoughts
Drawing and sketching freehand of any kind is truly a difficult skill to master, especially when it’s digital drawing. If you are starting from scratch, I recommend using the tracing method shown above until you’re comfortable enough to start some freehand sketching afterward.
This is one of the most common things that people want to learn how to do and it is not a quick thing to learn. Make sure you dedicate a good amount of time to this topic and just keep practicing. Eventually, you will be able to draw lips with your eyes closed. I promise!
Do you draw lips in Procreate? Leave your examples in the comments section below.