
Tap on the Adjustments tool (magic wand icon). In the drop-down menu, choose from one of the three blurring tools- Gaussian Blur, Motion Blur, or Perspective Blur. Adjust the levels accordingly. When you’re done, tap on the Adjustments tool again to close it.
I’m Carolyn and I’ve been using Procreate to run my digital illustration business for over three years. Because I work on the app all day long, I have to be familiar with all of the different tricks and tools that it has to offer in order to ensure that I keep ahead of the game.
Procreate offers three different options when it comes to blurring. Each one of them provides something different depending on what effect you are looking for. This is the quickest way to blur a large area or layer of your canvas. Today, I’m going to show you how.
Note: Screenshots are taken from Procreate on iPadOS 15.5.
Table of Contents
Key Takeaways
- There are three blurring tools to choose from in Procreate.
- Access to the blurring tools is through the Adjustments menu.
- This is a great way to evenly blend or blur a large area or layer within your canvas.
- You can also blur and blend in Procreate by using the Smudge tool and selecting a blur brush.
- This tool is useful for creating depth, shifting focus, and blending colors together.
How to Blur in Procreate – Step by Step
If you want to blend or blur an entire layer, ensure your chosen layer is active. If you want to blur a shape or area, ensure it is active and Alpha Locked to isolate the area you want to blur. Then you can start to blur. Here’s how:
Step 1: Open your Adjustments menu by tapping on the magic wand icon. Scroll down and tap on Gaussian Blur, Motion Blur, or Perspective Blur.
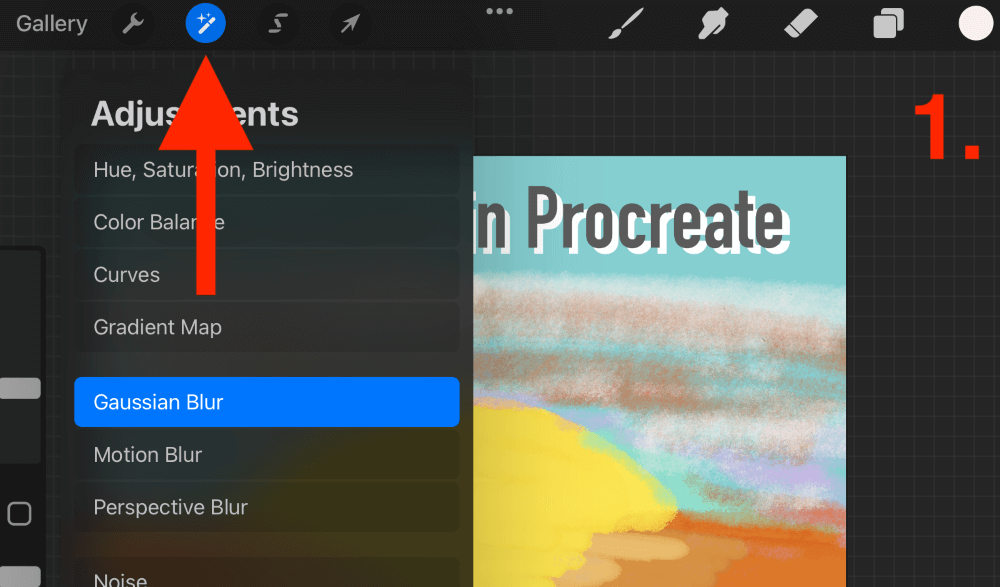
Step 2: Choose a blur style. Here’s a quick guide on the three different styles of blurring effects.
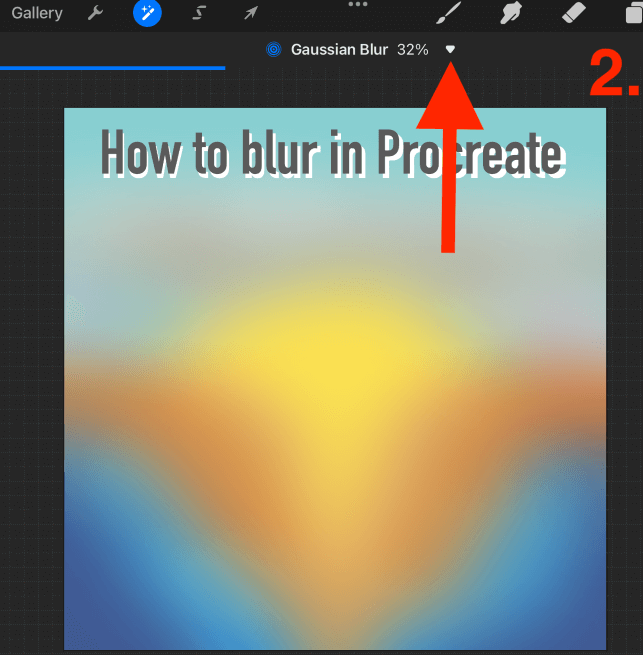
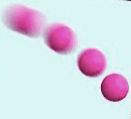
Gaussian Blur blends and blurs your entire layer together evenly.
Slide your finger or stylus to the right until you achieve the right percentage of blur you desire. You can choose to blur by Layer or by Pencil by tapping the little arrow to the right of your Gaussian Blur percentage display.
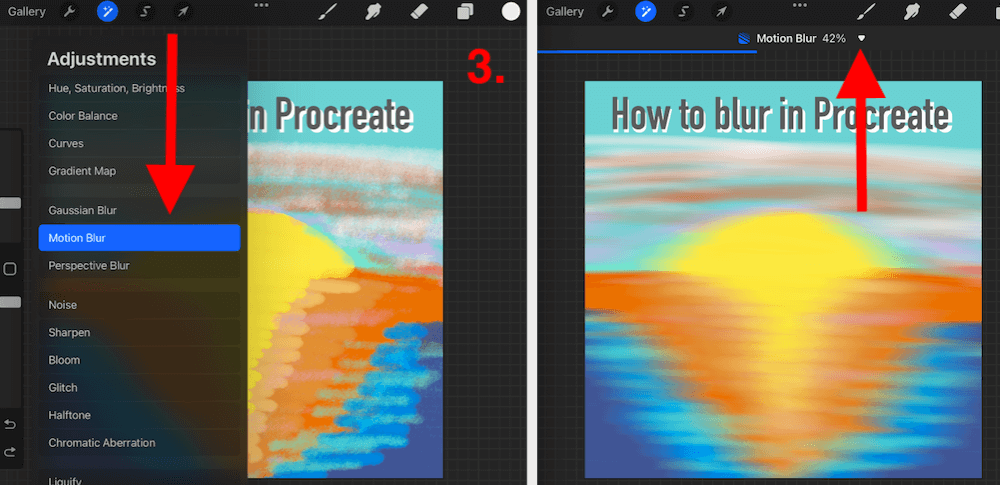
Motion Blur applies movement to your blur like an action shot.
Select the Motion Blur from the Adjustments menu. Slide your finger or stylus to the right until you achieve the right percentage of a blur. You can choose to blur by Layer or by Pencil by tapping the arrow to the right of your Motion Blur percentage display.
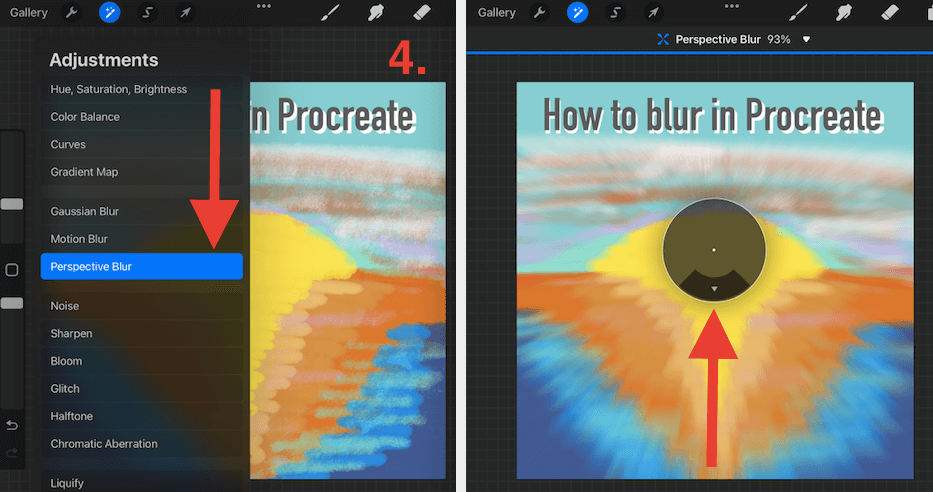
Perspective Blur blurs from and in a certain direction of your choosing.
Select the Perspective Blur from the Adjustments menu. Move your circle dial to wherever you want the blur direction to focus and then adjust your arrow to the right direction.
Slide your finger or stylus to the right until you achieve the right percentage of a blur. You can choose to blur by Positional or by Directional by tapping the arrow to the right of your Perspective Blur percentage display.
Pro Tip: These are the three mainstream ways that you can blur and blend in Procreate depending on your desired effect. You can also blur and blend in Procreate using the Smudge tool (index finger icon) if you need to focus on a smaller area of your canvas.
Examples of Blur Tool
There are many reasons you may need to use this tool and there’s a variety of cool results you can achieve by using it too. Below I have attached some of my favorite examples of other Procreate artists who have used this method to create unique effects in their artwork.
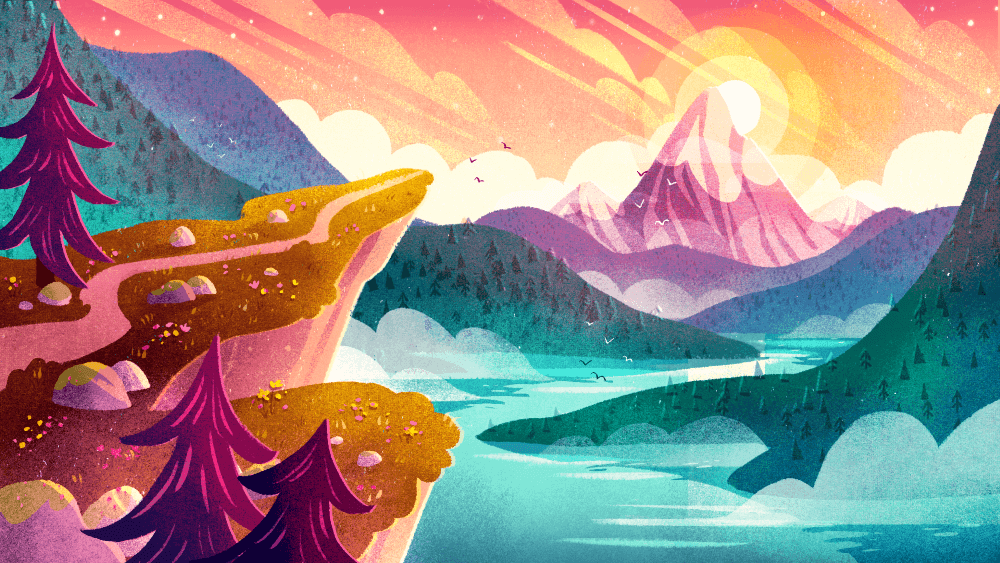
This landscape by Sarah Holliday shows how she uses the Gaussian Blur tool to create shadow and depth in the sky in the background, the mountains in the middle ground, and the trees in the foreground.
Art With Flo has an awesome video tutorial that shows you how to add Motion Blur in moving objects like their example above.
Theologie uses the Perspective blur to create cool lettering effects in this video tutorial.
FAQs
Here is a selection of your frequently asked questions about how to blur in Procreate.
How do I blur a specific area in Procreate?
You can use the Smudge tool to blur a specific area in Procreate or you can isolate the area you want to blur by Alpha Locking the latter and using a blur tool from the Adjustments menu.
Where is the smudge tool in Procreate?
The Smudge tool is going to be positioned right in between your Paint tool (paintbrush icon) and your Eraser tool (eraser icon). It looks like an index finger icon and will be in the top right-hand corner of your canvas.
How do you blur multiple layers in Procreate?
You can either merge all of the layers together and blur them as one or you can blur them all individually using Gaussian, Motion, or Perspective blur tools from the Adjustments menu.
How to blur colors together in Procreate?
Paint your chosen colors close together in a layer in the area format you like – stripes, polka dots, straight lines. Then tap on your Adjustments menu and select Gaussian Blur, Layer option. This will slowly blend all of your colors together.
Why would I blur in Procreate?
This is a great way to blend colors in a layer or to create depth by blurring the background or foreground of a landscape drawing.
Final Thoughts
Everyone should learn how to use this tool. You will someday need to use it and if you haven’t learned by now, you are missing out. This is an awesome way to create incredible depth in a landscape, shift the visual focus of a piece, or create a beautifully blended color layer.
I love using this tool for so many reasons and it’s just so easy, quick, and convenient to use. By being able to gradually slide my percentage higher or lower, it gives me full control over the results and that’s one of the reasons why it’s my favorite and it will be yours too.
Do you use the blur tool in your work? What do you use it for? Leave your examples in the comment section below, I’d love to see them.