
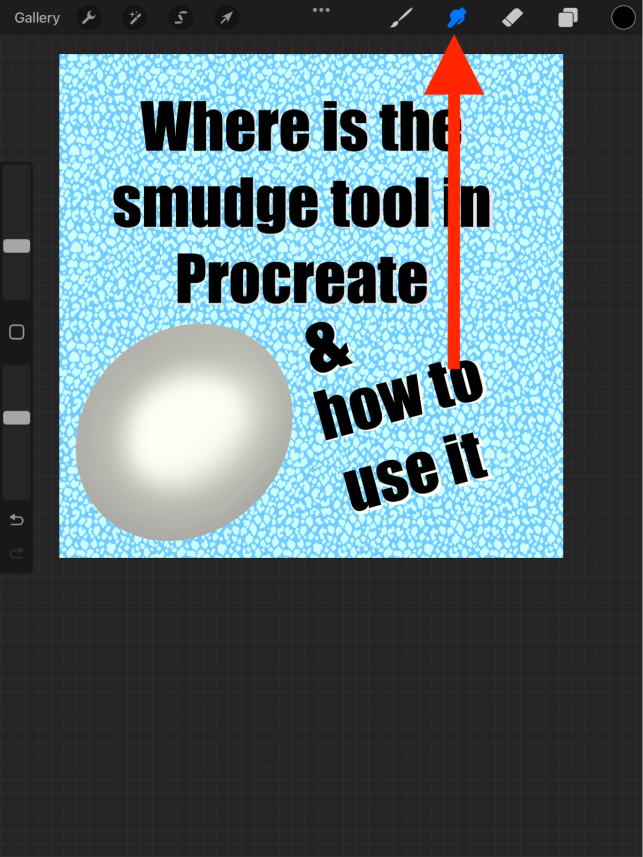
The Smudge tool (pointed finger icon) is located between the Brush tool and the Eraser tool in the top right corner of your canvas. It can be used the same as a Brush but instead of adding marks, it will blur the marks that are already present.
I’m Carolyn and I’ve been using Procreate to run my digital illustration business for over three years now so I am very familiar with all of the app’s features. I use the Smudge tool regularly as a lot of my artwork is portraits so I love using this tool to mix and blend colors together.
The Smudge tool is easy to find and easy to use once you’ve had some practice. Because you can use this tool with any of the Procreate brushes, it has a large variety of uses and it can expand your skill set immensely. I’m going to show you where to find it and how to use it.
Table of Contents
Key Takeaways
- The Smudge tool is located in between the Brush tool and the Eraser tool.
- You can choose to Smudge with any of the pre-loaded Procreate brushes.
- This tool can be used for blending, smoothing lines, or mixing colors together.
- An alternative to the Smudge tool is using the Gaussian Blur.
Where is the Smudge Tool in Procreate
The Smudge tool is located in between the Brush tool (paintbrush icon) and the Eraser tool (eraser icon) in the top right-hand corner of the canvas. It gives you access to all of the Procreate brushes and you can modify the size and opacity on the sidebar.
As this feature is such a key part of the Procreate user’s experience, it takes pride of place in between the two most commonly used tools on the main canvas toolbar within the app. It’s easy to find and access quickly while still being able to switch between tools easily.
How to Use the Smudge Tool in Procreate – Step by Step
This tool has so many benefits and really offers to bring a lot to the table. But it definitely took me some time to get a grasp on when and how to use it properly. Here’s a step-by-step to get you started:
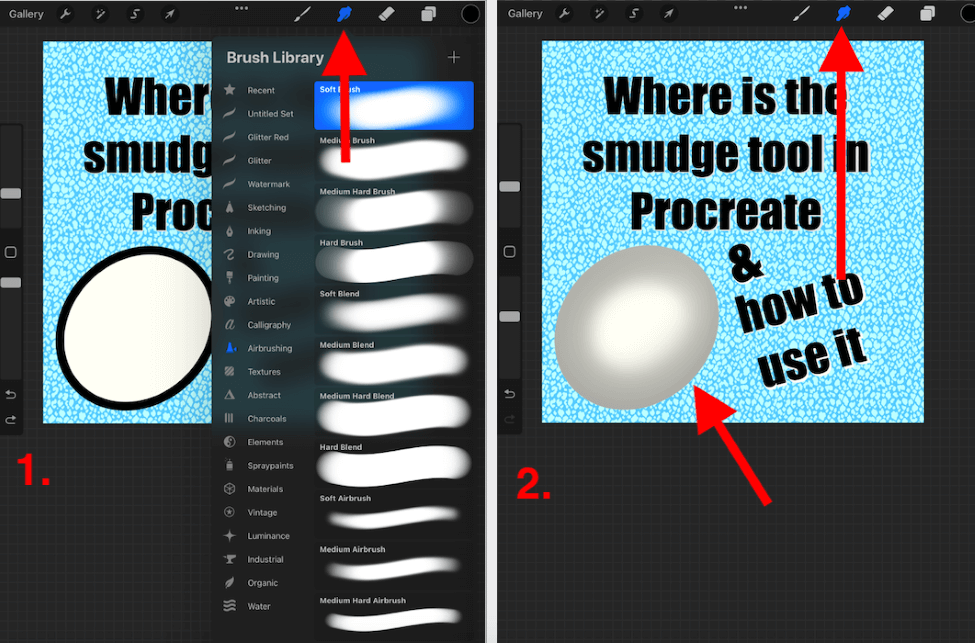
Step 1: To activate the Smudge tool, tap on the pointed finger icon in between the Brush tool and the Eraser tool in the top right-hand corner of your canvas. Select which brush to use and modify its size and opacity until you have the settings you want.
Step 2: Once your Smudge tool is activated you can start to blend with it on your canvas. Remember, you can always undo this action by double-finger tapping the same as you would painting with a brush.
Pro Tips
I usually use the Soft Brush when I’m blending. I find this is great for skin tones and general blending. But try a few different brush types depending on what you need.
If you don’t want your blend to bleed outside of the lines, make sure the shape you are blending is on Alpha Lock.
Smudge Tool Alternatives for Blending
There is another way of blending that doesn’t involve the Smudge tool. This method provides a quick and generic blend, like if you need to blend an entire layer. It does not allow you the same control as the Smudge tool.
Gaussian Blur
This method uses the Gaussian Blur tool to blur the entire layer from 0% to 100%. This is a great tool to use if you want to blend colors together or perhaps in a more generic motion like a sky or a sunset. Here’s how:
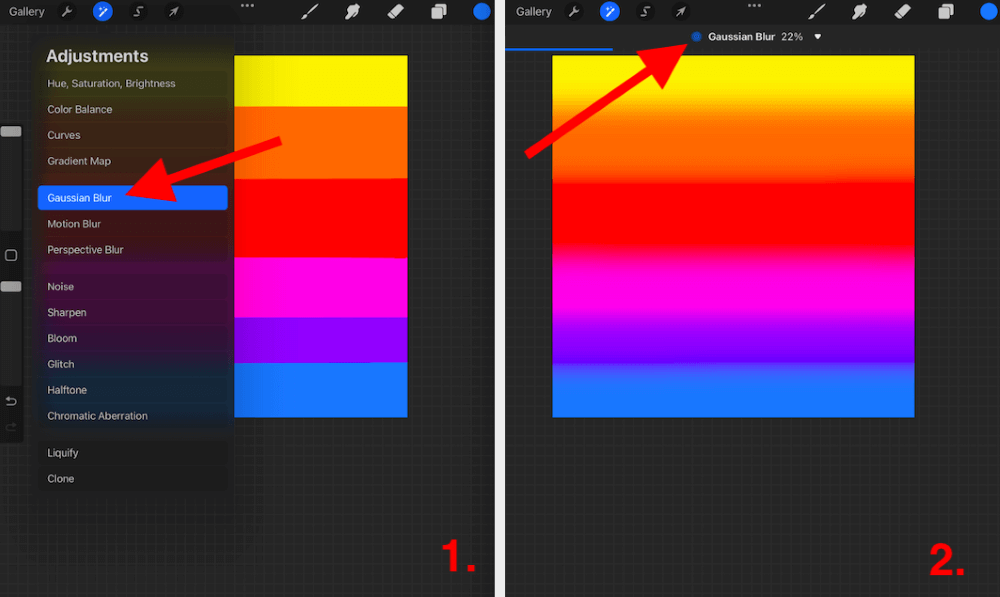
Step 1: Ensure the color or colors you want to blend together are on the same layer or do this step individually per layer. Tap on the Adjustments tab and scroll down to select Gaussian Blur.
Step 2: Tap on the Layer and slowly drag your finger or stylus to the right, until you get the desired level of blur that you are looking for. Once you are done, you can release your hold and tap on the Adjustments tool again to deactivate this tool.
If you’re more of a visual learner, Haze Long has made an awesome video tutorial on YouTube.
FAQs
I have gathered some of your frequently asked questions about this topic and briefly answered a few of them below:
How to smudge on Procreate Pocket?
You can follow the exact same method above to smudge on Procreate Pocket. Just make sure you tap on the Modify button first to access the Adjustments tab.
How to blend in Procreate?
You can use both of the methods above to blend in Procreate. You can use the Smudge tool or the Gaussian Blur method.
What is the best blending brush in Procreate?
This depends on what and how you are looking to blend your work. I prefer to use the Soft Brush when blending skin tones and the Noise Brush when creating a more rugged blended appearance.
Conclusion
This tool took me quite a while to get used to as it really is a skill you need to develop. I still find myself learning new techniques and quirks of this tool that have a huge effect on my work and I haven’t even scraped the surface of what it can do.
I recommend spending some time with this feature and doing your research as to what it can offer you. As with many of Procreate’s awesome features, there is so much this tool has to offer and it can open up your world once you give it some time.
How do you like the Smudge tool? Leave your feedback in the comments section below.