
Procreate is a great app that has become a dream tool when creating digital artwork. Coloring your piece has never been easier when you use the Color Fill option that is available in the program!
My name is Kerry Hynes, an artist, and educator with years of experience creating projects with audiences of all ages. I’m no stranger to trying out new technology and am here to share all the tips for your Procreate projects.
In this article, I’m going to show you how to add color to your projects that will save you time and energy. I’m going to explain three methods for utilizing Color Fill in Procreate based on your needs. And off we go!
Table of Contents
3 Ways to Fill Colors in Procreate
If you’ve used other digital art software, you probably have seen a paint bucket as a tool to fill in colors without manually coloring in a design. In Procreate, however, there isn’t that tool. Instead, there are a few different methods to add color using a technique called “Color Fill”.
The basics are that you can fill your shapes in Procreate by dragging in a color from the Color Picker tool into a closed shape, including individual objects, entire layers, and selections. This will save you time and energy if you want to add color in a timely manner.
Let me show you how it works to color different objects in Procreate.
Method 1: Color fill individual objects in a selection
Let’s say you want to change the color of an individual object in your work. You need to open the color picker on the top right of your screen. (That’s the little circle with a color displayed in it.)

Once you’ve done that and clicked on the color you want to use, tap the color circle and drag it over the area that you want to fill. That object should then match the color that you chose.
It’s important to note that if you’re filling a smaller shape within your design, it helps to zoom in on the specific area to ensure that you’re dragging the color into the correct spot. If your lines aren’t completely joined, you will find that the color fills the entire canvas.
Method 2: Color fill an entire layer
If you want to fill in an entire layer with a single color, you will open the layers menu on the top right and tap the layer that you want to be working on.
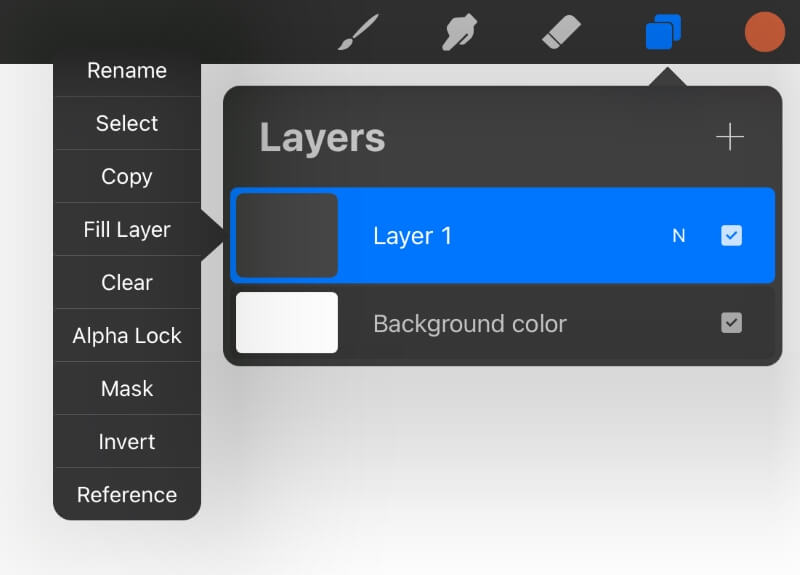
When you tap that layer, a submenu will pop up next to it with choices of actions, such as rename, select, copy, fill later, clear, alpha lock, and so on.
Click on the option that says Fill Layer and it will fill the entire layer with the color that is highlighted in the color picker at the time.
Method 3: Color Fill a Selection
If you’re looking to fill specific spots within your drawing, you can click on the selection button (the button that looks like a squiggly line at the top left of your screen).

When you click on it, there will be different types of selections available to meet your needs, with freehand being exactly what it says- you can draw an outline around the area that you want to fill.
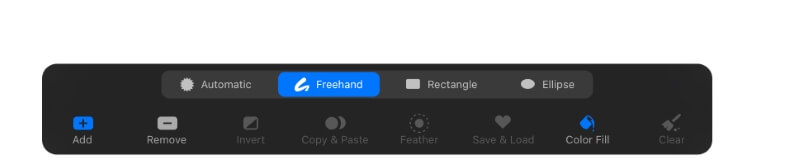
Underneath, there is an option that specifically says, “Color Fill”. If that option is highlighted, it makes it so that whenever you make a selection it will be automatically filled with whatever color you have enabled in your color picker.
Note: If you have color fill turned off while using the selection tool but want to retroactively fill in color, you can grab your color from the top right circle and tap and drag it into the selection to manually color fill.
Conclusion
So that’s about it! Thanks for checking out the basics of utilizing the Color Fill techniques in Procreate. Depending on your needs, each method has its benefits and can definitely save you time when completing a project.
Feel free to add any questions or comments that you have regarding this topic below.