
Changing the opacity, or transparency, of individual layers in Procreate is an easy and useful feature of the program. Many Procreate artists use layer opacity to create sketch guides to structure final linework. It can also be used to adjust the intensity of added elements to your canvas.
My name is Lee Wood, a professional illustrator who has used Procreate exclusively for more than five years. Layer opacity is one of my favorite base features of the program – one that I use almost every time I create a piece in Procreate.
In this article, we will cover two different methods to change your layer opacity. Follow my step-by-step guides and see how easy it is for yourself!
This is what I believe to be the most intuitive way of editing layer opacity. You’ll be selecting the option from the Layers panel located on the top menu bar.
Step 1: On the main menu bar, locate the Layers icon in the top right corner of your screen. It’s the icon that looks like two overlapping squares.
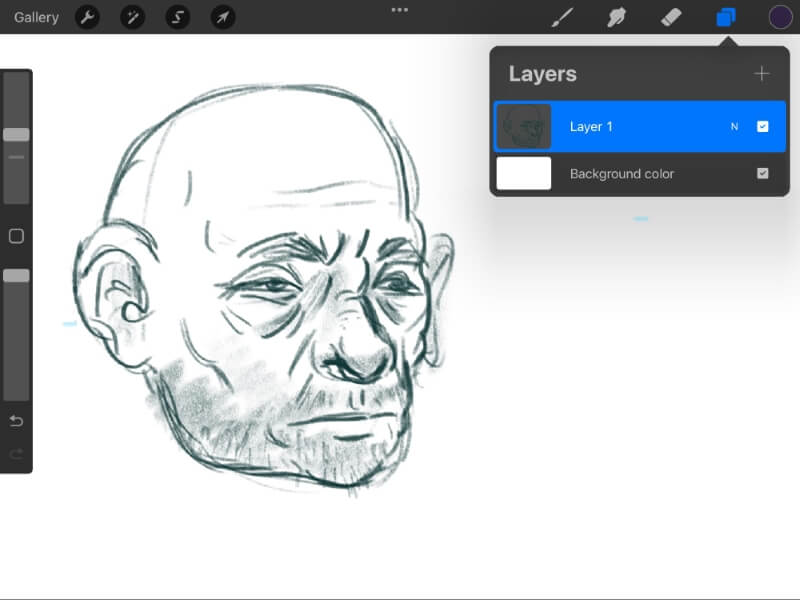
Tap the Layers icon and this will open a drop-down menu listing all of your layers.

Step 2: Tap the N to the left of the checkmark on the layer that you’d like to change the opacity of.
This will extend the menu for the layer you’ve selected. You will see multiple color profile options listed underneath the name of the layer. For now, we’re going to focus on the opacity option, the first listed option in the menu.
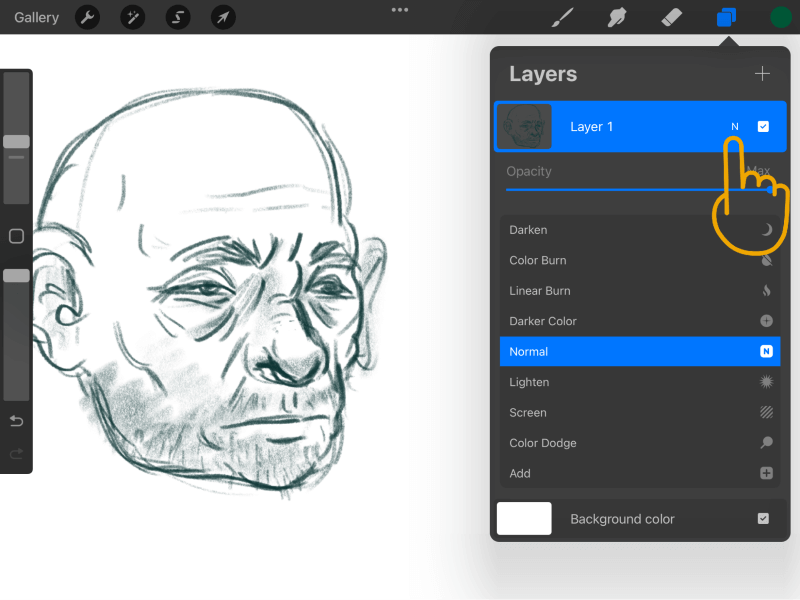
It should be noted that when a layer is created, the color profile is set to Normal by default, that’s what the N you clicked stands for. If you have your layer set to a different color profile, a different letter representing that profile will appear in this place.
You can still change the opacity of the layer no matter what this is set to.
Step 3: Use your finger or stylus to adjust the slider in the opacity bar to change the transparency of your layer. The percentage on the right will reflect the position of the slider and your canvas will also show a preview of the setting as you move the opacity slider.
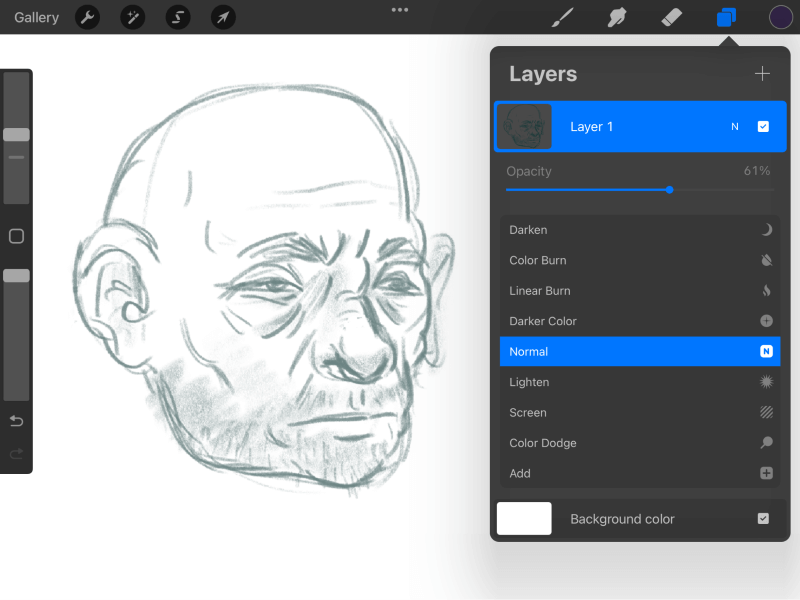
Once you’re satisfied with how your layer looks, you can either double tap the layer icon or anywhere on the canvas to close the menu. You’ve just successfully changed the opacity of your layer!
Method 2: Two Finger Tap Method
In previous versions of Procreate, this opacity setting interface was accessed through the Adjustments menu, but in the current version, it’s no longer listed there.
However, here’s a quick trick to access the layer opacity slider. Follow these steps for the fastest way to change the opacity of a layer.
Step 1: Open the Layers menu by taping the Layers icon in the top right of your screen. This is the same icon mentioned in Step 1 of the previous method.
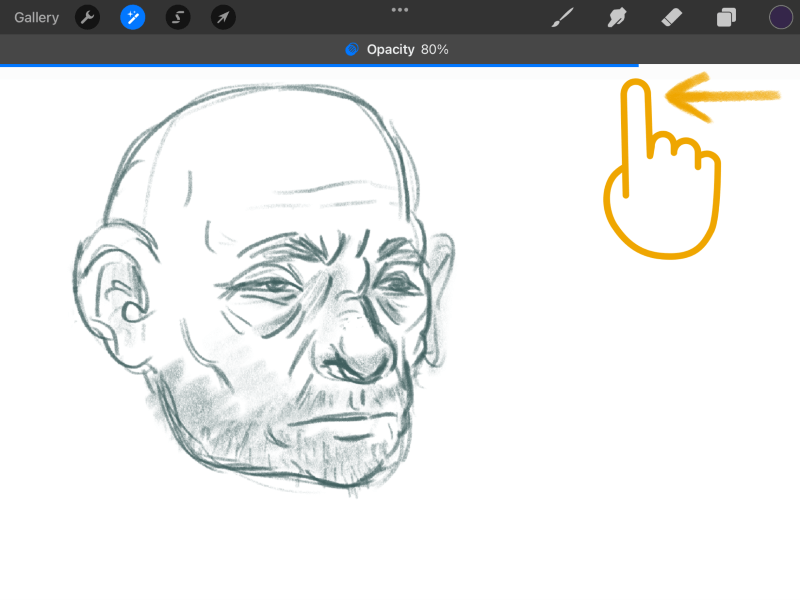
Step 2: With two fingers, tap the layer you want to edit the opacity of.
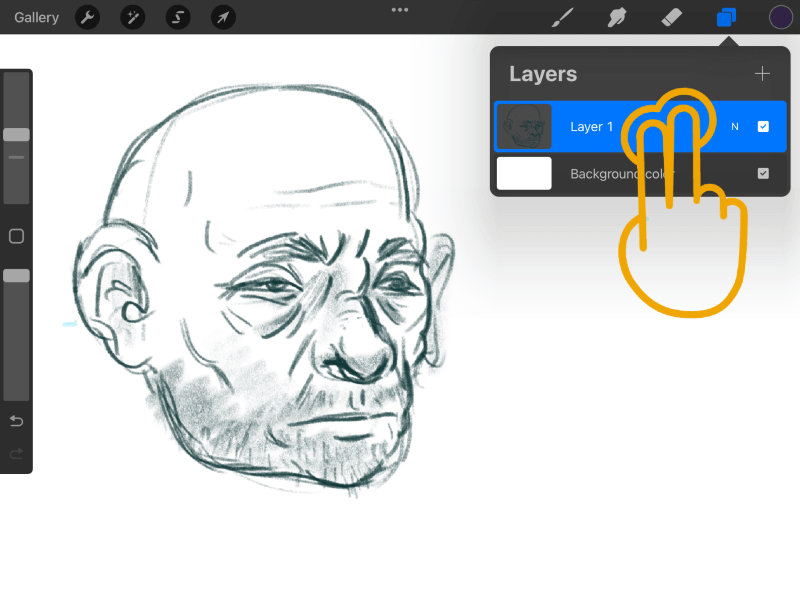
If done correctly, the display should now show a bar at the top of your canvas labeled “Opacity” along with the percentage.
Step 3: Anywhere on the canvas, slide your finger or stylus to the left or right to change the opacity of the layer. As in the previous method, you will see the canvas reflect the layer opacity percentage as you move the slider.
This method gives you the option to change your layer opacity while viewing your entire canvas unobstructed. You can even zoom in and out while this mode is active.
When you’ve found a level that you’re happy with, simply click any of the tool icons in the top menu bar to apply the change to the layer. That’s it! Quick and easy!
A Final Word
Currently, in Procreate, you can only edit one layer at a time. This is important to remember if you plan on merging any layers that have different opacity settings. The layers will be combined and the opacity level will be reset to 100%.
The layers will still look the same, but you will only be able to lower the opacity from this point. This merged layer will only be edited as one layer, rather than individual parts.
Now that you know the basics of Layer Opacity in Procreate, I suggest you have some fun with it! Try it out and see which method you prefer. If this article helped you or you have feedback, please leave a comment!