Pixelmator
Summary
Pixelmator Pro is a destructive image editor and digital painting app that corners the market on high-quality amateur Photoshop alternatives for Mac. It has an interface simple enough for you to learn without extensive tutorials and is fairly powerful when it comes to editing images through color adjustments and manipulations. The app offers an array of filters that create interesting effects on the image, from kaleidoscope and tiling to multiple types of distortion. It also features a great set of tools for digital painting, supporting custom and imported brushes.
The app is best suited for amateur or occasional image editors and designers. It’s designed to work on one project at a time, and you can’t expect to batch edit dozens of photos or work with RAW files. However, for those looking to engage in occasional graphic design, painting, or photo editing, Pixelmator is a great option. The tools are intuitive and well designed, and the features match up to those offered in more expensive competing tools.
What I Like: Clean interface, easy to use. Variety of effects beyond image adjustments. Supports a range of program customizations. Painting tools are effective and bug-free. Great set of tools that match other professional photo editors.
What I Don’t Like: Image editing control feels limited. No history panel or non-destructive effects. Lacks design tools such as CMYK or RAW support.
What is Pixelmator?
Pixelmator is a destructive photo editor and digital painting app for macOS. This means that you can adjust color tones in your images, and make transformations and other manipulations to your images using the app. You can also create a blank document and use the painting tools to design your own picture, whether freehand or using shape tools. It is a bitmap program and does not support vector graphics.
It is advertised as a program with better editing tools and workflow, designed specifically for photo work by professionals.
Is Pixelmator like Photoshop?
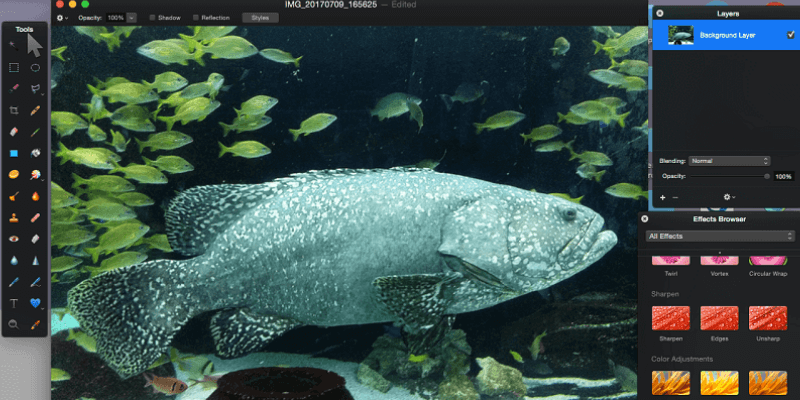
Yes, Pixelmator is similar to Adobe Photoshop. As someone who has used both, I see several connections between interface, tools, and processing. For example, consider how similar the tool panel for Photoshop and Pixelmator appears at first glance.
While Photoshop has condensed a few more tools, Pixelmator has almost every tool to match. However, it is important to note that there are differences between the two programs. Photoshop is an industry-standard program, that supports the creation of animations, non-destructive effects, and CMYK colors.
On the other hand, Pixelmator is considered a Photoshop alternative for the Mac and lacks these more advanced features. Pixelmator is not intended to replace Photoshop for working professionals, but it does make a great resource for students, hobbyists, or occasional designers.
Is Pixelmator free?
No, Pixelmator is not a free program. It is available for $19.99 on Mac App Store, which is the only place you can purchase the program. If you aren’t sure you want to buy it, the Pixelmator site offers a free trial that allows you to download the program and use all of its features for 30 days. You do not have to include an email or credit card. After 30 days, you will be restricted from using the program until you buy it.
Is Pixelmator available for Windows?
Unfortunately, Pixelmator is not available for Windows at this time and can only be purchased from the Mac App Store. I contacted their info team by email to ask if they had any plans for a PC application in the future and received the following response: “No concrete plans for a PC version, but it’s something we have considered!”
It appears Windows users are out of luck on this one. However, the “Alternatives” section below contains several other options that function on Windows and might list what you’re looking for.
How to use Pixelmator?
If you’ve already worked with a Mac photo editing or painting app such as Photoshop, Pixlr, or GIMP, you can dive right in with Pixelmator. The interfaces are very similar across all of these programs, even down to hotkeys and shortcuts. But even if you’re brand new to editing, Pixelmator is a very easy program to get started with.
The Pixelmator creators offer a great set of “getting started” tutorials on almost every topic you can think of, available in written format here. If you’re more of a video person, there are plenty of tutorials for you, too. The Pixelmator Youtube Channel offers video lessons on many of the same topics covered in print.
Table of Contents
Why Trust Me for This Review?
My name is Nicole Pav, and I remember first using a computer around the age of seven. I was fascinated then, and I’ve been hooked ever since. I also have a passion for art, which I engage in as a hobby when I have a few spare hours. I value honesty and clarity, which is why I write specifically to provide first-hand information on programs I have actually tried. Like you, I want to make the most of my budget and thoroughly enjoy the product I end up with.
For several days, I worked with Pixelmator to test as many features as I could. For the digital painting features, I used my Huion 610PRO tablet (comparable to larger Wacom tablets) while the photo editing features were tested on a few photos from a recent trip of mine. I obtained a copy of Pixelmator through their free trial option, which allows you to use the program completely free for thirty days without an email or credit card.
Throughout my experimentation, I created a couple of files and even contacted their support teams to get a deeper understanding of the program (read more on this in the “Reasons Behind My Ratings” section).
Pixelmator Review: What’s in It for You?
Tools & Interface
When first opening the program, those using the trial version will be greeted with a message detailing how many days of use are left. Once this message is clicked through, both purchasers and experimenters will be sent to the following startup screen.
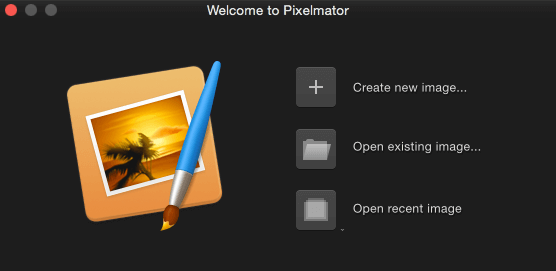
The options are fairly self-explanatory. Creating a new image will present a blank canvas with dimensions and specifications you choose, opening an existing image will prompt you to choose a picture from your computer, and opening a recent image will only be relevant if you want to open a file you were previously manipulating in Pixelmator.
Regardless of what you choose, you’ll be forwarded to the same interface for working. Here, I’ve imported a picture of a large fish from an aquarium I visited. It definitely isn’t a stellar photo, but it gave plenty of room to make adjustments and experiment.
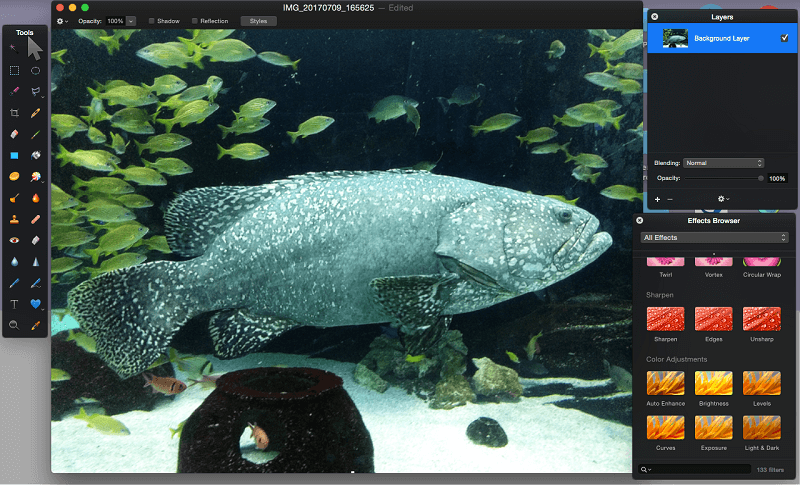
With Pixelmator, the interface isn’t confined to a single window, which has its pros and cons. On one hand, this makes everything very customizable. You can drag editing panels wherever you need them, which could greatly enhance your workflow. Panels can be added or removed at will to free up space, and everything is resizable.
On the other hand, any background windows you have open will remain just behind your work, which can be distracting or cause you to accidentally switch windows. Also, minimizing the image you are working on doesn’t minimize the editing panels, which will be visible until you click out of the program.
Each panel contains a set of tools related to a specific function, and panels can be hidden or shown from the VIEW drop-down menu. By default, the program displays the toolbar, the layers panel, and the effects browser.
The toolbar contains all of the basic tools you would expect from an editing and painting program, from “move” or “erase” to various selection options, retouching choices, and painting tools. In addition, you can edit what appears in this toolbar by opening the program preferences and dragging and dropping. This allows you to remove tools you don’t use or rearrange the panel into something that better fits your workflow.
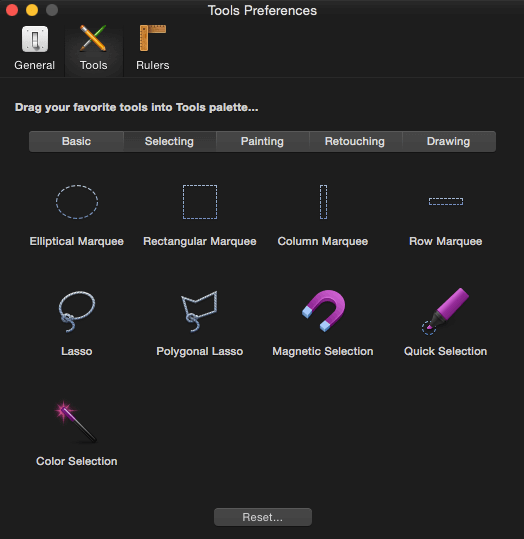
From burn to blur, the tool options for Pixelmator certainly match up to its competitors. You’ll have no problem selecting, replacing, and distorting at will.
Photo Editing: Colors & Adjustments
Unlike most photo editors, Pixelmator does not display all of the editing sliders in a long list of options. Instead, they’re located in the effects browser in small blocks that display a sample of what they change.
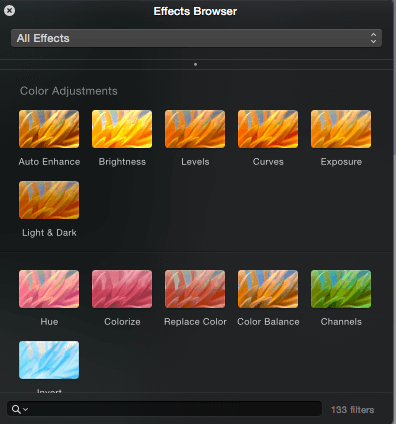
The color adjustments are partway through a long scrolling list of effects, or you can go directly to them by using the dropdown list at the top of the effects browser. To use an adjustment feature, you’ll need to drag the corresponding box from the browser panel onto your image (a small green plus will appear). When you release, options for the effect will pop up in a separate panel.
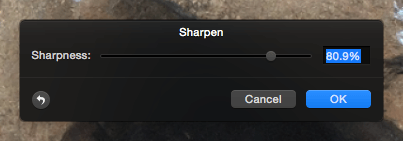
From here, you can make changes using the chosen effect. The small arrow in the bottom corner will reset the effect to its original values. I could not find a way to compare the original and edited image side by side or perhaps over only half the images, which was slightly frustrating. But the effects did do what they said they would. There is a functional curve editor, as well as levels, a few black and white effects, and a color replacement tool that works very effectively.
The drag and drop method also has its positives and negatives. It’s disorienting at first not to have every option at my fingertips. The lack of visibility as to what I’ve already done is also strange. However, it does provide a great method of isolating certain effects.
Note that these effects do not appear as separate layers or otherwise differentiate themselves once they have been applied. All effects are immediately applied to the current layers, and there is no history panel that allows you to revert to a specific step in the past. You’ll need to use the undo button for any mistakes.
Photo Editing: Distortion and Special Effects
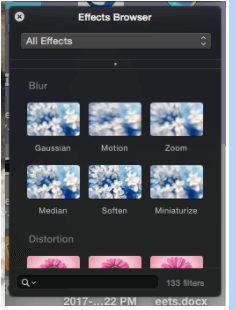
There are a few main categories of effects that do not directly deal with color and tone adjustment. First are the more artistic filters, such as several kinds of blur filters. While it usually wouldn’t make sense to slap this on an entire image, it would be great for creating special effects or specific visual appearances.
Aside from the traditional transform tool, there are a plethora of more unorthodox effects that could be described as distortions or fall under a “circus fun house” theme. For example, there is a “ripple” or “bubble” tool that creates a fisheye effect over a section of your image, which can be used to change the shape of an object. There’s also a Kaleidoscope effect, as well as several less symmetrical but functionally similar alternatives that were fun to play with. For example, I was able to take a picture of some penguins sitting on rocks and turn it into this mandala-like creation:
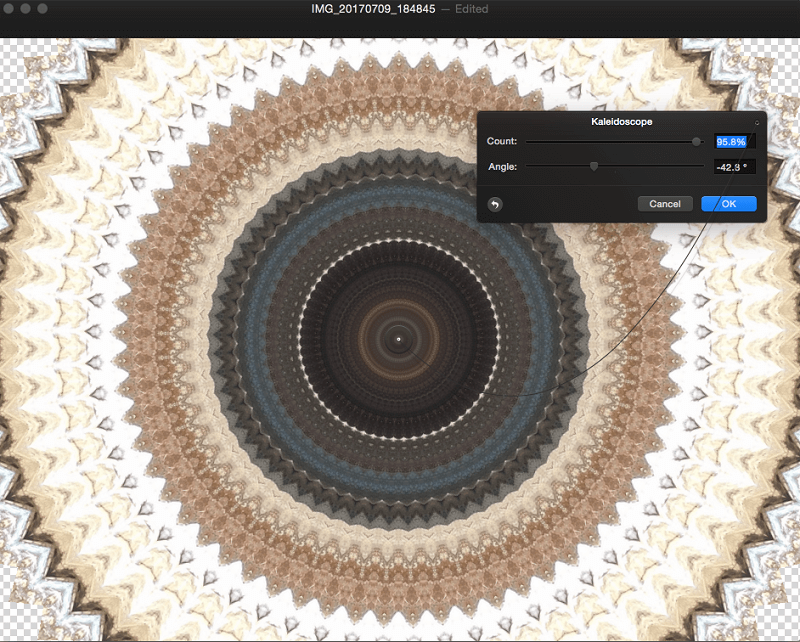
This, of course, might not seem inherently useful, but it would actually be pretty versatile if manipulated to create more abstract images, photo manipulation compositions, or on a part of the image rather than the entire picture. Pixelmator does not contain a tool to match the Photoshop “warp” feature, but with a variety of distortion and fun filtering options, you’ll definitely have a lot of creative freedom when it comes to applying effects to your image.
Digital Painting
As an artist by hobby, I was excited to try the painting features of Pixelmator. I was not disappointed with the brush customization settings available, and the default brushes were great to work with as well (shown below).
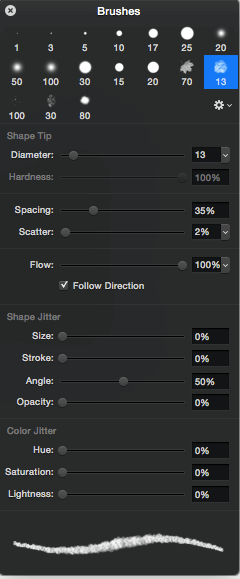
Beyond these simple defaults, there are a few other sets built in, and you can create your own brushes at any time by importing a PNG. If you have a custom brush pack your prefer, Pixelmator also allows you to import .abr files originally for Photoshop (check out this super simple tutorial on how).
I used just these basic ones that first appeared to make a quick image of a squid using a Huion 610PRO tablet, which is comparable to some of the larger Wacom models.

While my image isn’t exactly a masterpiece, during painting I didn’t experience any bugs, unwanted jittering, or other annoyances. All of the brushes functioned very smoothly, and the customization options are almost identical to what you would see in Photoshop or another painting program.
Overall, Pixelmator has very well-rounded painting features that are comparable to more expensive programs. It was easy to manipulate and uses an interface that is almost universal in painting applications, meaning you’ll have no problem using it if you choose to switch from another program.
Once you’re done editing your image or creating your masterpiece, there are a couple of ways to move the final project out of Pixelmator. The most simple one is the classic “save” (CMD + S), which will prompt you to pick a name and location for your file.
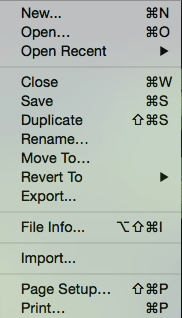
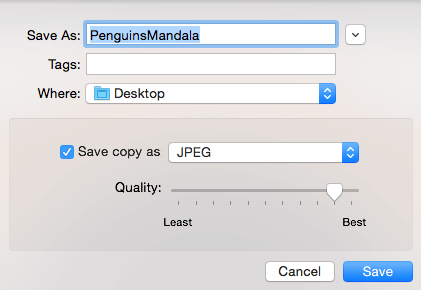
Saving creates a reusable Pixelmator file, which stores your layers and edits (but not your edit history – you can’t undo things from before you saved). It creates a new file and does not replace your original copy. Additionally, you can choose to save an additional copy in a more common format such as JPEG or PNG.
Alternatively, you can choose to export your file if you’re done making edits or need a specific file type. Pixelmator offers JPEG, PNG, TIFF, PSD, PDF, and a few tertiary options such as GIF and BMP (note that Pixelmator does not support animated GIFs).
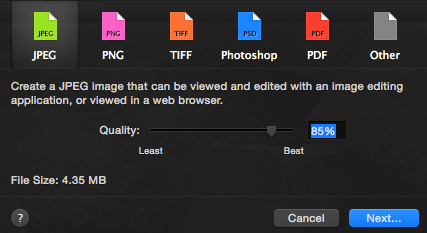
The process for exporting is fairly simple. Just choose FILE > EXPORT and you’ll be prompted to pick a file type. Each one has different customization settings due to their individual capabilities, and once you specify these and choose NEXT, you’ll need to name your file and choose the export location. Once this is done, your file is saved and you can either continue editing or move forward with the new file you’ve created.
Pixelmator does not appear to have a built-in option for exporting to a specific platform such as an image sharing site or cloud file servers. You will need to export it as a file and then upload it to those sites and services of your choice.
Reasons Behind My Ratings
Effectiveness: 4/5
Pixelmator does a great job providing an intuitive place for you to edit and create graphics, making it a very effective program. You’ll have access to color correcting tools and editing features that will ensure your final image looks sharp. Painters will enjoy a good default brush library and the ability to import custom packs as needed. However, I did feel a little limited when it came to making adjustments. Especially after just using a dedicated photo editor with a plethora of fine-tuning tools, I felt slightly limited by Pixelmator’s editing tools. Maybe it’s the slider arrangement or the available adjusters, but I felt like I wasn’t getting as much out of it as I could have.
Price: 4/5
Compared to similar programs, Pixelmator is extremely low priced. Whereas Photoshop costs around $20 per month, and only by subscription, Pixelmator is a one-time purchase of $30 through the app store. You’re definitely getting a great program with your purchase, and it should meet the needs of most users. However, it isn’t the cheapest program on the market with several competing open source options that offer similar features.
Ease of Use: 4.5/5
The interface is extremely well-designed. Buttons are clear and thoughtful, with intuitive uses. The panels that are shown by default are the right ones to get you started, and you can insert those you need on your screen by adding them from the VIEW menu. Although it did take a few minutes to learn how to use some features, especially those related to image adjustments, I enjoyed using the program overall.
Support: 4/5
Pixelmator offers several forms of support. Their community forum and written tutorials are the primary ways of getting information, which can be found by visiting their site and dropping down the tab that says “Explore”. It did take me a bit to find the email support option, which is located in a slightly obscure location at the bottom of one of the support forums. It also produced two emails: [email protected] and [email protected]. I emailed both and got responses in around two days. My question regarding the color picker (sent to support, not info) received the following response:

I found this to be generally satisfactory though not particularly insightful for a response that took a couple of days to communicate. Either way, it answered my question, and the other support resources are always available as well.
Alternatives to Pixelmator
Adobe Photoshop (macOS, Windows)
For $19.99 per month (billed annually), or as part of an existing Adobe Creative Cloud membership plan, you’ll have access to an industry standard software that can meet professional needs in photo editing and painting. This is a great alternative if Pixelmator seems to fall just short of your needs. Read our full Photoshop CC review for more.
Luminar (macOS, Windows)
Mac users looking for a photo-specific editor will find Luminar meets all of their needs. It’s clean, effective, and offers features for everything from black and white editing to Lightroom integration. You can read our full Luminar review here.
Affinity Photo (macOS, Windows)
Supporting the important file types and multiple color spaces, Affinity weighs about $50. It matches many of the Pixelmator features and offers a variety of tools for image adjustment and transformation. Read more from our Affinity Photo review.
Krita (macOS, Windows, & Linux)
For those who are leaning towards the raster painting and design aspects of Pixelmator, Krita expands upon these features by offering a full-featured painting program with support for drawing, animation, and transformation. It is free and open source.
Conclusion
Pixelmator is an exemplary Photoshop alternative, proving you don’t need to pay boatloads for an effective and intuitive program. It comes with dozens of features that Photoshop is known for but at a much lower price. The layout is perfect for beginners and advanced users alike, making use of the classic editing interface.
The app is very customizable which means you’ll be able to arrange your workspace as needed for maximum efficiency. Photo editors will enjoy the adjustment features and unique filters that come with the program. Brushes and other features necessary for painting are highly developed and work with ease.
Overall, Pixelmator is a great purchase for casual editors and digital painters who are looking to upgrade a current program or switch from something that’s too pricey or not meeting every need.

Thank you for such a detailed and well-written review. I have purchased Pixelmator and look forward to using it. I actually vacillated between this and the pro version, but decided on this because I seemed to like the interface better. It would be great if you could do a review of Pixelmator Pro sometime. Thanks again for your thoroughness!
Can you make templates such as greeting cards (7×10), to attach your photos to?
I have Pixelmator. It does not work on my iMac. I’ve tried the tutorials. Never been successful at getting anything done. I’ve worked with CorelDraw, Adobe Illustrator and Photoshop as well as AutoCad up to release 2006. No problem with them. But for whatever reason the tools work intermittently or not at all. Tried Support but they aren’t that quick about responding. I tried the latest template this morning. It worked right up until I tried to paint with it. That was where it stopped.
I wish I had glowing comments to share but having owned this program for about 2 years I have a lot of frustration and not nearly as much done as I should have. Too bad I can’t share images of what happens here.