
Since its earliest days in the mid-1980s, the creative community has been in love with the Mac. While PCs took over the business world, Mac has always been popular for digital artists thanks to its incredible product design, attention to detail, and ease of use.
Four decades later, that connection still holds true. As a result, there are a massive number of photo editors for Mac available to choose from. If you’re new to photo editing, it can be overwhelming to choose the right one, so this review should help guide you to the best editor for your specific needs.

In case you haven’t already heard of it, Adobe Photoshop is the most capable piece of photo editing software available, and has been for decades. Photoshop has a massive and unrivaled feature set, incredible learning materials and support, and a completely customizable interface. Many users have taken issue with Adobe’s enforced subscription model. If you want to use the best photo editor available, though, Photoshop is the industry standard.
For those looking for a high-quality editor without Photoshop’s baggage, Serif Affinity Photo is a rising star in the editing world and is currently the next-best choice. It’s less intimidating to learn than Photoshop, though it’s much newer and doesn’t have a wealth of support materials available. Serif is hungry to steal market share from Adobe; they’ve been implementing appealing tools and interface changes that often leave Adobe playing catch-up.
For more casual home editing, like holiday snapshots and family pictures, Pixelmator Pro offers easy-to-use filters and editing tools. You won’t get the same range of capabilities as Photoshop or Affinity Photo, but you can learn Pixelmator with almost no training. It plays well with all your other Apple devices and services and is our most affordable option.
On a PC? Also Read: Best Photo Editor for Windows
Table of Contents
My Background with Photo Editing on Mac
Hello! As you probably saw in the byline, my name is Thomas Boldt. I’ve worked with digital photographs for over 15 years. Through my writing for SoftwareHow and my own experimentation, I’ve tested nearly every photo editing app on Mac. Or maybe it just feels that way. 😉
My reviews are guided by my experience using photo editors in a professional capacity and my own personal photography. Naturally, I want to use the best possible apps when working on photos, and I’m sure you’d like to do the same.
Selecting The Right Mac Photo Editing Software
Digital photographs are everywhere. People have a near-infinite number of reasons for editing them. The problem is, there’s a near-infinite number of photo editors available. That can be a blessing and a curse when you’re trying to figure out which editor is the best for your situation.
Let’s say you’re a photo expert, and you’re trying to apply Ansel Adams’ famous Zone System in the digital era. You’ll probably want a professional editor that gives you the finest degree of control possible.
If you just need to remove red-eye from your favorite pet snapshot, you might not need pro editing software. Sure, you could buy Photoshop just to do red-eye removal, but that doesn’t mean it’s your best choice.
I’m guessing that most of you probably land somewhere in the middle. However, I explore a wide range of options in this review. Even after we have narrowed the field down to the three best photo editors for Mac, you’ll still need to choose which one best fits your needs.
Before we can get down to the details, some background will help us sort through the huge range of photo editors available for macOS.
At the most basic level, there are two primary approaches to image editing: non-destructive editing, which applies dynamic adjustments to your images that can be modified later, and pixel-based editing, which changes the pixel information in your photo permanently.
Non-destructive editing tools are a great first step. With most of your photos, you won’t need anything more complicated. For the highest degree of control, though, you’ll need to work at the pixel level.
Even in pixel editing, you can (and should!) be using non-destructive techniques such as layering and masking to preserve your source image data. When you’re working on a complex edit or composite, you might not get it right the first time. Even if you have 200 undo steps to work with, that isn’t always enough. Working effectively with layers is essential for a photo editor—and it’ll save you some massive headaches!
In case you’re not familiar with the idea, layers allow you to separate individual elements of your image and control the order in which they are combined. Think of a stack of glass panes, each displaying a different part of your picture. When you view them from the top, you see the entire photo all at once. They’re perfect for fine-tuning more complicated edits, and an absolute must for creating photorealistic composites.
Best Photo Editing Apps for Mac: Our Top Picks
Since there are so many editors out there, and there are so many different reasons for editing photos, I’ve selected winners in three different categories to clarify things. Professionals need the best in every area, while casual photographers probably won’t need a digital Swiss Army knife complete with kitchen sink attachment.
Best Editor for Pros: Adobe Photoshop
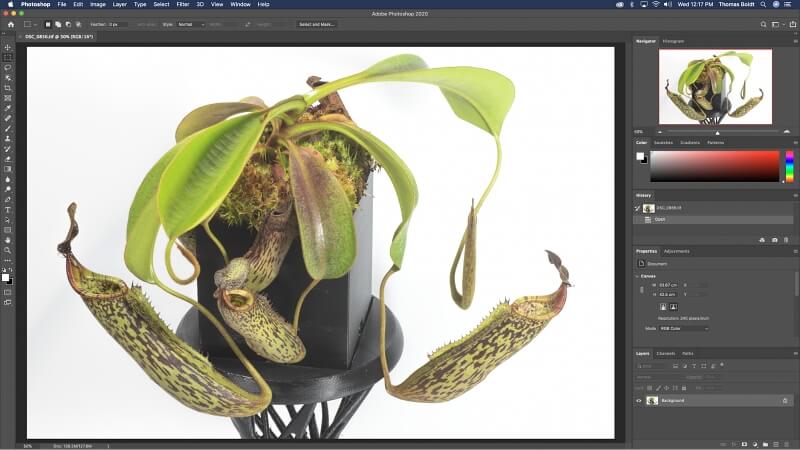
First released in 1990, Photoshop is one of the oldest photo editors still in development. I believe it’s also the only photo editor in history to become a verb. ‘Photoshop’ is often used interchangeably with ‘edit’ the same way people often say ‘Google it’ when they mean ‘search for it online.’
After writing tons of reviews of photo editors, it feels unfair to choose Photoshop as the winner in almost every article. But the impressive range of capabilities it offers just can’t be denied. There are many reasons that it has been the industry standard for decades.
Photoshop contains so many features that most of us will never use them all. Still, its core editing functionality is very impressive. Its layer-based editing tools are powerful, flexible, and perfectly responsive, even when working with large high-resolution images.
If you work with RAW images, you’re covered. Adobe’s built-in Camera RAW program allows you to apply all the standard non-destructive edits to exposure, highlights/shadows, lens correction, and more before opening the RAW image for pixel editing. That being said, Photoshop is best when used for complex edits to specific images, rather than managing a whole RAW photo collection.
While Photoshop is technically a pixel-based editor, adjustment layers also allow you to use masks to apply edits in a non-destructive workflow outside of Camera RAW, which gives you the best of both worlds.
Beyond the realm of basic editing, Photoshop has tools that can be mind-boggling the first time you see them in action. ‘Content-aware fill’ is their newest poster child. It allows you to fill in areas of your photo automatically with image data that matches your existing content.
Essentially, this means the computer makes an educated guess about what should fill in a selected area, even if it involves complicated textures and shapes. It’s not always perfect, but it’s certainly cool. Even if it doesn’t always do a perfect job, content-aware fill can provide a head start when filling in large sections of a missing background.
The only area where Photoshop comes up short is ease of use. This isn’t really Adobe’s fault; it’s simply due to the massive number of tools and features they’ve crammed into the editor. There isn’t really a good way to give you both powerful tools and an uncluttered user interface.
Fortunately, it’s possible to customize almost every aspect of the UI, allowing you to strip away the tools you don’t need at the moment. Photoshop includes UI presets for editing, painting, and more. You can also create custom workspaces for different tasks and switch between them easily with only a couple of clicks.

If you’re feeling overwhelmed by Photoshop the first (or even the hundredth) time you run it, there are millions of guides, tutorials, and other learning materials to help you get up to speed. Adobe has also begun including “official” tutorial links right inside the latest versions of Photoshop to help give new users a leg up. Read my full Photoshop review here.
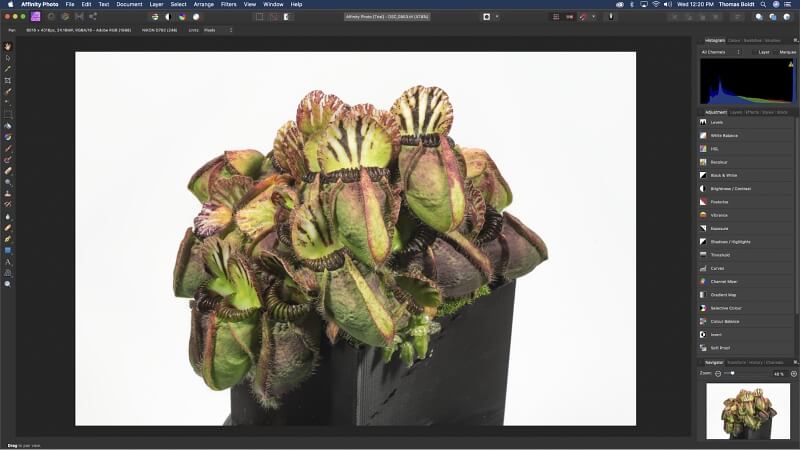
Best Single-Purchase Editor: Serif Affinity Photo

Many programs are competing to unseat Photoshop as the best photo editor. I think the closest contender is the excellent Affinity Photo from Serif. Adobe angered many users with the enforced subscription model it adopted for Photoshop several years ago. This left Serif perfectly positioned. They had a top-notch alternative for photographers, fully functional, that was available as a one-time purchase.
Like many newer editors, Affinity Photo takes much of its interface style from Photoshop. This makes it feel immediately familiar to anyone making the switch. However, there are still a few differences to learn about. New users will appreciate the on-screen introductory tutorial complete with helpful links to additional material.
Affinity Photo (or AP for short) separates its features into sections, known as ‘Personas,’ which can be accessed in the top left of the UI: Photo, Liquify, Develop, Tone Mapping, and Export. Photo is where you’ll be doing all your layer-based editing. If you’re working from a RAW photo source, though, the Develop persona will be helpful as a starting point. Tone Mapping is for working with HDR images. For some reason, the Liquify tool gets its own persona.
The Photo persona is where you’ll do most of your complex editing. It’s where you’ll find layer-based edits and other adjustments. Adjustments in the Photo persona are automatically created as non-destructive adjustment layers, allowing you to mask the effect as needed or tweak settings later.
By default, the ‘Layers’ view might be difficult to find nestled under the histogram in small type. But like almost all of the interface, it can be customized. It’s not yet possible to create workspace presets, but I’m hoping AP will stay focused enough on photo editing that it won’t need them.
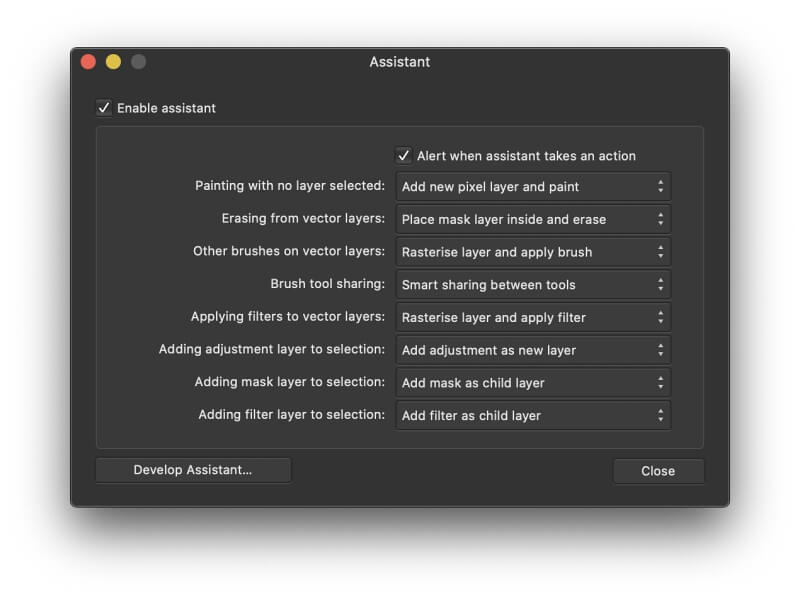
One of my favorite new ideas in AP is the Assistant, which automatically handles some basic situations based on a set of customized responses. For example, if you start drawing pixels without selecting a layer first, you can set the Assistant to automatically create a new layer. The options available are limited at the moment. Still, it’s a unique way of handling workflow customization and should only get better as the program matures.
Overall, I find the interface a little confusing, but that’s partly due to all the years of Photoshop habits I have ingrained in me. I don’t understand the point of separating AP’s functions into different modules. That’s a very minor issue, so don’t let it discourage you from giving Affinity Photo a try on your Mac! Read my full Affinity Photo review for more.
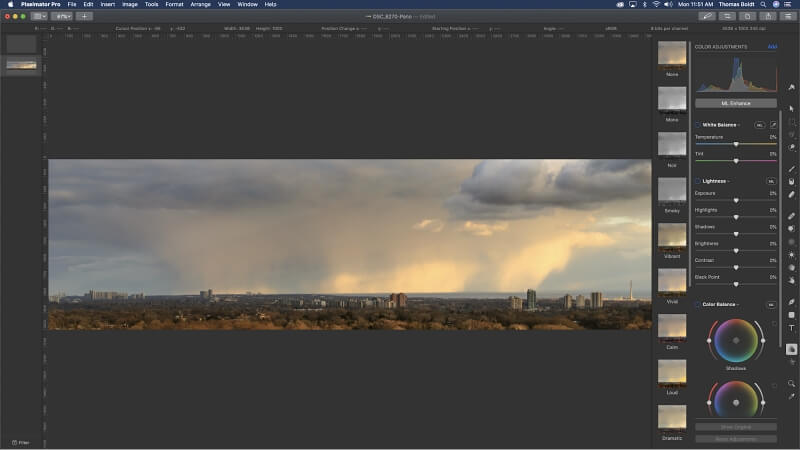
Best for Home Users: Pixelmator Pro
Even if you’re not looking for an industry-level photo editor, you probably still want one that’s capable, easy to use, and runs smoothly on your Mac. Pixelmator has been making a name for itself over the last few years with the original version. The latest ‘Pro’ release builds on those successes.
Pixelmator Pro has been built from the ground up as a Mac app. It uses the Mac-only Metal 2 and Core Image graphics libraries to produce terrific results that are perfectly responsive, even when working with large images. Supposedly, this provides an improvement over the previous ‘non-Pro’ version, which I don’t have much experience with.
The essential editing tools in Pixelmator Pro are great. I’m a big fan of the way they handle automatic selection tools. When using the ‘Quick Selection’ tool, a colored overlay sits just below the cursor when moving it across the image, showing you easily and clearly which sections of the image would be selected based on your current settings.
When it comes to extras, Pixelmator Pro has been leaning heavily on ‘machine learning.’ All the tools that benefit from machine learning techniques are labeled ‘ML,’ such as ‘ML Super Resolution,’ in the case of their resolution upscaling tool. It’s not entirely clear how machine learning was used to create the tools found in the program, but that’s probably just me being nit-picky.
The only hesitation I have about recommending Pixelmator comes, oddly enough, from looking at the list of newly-added features to the program. Most of them are things that I would expect to be included in version 1.0 of the program rather than in new updates. The other way to look at that is that it speaks to how intensely the program is being developed.
One of the newly-added items is the Welcome screen, which helps orient new users. Unfortunately, because Pixelmator Pro is relatively new on the scene, there aren’t many more tutorials available than what you can find on their website. The list is growing every day, though. It’s also pretty easy to use without much help once you’ve got your bearings, as long as you’re familiar with other photo editors.
Pixelmator is a solid program with incredible potential guided by a dedicated development team. We may soon see it edging out more traditional professional editors. It’s not quite mature enough to provide the degree of reliability required by the pros, but it’s definitely on its way. Be sure to try it out if you’re looking for the best photo editing software for your Mac!
Read on for a number of other great photo editors.
Other Good Paid Photo Editing Software for Mac
As mentioned in the introduction, there are a vast number of photo editors out there. Every photographer has their own personal preference when it comes to editing styles. If none of the winners suit your taste, then one of these other Mac photo editors may do the trick.
1. Adobe Photoshop Elements
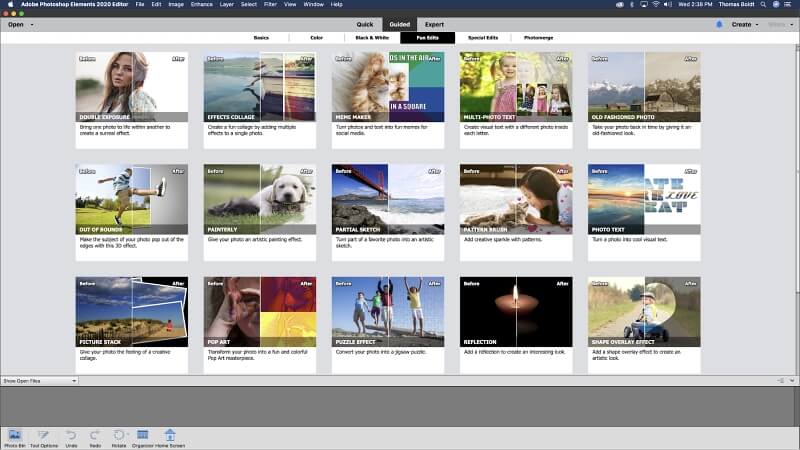
Photoshop Elements hasn’t been around nearly as long as its older cousin. It shares a lot of what earned Photoshop the top recommendation. As you probably guessed from the name, it takes the primary elements of Photoshop’s feature set and simplifies them for the casual user.
It offers an easy-to-use ‘Quick’ editing mode for beginners with a minimal toolset for performing basic edits like cropping and red-eye removal. If you’re completely new to photo editing, ‘Guided’ mode walks you through common editing processes like contrast adjustments, color changes, and more fun options.
Once you’re more comfortable with the program and photo editing in general, you can switch to ‘Expert’ mode. You won’t get the kind of control and fancy features you’ll find in the professional version of Photoshop. However, some added automatic perks in Elements might appeal more than heavy-duty tools. Automatic color swaps, one-click selections, and automatic object removal are just a few available options.
Overall, Photoshop Elements is a wonderful introductory photo editor that can act as a stepping stone to more powerful programs. It’s also a solid choice for the casual photographer who doesn’t need a high-powered solution. Unfortunately, at $100 US, it’s priced too high compared to other options, which is one of the few reasons that kept it from winning. Read our detailed review for more.
2. Acorn
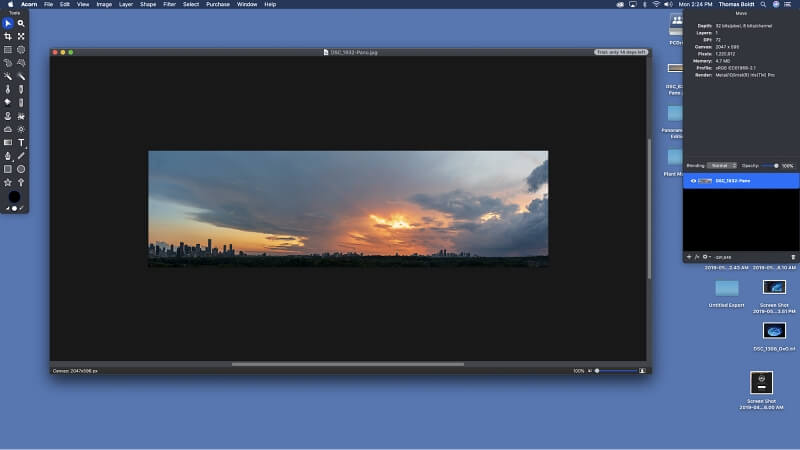
Acorn is one of the more mature photo editors available for Mac, with the first version released towards the end of 2007. Despite that maturity, it’s underwhelming in terms of the bells and whistles most programs have nowadays. It’s a terrific no-frills photo editor, so you won’t be disappointed as long as you know what you’re getting from the start.
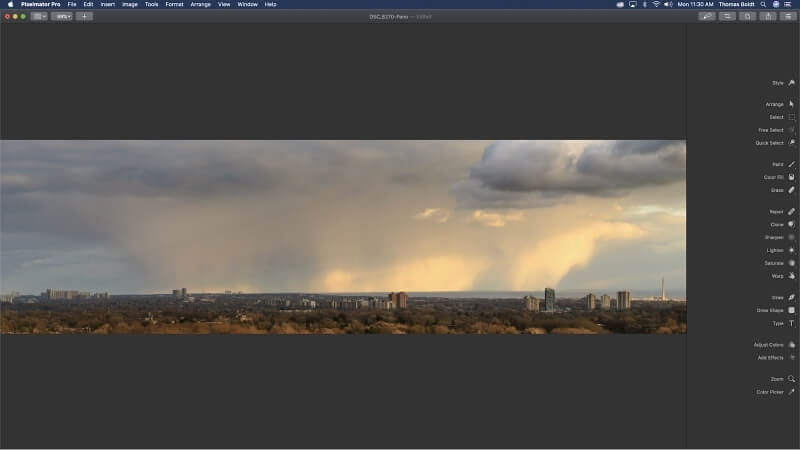
It’s got a great set of tools that can handle the majority of photo editing tasks; you just have to do everything manually. That means there aren’t any automatic selection tools, automatic exposure adjustments, anything like that. I noticed occasional lag when using clone stamping on larger images, such as in the panorama above. However, it wasn’t serious enough to make the tool unusable.
Personally, I find the multi-window UI style quite distracting, especially in a modern world where literally every digital thing is constantly clamoring for attention. A single-window interface minimizes distractions and lets you focus; modern development techniques certainly allow for UI customization within a single window. Acorn does offer a ‘full screen’ mode, but for some reason, it doesn’t feel quite the same to me. Maybe it won’t bother you.
3. Skylum Luminar
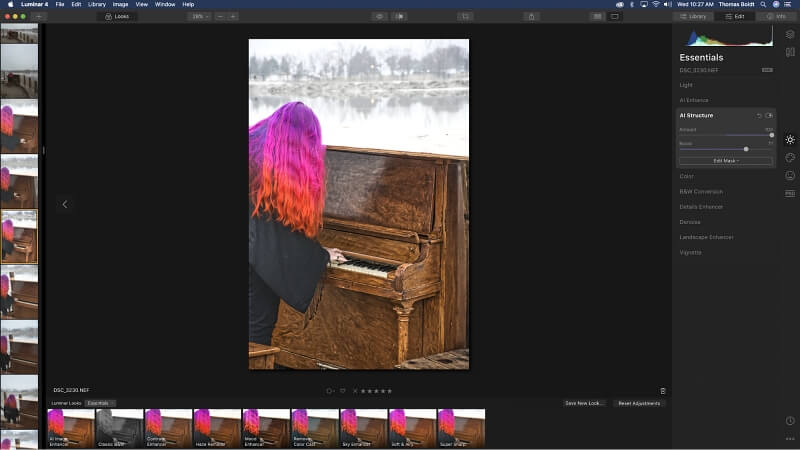
Luminar is largely directed at the non-destructive RAW editing market, so it almost didn’t make it into this review. It does offer the ability to use layers for image data and adjustments to give you more control, but this isn’t really its strong suit. Layer-based editing is fairly slow. There was a nearly 10-second delay just to create a new clone stamping layer on my iMac (even after upgrading it to a fast SSD).
It does quite an excellent job of handling non-destructive adjustments across the board and has some interesting tools you won’t find in other programs. I suspect it would be possible to recreate their effects using different tools. Still, some of the sky and landscape enhancement options are quite handy if you shoot a lot of nature scenes.
Luminar is a promising program with powerful adjustments that are easy to use. It’s under active development; Skylum is dedicated to constantly improving it, with several updates being released during the writing of this review. I think it needs to develop a bit more before it’s ready for the winner’s circle. However, it’s still worth a look if the other editors we selected don’t appeal to you. Read our detailed Luminar review for more.
Some Free Mac Photo Editing Apps
While most of the best photo editing software for Mac requires a purchase of some description, there are a few free editors that are worth a look.
GIMP
macOS gets a boost in capability thanks to its Unix background, so it’s only right that we mention one of the most popular Unix-compatible open source photo editors. The Gnu Image Manipulation Program has been around seemingly forever. Despite being free, though, it never really gained much popularity outside of Linux users. Of course, they had almost no choice but to use it, so I’m not sure if that really counts.
GIMP was always held back by an extremely confusing default interface, a huge barrier for new users. Even as an experienced editor, I found it quite frustrating to use. I knew the tools I needed were in there somewhere; it just wasn’t worth it to go digging for them. Fortunately, the UI problem has been solved at last, and GIMP is now worth another look.
Editing tools are responsive and effective, although the new UI still doesn’t extend too deeply into the program, which can make tweaking some settings more frustrating than I’d like. That said, you can’t argue with the price, and GIMP is still under active development. Hopefully, the new focus on improving the UI will continue as new versions are released.
PhotoScape X
I’m not sure if PhotoScape should really be in the ‘Free Alternatives’ category. It’s available as a free program with an unlockable paid ‘Pro’ version, but the free version still has some decent editing capabilities.
Unfortunately, most of the powerful tools require the purchase to unlock. Old standards like Curves adjustments, hue/saturation, and other important tools are unavailable, though you can still get similar effects with less precise free tools.
It almost feels like the entirety of the free version is designed to act as a storefront for the paid offerings, which might make sense from a business perspective but disappoints me as a user. It also makes me less inclined to purchase the full program, but you may find that the free version does the trick for your more basic editing needs.
Special Mention: Apple Photos
This might seem like a strange option to include, but Apple’s official Photos app does have some basic editing options. You won’t be creating digital masterpieces with it, but sometimes the best tool is the one you’ve got at hand. If you only want to crop and resize (or maybe just make a dank meme), this might be what you need. I’ve often chafed at the idea of loading Photoshop to do a simple crop and resize.
Probably the best part about it is the excellent integration with your iCloud photo library. If you’re already fully embracing the Apple ecosystem, it might be a good choice for really basic editing—though perhaps it’s really best for demonstrating the importance of choosing one of our winning selections instead! 😉
How We Tested and Picked These Mac Photo Editors
Layer-based Pixel Editing
Obviously, editing features are the most critical part of a photo editor! As I mentioned earlier, having the ability to dive down to the pixel level is essential for complex editing and compositing. All the pixel editors we selected as winners do non-destructive edits. Without the ability to drill down to the pixel level, they wouldn’t make the cut. As a result, I’ve left exclusively non-destructive editors like Adobe Lightroom out of this review.
Essential Editing Tools
In addition to managing adjustments to exposure, color balance, and sharpness, the ideal editor should make it easy to work with specific sections of your photo through masking tools, brushes, and layer management.
Effective selection tools are a must for working with pixel-based layers. Ideally, the best editor includes a wide range of selection options to isolate specific areas you want to work with. Automatic selection tools can be helpful when working with delicate image areas like hair, fur, or other complex shapes.
If automatic selection tools can’t do the job, the ability to completely customize your brush tools makes manual selection easier. Brush adjustments are also helpful for the clone stamping and texture healing processes used in more complex photo reconstructions.
Going Above and Beyond
To really shine, a good editor should go above and beyond a reliable set of basic editing tools. These aren’t exactly essential features for a photo editor, but they are definitely perks.
While it’s possible to manually recreate a texture to replace or reconstruct an object, it can be incredibly tedious. Some of the more advanced photo editors use AI to “guess” how missing pixels should arrange themselves. They even recreate missing concrete textures or treelines along the horizon of an image.
This is just one example of emerging photo editing techniques. While they’re cool, though, it’s important to remember they’re still ‘extras.’ Blade Runner-level photo editing features can’t save a program that has problems with basic functionality.
Ease of Use
The best tools in the world are worthless if they are impossible to use. Some developers go out of their way to create a great experience for new users (and for more experienced ones as well).
Little bonuses like welcome screens, introductory tutorials, and comprehensive tooltips can make a big difference in how easy a program is to use. Distinct icons, legible typography, and sensible design are also essential (but sometimes tragically overlooked).
Customization is a nice perk for ease of use. Setting up the interface just the way you want allows for more streamlined workflows. If you’re trying to focus on a specific task, you don’t need to have the UI cluttered with a bunch of tools and panels you’re not using.
Tutorials & Support
You can teach yourself any program given enough time, but it’s usually much easier to get help along the way. More established programs have a pool of tutorials that help you learn new techniques, whether basic or advanced. But newer programs also tend to build in this kind of support from the ground up—they shouldn’t be discounted just because they’re up-and-comers.
In addition to tutorials, you’ll need help if something goes wrong. Most programs offer some kind of online tech support forum to help both new and experienced users. However, for a forum to be useful, it needs to be filled with active users and provide an official path back to the developers for more detailed customer support.