There are two steps when it comes to making pixel art in Procreate. First, you need to make a pixel brush and then you need to create a pixel-friendly canvas. Alternatively, you can purchase and download pixel art brush palettes online to save time.
I’m Carolyn and I’ve been working with Procreate for over three years and using it to run my digital illustration business. I get many different requests from my clients which always keeps me on my toes and ready to learn the next best technique for creating digital artwork.
Pixel art is quite an elaborate skill to learn on the app as there is no predetermined setting for it in Procreate so users must essentially start from scratch. Today I am going to walk you through each step you can take to get your Procreate app pixel art ready.
Table of Contents
Key Takeaways
- Creating a pixel brush in Procreate is a long and tedious process but only needs to be done once.
- Pixel-friendly canvases can be created quickly and easily and saved to your Canvas menu.
- Pixel art is a widely popular style of graphic drawing and produces some incredible artwork.
How to Make Pixel Art in Procreate – 2 Parts
There are two parts to creating pixel art in Procreate. First, you must create your own pixel brush, and then you need to create your own pixel-friendly canvas that will display your pixel brush markings. All you need is your Procreate app, your Apple Pencil, and your full concentration.
Part 1: Creating Your Pixel Brush
This can be quite a long and tedious process to follow through with, but once you create your own pixel brush you can use it forever and will never have to use this method ever again. Here’s how to make your own pixel brush in Procreate:
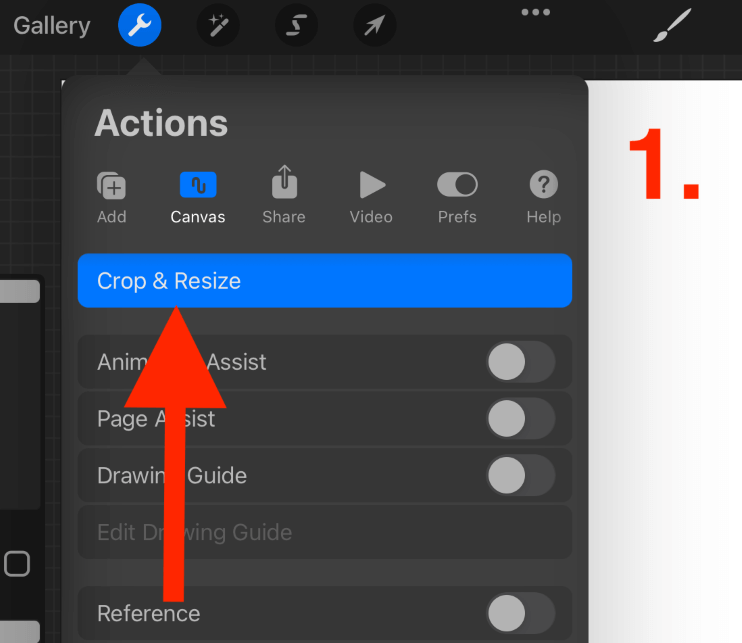
Step 1: Open a new canvas. Tap on your Actions tool (wrench icon) and open your Canvas menu. Select the Crop & Resize function.
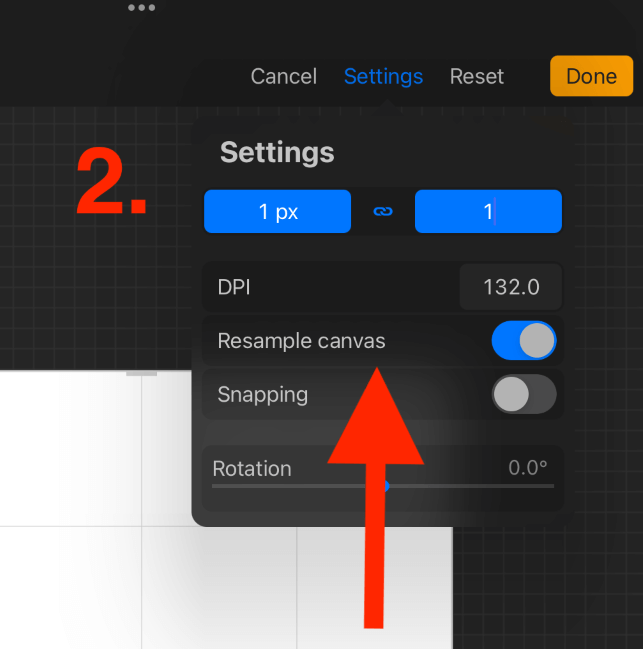
Step 2: Tap on your Settings in the top right-hand corner of the screen. Switch the Resample Canvas toggle to on. Adjust your dimensions to 1 pixel x 1 pixel. Once you have done this, tap on Done.
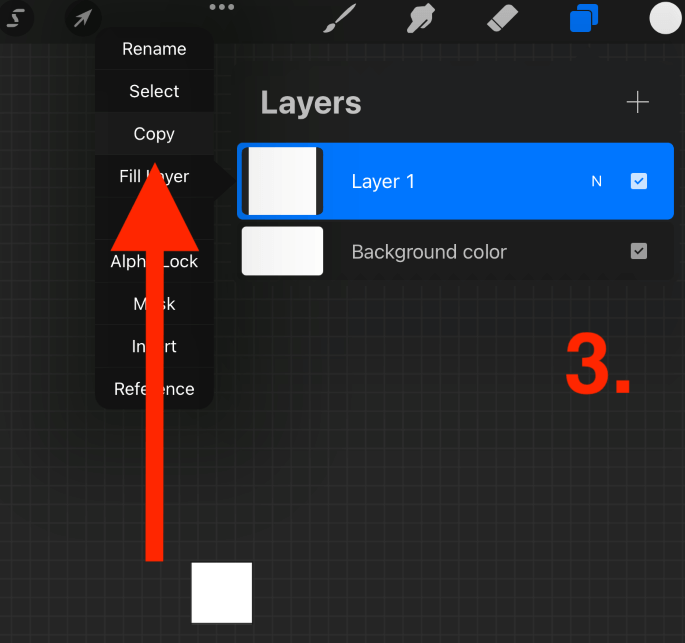
Step 3: Fill your layer with white. Then copy this layer by tapping on the layer’s thumbnail and selecting Copy.
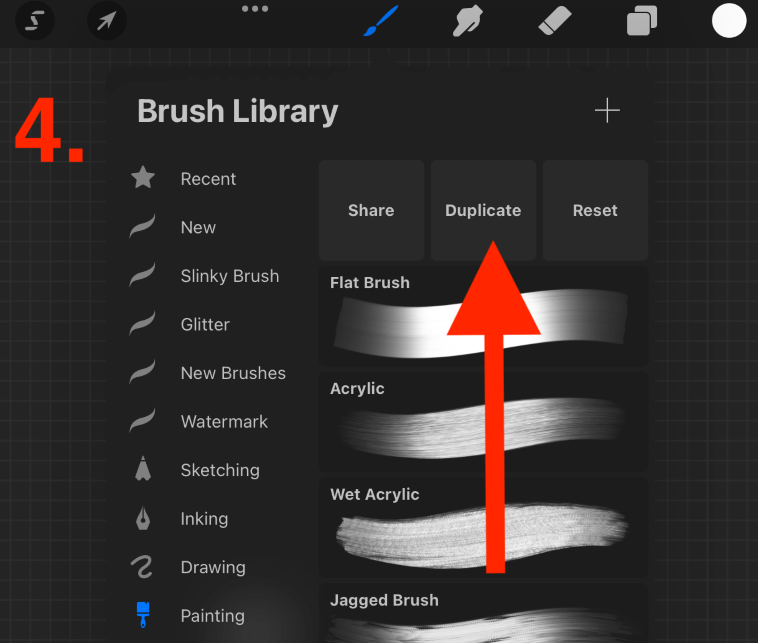
Step 4: Open your Brush Library and choose a basic brush. I used the Round Brush from the Painting palette. Then duplicate this brush by swiping to the left on the brush name.
Step 5: Tap on your new duplicated brush until the Brush Studio appears. Select Shape from the drop-down menu and then tap on Shape Source.
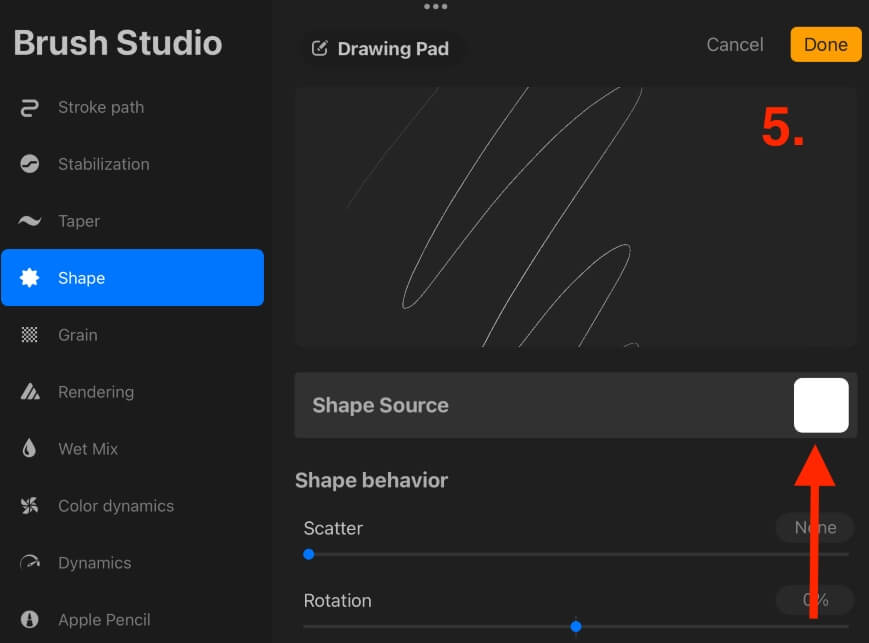
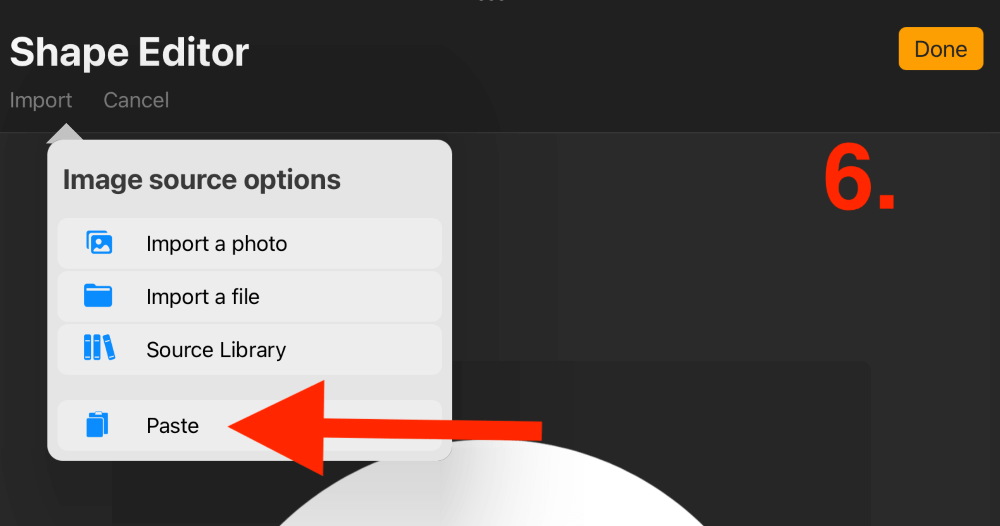
Step 6: In your Shape Editor, tap on Import and then select Paste. This will paste your copied layer into the Shape Source screen. Once you have done this, tap on Done.
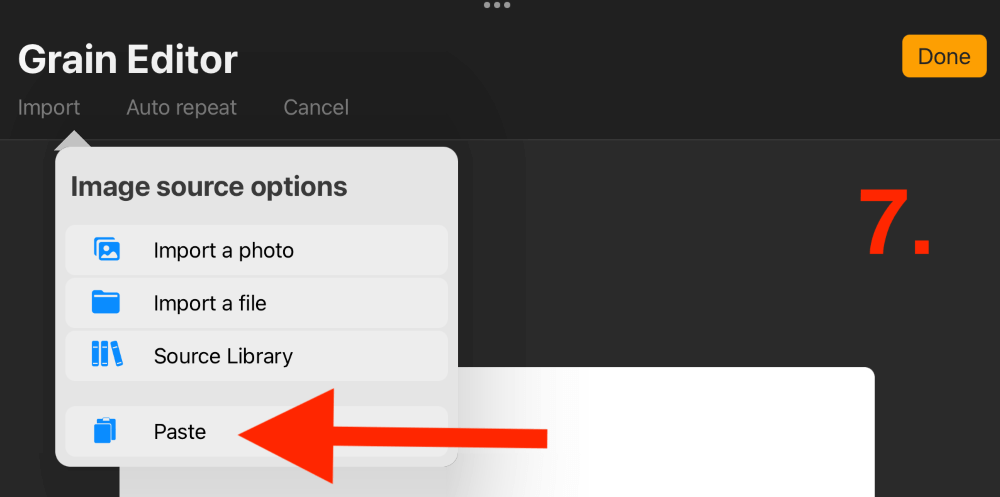
Step 7: From the Brush Studio, open the Grain menu. Tap on Import and then select Paste. This will paste your copied layer into the Grain Source screen just like in Step 6. Once you have done this, tap on Done.
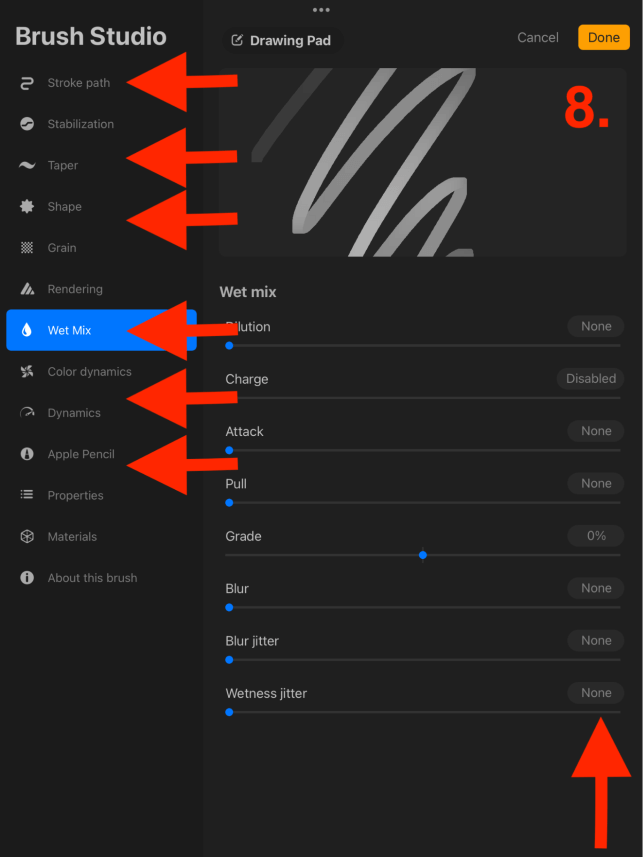
Step 8: Now you’re going to turn off every option in the following menus by sliding all of the toggles to 0%. Ensure you do this in each of the following: Stroke Path, Taper, Shape, Wet Mix, Color Dynamics, Dynamics, and Apple Pencil.
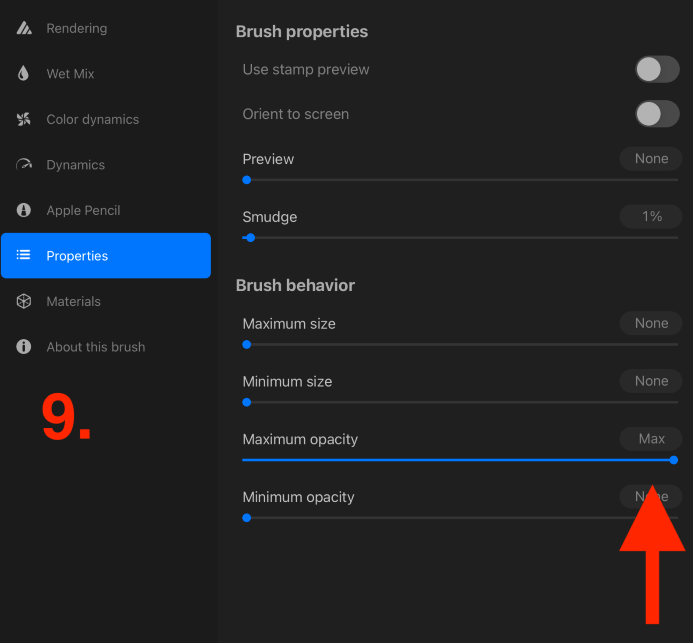
Step 9: Open your Properties menu. Ensure your Preview, Smudge, Maximum Size, Minimum Size, and Minimum Opacity are reduced to 0% or none. Ensure your Maximum Opacity is at 100%, Max.
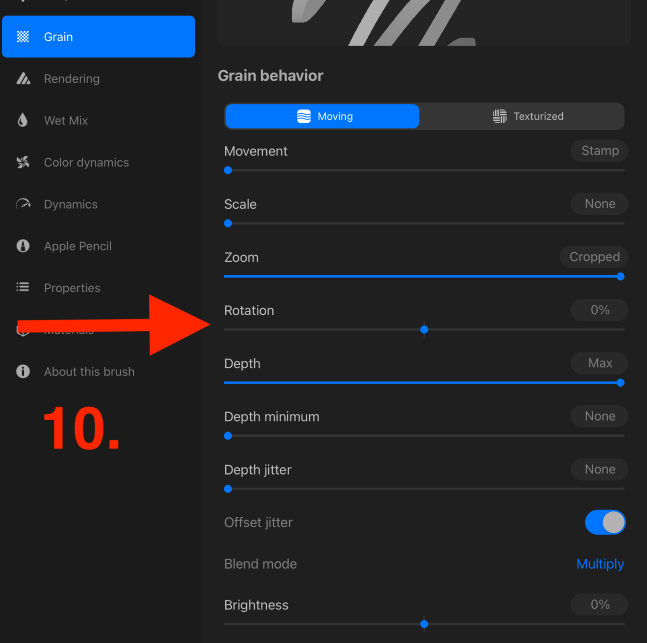
Step 10: Open your Grain menu. Ensure that the Zoom and Depth are increased to Max while everything else should remain at 0% or none.
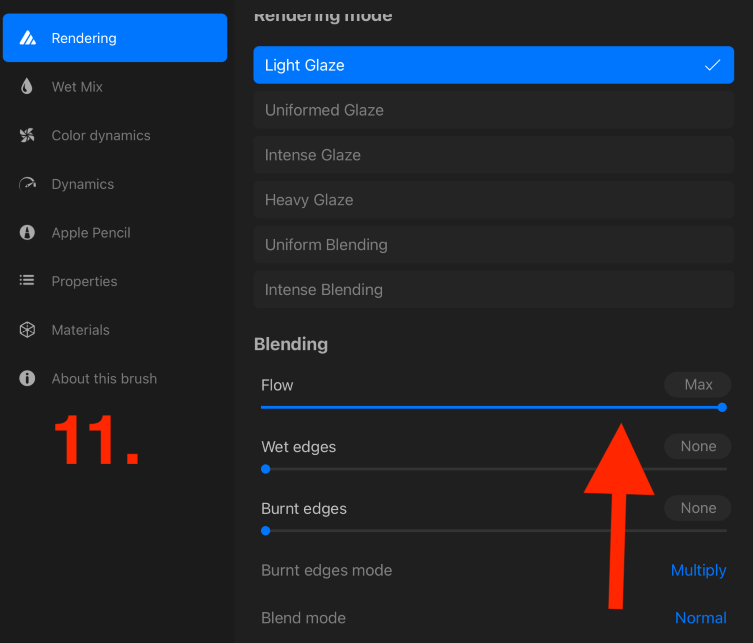
Step 11: Now open your Rendering menu. Ensure that the Flow is increased to Max while everything else should remain at 0% or none.
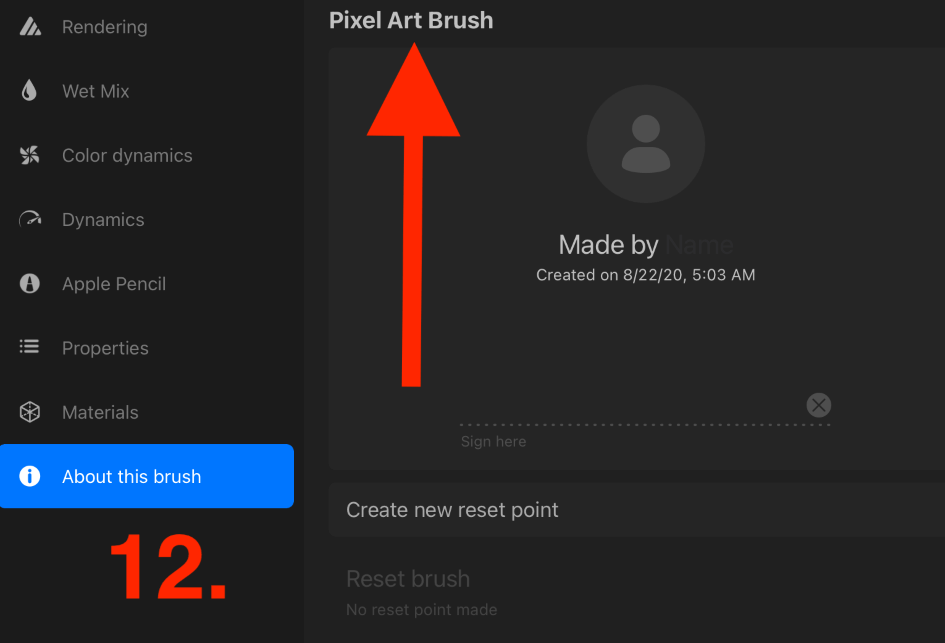
Step 12: In About This Brush, you can rename your new brush so that you can distinguish it from the others. Once you have completed Steps 1 to 12, tap on Done. Your pixel brush is now ready.
Part 2: Creating Your Pixel Canvas
Phew, now that that’s over, it’s time for the easy part. In this section, I will show you how to create a unique canvas that will support your new pixel brush.
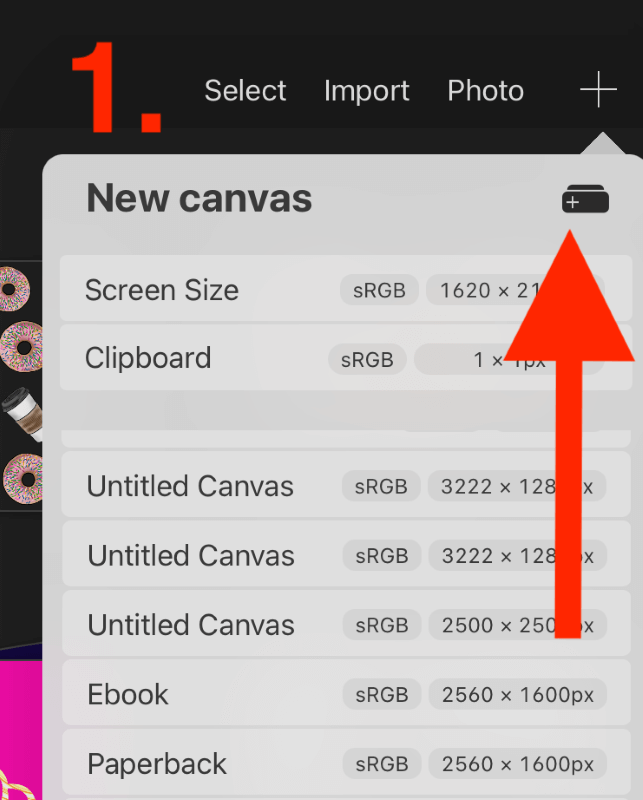
Step 1: In your Procreate Gallery, tap on the + symbol and then select New Canvas.
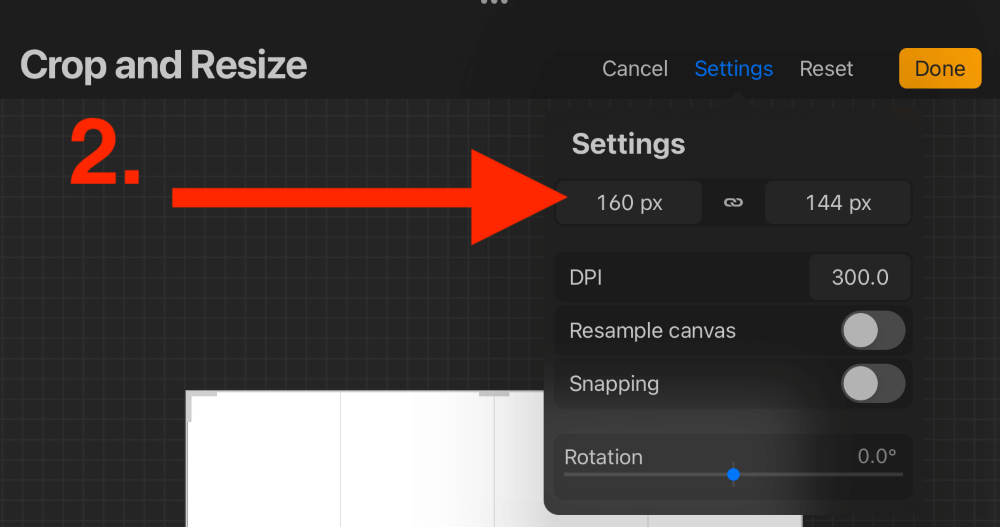
Step 2: In your new Canvas Settings, adjust the dimensions to 160 pixels x 144 pixels. Once you have done this, tap on Done.
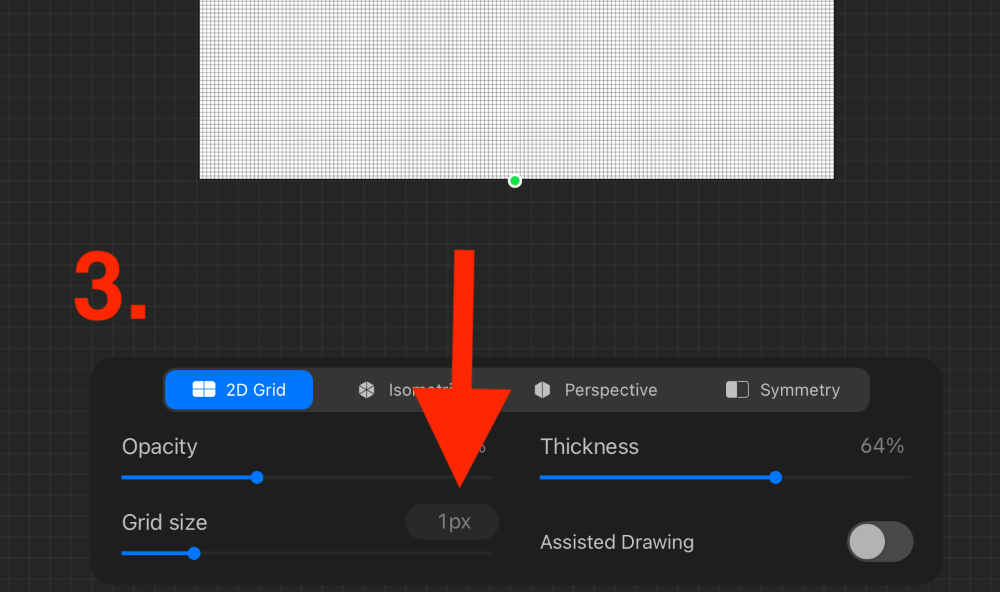
Step 3 (Optional): Activate your Drawing Guide and adjust your Grid Size to 1 pixel. This can help you when drawing with individual pixels. I prefer to draw freehand without it.
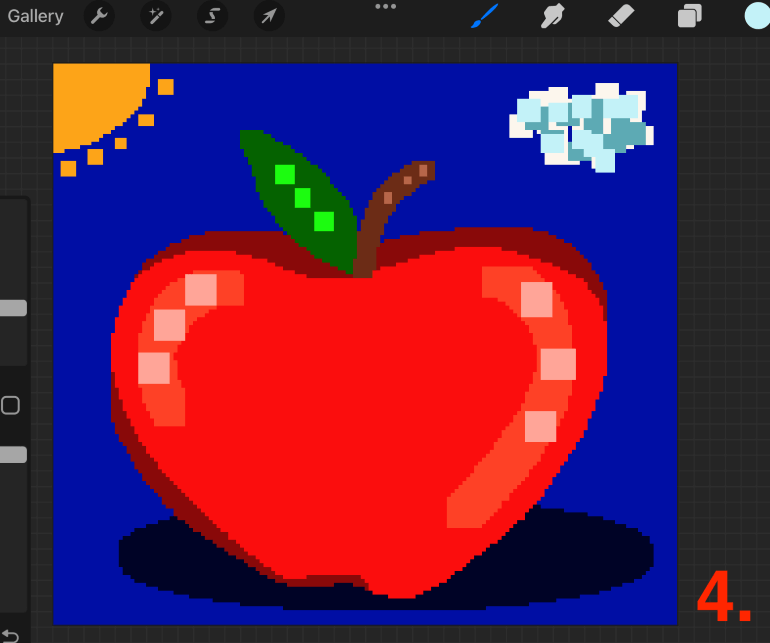
Step 4: You are now ready to start drawing your pixel art. Once you have completed your drawing, feel free to save it as any file of your choice.
Pro Tip: If you really don’t have the time or effort to create your own pixel brush, you can skip Part 1 and purchase pixel brush sets from other artists online and import them into your Procreate Brush Library. This will save you time and support other digital artists.
Why Pixel Art?
Some people have asked me why on earth would you try to make your digital artwork look of lesser quality. I tell them the same thing. Pixel art is a style of digital drawing and it also isolates your subject in a really unique way. There’s a reason it’s so popular and sought after.
It’s a graphic style of working that eliminates the fluff and faff around the lesser elements of perfection and really lets the viewer focus on the main message of plain and simple. Have a look at some of these examples of pixel art online and see what you think:

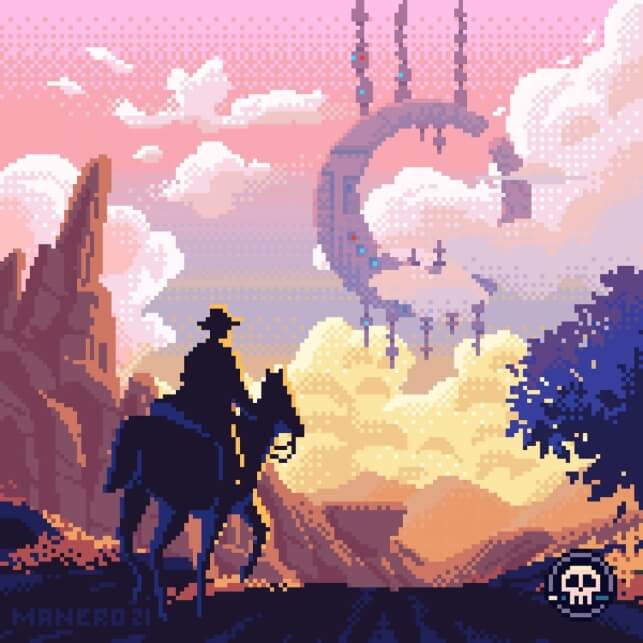
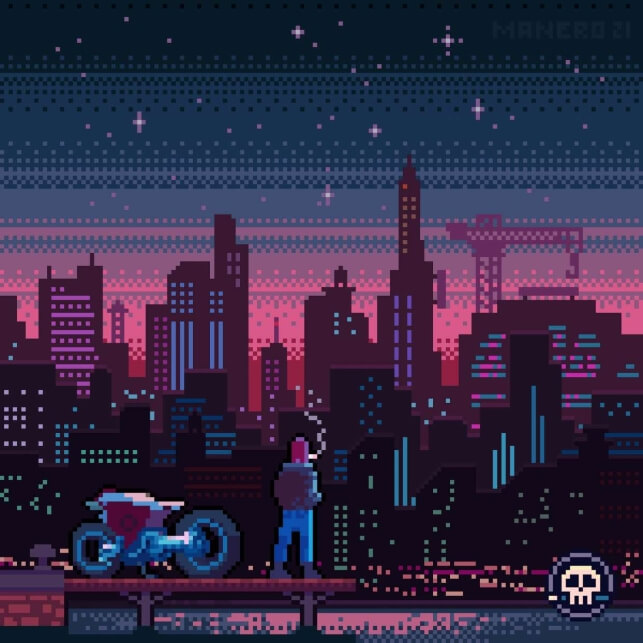
Procreate artist Ittai Manero offers an array of pixel brushes and has posted some of his own work to promote them. You can see more of his work here.
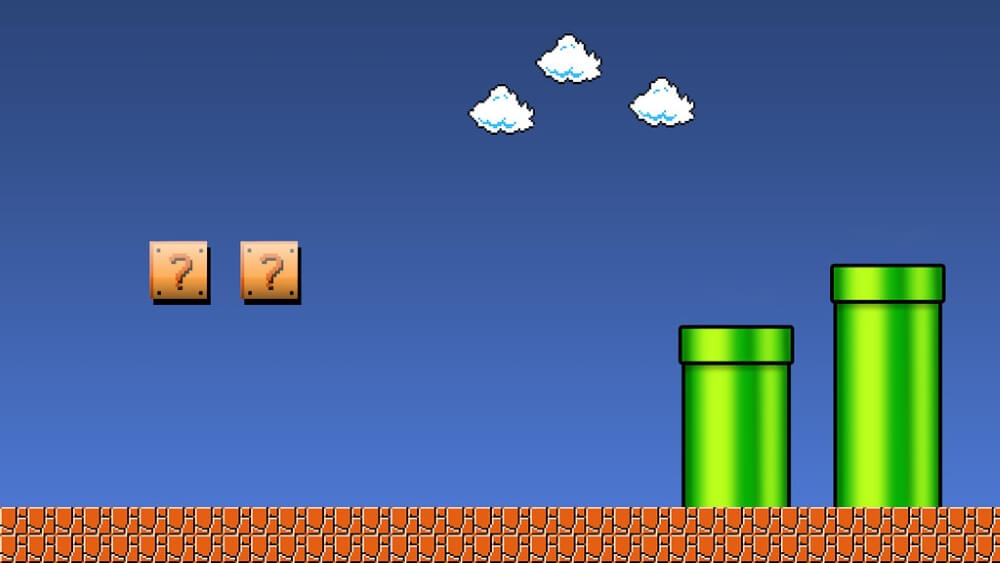
Let’s never forget the iconic OG Super Mario. The Nintendo graphics of my childhood will forever live in my heart and excite my inner Gameboy fanatic. These masterpieces were found on Sideshow and Flickr.
FAQs
Below is a selection of your pixel art questions. I have answered them briefly for you:
How to do pixel art in Procreate Pocket?
The Procreate Pocket app has all of the functions you need to be able to complete both parts of the tutorial above. This means you can absolutely make pixel art on the Pocket app too.
Can I use the Procreate pixel art grid?
You can download a grid online and use it when drawing your pixel art on Procreate. Alternatively, you can also activate your Drawing Guide and change your Grid Size to 1 pixel.
What’s the Procreate pixel art canvas size?
You can research a series of suitable canvas dimensions online depending on your needs that will support pixel art on Procreate. I personally like to use the dimensions 160px – 144px as I find this size very reliable.
How to export pixel art on Procreate?
You can export your pixel art on Procreate the same way you would save any other artwork. Choose the Share option and select PNG or JPEG to save your work onto your device.
Conclusion
Pixel art is timeless and has proven that it’s not going away. If you’re interested in this graphic style of drawing, I highly suggest spending the time to create your own pixel brush so that you can learn from scratch and really understand the technical aspect of the drawing style.
If you are short on time, don’t worry. Procreate artists all over the world have your back and have a wide range of pixel art brush palettes to choose from so you can get started today. You never know, this might just be your favorite new skill waiting to be discovered.
Are you a pixel artist on Procreate? Share your own personal experience in the comments section below.
