
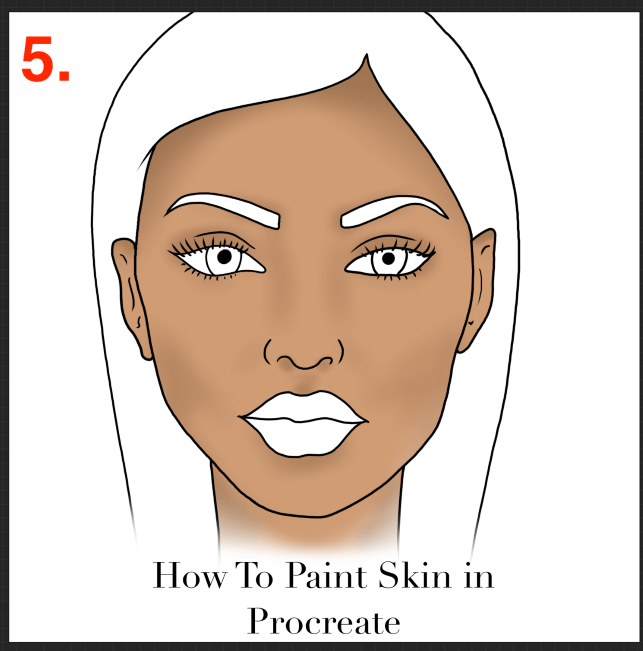
Start by creating a palette of skin tones in your Color Disc. Then use a base color and fill in all areas of the skin. Using the Soft Brush, add darker shadows, mid-tones, and highlights to your canvas. After they are blended, add your textures and details.
I’m Carolyn and for over three years, I have been running my digital illustration business using Procreate. I started off doing portraits of people and animals so I’m very experienced when it comes to coloring in and painting skin tones using the app.
If you plan on creating artwork that consists of characters, humans, or any realistic creatures, this skill will be used quite frequently so it’s best to start learning it as soon as possible.
In this article, I’m going to show you the very basics of adding color tone to your artwork in Procreate along with some drawing tips.
Note: Screenshots are taken from Procreate on iPadOS 15.5.
Table of Contents
Key Takeaways
- Always have a skin color palette that you would like to use pre-loaded into your Color Wheel.
- Start by adding a neutral skin tone as a base color for your drawing.
- Use a blending brush to add in the darkest and lightest areas of the skin.
- Add final touches like hair, freckles, blemishes, or textures last.
10 Detailed Steps to Color/Paint Skin in Procreate
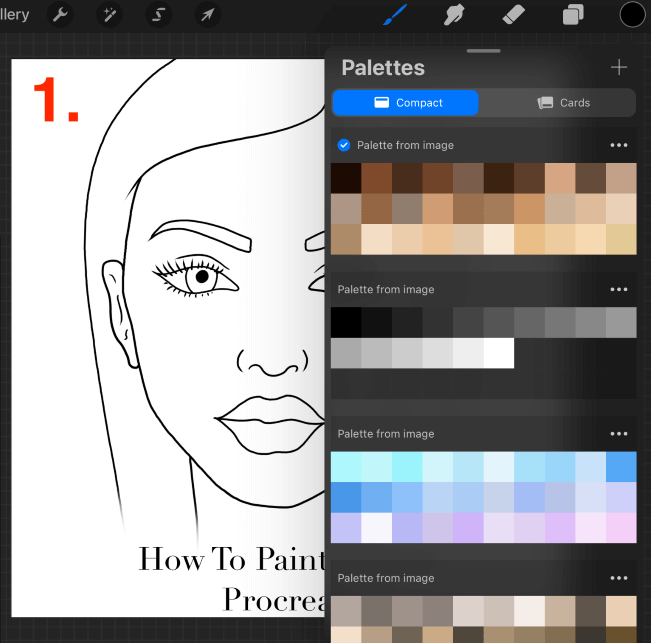
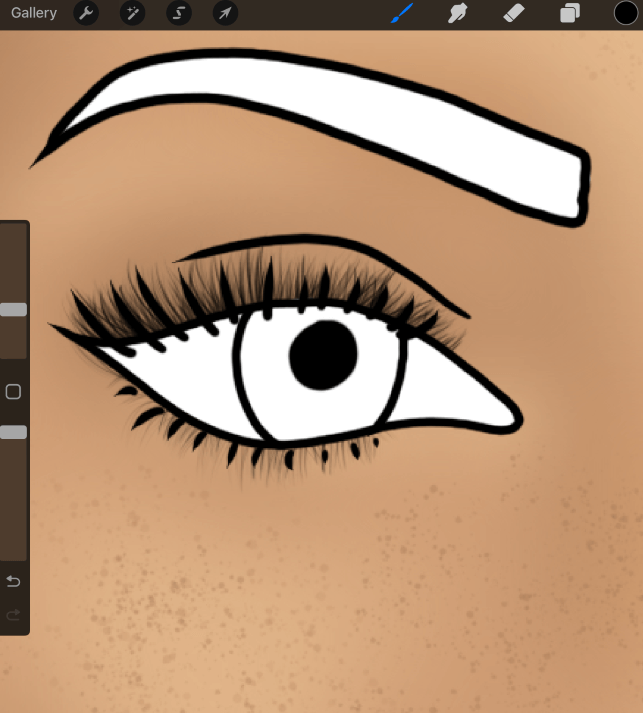
In order to get started on this method, you should have your outline drawing done and have a good idea of which areas you want to add skin color to. Ensure you have added a color palette of skin tones into your Color Disc that you can use for your drawing.
Step 1: Choose the color palette you are going to use for skin tones. I added mine as an image that I found online which consisted of the skin tone range I wanted to emulate. Choose the base color. This should be a mid-range neutral skin color.
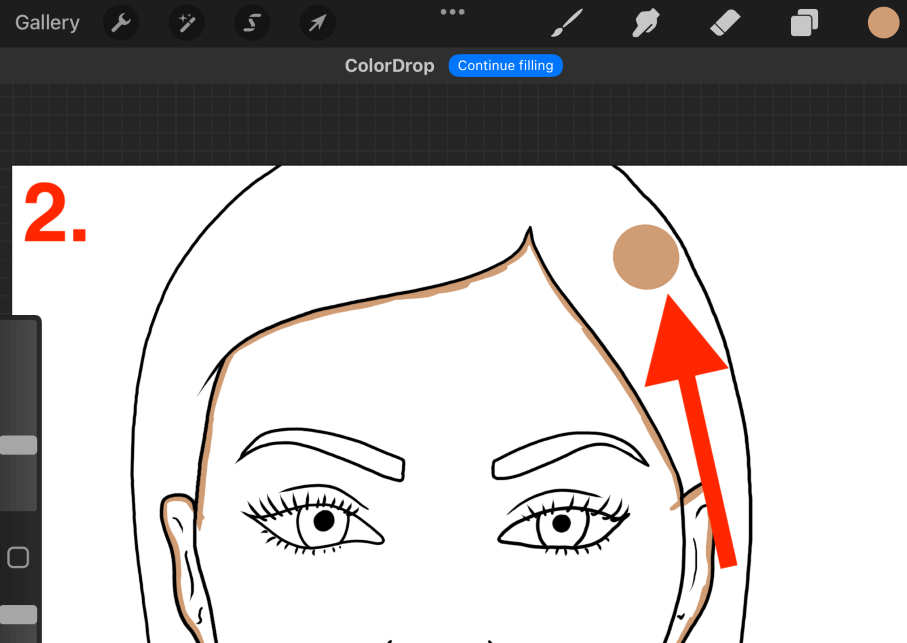
Step 2: Use a clean line brush like the Studio Pen, and fill in the areas of skin color with your base color from your palette. I did this by outlining the features and the face and then dragging and dropping the color disc to invoke to Color Fill tool.
Step 3: Once you have added your base color, Alpha Lock this layer by tapping on the thumbnail of the layer and choosing the Alpha Lock setting. Then create a new layer on top of your base color and activate the Clipping Mask.
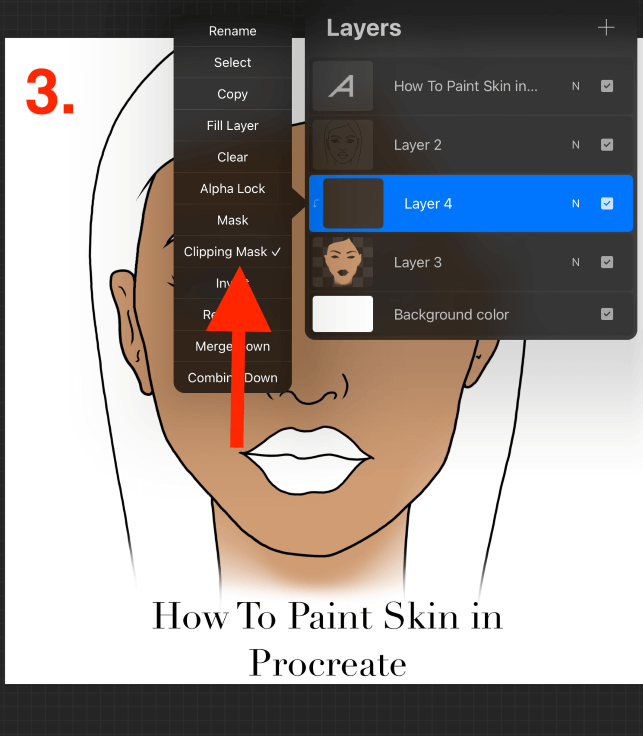
Pro Tip: By activating the Clipping Mask will only allow you to add color to the same area of the layer that you have Alpha Locked beneath it. This basically helps you color within the lines but on a totally separate layer.
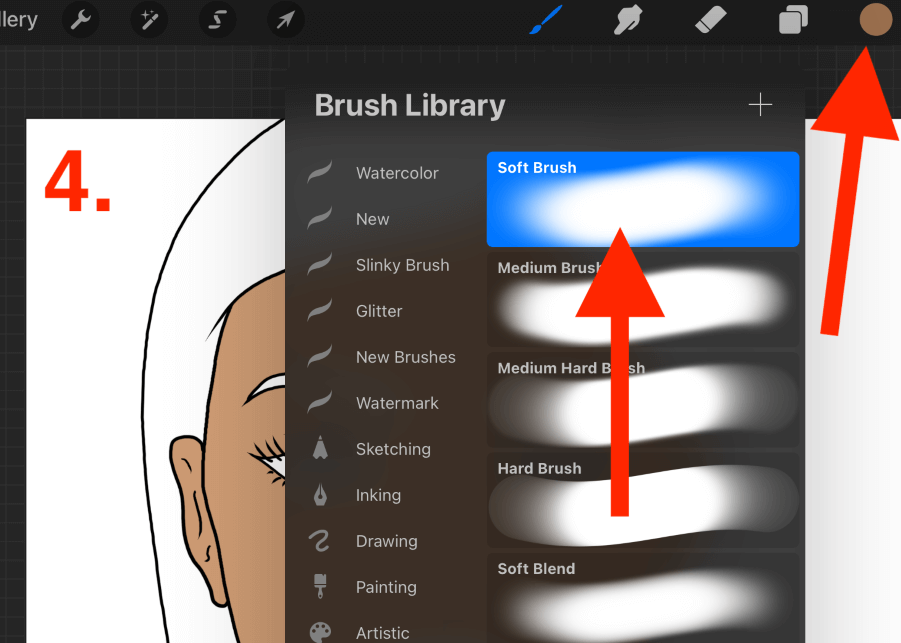
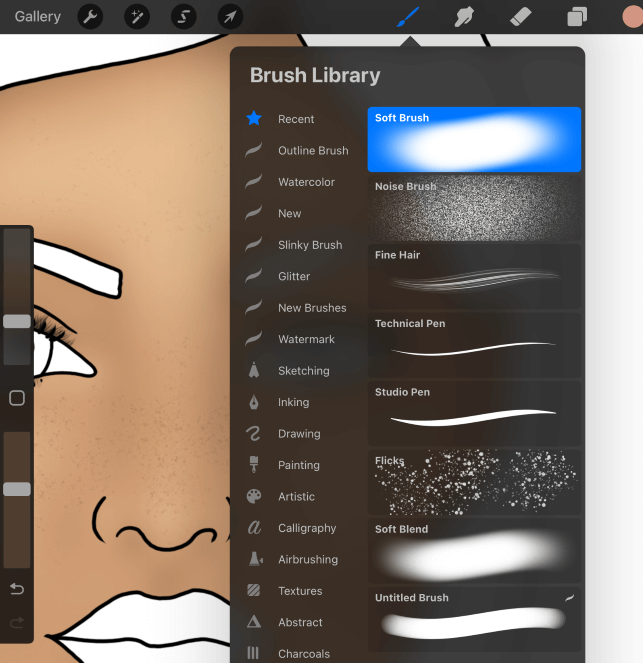
Step 4: Choose a darker shade of skin color from your palette. Then activate the Soft Brush by tapping on the paintbrush icon and scrolling down to open the Airbrushing menu.
Step 5: Using the Soft Brush, add the darker shadows of the face around the edge of the face and the features. Then using a brighter skin tone, add in the lighter areas of the face like the ridge of the nose and the cheeks. I also add mid-tones to help with blending.
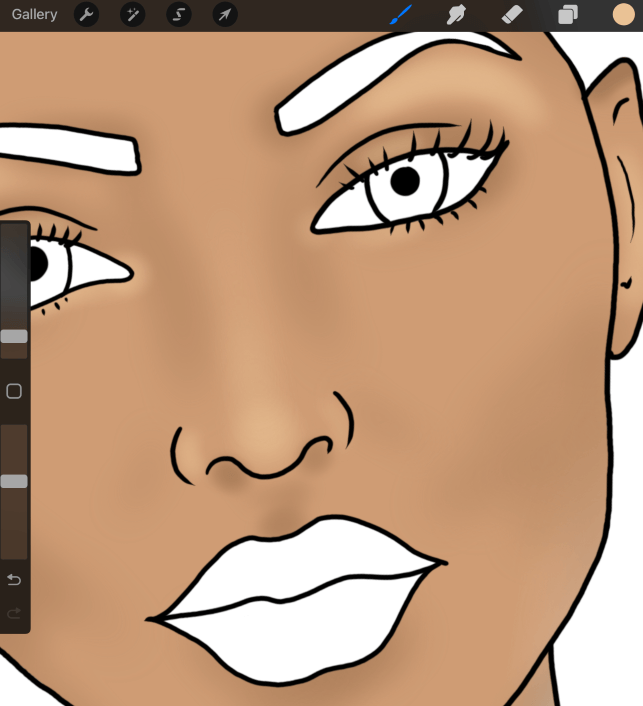
Pro Tip: Before you apply shading, you should identify a light source. This will better help you to distinguish where to add the different shades and tones. Simply choose which direction the sun is shining on the face of your drawing and imagine the light is coming from that angle.
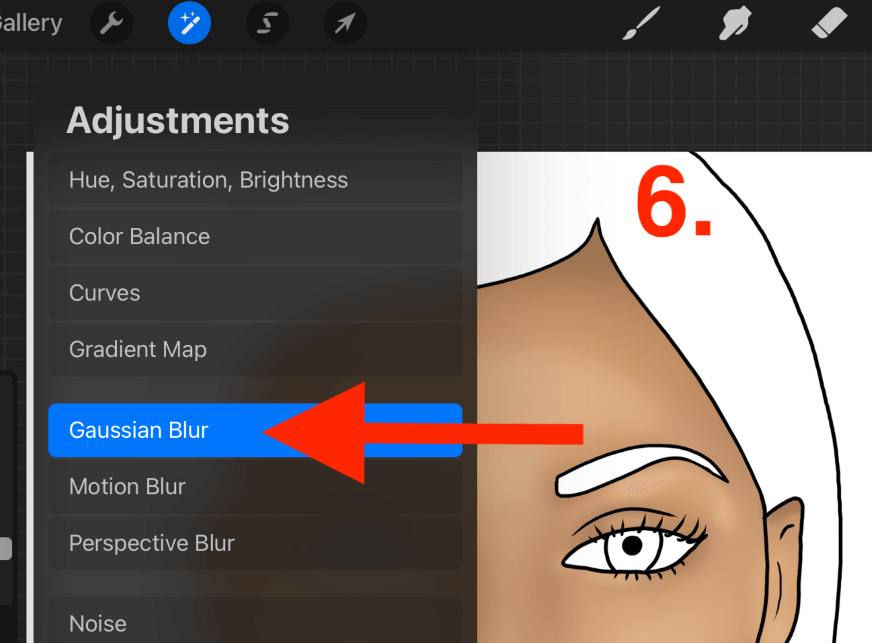
Step 6: Now it’s time to blend the shading that you have added to the face. Open your Adjustments tool by tapping on the magic wand icon. Scroll down to select the Gaussian Blur option.
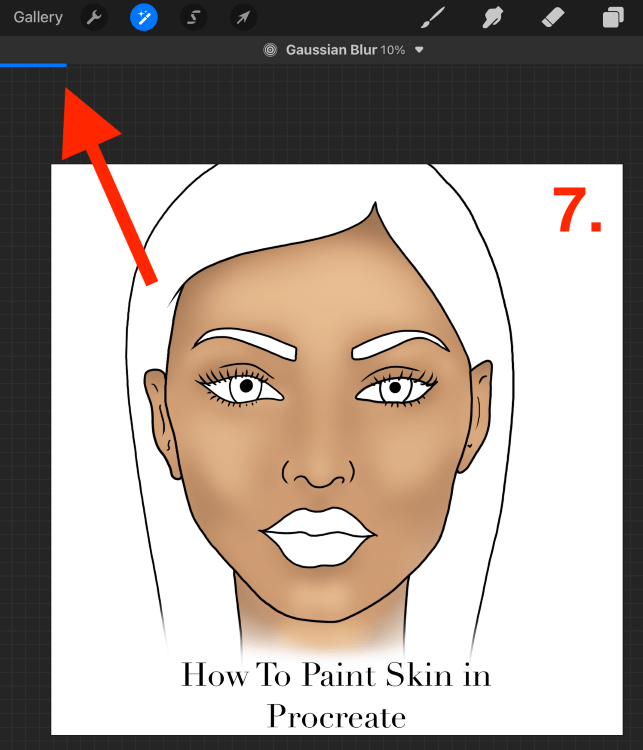
Step 7: Increase the percentage of Gaussian Blur by sliding your stylus to the right of the canvas. Because you used a soft brush, you won’t need to slide very far. You want your lines to be blended but still be able to distinguish the color difference between the shades.
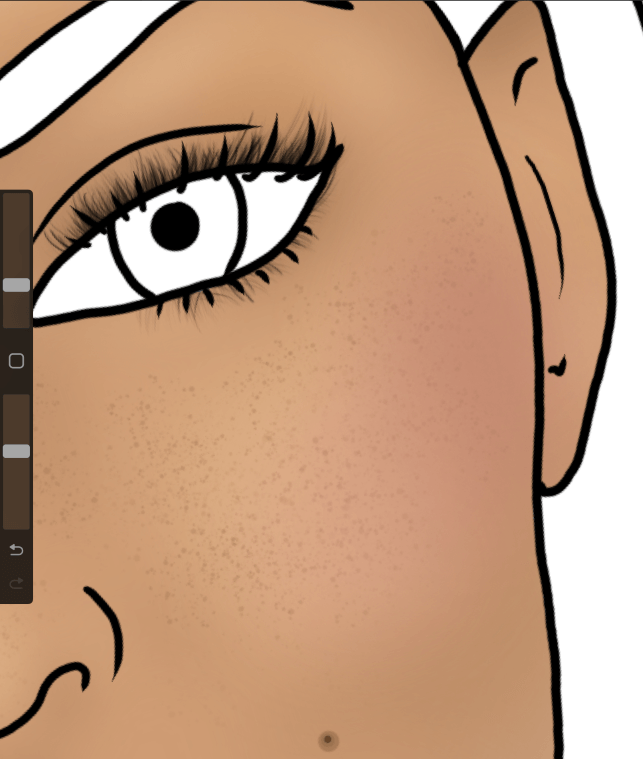
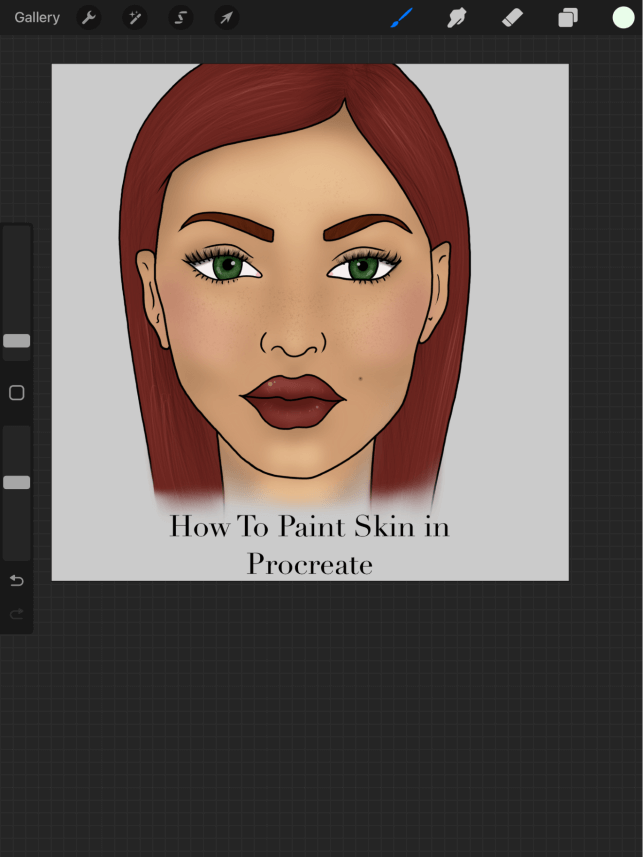
Step 8: Once you are happy with skin color and shading, it’s time to add the final details of the skin.
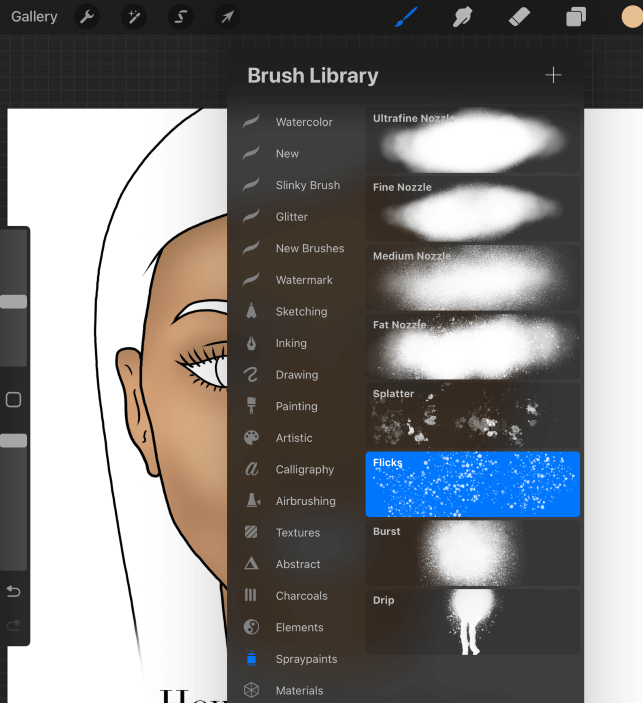
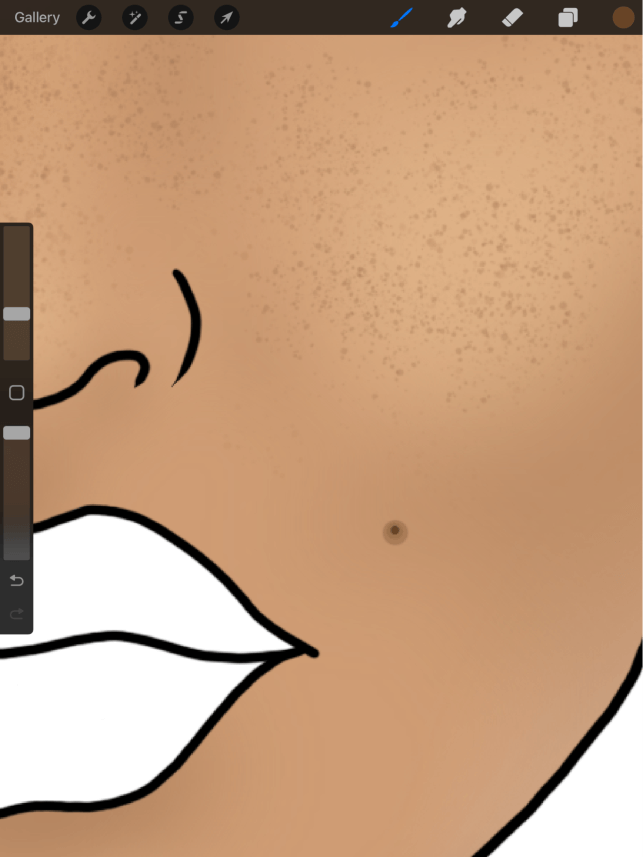
I used the Flicks brush from the Spraypaints palette to add freckles across the cheeks and the nose.
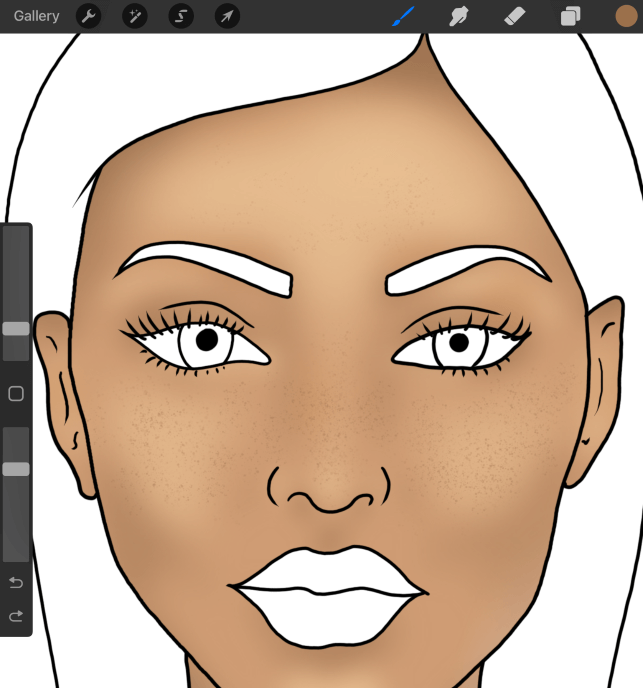
I used the Studio Pen with low opacity to add a mole to the right of the mouth.
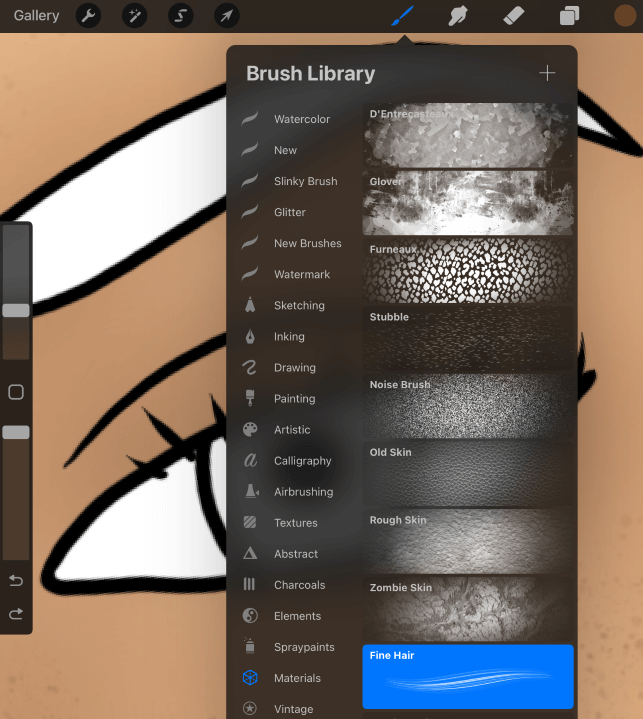
Then I used the Fine Hair brush from the Materials palette to add volume to the eyelashes. You can also use the Stubble brush to add facial hair to your skin if needed.
I used the Soft Brush with a pinker tone from the color palette to add some blush to the cheekbones.
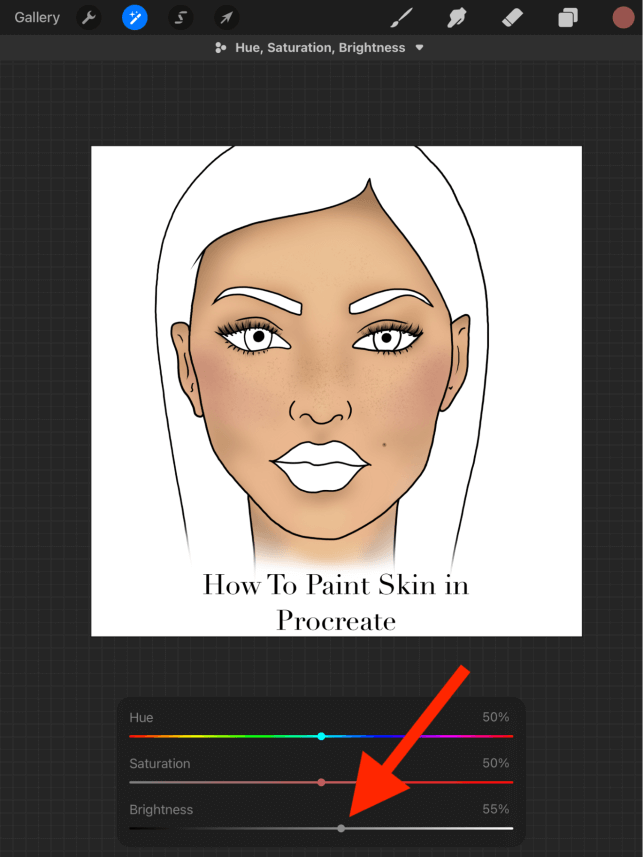
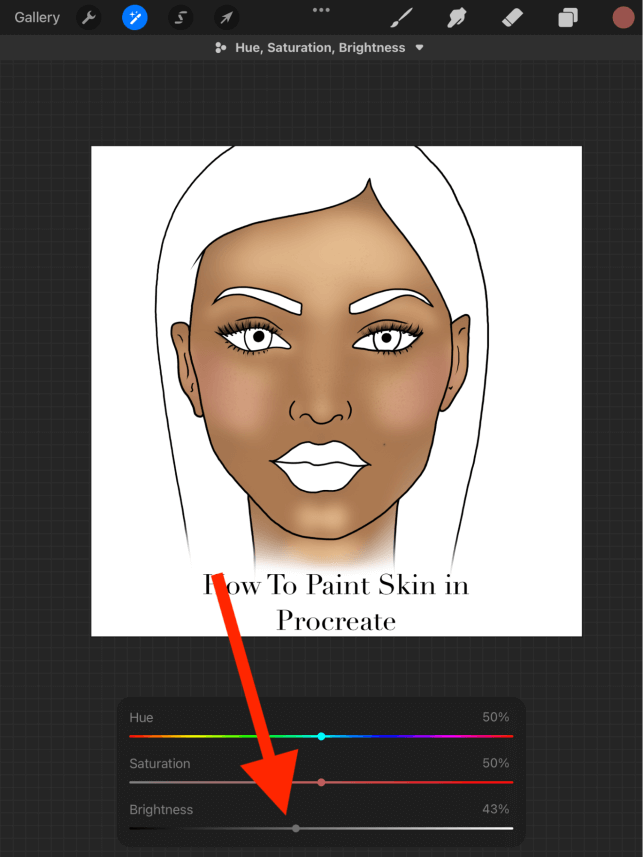
Step 9: This step is optional but a good thing to know. If you have made the skin tone too dark, too light, or too vibrant, you can use the Adjustments tool to change the light levels and saturation of the skin tones.
Tap on the magic wand icon and select the Hue, Brightness, Saturation menu.
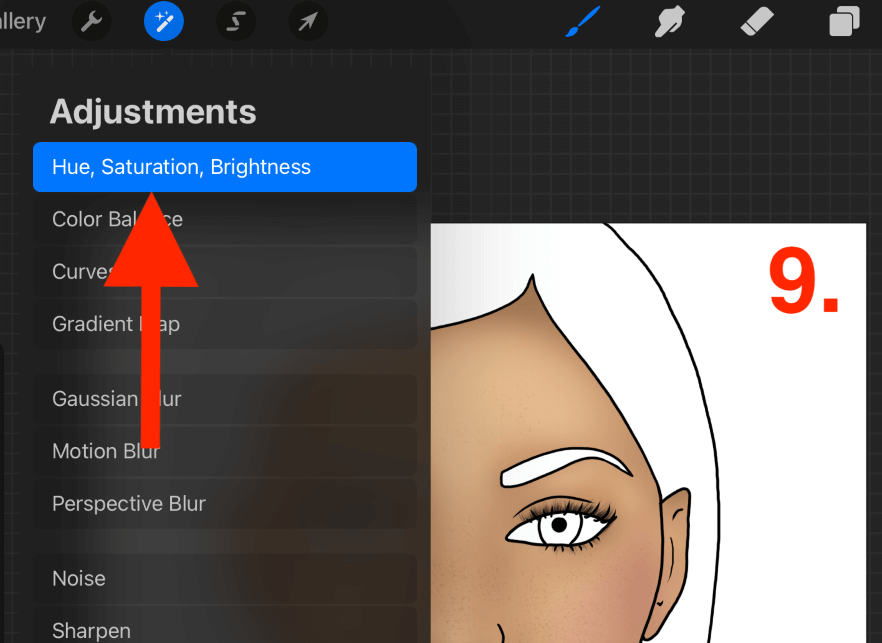
Adjust the toggles at the bottom to make your skin tones lighter, darker, or less saturated.
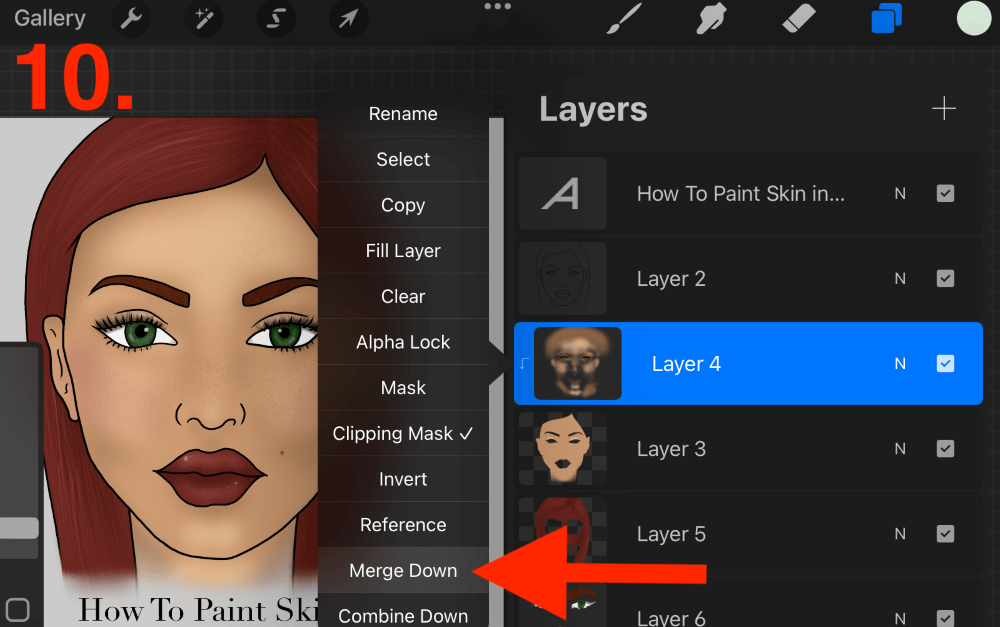
Step 10: Once you have added all of the final touches and have completed your drawing, merge the layers together by tapping on the thumbnail image of the layer and selecting the Merge Down option to combine the two.
FAQs
Below is a selection of your frequently asked questions about how to color or paint skin in Procreate.
How to color anime-style skin in Procreate?
To color anime style skin in Procreate will be a little different than the method shown above as you will use different styles of shading and also a different color palette depending on the style.
How to change skin tone in Procreate?
If you have already applied skin tone in Procreate but want to change it, try opening the Adjustments tool (magic wand icon) and adjusting the levels of Saturation and Brightness until you achieve your desired results.
How to make a Procreate skin color palette?
You can create your own palette or just find one online by searching for it in Google Images. Once you have found a palette or photo source that you like, add it to your Color Wheel by choosing the “Choose from photo” setting.
Is there a free skin texture brush in Procreate?
Procreate does not come with a preloaded skin brush as it’s a hard texture to define. This means I usually end up using a combination of different brushes to achieve the skin texture. Alternatively, you can find one online for free or purchase brushes from another digital artist.
How to shade skin in Procreate?
I recommend using the Soft Brush and always adding the darker skin tones first, Then the lighter tones and you can also add some mid-tones. This will balance out the color values when it comes to blending them together using the Gaussian Blur tool.
Final Thoughts
This guide is a great way to get started on creating skin colors and tones in Procreate. You can modify many parts of this process yourself by changing the palette, brushes, and details used to suit your own subject.
Creating realistic skin tones and textures can be very challenging but it’s one of my favorite things to do in Procreate. I often use close-up photographs of skin as resources to refer to when working on a skin color project. This helps me identify the finer, more subtle details.
How do you paint and color skin in Procreate? Leave me your method in the comments section below.