
Insert the photo you want to use into your canvas. Reduce the Opacity to 65% and add a new layer on top of it. Draw the outline of the subject while accentuating the features. Fill the colors onto another layer and begin shading. Delete the image when complete.
I’m Carolyn and I’ve been using Procreate for over three years to run my digital illustration business. One of my most popular products that customers order are cartoon portraits of existing photos of their family or pets that they want to either frame or print for gifts or logos.
This is a very common use for digital illustration and it’s one of the most enjoyable things to do on Procreate. It takes a bit of practice but once you complete some sample cartoons and find your style, you will never want to stop creating them. Today I’m going to show you how.
Note: Screenshots are taken from Procreate on iPadOS 15.5.
Table of Contents
Key Takeaways
- Make sure the image you are using is of high quality and resolution.
- Accentuate the facial features for a more dramatic cartoon effect.
- Use fun and striking colors to create an eye-catching finished piece.
- The Color Drop tool can help to replicate a person’s hair or skin color.
- Always have the original image visible on your canvas for a quick reference while drawing.
How to Cartoon Yourself in Procreate – Step by Step
Before we get started, ensure you have a high-resolution image that you want to use for your cartoon saved to your device. You can use Google Images, purchase one from Shutterstock or take a photo yourself. Or use an image of Snoop Dogg, it’s up to you.
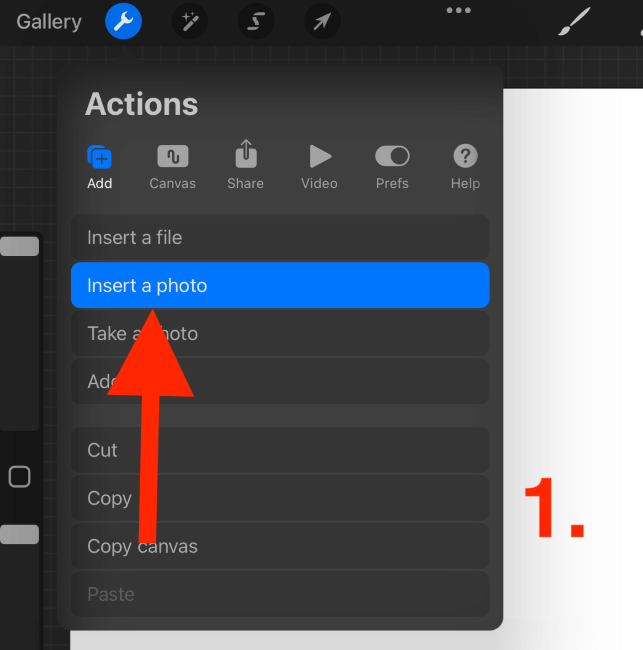
Step 1: Tap on your Actions tool (wrench icon) and click on Add. Then tap on Insert a photo. Tap the photo you want to use from your device and Procreate will automatically add it to Layer 1.
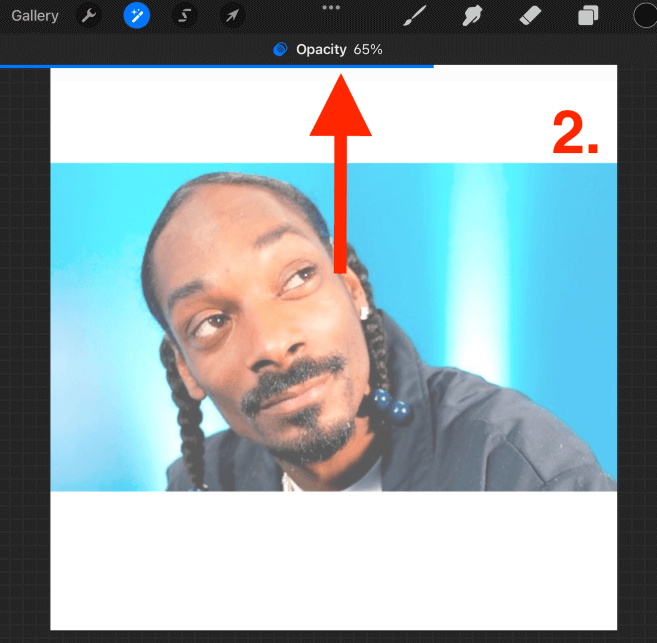
Step 2: Open your Layers menu and double-finger tap on your Image Layer. This will activate your Opacity adjustments menu. Slide your toggle to the left to reduce the Opacity to about 65%. This will allow you to see what you’re drawing in the next step.
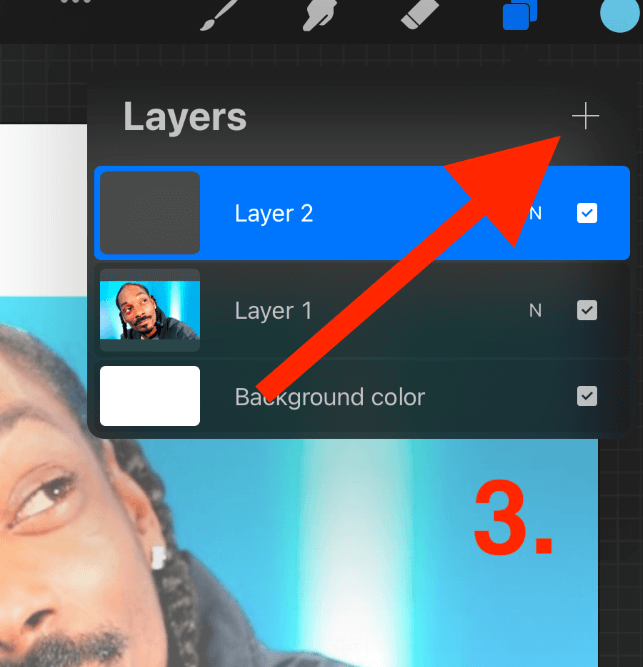
Step 3: Add a new layer on top of your image layer by tapping on the + symbol of your Layers Menu.
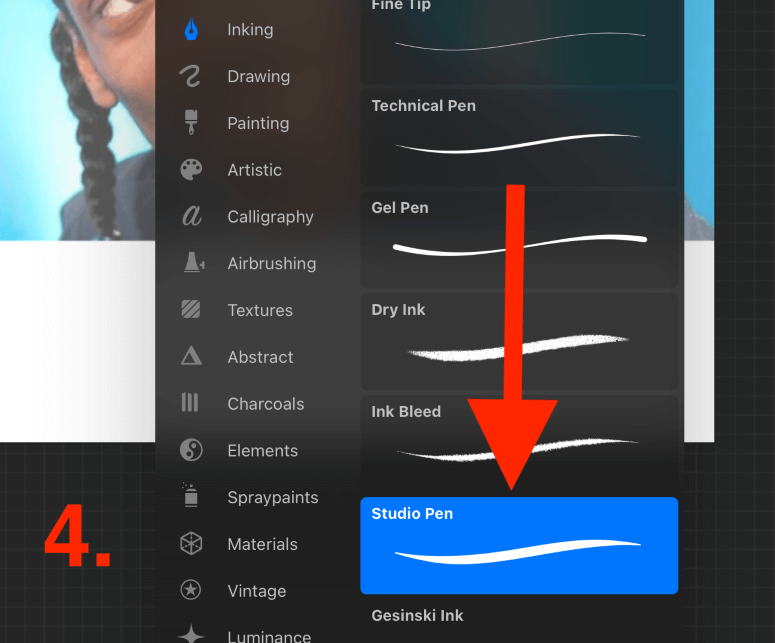
Step 4: Select a brush that you’re comfortable drawing with. You will use this brush to draw an outline of your subject so choose wisely. I like to use Studio Pen from the Inking palette with a size of about 20%.
Step 5: Begin drawing the outline of your subject. Focus on the hair, head, body, and features, but you don’t have to include too much detail. Cartoons are simple so don’t overdo the lines. Try to accentuate the features for a more cartoony look.

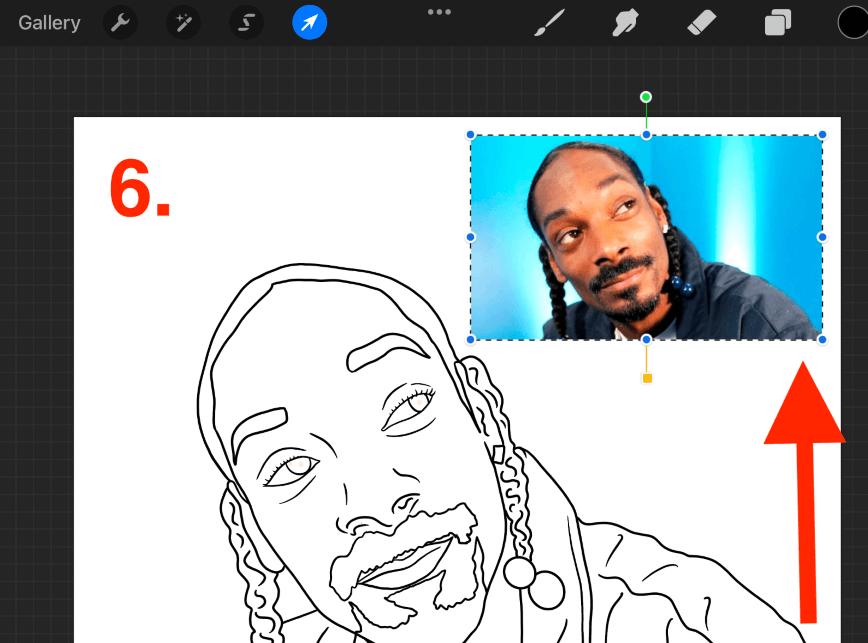
Step 6: Duplicate your image and move it to a corner of your canvas. This way you can use your photo as a reference when choosing which colors to use.
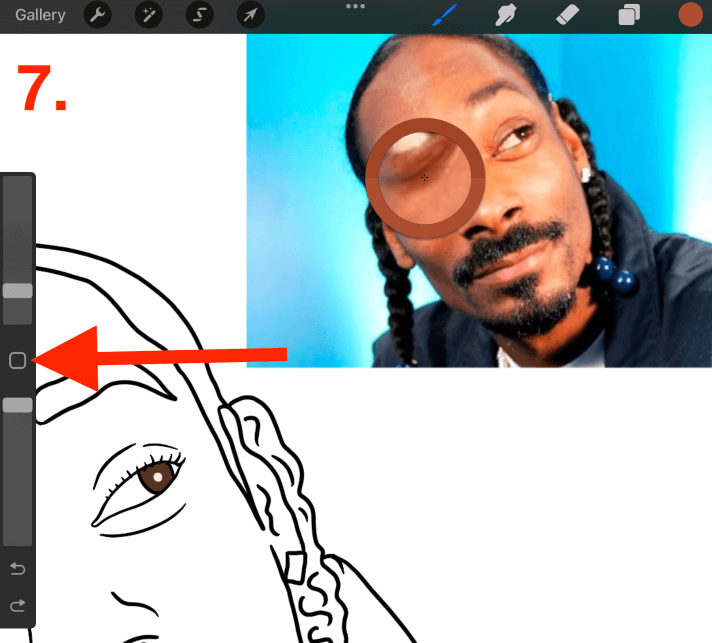
Step 7: Add new layers underneath your outline layer and begin filling in your colors. Use the Color Drop tool to identify different shades from your image.
Do this by tapping on the square shape in the middle of your Sidebar and dragging it over the color you want to emulate.
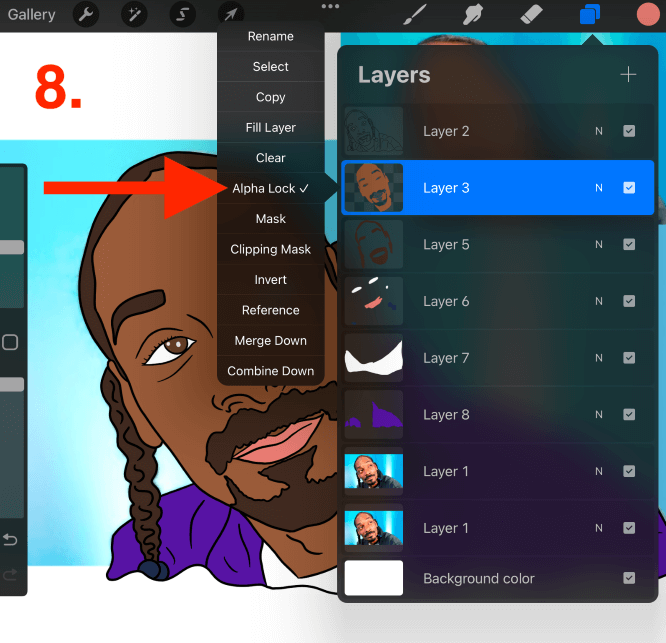
Step 8: Once you have added all of your base colors, it’s time to add some details and shading. Activate Alpha Lock on each layer by tapping the layer’s thumbnail and selecting the Alpha Lock option. Now add your details to each layer.
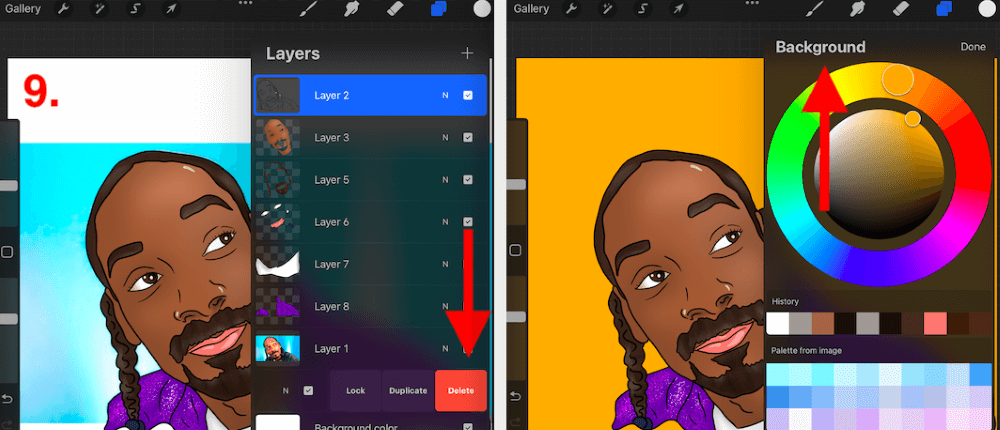
Step 9: Once you have added the finishing touches, delete the original image by sliding left on the layer and selecting Delete. Now you are ready to change the background color and add any other details to the artwork.
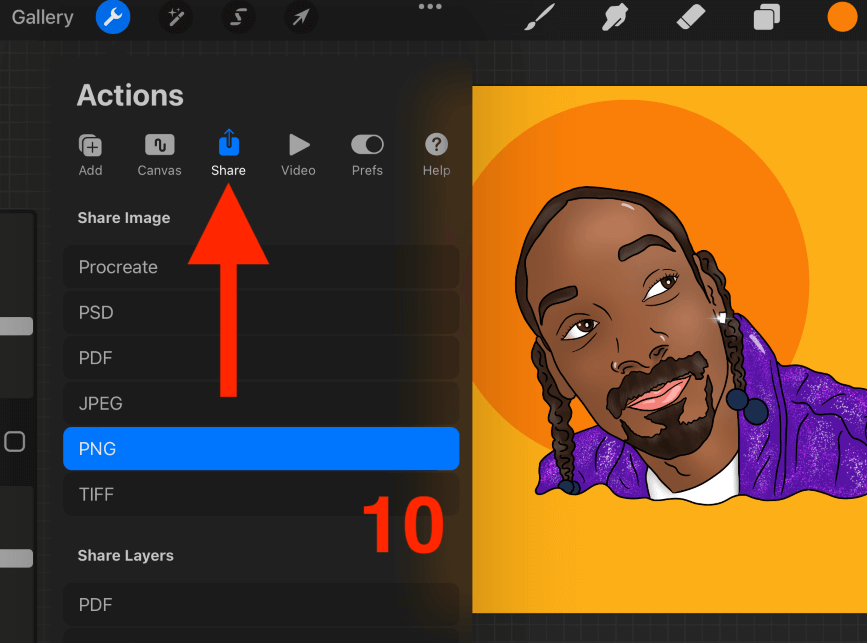
Step 10: Once you are finished with your artwork, tap on the Actions Tool (wrench icon) and select Share. Tap on the file type you need and save your project to your device.
Hints and Tips
I do have a selection of tips that you should be aware of when using this method. They might be able to help you get the results you want. Here they are:
Choosing the right image
The quality of the image you use for this method will have a direct impact on your results. You need to ensure your photo is high resolution, extremely clear, and isn’t missing anything that you can’t replicate from your own memory.
For example, Your client wants a full-length cartoon but the image is of the shoulders up only.
If a client sends you a photo, always add it to your canvas and zoom in to make sure it’s high enough quality. If it’s not, ask the client for a better image. Otherwise, you may risk having low-quality details in the final design.
Double-check the eye color
I always ask my clients to confirm the eye color of each person in the photograph. It’s a small detail but if it is overlooked or incorrect, it can destroy the likeness of a person or animal. Eye color is extremely hard to identify from a photograph, especially if it’s not a high-quality one.
Accentuate the features
If you are looking for a more extreme cartoon effect, try accentuating the size of the main features like the eyes, nose, or lips. This can give you more caricature or Disney-like effects without changing too much of the original image.
Get creative with colors
You don’t have to replicate each color from an image exactly. Feel free to experiment with different or eye-popping colors to bring some unique, cartoon fun into the mix. This is where you can really make an artwork pop so have fun with it.
Ensure likeness
It’s important to really study the shapes and details of a person or animal’s image to make sure that the final result actually looks like them. You may not notice a small difference in someone’s ears but to your client, that could be a deal breaker if it doesn’t look right to them.
Color Drop tool
I like to use the Color Drop tool when I’m trying to recreate a person’s hair or skin color. This can give you a great place to start on your color wheel until you find the shade that looks just right.
FAQs
Below is a selection of your frequently asked questions about this topic. I have briefly answered them for you:
How to cartoon an image on Procreate?
You can use the method above to turn any image into a cartoon on Procreate but there is no quick fix or setting that does it for you. You need to insert the image into a canvas and hand draw it in a cartoon style and color it in.
How to turn a picture into a drawing on Procreate?
Insert your picture into a layer on Procreate and reduce its opacity. Add a new layer above the picture layer and begin to draw or trace it. Then manually color it in and add any details you want to add before exporting it as a file and saving it to your device.
How to cartoon yourself for free?
There are a few different apps and websites available online that will take your photograph and turn it into a cartoon in seconds. However, I prefer the hand-drawn technique as the results come out way more authentic than what a website can offer you.
Should I get cartoon brushes for Procreate?
Honestly, the preloaded brushes that are already available on Procreate are more than enough for what you need to cartoon an image on the app. There is no need to purchase extra brushes unless you have a very particular style in mind.
Final Thoughts
Turning an image into a cartoon on Procreate is by far one of my favorite things to do on the app. The results are striking and every single image always comes out so differently. On top of this, you have a lot of freedom to spice up simple or dull images into something new.
This was one of the first things I learned how to do on Procreate when I first started learning how to use the app. So clearly I highly suggest you do the same. This is a great and fun way to get to know your drawing style and build upon your technique while making something fun.
Have you cartooned yourself on Procreate? Share your results in the comments section below.