To save an artwork with a transparent background in Procreate, you need to untick the Background layer in your Layers menu. Then open your Actions tool (wrench icon) and tap on the Share option. Select the PNG file format and it will export to your device.
I’m Carolyn and I’ve been using Procreate to run my digital illustration business for over three years. Because I work a lot with logo design, graphic design, and lettering, I always have to know the best option when it comes to saving my artwork with a transparent background.
Procreate has made this process very simple and easy for us. It only takes a moment to save your artwork with a transparent background. But before saving the file with transparent background, you need to remove the background first, and I’ll show you how.
Note: Screenshots are taken from Procreate on iPadOS 15.5.
Table of Contents
Key Takeaways
- You can save your file with a transparent background by unticking the Background Layer and saving it to your device as a PNG file.
- There are two ways to remove a background from an image or artwork – the Selection Tool and the Eraser Tool.
- PNG is one of the only file types that supports transparent backgrounds so make sure you always save your file as PNG.
2 Ways to Remove a Background in Procreate
In order to save/export your file with a transparent background, you need to first remove the existing background or create an artwork with no background details. You can use the following method to remove the background from both photos or digital artwork. Here’s how:
Method 1: Selection Tool
This method is the best option if your subject doesn’t have a lot of small or fine details around the edges and it can be a little bit less time-consuming.
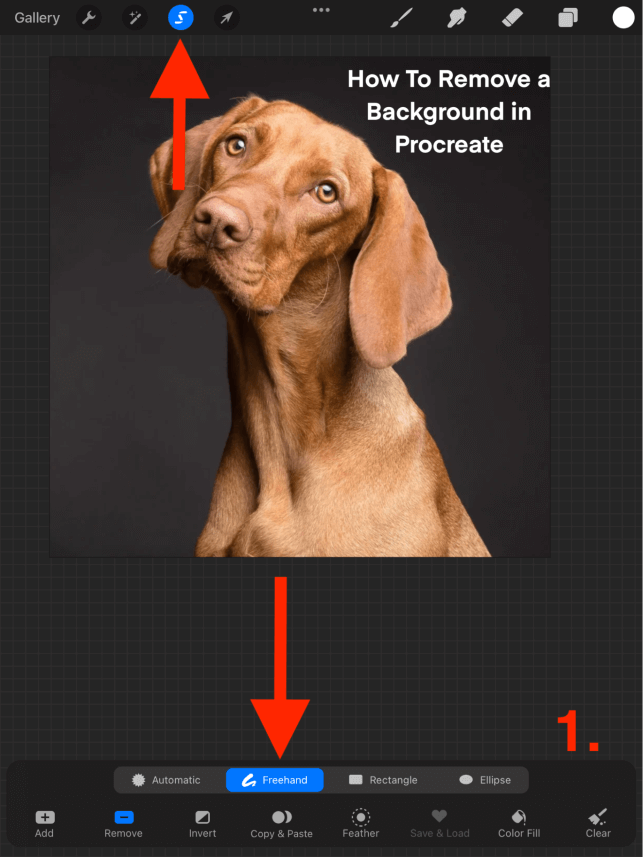
Step 1: Open your Selection tool by tapping on the S icon. In the bottom window, select the Freehand option.
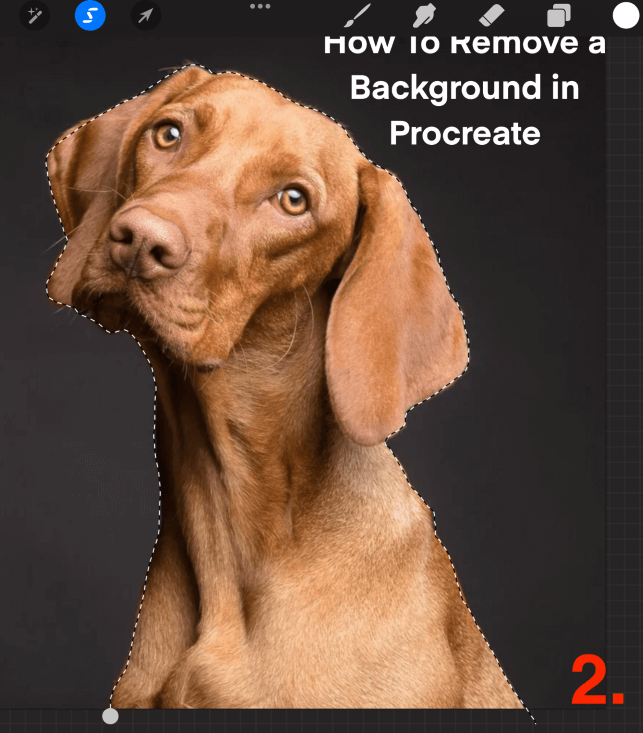
Step 2: Using your finger or stylus, manually draw an outline around the area you want to keep.
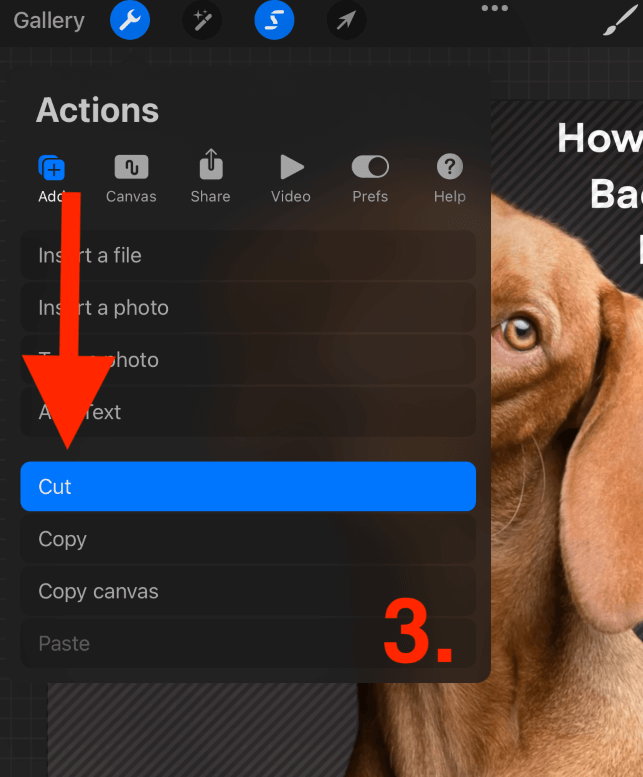
Step 3: To keep your Selection tool active, tap on your Actions tool (wrench icon). Under the Add menu, tap on Cut. This will remove the area around your subject. You are now ready to save your file following the method shown above.
Method 2: Eraser Tool
This is a more time-consuming method that involves manually removing the background however it gives you more control over finer details.
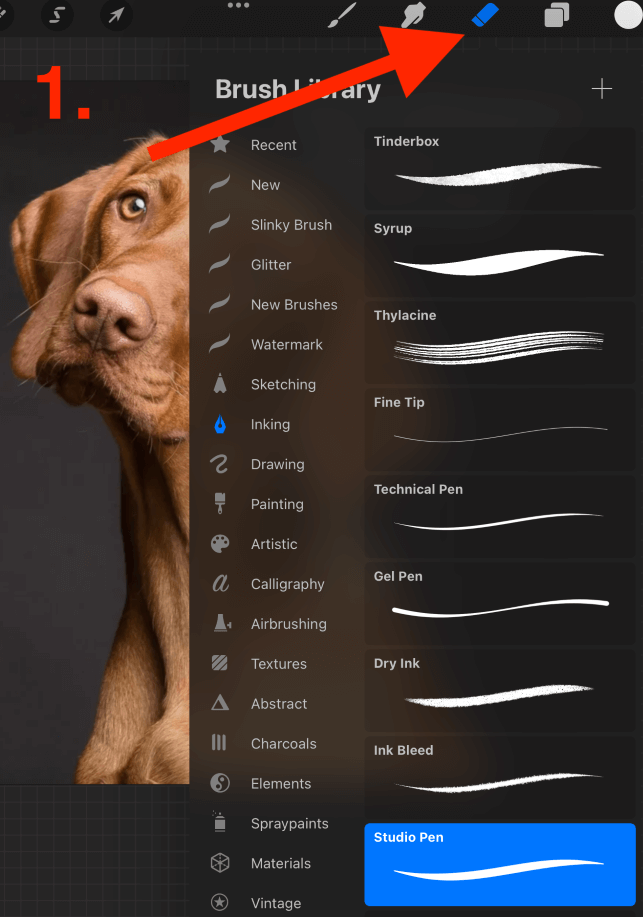
Step 1: Open your Eraser tool (eraser icon) and select an eraser brush that will allow you to have smooth and fine lines. I usually use the Studio Pen. Once you have made your selection, tap back to your canvas.
Step 2: Using your Eraser tool, manually remove first the edges around your subject and then the remaining background of the image.
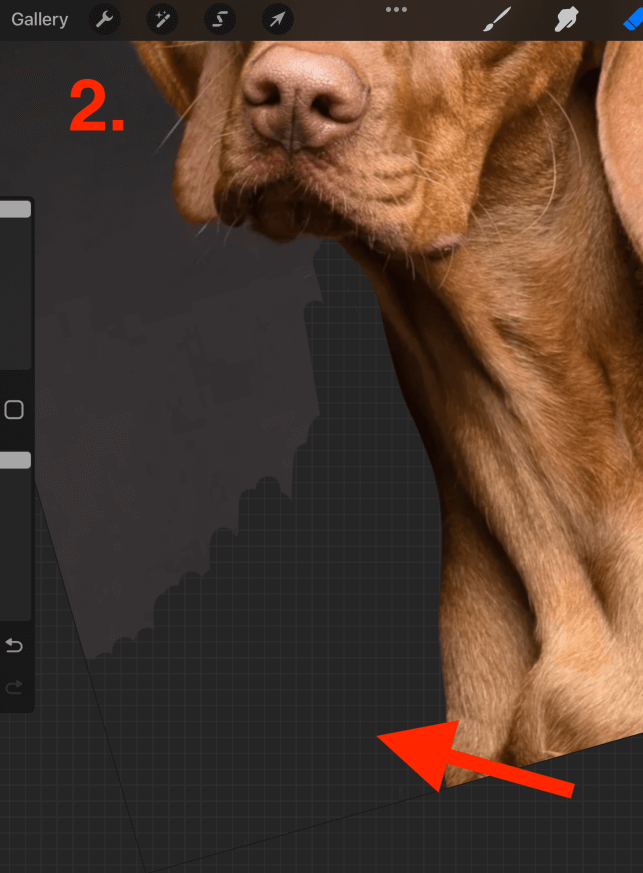
Step 3: Once you have removed the background and followed the method shown above to save your PNG file, your image will be accessible on your device with a checkered background. Tap on the image to see it with a transparent background.

Pro Tip: You know your image is saved as a transparent background if you can see a checkered background. Once you add your image somewhere, the checkers will no longer appear. This is just your device’s way of showing that this image has no background.
How to Save Procreate File with Transparent Background – Step by Step
This is a very quick and easy process to follow. You just need to ensure your artwork is transparent background compatible, meaning there’s no layer covering the whole canvas that you need to keep. Here’s how:
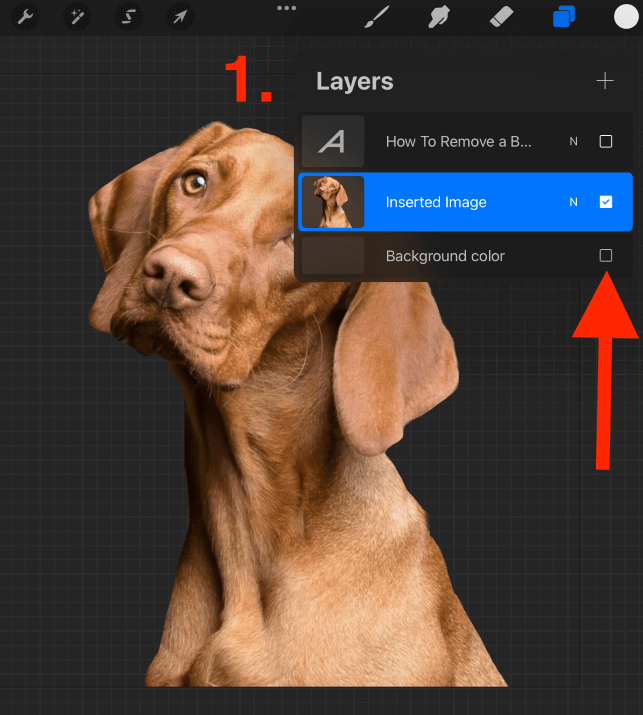
Step 1: Open your Layers menu (two squares icon) in the top right-hand corner of your canvas beside your Color Disc. Untick the Background Color layer.
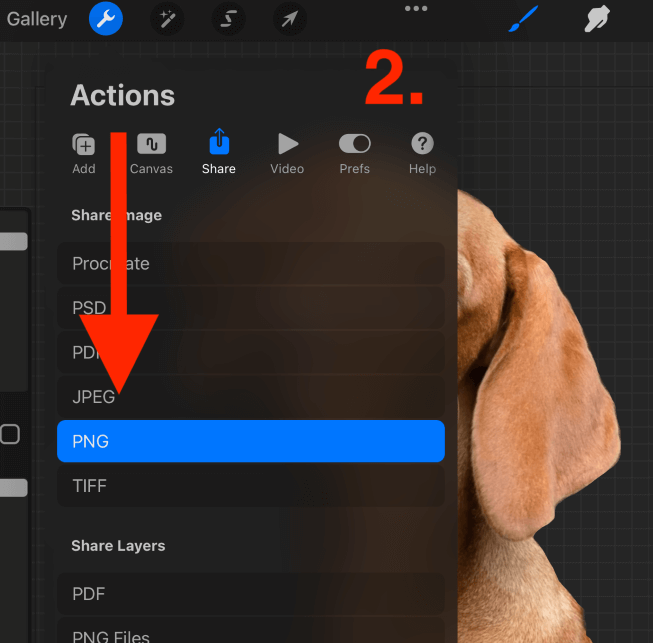
Step 2: Tap on your Actions tool (wrench icon) and open the Share menu. Scroll down and tap on PNG. This will prepare your image as a PNG file and get it ready to be exported.
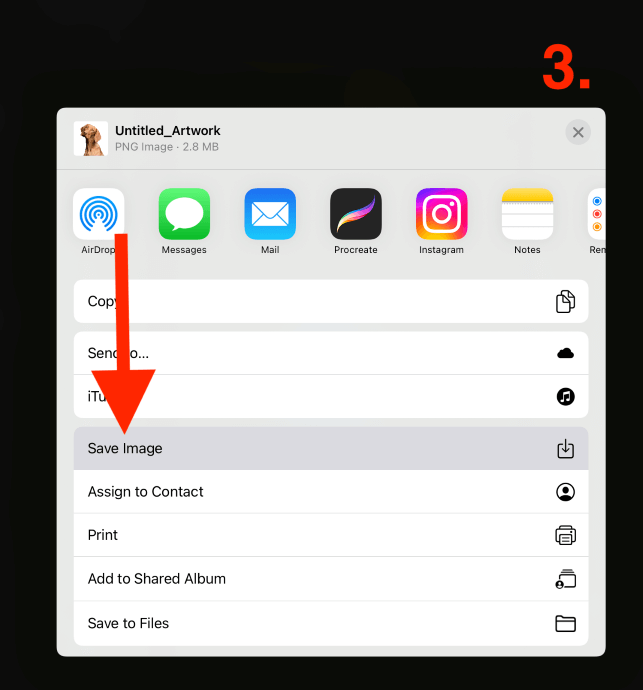
Step 3: Once the export is complete, a window will appear. Here you can choose where you want to save your PNG file to. Select Save Image and it will automatically save it to your device.
Pro Tip: It is very important to export your file as PNG because it’s one of the only file types that supports transparent backgrounds. For example, JPEG does not support a transparent background so it will save your image with a white background.
Transparent Background Examples
There are many uses for saving an image with a transparent background. This is particularly useful for saving GIFs, logos, and sticker files. Here are some examples for you that I found online:
This before and after logo is from Shutterstock.


This before and after sticker design is from Pinterest.
FAQs
Below I have gathered some of your frequently asked questions about how to save your Procreate file with a transparent background.
Why is Procreate not saving transparent backgrounds?
Ensure you are saving your image as a PNG file. Remember that PNG is one of the only file types that supports transparent backgrounds.
How to make the white background transparent in Procreate?
In order to make the white of an image transparent, you will need to remove the white from your background and then remove your background layer in order to save your file with a transparent background.
How to make a transparent background in Procreate Pocket?
You can also untick the Background Layer of your artwork in the Layers menu of your Procreate Pocket app. You can also use the same methods shown above to remove the background if you need to.
How to use the magic wand to remove the background in Procreate?
You can use the magic wand in Procreate by choosing the Cut setting in the Selection tool. This is a good way to remove large chunks of color but I never use it as it doesn’t work well for smooth lines and fine details.
Final Thoughts
I didn’t actually learn how to save my files with a transparent background straight away but I wish I had. I didn’t realize that this awesome setting was literally at my fingertips and only one tap away. That’s why I wanted to share this awesome information with you today.
This is a quick and easy part of the Procreate app that every user should know about. I recommend spending some time today to create some examples and see how this setting can impact your work. It will open up a whole world of artwork options for you too.
Do you ever save your files with transparent backgrounds in Procreate? Show us some examples of your work by adding them in the comments section below.
