
Photomatix Pro 7
Summary
Photomatix Pro 7 is one of the best dedicated HDR software available, offering a comprehensive set of tone mapping and conversion tools and a completely 32-bit workflow. Professional users who need to work with large HDR photoshoots will also love the batch processing option, which allows you to automate the merging process from start to finish.
While Photomatix is undeniably one of the heavyweights in the world of HDR photography, it has lagged a bit behind the rest of the software world in terms of user interface and user experience design. The interface can be a bit tedious to work with at times, although none of the issues are large enough to prevent you from creating impressive HDR imagery.
What I Like: Excellent tone mapping options. Full 32-bit workflow supported. Lens correction profiles. Supports batch HDR merging. Free Lightroom Classic workflow plugin.
What I Don’t Like: Outdated interface. Steep learning curve. Localized editing tools need work. No GPU acceleration.
How much does Photomatix cost?
Photomatix is available in several different editions, but the most popular choice is the full Photomatix Pro 7, which costs $99 USD. There is also a more limited essentials version available for $39 USD, and there is even a command-line-only version for $19 USD.
Does Photomatix work with RAW?
Yes, Photomatix can work with RAW image files from most major camera manufacturers. The latest version of Photomatix has been updated to support RAW files from the newest cameras, but you should double-check to make sure that Photomatix supports your camera before purchasing.
Who makes Photomatix?
Photomatix is developed by HDRsoft, a software development company based in the UK. They released the first edition of Photomatix way back in 2003, and the latest version was released at the beginning of 2023.
Table of Contents
Why Trust Me for This Review
Hi, my name is Thomas Boldt, and I’ve been working in the digital arts for roughly as long as Photomatix has been around – about 20 years – but it was Photoshop that first launched my interest in the world of digital images. I didn’t start experimenting with HDR until I got my first DSLR camera, but since then, I’ve shot more bracketed HDR exposures than I can count.
I’ve always appreciated the simplicity of working with HDR in Lightroom, but Lightroom has an extremely limited set of options for customizing your results, so I’m curious to see whether or not the latest version of Photomatix can convince me to change up my HDR workflow.
Detailed Review of Photomatix Pro 7
There’s an impressive degree of customization available for your HDR images with Photomatix Pro 7, so I don’t have space to cover every single feature. Instead of that deep dive, I’ll take a broader look at the user interface design, how the HDR merging process works, and some different ways you can modify your merged HDR exposure. Finally, I’ll take a look at how you can export your images for sharing online or into another editor for the finishing touches.
User Interface
The first thing you’ll notice when loading Photomatix is that it feels a bit out of date, and that impression never really goes away. This is unfortunate because the app is quite capable from a technical perspective, but you’ll have to put up with a bit of minor annoyance to get your HDR merges done.
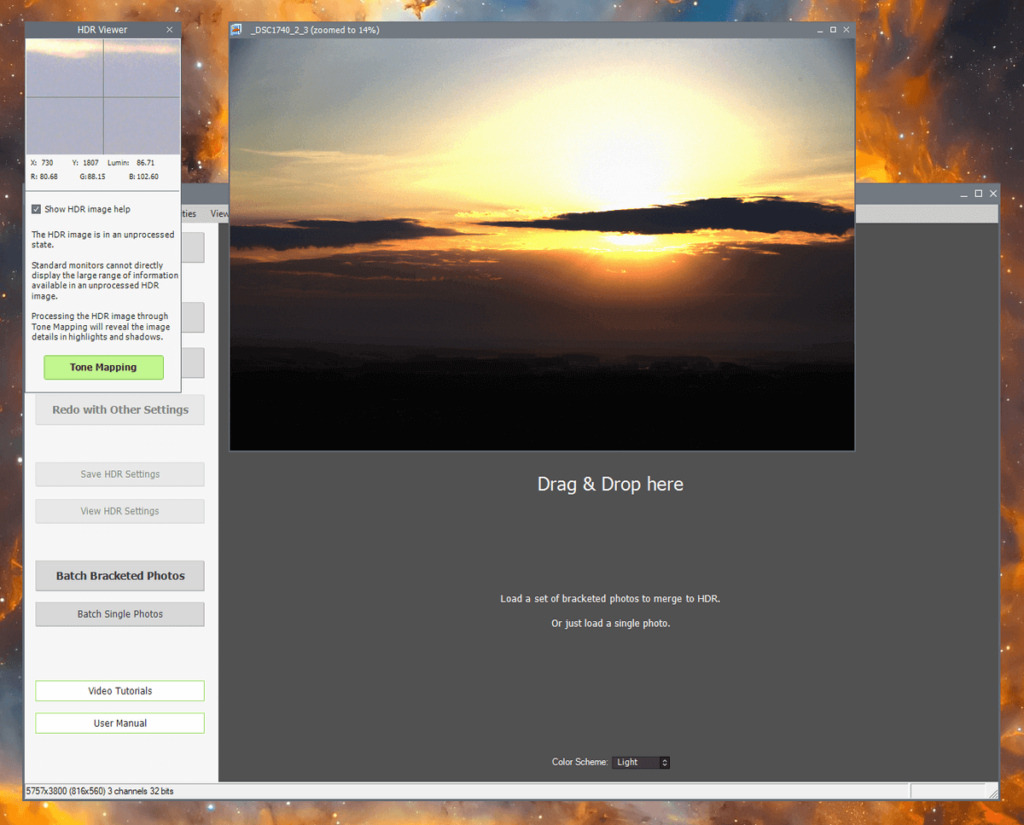
Rather than creating a unified interface that can handle the entire HDR workflow, Photomatix uses a series of separate windows, even when the ‘Unified Window’ option is enabled in the Preferences. Sometimes, these windows can get a bit confused about where they’re supposed to be when they first open, as in this example:
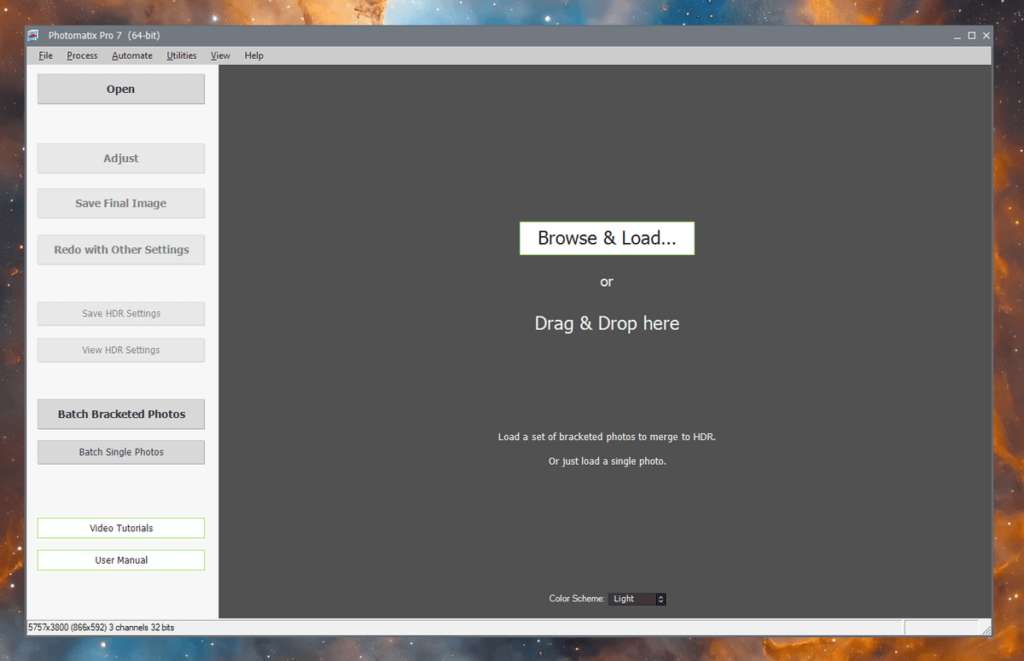
On the home screen, you can choose between Light mode and Dark mode, but that’s about the extent of the customization you’ll find in the interface. Your chosen setting doesn’t apply when entering the Adjust and Preview workspace, which is always dark gray.
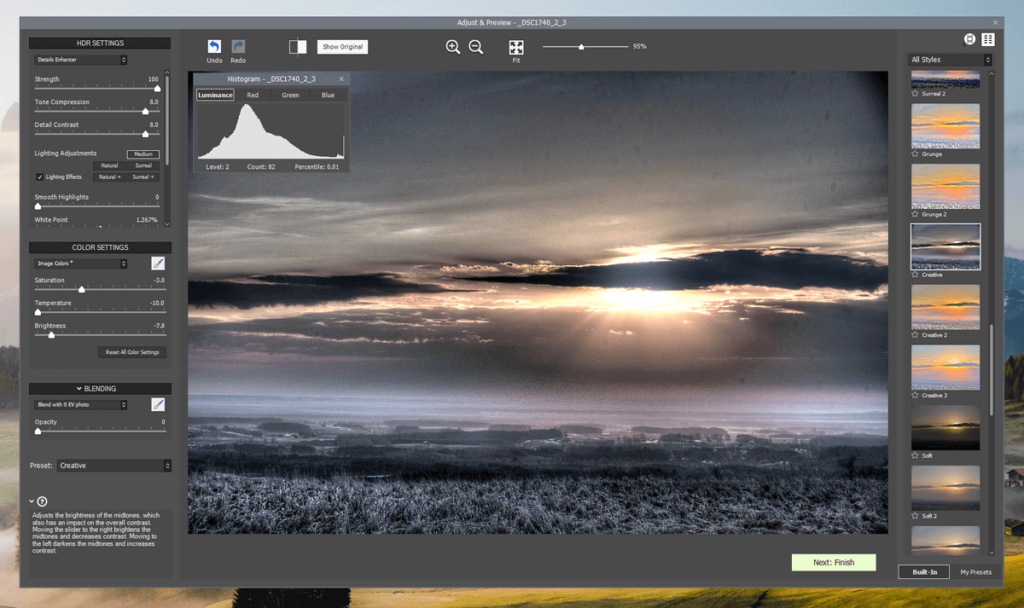
The Adjust and Preview section also uses the same multi-window approach, although only for the histogram display. This is where you’ll be spending most of your time, and for the most part, the controls are clear and effective, as long as the Histogram window doesn’t get lost. I’m not sure why it simply isn’t integrated into the main window design above the presets panel where it naturally fits.
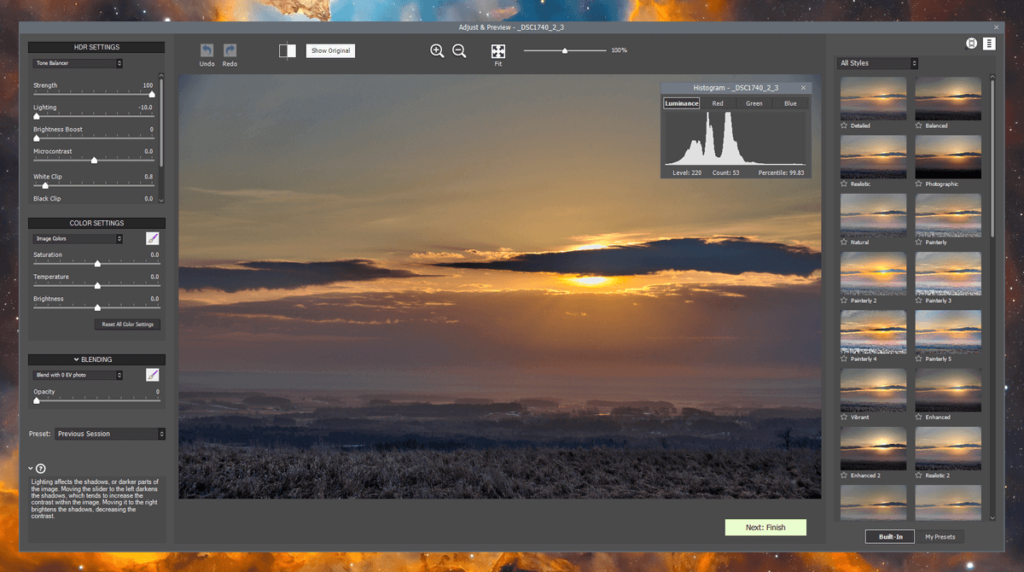
The left side of the workspace contains all the different tone mapping and conversion options, although they can be slightly confusing at first since they all have vaguely similar names.
Fortunately, a handy info section in the bottom left corner of the interface gives additional details about each slider when you hover your cursor over them, so even new users can get a good sense of how their adjustments will affect their image.
You’ll also notice there is a wide range of preset HDR rendering configurations available on the right side, although I think that most of these are better used for exploring what the software is capable of than for your everyday editing process. You can create your own presets at various points throughout the app, but I think the process could be a lot clearer.
My personal take: This isn’t the best UI that I’ve used, but it’s also far from the worst. It feels like it’s long past time for a refreshed design that rethinks the user experience and overall workflow process. It can be a bit frustrating sometimes, but it’s not so bad that you’ll have any major issues while working with your HDR files.
The HDR Merging Process
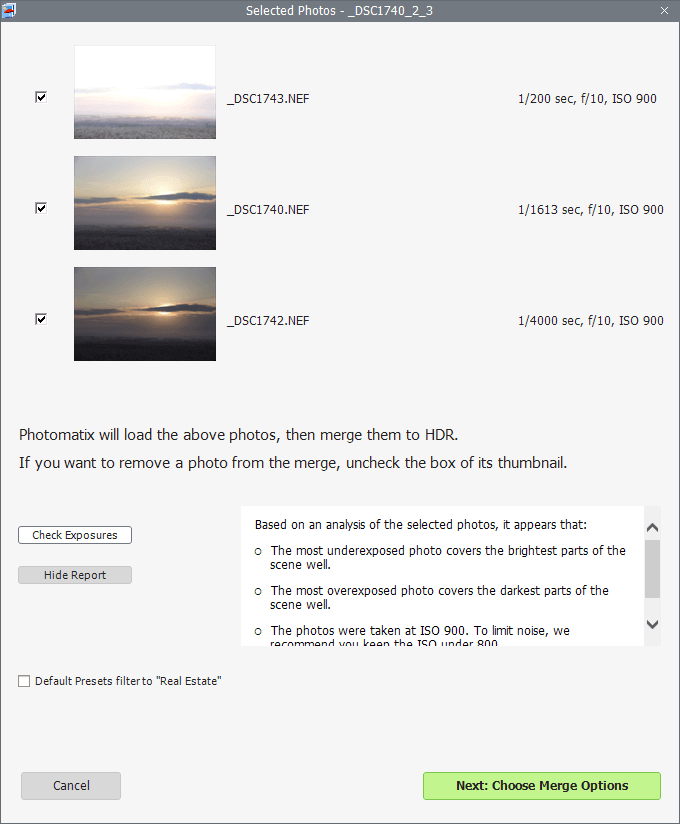
The actual process of merging your bracketed images into an HDR composite worked quite well during my testing of the latest version. My images were loaded quickly and properly, and the Check Exposures feature is a nice touch that helps ensure your bracketed images cover enough of the scene for an effective HDR merge.
Once the basics are confirmed, you get a chance to apply some basic adjustments to your images. Photomatix is capable of processing RAW images from a wide range of cameras, but the RAW processing options are limited when compared to a dedicated RAW development app.
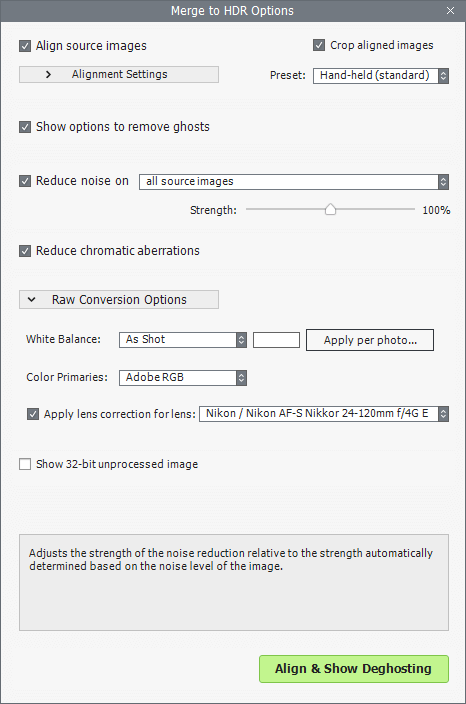
While there are some useful options here like lens corrections, noise removal, and chromatic aberration correction, it’s still probably better to process your images individually as much as possible in your main RAW development app and then export them as DNG files before merging them in Photomatix. If you go that route, just make sure that you turn off all the lens, noise, and chromatic aberration corrections, or Photomatix will just blindly follow orders and apply them all over again 😉
The deghosting tools are used to correct for any moving subjects that appear in different positions across your bracketed exposures. For the most part, the tools work fine, although I discovered in my testing that the deghosting preview isn’t always perfectly accurate for checking the final results that get passed to the tone mapping phase (which I’ll discuss in the next section).
While there’s a handy in-app tutorial built into the deghosting window, it can still take some time to get used to how it works. You may also want to experiment with various deghosting settings, but you may have to restart the entire merging process if you get an unexpected artifact after the deghosting step is completed.
HDRsoft includes a free Photomatix plugin for Lightroom that makes it easier to work with your images, combining the two apps in a powerful HDR workflow, so Lightroom users should definitely check that out. It worked much more effectively during my testing than Photomatix’s standard File Open dialog and also allowed me to reimport the finished product back into my Lightroom workflow in DNG format for some final processing.
My personal take: Lightroom users would be smart to take advantage of the free workflow plugin that makes it easy to pass images back and forth between the two apps. I discovered just how tedious it can be to search through an evening photoshoot worth of very similar bracketed images without the help of a cataloging system, so it’s definitely worth saving yourself from the same hassle.
Tone Mapping and Adjustments
Once your images have been aligned and merged, the real fun begins in the Adjust and Preview workspace. This is where you can adjust the various elements of your 32-bit merged image to create a carefully balanced final version that can be rendered as a standard 8-bit image that can be printed, shared online, or displayed in a normal image viewer.
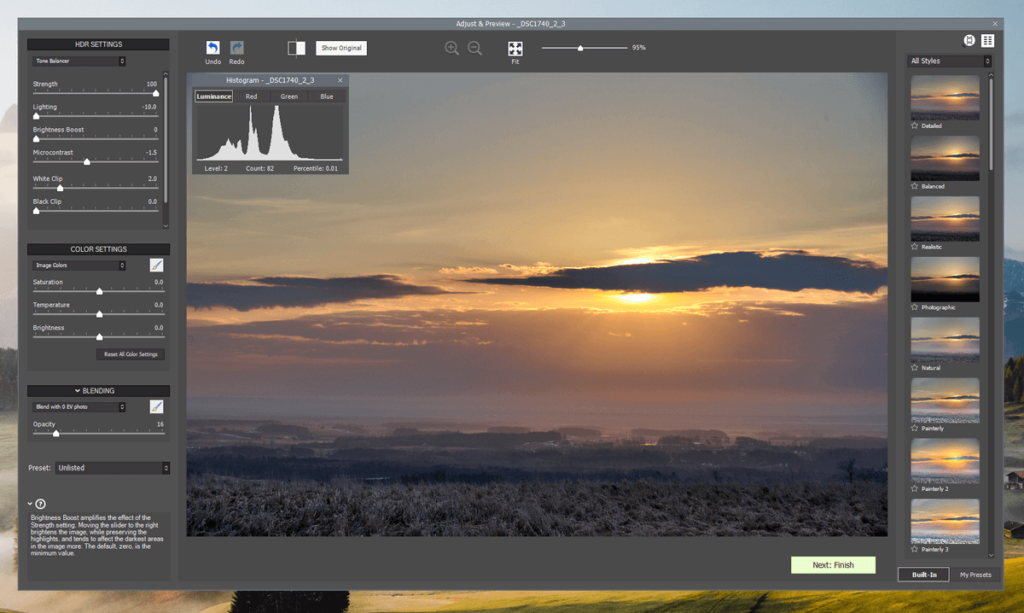
If you’re used to making HDR merges in Lightroom, then you’ll be pleasantly surprised by the number of tone mapping options available in Photomatix. There are six primary processing options available in a dropdown menu in the top left, depending on your desired results. Each one has its own set of adjustment sliders that allow you to control how your different exposures are merged. I found that some of the modes were a bit too extreme for regular usage, but there’s plenty of variety.
Photomatix also allows you to use masks to apply more localized corrections for color settings and blending with the original exposure, but the masking system has one major flaw that makes it a bit problematic to use: when using the brush tool, you can’t actually view the mask itself, and there’s no way to edit a mask once you leave the masking workspace.
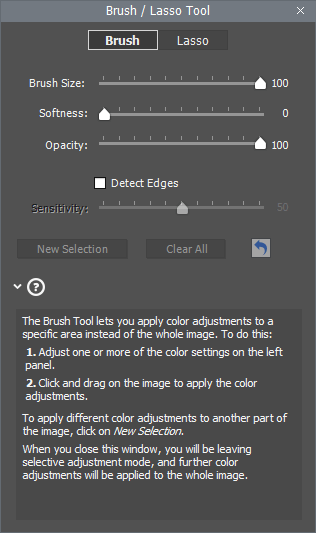
By contrast, the Lasso tool does provide a visual overlay that shows you where your effect has been applied, but that only makes it more confusing that the brush tool doesn’t get the same treatment. So while the localized editing options are useful, they’re a bit hampered by how the system is designed.
If you’re not sure where you start, you can explore the full range of preset adjustments that are included with Photomatix, although I’m not sure how much use they will be for everyday usage. They’re a lot more useful for showing off the wide range of options that are available – which is admittedly impressive – but most of the results just look plain ugly to me.
However, you can make your own presets with just a few clicks in this workspace. This is a much more effective approach and absolutely essential if you’re planning to do any batch processing of images.
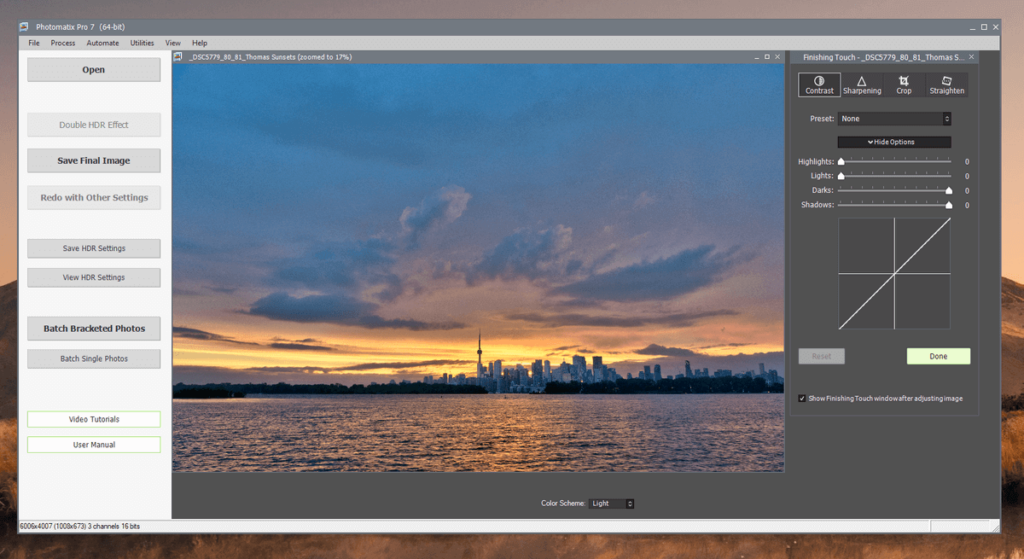
Once you’ve got your image tone mapped the way you want, the green Finish button will take you back to the Photomatix home screen. By default, it will then launch the ‘Finishing Touch’ tool, where you can make final adjustments to contrast, sharpening, cropping, and straightening.
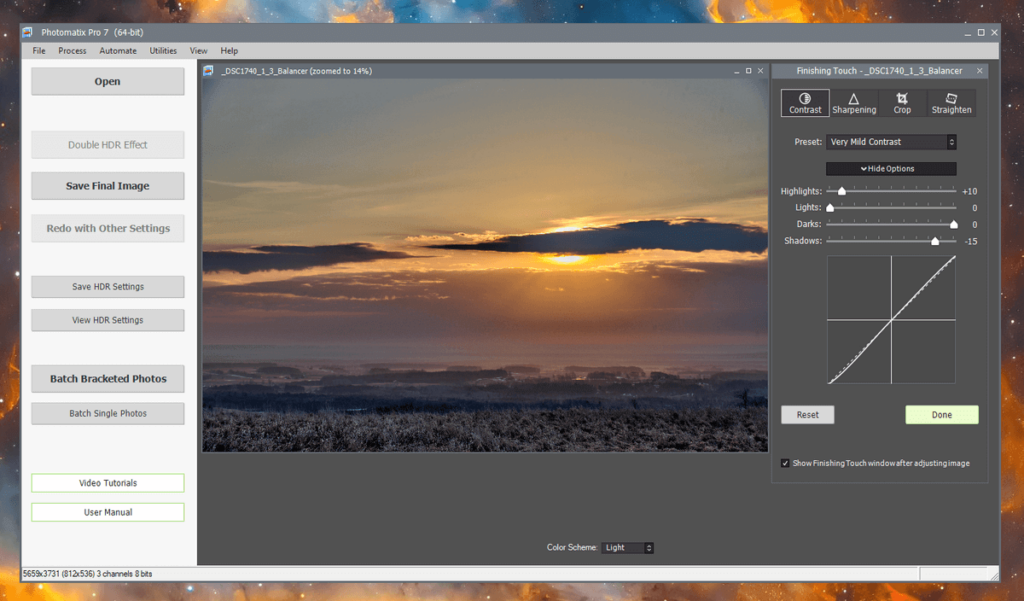
Once you’re satisfied with your work, the Save Final Image button will allow you to export your image as an 8- or 16-bit TIFF, DNG, or JPEG. Unfortunately, at this point, it’s no longer possible to save the unedited 32-bit version of your file, which is a bit disappointing. The only way to save that version of the merge is to check the ‘View 32-bit unprocessed image’ way back in the initial merging stage.
My personal take: Tone mapping is where Photomatix really shines, and there are more than enough options to keep a dedicated HDR enthusiast happy. I am disappointed in the way that localized edits are handled, especially considering how expensive Photomatix is, but the rest of the tools are responsive and effective.
Batch Processing
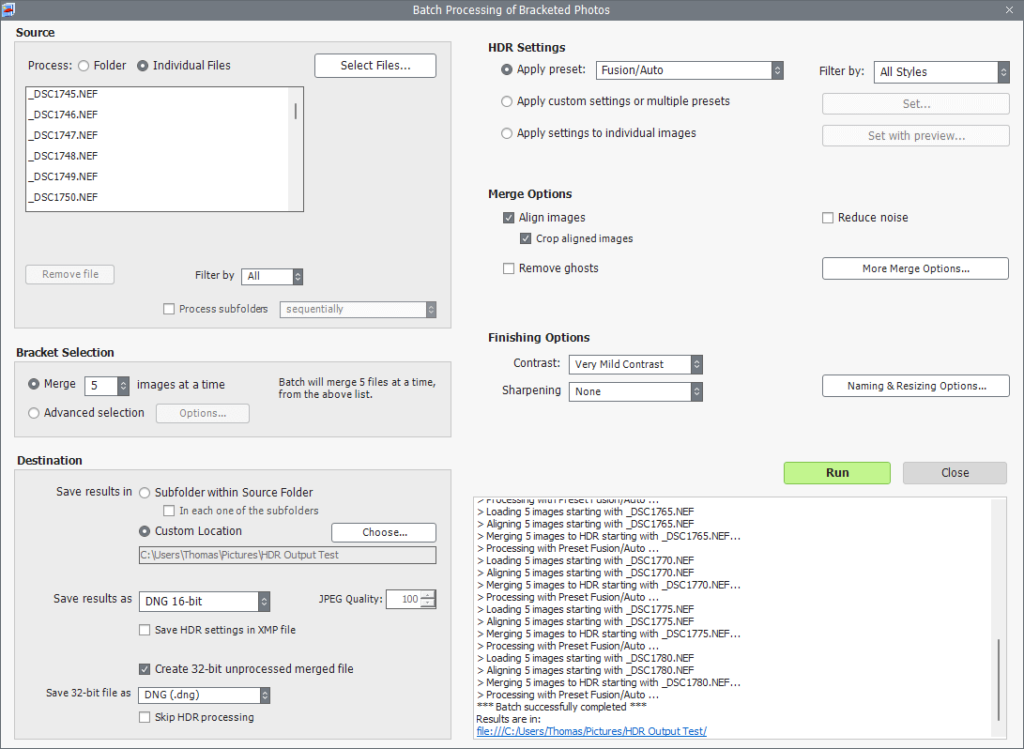
You can also merge images in batches to save time, which offers a nice productivity boost for real estate photographers and anyone else who needs to process entire photoshoots of bracketed images on a deadline.
When adding files to your batch, you can add an entire folder or individual files, and Photomatix can even automatically detect which images should be treated as a bracketed series. This feature relies entirely on capture time metadata, so it may not always work perfectly, but I didn’t run into any issues with it during my testing.
Batch processing a large number of photos can take quite some time, however, and I wonder if it would be possible to get a performance boost if HDRsoft added some GPU acceleration features to Photomatix instead of relying entirely on your CPU to handle the merging process.
I ran a hardware monitor during the batch process, and my i9-12900K CPU was running at roughly 10-15% capacity for the vast majority of the merging process. I reran the test without outputting a 32-bit DNG version of my merged file in addition to a 16-bit version, and the batch processing speed dramatically improved, but I’d still hope to get another major boost if Photomatix could take advantage of my GPU.
Like the rest of the interface, the batch process could also use a redesign to something a bit more user-friendly, but it’s a relatively minor issue. There is a Photomatix batch plugin available for Lightroom users that you might prefer to use instead, although it costs extra unless you purchased the more expensive Photomatix Pro Plus Bundle.
My personal take: Batch processing is essential for merging entire photoshoots, but if you find yourself doing a lot of them, you’re probably better off using the Photomatix batch merging Lightroom plugin so that you can take advantage of Lightroom’s cataloging features. Otherwise, you may wind up spending batch processing time on images that should have been filtered out beforehand, and a single stray image in the wrong place can ruin the rest of your batch.
Reasons Behind My Ratings
Features: 4.5/5
Photomatix offers excellent HDR tone mapping tools that offer an impressive degree of control over the look of your final image. The localized editing tools and some of the presets are a bit less successful, which prevents me from giving Photomatix a full 5 out of 5, but these are fairly minor issues.
Pricing: 3.5/5
Photomatix is priced a bit higher than I would expect, especially when you consider that other apps with similar functionality are priced much more affordably. However, if you’re a dedicated HDR enthusiast, then Photomatix may just be worth the higher cost to you. There is also a more affordable version available named Photomatix Essentials, although it has fewer features than the Pro version.
Ease of Use: 4/5
Most of the functions of Photomatix are easy to use, but the user interface feels outdated and uses a multi-window system that can be annoying. While making your final tone adjustments, there’s a bit of helpful instruction for each slider located at the bottom of the window, and there’s a link on the home screen to a full set of video tutorials. The adjustments are easy to make, and presets can simplify the process even further, especially if you want to batch-process your images.
Support: 4.5/5
Photomatix provides comprehensive support for new users, offering easy in-app links to a complete online video tutorial and an extensive user guide. The website is filled with technical tips and frequently asked questions, but the only way to get in touch with the developers is via email. While I didn’t encounter any bugs in the software, it would be nice if there was a support ticket system for managing any potential issues.
Final Verdict
Despite its user interface quirks, Photomatix Pro 7 is an excellent way to process your bracketed HDR images, but I think it works best when used in combination with another image processing app like Photoshop and/or Lightroom. The standalone app has excellent options for controlling your merged images, but it’s not able to do enough RAW processing to produce perfect images all by itself.
Do you have a question about Photomatix Pro 7 that I didn’t answer in this review? Let me know in the comments below, and I’ll do what I can to help.
I enjoyed your review of Photomatrix, thanks.
After I edit a photo using photomatix Pro & Save as. Could I than send it to my Photo Elements 12 or to my Picasa programs?