
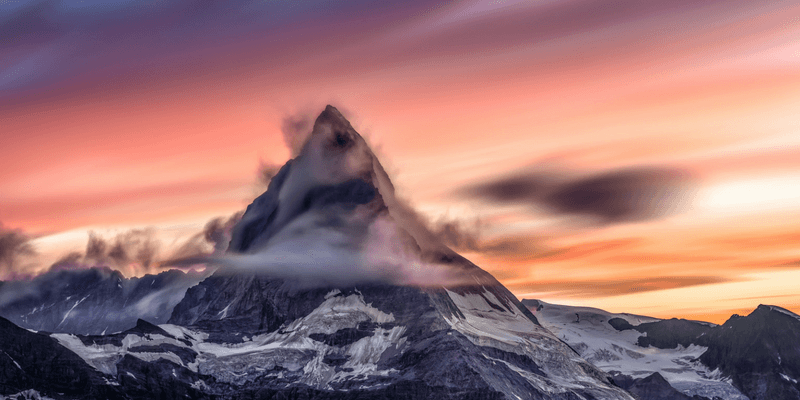
Digital cameras can’t really accomplish the same thing on their own. When you expose a photograph perfectly for the clouds, your landscape tends to appear too dark. When you expose properly for the landscape, the area around the Sun appears too bright and washed out. With a bit of digital editing, it is possible to take multiple different exposures of the same shot and combine them into a high dynamic range (HDR) image.
There are tons of different pieces of software available to accomplish this, but they’re not all created equal. I finally selected the two best HDR photography software available, although I looked at quite some options for this review which we’ll discuss later on.
Aurora HDR offers an impressive set of features with an in-depth level of control for the more demanding photographer. It is far better at creating realistic HDR images than any of the other programs that I reviewed, but that also means that it requires a bit more skill to use successfully. It’s still possible to create surrealist paintings out of your HDR photos, but it’s also possible to turn them into realistic HDR masterpieces.
HDR Darkroom 3 is better suited to quick compositions where you want to expand the dynamic range of your images slightly without worrying too much about realism. It provides quick, easy-to-use options that are perfect for photographers just beginning to experiment with HDR images, or for casual users who want to have a bit of fun with their photos.
Table of Contents
Why Trust Me for This Guide
I’ve been interested in HDR photography since I got my first digital SLR camera over a decade ago. I always wanted a camera that could accurately capture what my eye saw in its complete form, and I was frustrated with the available native dynamic range.
This started me on a journey into the world of HDR, although it was relatively new outside the laboratory at that time. The camera’s automatic bracketing was limited to only three shots, but that was enough to kickstart my interest and I began to explore the HDR compositing software that was available.
Since then, both digital camera sensors and the software have improved dramatically, and I’ve been keeping tabs on the available options as they matured into fully developed programs. Hopefully, my experience will be able to guide you away from time-consuming experimentation and towards an HDR compositor that really works for you!
Do You Really Need HDR Software?
Like most technical questions in photography, the answer to this comes down to the type of photographs you shoot and how dedicated you are to photography in general. If you’re a casual photographer, then it’s probably best to experiment with some of the demo versions and free options before you purchase a dedicated HDR program. You’ll have a bit of fun (which is always worth it), but in the end, you’ll probably want a simple, easy-to-use HDR program that doesn’t get too technical or overwhelm you with options.
If you’re an aspiring amateur, working with HDR is an interesting way to expand your photography practice and technical know-how. Just be careful not to overprocess your images if you want them to be taken seriously – they always stick out like a sore thumb to the experienced eye!
If you’re working in the world of professional photography, you won’t necessarily benefit from HDR shots, but it’s more likely that you will appreciate what can be accomplished with a great composite in your specific field.
Anyone who shoots static images in high-contrast environments will benefit from HDR, depending on your choice of subject. Landscape photographers will get a real kick out of their first perfectly exposed wide-angle HDR sunset and may find that they never want to go back to a single-frame photography style.
Architectural photographers will be able to capture dramatically lit scenes with ease, and interior/real estate photographers will also benefit from the ability to show both the interior and what’s out the window in a single frame.
If you’ve been managing these types of professional shots without the benefit of HDR so far, then you obviously don’t need HDR software – but it might make things much, much easier!
Best for Professional Photographers: Aurora HDR
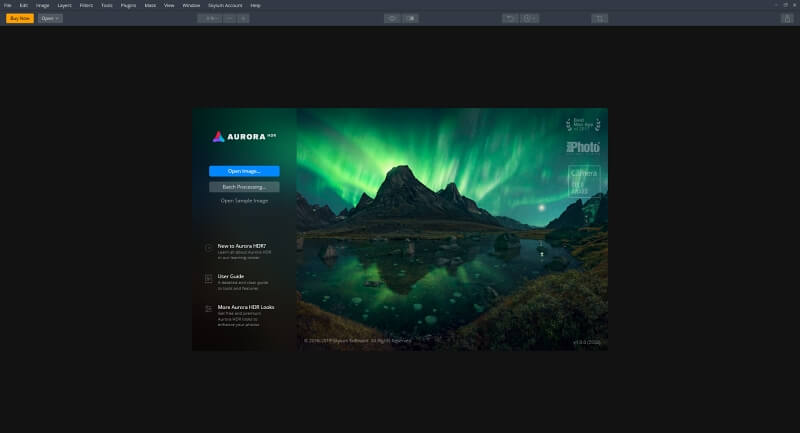
Aurora HDR from Skylum is the most exciting and capable HDR photography editor currently available. The latest update has a completely revamped HDR compositing engine known as the ‘Quantum HDR Engine’, and it produces some impressive results. You can get a free trial from their website, just check the dropdown menu for the ‘Download Trial’ link. You will have to provide an email address to launch the trial, but it’s well worth it!
The interface for Aurora HDR is extremely polished, so much so that it makes all the other programs I reviewed look clumsy and awkward by comparison. The main preview window is surrounded by controls on three sides, but it’s all well-balanced so nothing feels cluttered despite the impressive number of settings you have to work with.
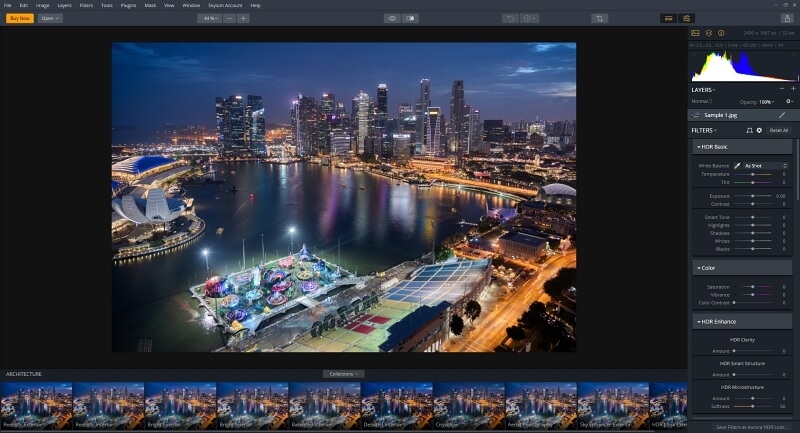
The tone mapping options are by far the most comprehensive of any program I looked at, although it will definitely take a bit of time to get used to them all. There is a full-fledged set of localized non-destructive editing tools, complete with dodging/burning and adjustment layers with brush/gradient masking options.
For the most part, Aurora HDR manages to stay fast and responsive while juggling all these tasks. You could probably slow it down by working on a very high-resolution file with a few extra layers, but the same thing will happen even in a program like Photoshop no matter how powerful your computer is.
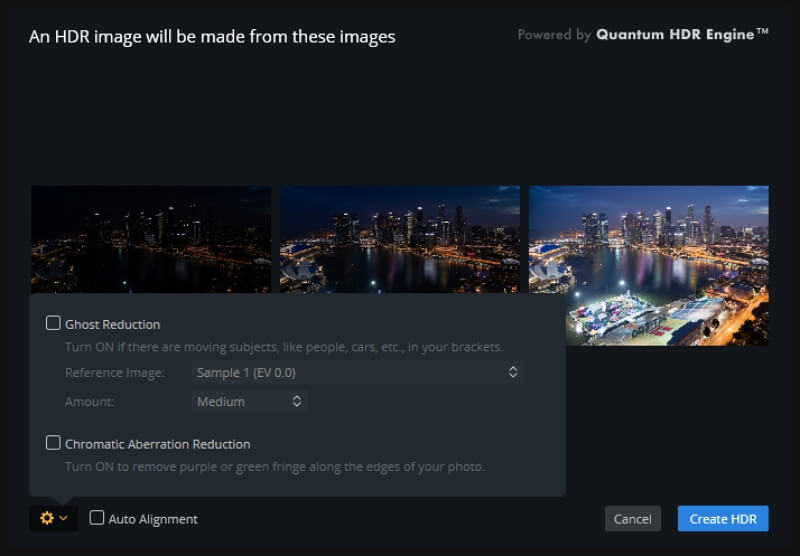
The only issues that I had when testing out Aurora HDR were relatively minor, although they seemed a bit odd when you consider how well-developed the rest of the program is. The process for browsing and opening your source images is nothing more than a standard ‘Open File’ dialog box with very limited browsing capabilities, which is adequate, but only barely.
Once you’ve selected your images, there are a few optional (but important) settings that are inexplicably hidden within a menu instead of being front and center. Aurora makes up for this with some helpful explanations of each setting, but it would be far simpler to include them in the main dialog box.
Aurora HDR was designed in conjunction with professional HDR photographer Trey Ratcliff, and the developers have clearly committed themselves to going above and beyond. This is easily the best HDR app I have ever used, and I’ve tested a great many of them. Professional photographers will find more than enough to satisfy them, although the degree of control may put off the more casual photographer.
At $99 USD, it’s not the cheapest option out there, but you get quite a lot of value for your dollar. There is no word about how long this sale will last, but it may be on ‘semi-permanent sale’ as a marketing tactic.
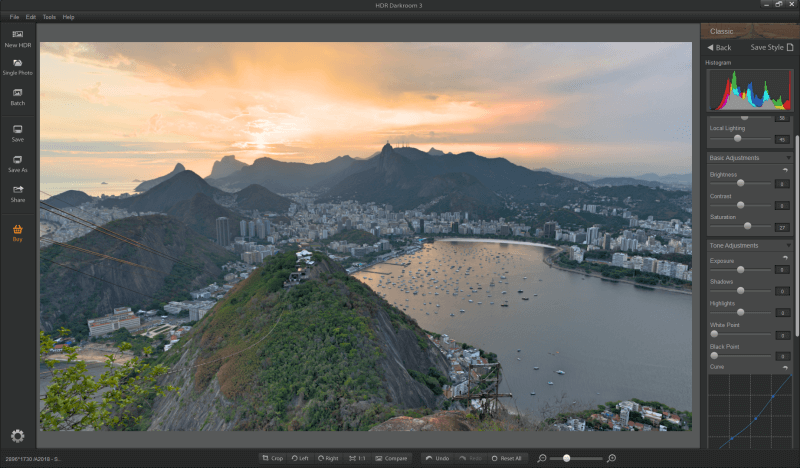
Best for Casual Users: HDR Darkroom 3
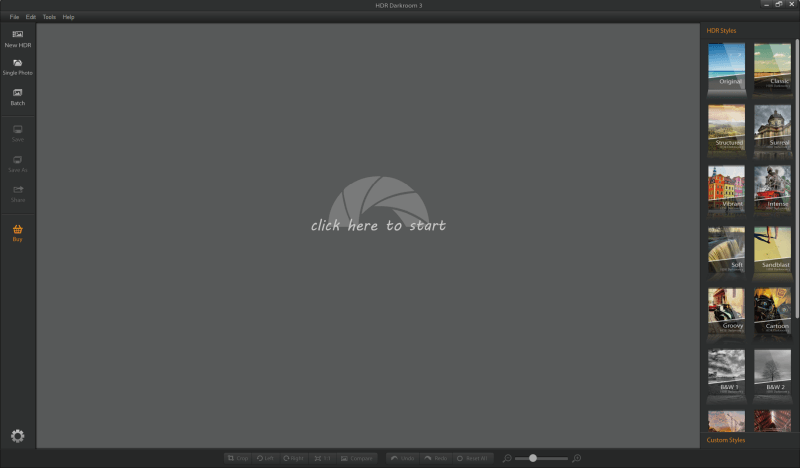
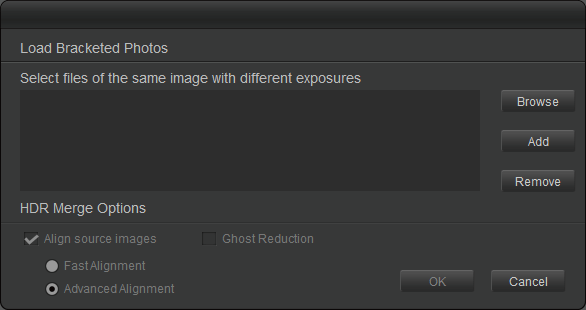
HDR Darkroom may not be the most powerful HDR app out there, but it is definitely one of the easiest to use. The ‘New HDR’ button gives you a quick overview of how to add photos, as well as some basic options for aligning images and deghosting.
Choosing ‘Advanced Alignment’ increases the time required to load your initial composite, but it takes more time to ensure things are correct. Unfortunately, the ‘Ghost Reduction’ option offers no settings at all, but that’s part of the simplicity of the program.
The interface first loads your image into a basic preset mode with very simple control over saturation and exposure, but you can click the ‘Advanced’ button to dig much deeper into your tone mapping controls and general exposure options.
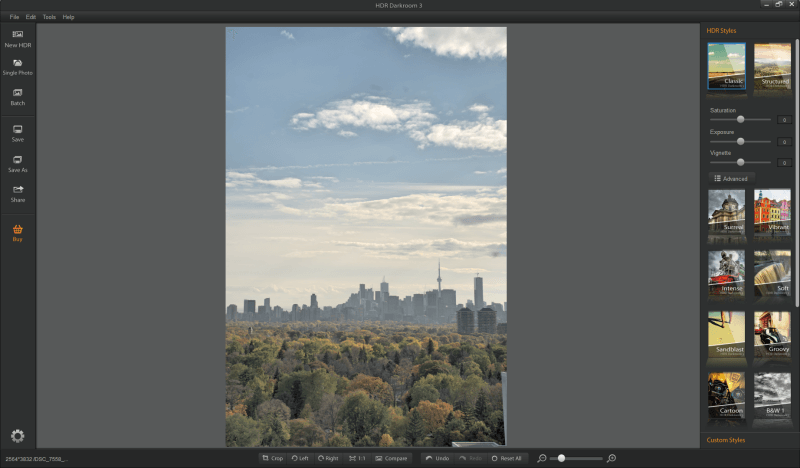
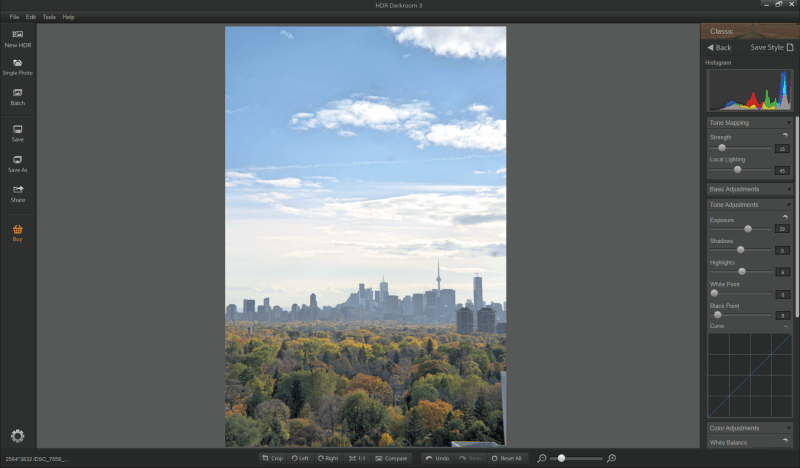
The default ‘Classic’ preset style shown above in the Basic interface mode clearly needs some adjustment for this shot, but the ‘Advanced’ controls (shown below) offer the flexibility to clean the image up fairly successfully.
Despite the lack of any localized editing tools, they offer you a decent amount of control over your image, and throw in some basic chromatic aberration correction for you as an added bonus. As most beginner photographers aren’t using top-of-the-line lenses, the CA correction is quite helpful.
The editing process is fairly responsive, although there is a bit of a lag time between entering your new settings and seeing the results in the preview window, even on this powerful testing computer. Even after the edits, there are some slight halos around the clouds and some of the trees, but that’s a legacy of the limited deghosting options I mentioned earlier.
This problem might not occur on a shot with more static elements, but the image quality isn’t the same as what you’d get from a professional HDR program. To prove the point, I’ve run the sample images from Aurora HDR through HDR Darkroom below.
HDR Darkroom isn’t the cheapest option at $89 USD, but it is a good way for beginner photographers to start experimenting with HDR photography without being overwhelmed with technical details. If you’re looking for something with a lot more power, be sure to check out Aurora HDR, especially if you can get it on sale for just a few dollars more.
Other Good Paid HDR Photography Software
1. Nik HDR Efex Pro
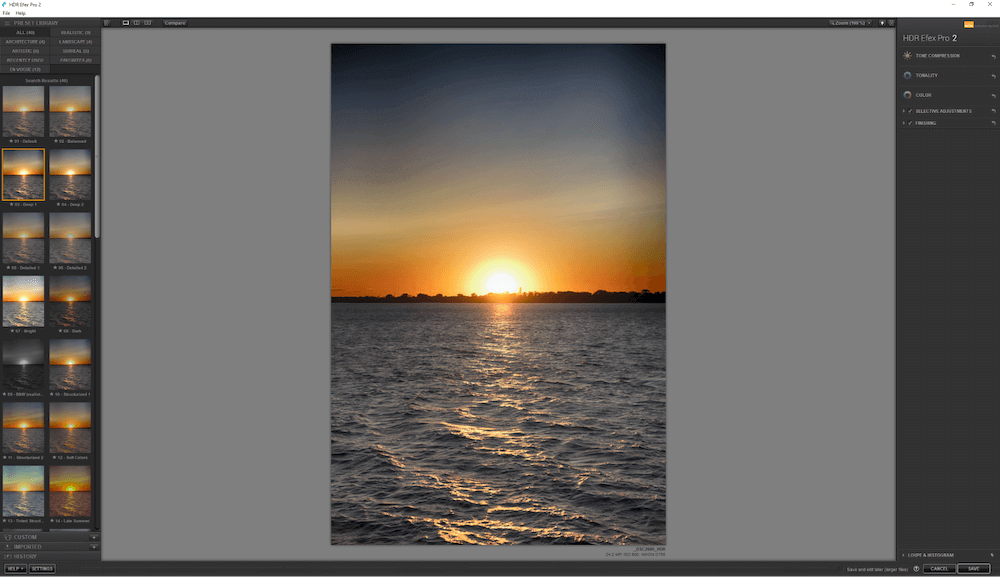
HDR Efex Pro is a part of the Nik plugin collection, which has a long and surprising history. The collection originally cost an eye-popping $500, until Nik was sold to Google in 2012, and Google released the entire Nik plugin series for free while openly ignoring its development. Google eventually sold it to DxO in 2017, and DxO has resumed charging for it – but it’s also back under active development.
This is a great little HDR editor that is newly available as a standalone program, and it is also available as a plugin for DxO PhotoLab, Photoshop CC, or Lightroom Classic CC. It does its best work when launched from one of these host apps, as they unlock its full editing capabilities.
Unfortunately, the standalone version of the program doesn’t seem able to edit RAW files directly, which seems like a bizarre development choice to me. For whatever reason, it can only natively open JPEG images, even though it can save them as TIFF files after editing.
The interface is well-designed and easy to use. The alignment and deghosting options are fairly standard during import, and you do get a bit of choice as to the strength of the deghosting effect.
There are some basic but useful tone mapping tools, although each control over the HDR method is limited to a few options. HDR Efex offers localized editing features, but the proprietary ‘U-Point’ control system it uses for local adjustments doesn’t offer the same level of control as a brush-based mask, in my opinion – though some people love it.
If you already have an established workflow in Photoshop and/or Lightroom that you’re satisfied with, you can incorporate HDR Efex directly into those programs to replace their more basic built-in HDR tools. This gives you the advantage of having your familiar editing tools readily available without the hassle of switching programs to complete your other edits.
2. Photomatix Pro
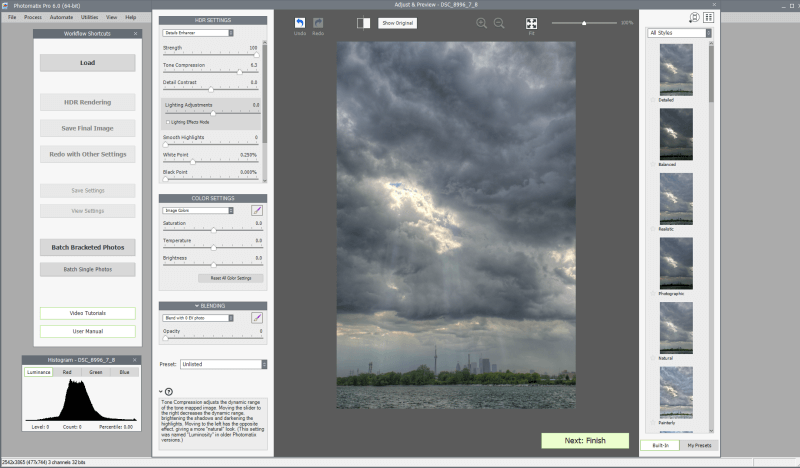
Photomatix has been around for quite some time, and as a result, it has a well-developed set of tools for editing HDR images. There are comprehensive alignment and deghosting options, and you can even apply lens corrections, noise reduction, and chromatic aberration reduction during the import process. You get a decent amount of control over your tone mapping, and there is a range of presets available (including some that don’t make your photo look unrealistic!).
There are some brush-based local editing features, but they caused the only discernible lag in responsiveness I found while testing. They are also fairly limited and difficult to review/edit once you’ve defined your mask, which is largely caused by the main drawback of Photomatix: the unpolished user interface.
It’s a great program with great capabilities, but the interface is quite clunky and gets in the way. Individual palette windows are all un-docked and scaled to odd sizes by default, and when you minimize the program, the Histogram window sometimes stays visible and can’t be minimized.

Photomatix is available for Windows and macOS from the HDRSoft website here. At $99 USD, it’s one of the more expensive programs we looked at, but there is a free trial available so you can give it a try for yourself before making a decision. All your images made using the trial version will be watermarked, but you can use it for as long as you like.
3. EasyHDR
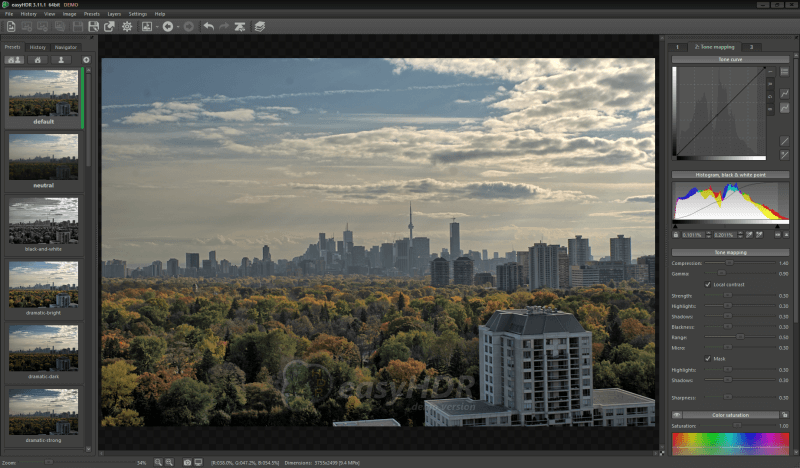
Despite the name, EasyHDR has a very comprehensive set of options for editing your HDR images. The tone mapping options are decent, and there are excellent options for controlling alignment, deghosting, and lens corrections during the import process. When working with some images I noticed that the default settings looked a bit over-processed and unrealistic, but it’s possible to adjust these settings and save new presets.
If you want more localized editing options, EasyHDR has an excellent set with clearly editable brush and gradient masking tools, and multiple layers. The only unfortunate aspect is that the ‘Enable/disable layers’ option limits the preview window a bit. Editing tools are fast and responsive, just like all the other steps involved in creating an HDR image.
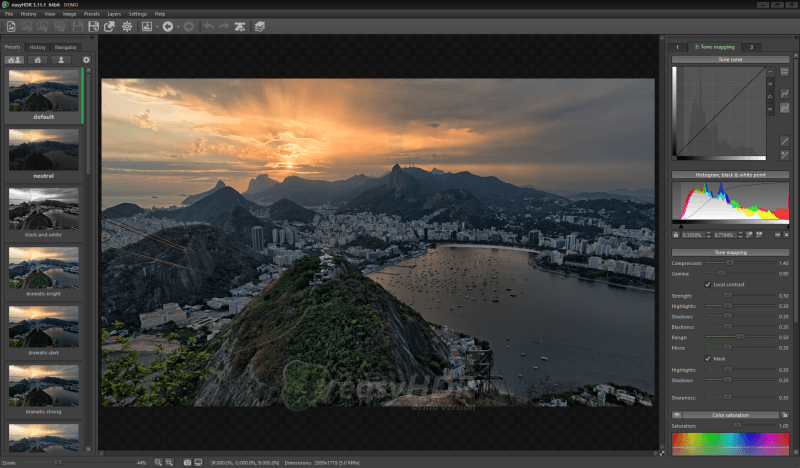
EasyHDR is one of the most affordable programs we looked at, costing just $39 USD for home use or $65 for commercial use. It doesn’t offer the same level of control that a demanding professional photographer would want, but it’s an excellent mid-range program with great value for your money.
EasyHDR is available here for Windows or macOS, and there is also a free trial available. The trial doesn’t limit you in terms of time, but it does restrict you to saving your images in JPG format and applies a watermark to all images you create with it.
4. Oloneo HDRengine
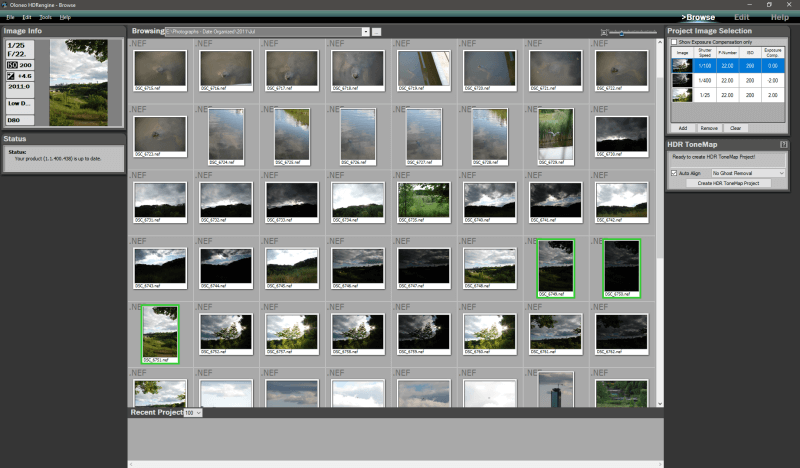
After being disappointed by the lack of file browsers in other programs, Oloneo has proven that a badly implemented browser is worse than no browser at all. It uses a standard ‘Open Folder’ dialog box to select your source folder, but you’re forced to use it every time you want to change folders which gets quite frustrating if you’re searching for something.
During the import process, there is a basic ‘auto-align’ option, but the two deghosting methods are unhelpfully named ‘method 1’ and ‘method 2’, with no explanation of the difference between the two. Once it’s time to edit your HDr image, there are very limited tone mapping options, and no localized editing features at all.
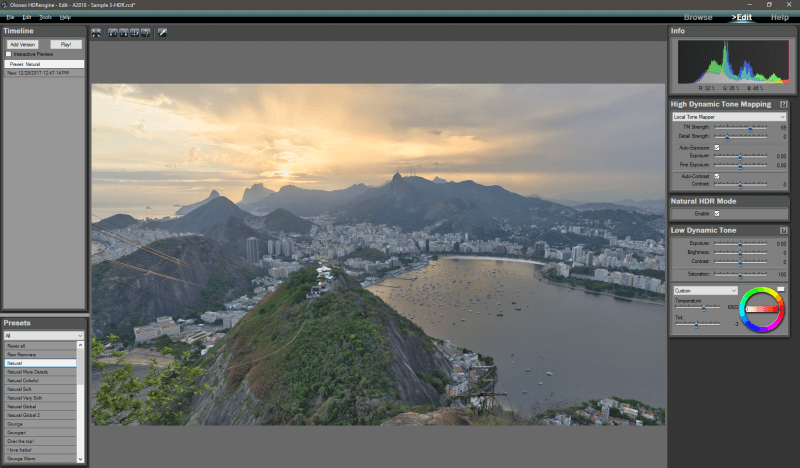
I don’t like being mean in my software reviews, but I have to say that this app feels a bit more like a toy or a programmer’s learning project than a serious HDR program. Despite the basic tone mapping options, the developers took the time to incorporate a ‘Play’ button that uses your edit history to automatically display all of your edits in sequence as a sort of time-lapse movie in the preview window.
It must be said that HDRengine is quite fast and responsive – which is part of how it pulls off that ‘edit history movie’ trick – but that doesn’t really seem like a worthwhile tradeoff. There is a 30-day free trial available from Oloneo here (signup required) if you want to test it yourself, but I recommend that you look at the other programs first. The full version costs $59 USD, and it is available for Windows only.
5. HDR Expose
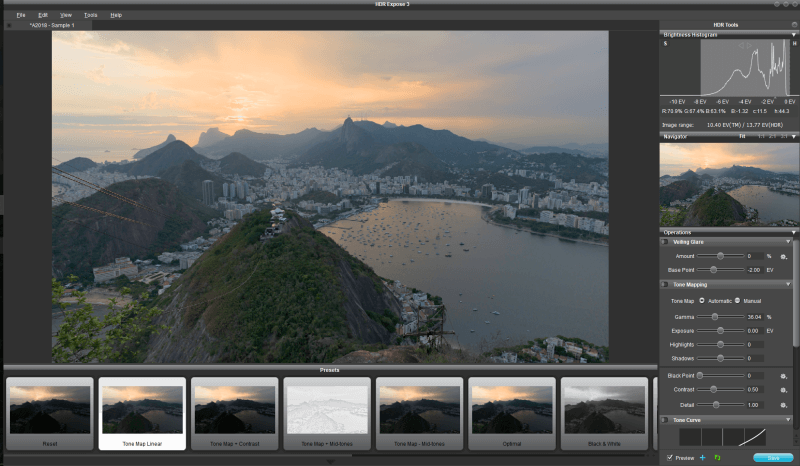
HDR Expose has a slightly confusing system for opening files, because it asks you to browse to a single folder at a time to review your images. This was time-consuming for me, since I have my images sorted into month-based folders, but it allows for a surprising and unique feature: when browsing your images, HDR Expose tries to automatically stack them into sets of bracketed images by comparing the thumbnails of each image. It wasn’t always perfect, but it can be helpful when you’re sorting through hundreds or thousands of photos to find your bracketed set.
The manual alignment and deghosting tools are quite excellent, allowing a great deal of control in addition to the automatic options. The tone mapping options are decent, covering the basic range of exposure controls you would expect. It has some basic local editing tools in the form of dodge/burn brushes, but they don’t use individual layers which limits their effectiveness.
The interface is basic but clear, although some of the controls feel a bit oversized thanks to the unnecessary highlighting around each element. It was fairly quick when creating the initial composite, as well as when applying updated changes. The only time it ran into trouble was when I tried to apply too many Undo commands in rapid sequence, even going so far as to blank out the UI for a few seconds, but eventually, it came back.
Some Free HDR Software
Not all HDR programs cost money, but there is often a bit of a trade-off when it comes to free software. Here are a few free HDR programs that you might want to consider if you’re on a tight budget, although they usually don’t provide the same quality as you’ll get from a program with a paid developer.
Picturenaut
Picturenaut is a quintessential free image editing program: it does what it says it will do, and not much more. It includes basic automatic alignment and deghosting options, but almost all of the tone mapping and editing settings are defined before you actually create your HDR composite. Needless to say, for most photographers, this will not provide nearly as much control during the editing process.
The compositing process was quite fast, but that’s probably due to the limited nature of the options available. You can do a bit of basic editing afterward by opening the Tone Mapping window, but the controls are as basic as possible and nowhere close to what you find in other programs.
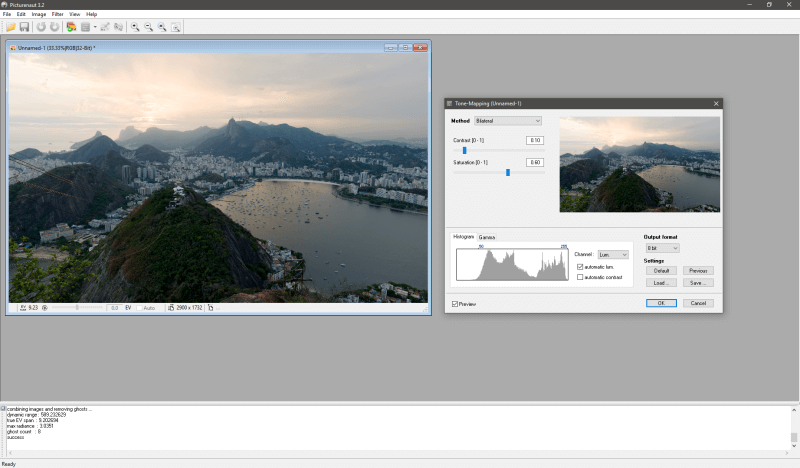
As you can see above, the end result is definitely in need of some additional retouching work in another editor, although even putting this composite through Photoshop won’t restore the kind of control that you need to create a really stunning image.
Luminance HDR
At first glance, Luminance HDR appeared to be a much more successful free HDR program. The interface was clean and simple, and it correctly identified all the relevant data from my source images. There are decent alignment and deghosting options, and the software seemed fairly responsive – at least, until it came time to complete the compositing process, when the entire program crashed.
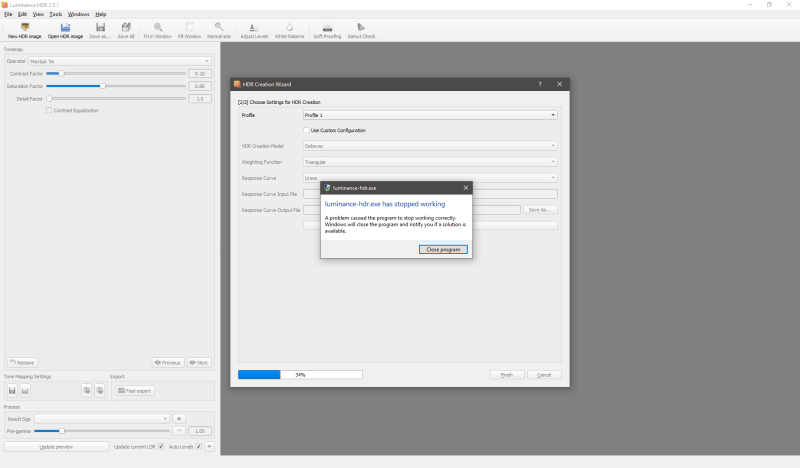
A second attempt was more successful, although I disabled auto-alignment and deghosting, which may have been the original problem. The interface has a few nice touches, such as an EV based histogram which shows the proper dynamic range, but the rest of the options are fairly confusing.
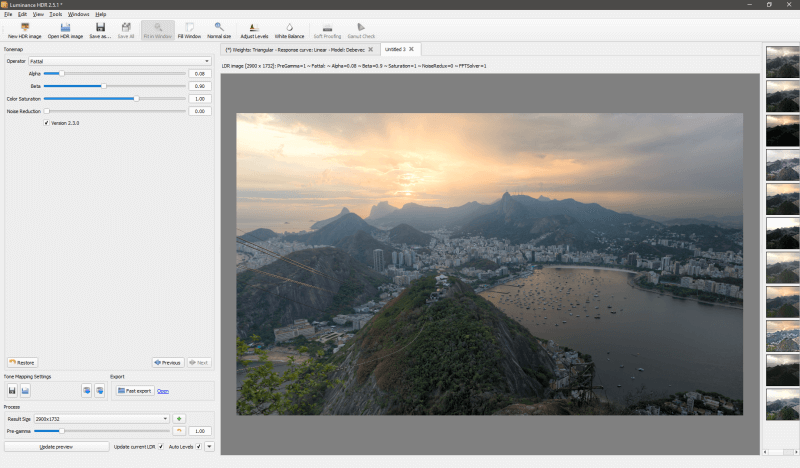
There is a range of tone mapping options, but no explanation of the various ‘Operators’, and the image preview must be manually updated every time you make a change to the settings. With some additional work and polish to the UI, this could be a decent free HDR program, but it’s not quite ready to challenge even the most basic of our paid alternatives yet.
A Few Truths about HDR
Attempts to expand the dynamic range of photographs are nothing new. Believe it or not, the very first photographic composites designed to expand dynamic range were made in the 1850s by Gustave Le Gray, but naturally, his attempts were crude by today’s standards. Legendary landscape photographer Ansel Adams used dodging and burning techniques in the darkroom to achieve a similar effect from a single negative during the mid-1900s.
The advent of popular digital photography created a resurgence of interest in HDR photography, as digital images could be composited much more easily with a computer program. At that time, digital camera sensors were very limited in their dynamic range, so HDR was a natural thing to experiment with.
But as with all digital technologies, digital photography has progressed by leaps and bounds since then. The dynamic range of modern camera sensors is far better than 15 years ago, and continually improves with each new generation of camera.
Many programs can reclaim highlight and shadow data from a single image, without needing to combine multiple exposures. The highlight and shadow recovery tools available in most RAW editors can do a great job of expanding the dynamic range in a single photo without having to fiddle around with image stacking, although they still can’t accomplish the same improvements as a widely-bracketed set of images.
It’s also worth noting that true HDR images cannot be displayed natively on most current monitors, although true HDR TVs and monitors are finally becoming available. However, even still, most of your outputs from any HDR app will be converted down to a standard dynamic range. In essence, this creates an HDR-style effect without actually saving your image as a 32-bit HDR file.
I don’t want to get too technical about the inner workings of bit depth and color representation here, but there is an excellent overview of the subject from Cambridge In Color here. Unexpectedly, since this isn’t exactly their main focus, the Android Authority website also has a good roundup of the differences between HDR and non-HDR displays which you can find here.
Feel free to read up on the technical side if you want to, but it’s not necessary for you to enjoy HDR photography. For now, let’s take a closer look at whether or not you’ll benefit from working with HDR.
The Necessary Features of HDR Software
There are a great number of HDR programs available, and they vary in terms of capability and ease of use. Here’s the list of criteria we used when evaluating each program and selecting our winners:
Are the tone mapping options comprehensive?
This is the most important aspect of a good HDR program because your 32-bit HDR image usually needs to be tone-mapped into a standard 8-bit image format. You should be able to have complete control over how the tones in the different source images are combined into your final image.
Does it do a good job at deghosting?
Your camera might not be the only thing moving over the course of a bracketed set of images. Wind, waves, clouds, and other subjects can shift enough during a burst shot that they are impossible to automatically align, resulting in visual artifacts known as ‘ghosts’ in the HDR world. A good HDR program will have reliable automatic deghosting options with a precise level of control over how they are applied to your image.
Is it fast and responsive?
Combining multiple images into a single HDR image can be time-consuming, especially when you’re working with a large number of high-resolution images. With a properly optimized application you should be able to get your initial composite quickly, and the editing process should be responsive without long recalculation times each time you make an adjustment.
Is it easy to use?
Even the most complex application can be easy to use if it is well-designed. A badly-designed program becomes frustrating to use, and frustrated image editors are rarely productive image editors. A clean, clear interface is a major factor when choosing a program you’re going to be using regularly.
Does it offer any other editing features?
You probably already have an established workflow for editing your photographs, but it can be helpful to have some additional correction options within your HDR app. Basic corrections such as cropping, lens distortion adjustments or even some localized editing features are a nice bonus, even if they are not required. You may feel more comfortable doing that type of adjustment using your current editor, but workflows tend to be faster when using a single program.
Is it compatible with Windows and macOS?
It’s always frustrating to hear about a great new program, only to discover that it’s not available for your particular operating system. The best programs with the most dedicated development teams usually create versions of their software for both Windows and macOS.
Final Words
The digital camera is an incredible and complex device, allowing us to capture everything from vast landscapes to incredibly personal moments. But for all its capabilities, it still can’t quite compete with the abilities of the human eye for one important reason: our brain.
When you look out at a beautiful sunset, your eyes adapt to limit the amount of light they receive. At the same time, your brain remembers what was happening in the darker areas of the scene in front of you and stitches it in, creating the illusion of being able to see a very wide range of contrasts. Your eyes aren’t really capturing everything all at once, but the switchover between the bright areas and the dark areas happens so quickly that you don’t usually notice it.
High dynamic range photography can be an exciting hobby, as long as you don’t have to fight against your software to get high-quality results. As you may have noticed in my review of many of these programs, the focus on the mathematics behind HDR has often turned the image quality and user interface into secondary considerations – at least, from the perspective of the software developers.
Fortunately, there are a few diamonds in the rough, and hopefully one of these great HDR programs will help you explore the world of HDR photography!
I appreciate your time and results, reviewing the options.
In my humble opinion based by years in the history and aesthetics of photography.
New medium software has its place, BUT…. nothing with rival the aesthetic of a Penn, Weston, Adams, & Avedon print in silver or platinum.
The original vision & skill of these masters left a benchmark for artist to strive too..
I have yet to see a HDR image, that gives me a similar aesthetic….. we see with the original technique of the artist,
the problem being software is is designed for the multitude of wanna be artist.
Art is not automation…it is artist self discovery in original moment of sweat and inspiration, not replication
Used with discretion and discipline, HDR it has its marks for image making…as a tool, NOT THE MASTERPICE
I’ve tried Photoshop & lightroom, they’re good, but limited control, I couldn’t achieve the results what I really want, so I start trying other softwares, I tried Photomatix Pro, it’s good with extra control, but when choosing an image with complicated lighting and color tones, I wasn’t satisfied, the image was for an interior furniture, 2 different lighting sources a window scene during early evening.
I took the same 3 bracketed images then to EasyHDR, after a little adjustments, result were slightly better, then I went to Aurora HDR 2019, started the image loading, it took longer time to render, but then.. I got shocked with the result! The default merge was stunning, even before doing any adjustments! What a smart software! Really precise and natural output, I’m really impressed!
It’s more higher cost to purchase, comparing to Photomatix Pro & EasyHDR Pro, but really worth it. Satisfaction gained with Aurora HDR 2019 🙂
I will try it next with outdoor landscapes and see how it goes.
Thanks Thomas!
Great article.
But I miss your opinion of HDR Efex Pro.
I use that one and Aurora and both called from Lightroom.
All the best!
Sven
Strange that you miss out on HDRmerge, ooen source and very capable. Will output dng raw.
Another option i would suggest is a Lightroom plugin merge 32bit.
It does the job and one simply uses all the features that Lightroom already provides in balancing your image.
Because i am not into over cocking images to look like paintings and find it adequate.
I have better results by using Photomatix Pro than Aurora. The alignment of the images is much better in Photomatrix Pro. Also the quality of the made HDR photo is better.
Great job on the reviews and explanations! I have used CloudHDR which has been in “Beta” mode for several years. You cannot download the file and must use their website which seems to go down constantly. This is especially frustrating when you have a project with a deadline and no one from the software support are available. The site has been down now for several weeks and no one responds. Thanks again for your review, it’s time for me to purchase a better program.
I can understand the frustration. I worked on my skills and learning HRD editing software in the past. These days I am helping people in the same through my blog so that they can get some useful and instant information. My intention was to create a place for people who are seeking for the same and struck in editing by using different software. This is also resource full blog. I really liked the information. I am pretty much experienced in Photography so I already did experimentation with paid and free software.