
At some point in your photography journey, you probably ran across RAW files and learned the value of using them. Now it’s time for a new file format – DNG.
Hey there, I’m Cara! The choice between RAW and DNG isn’t quite as clear-cut as the choice between JPEG and RAW. Whereas most serious photographers understand and use the extra information stored in RAW files, the benefits of DNG aren’t quite as obvious.
To clear things up, let’s dive in and learn about DNG files and how to use them here!
Table of Contents
What is DNG in Lightroom?
DNGs (Digital Negative Files) are a type of raw image format created by Adobe. It is an open-source, royalty-free, highly compatible file that is continuously being improved upon. It is specifically designed for editing photos – particularly with the Adobe software suite.
Why the need for DNG files? You might not realize this, but not all RAW files are created equal. In fact, they can’t even be read without special interpretive software.
Camera companies keep creating their own proprietary undocumented raw camera file formats and it’s hard to keep up. These files can only be opened by the manufacturer’s own raw processing software or third-party software that has been configured to interpret them.
At this point, Camera Raw and Lightroom support over 500 types of RAW files!
Thus, Adobe created the DNG format. Now, if you try to use an unsupported type of RAW file with Lightroom, you can convert to DNG and keep on going, business as usual.
Thinking that DNG files might be the best choice for you? Let’s look at how to do the conversion.
How to Convert RAW to DNG
Note: the screenshots below are taken from the Windows version of Lightroom Classic. If you are using the Mac version, they will look slightly different.
Converting RAW files to DNG is quite easy. The simplest way is to convert your files when you open or import them into Lightroom.
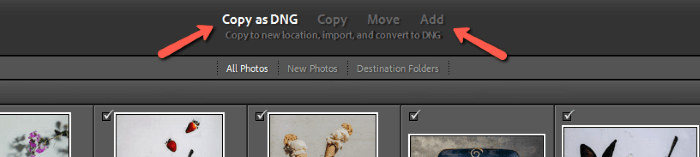
On the Import screen, you’ll notice a few options at the top. By default, the Add option will be on. Click on Copy as DNG to copy the images from the source location (such as an SD card) to your Lightroom catalog as DNGs.
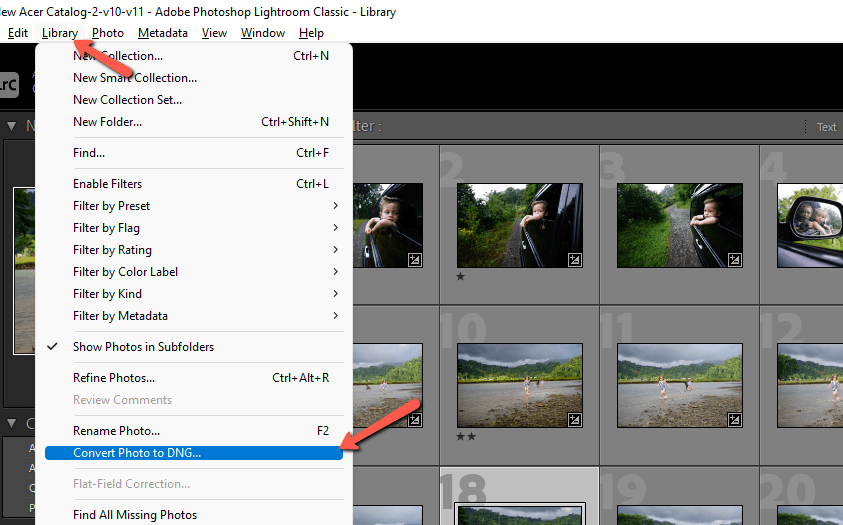
If the images are already in your catalog, you can convert them from the Library module. Select the images you want to convert. Then go to Library in the menu bar and choose Convert Photo to DNG
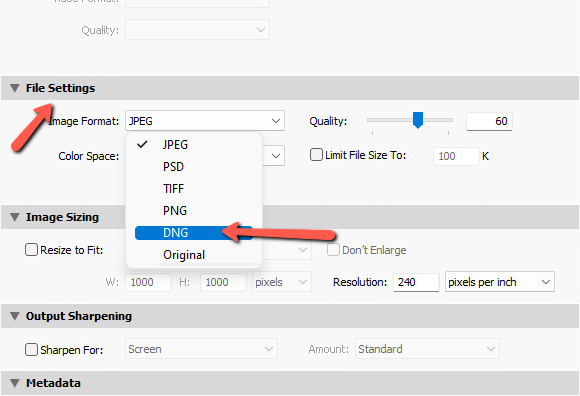
Finally, you have the option of exporting files as DNGs. In the File Settings section of the export options, click the Image Format dropdown and choose DNG from the list.
How to Use DNG Presets in Lightroom (Mobile)
Adding and using DNG presets is quite simple in Lightroom mobile. First, download the presets folder to your device, unzip the folder and save the files to your device or in the cloud.
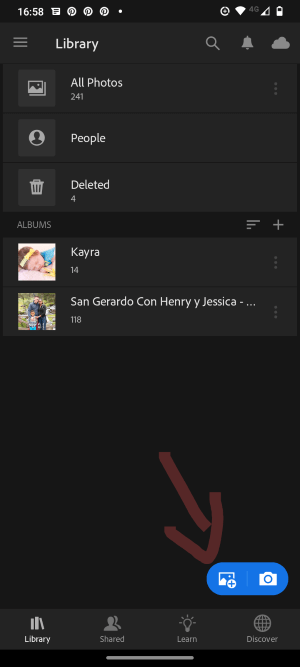
Then, go to your Lightroom app and choose the option to Add Photos.
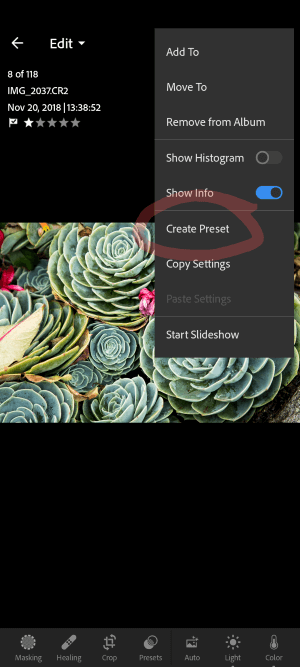
Go to wherever you saved your presets and select those that you want to import. Then tap the 3-dot icon in the upper right corner and choose Create Preset from the menu. Then save it to whatever preset group you want to use.

Applying the preset is simple. Tap the presets button at the bottom of the photo you want to edit. Then choose your DNG preset from wherever you saved it.
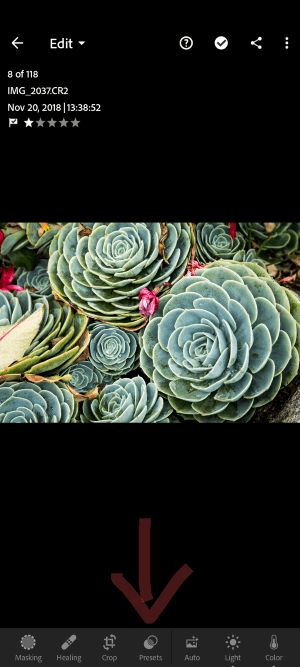
Tap the checkmark to apply the preset and you’re all set!
Why Use DNG Files? (3 Reasons)
If you work with RAW files that are supported by Adobe’s software, you might assume that DNG files offer no benefit to you. But that’s not the only reason you might consider using DNG. Let’s explore it a bit further.
1. Smaller File Size
Struggling with storage space? Some photographers are very prolific and storing hundreds of thousands of heavy RAW file images gets expensive. Wouldn’t it be nice if there were a way to make those files smaller without losing information?
It sounds too good to be true, but it actually is. DNG files store the exact same information as the proprietary RAW files in a slightly smaller package. In general, DNG files are about 15-20% smaller.
Might not sound like much, but considering a collection of several hundred thousand photos. 15-20% more space represents A LOT of additional images you can store!
2. No Sidecar Files
Have you ever noticed all those .xmp files that Lightroom and Camera Raw create when you start editing files? These sidecar files contain the editing information for your RAW files.
Instead of creating extra sidecar files, this information is stored within the DNG file itself.
3. HDR Advantages
You get this HDR benefit whether you choose to convert your raw files or not. When you merge images into panoramas or HDR images in Lightroom, they convert to DNG files. This allows you to keep all the raw information from the source images.
Again, these DNG files contain all this raw information in a smaller package. Other HDR software will pump out massive files to maintain the raw information. Thus, it is a more efficient way of working with DHR images and panoramas.
Disadvantages of DNG Files
Of course, there are a few disadvantages as well.
1. Extra Conversion Time
It takes time to convert RAW files to DNG. The space savings and other positive factors might be worth it to you — or they might not.
2. DNG Compatibility
If you only work with Adobe programs like Lightroom, you won’t run into this problem. However, if your workflow involves other editing programs outside the Adobe family, you could run into compatibility issues.
Most of these issues are fixable but this may be a roadblock that you’d rather avoid.
3. Slow Backing Up
The backing up process for metadata changes when you use DNG files. Instead of just copying the light .xmp files, the backup software has to copy the entire DNG file.
DNG VS RAW Files
So which type of file should you use? It comes down to your workflow. DNG and RAW files both have their advantages and disadvantages. You have to decide which type works best for your particular workflow.
DNG and proprietary RAW files basically carry the same information. There is a tiny bit of metadata loss when converting which contributes to the smaller file size. You might lose “less important” information like GPS data, focus points, the built-in JPEG preview, etc.
If this type of information matters for your workflow, obviously converting to DNG is a bad choice. However, the loss of this information usually isn’t enough to make a difference for most photographers.
What does make a difference is faster Lightroom performance. It takes longer to initially upload them because of the conversion, but you’ll find that operations like zooming and switching between photos go much faster with DNG files.
Since the initial upload is a hands-off operation, you can upload while you’re doing something else than enjoy faster performance while editing. If you need to upload right away and start working, the extra conversion time can be a problem.
Another thing to consider is the sidecar file. The absence of the sidecar file is a non-issue for most people. However, if multiple people are working on the same file, it is much easier and faster to share the tiny sidecar file than the entire DNG file.
There you have it! All you ever wanted to know about DNG files! Will you be switching over? Let us know in the comments!
Still on the fence about Lightroom itself? Check out some alternative RAW editing software here!