
Do you need to move your Lightroom catalog? Though the process is simple, it can be nerve-wracking if you don’t understand what you’re doing.
Hello! I’m Cara and the first time I moved my Lightroom catalog, I lost a bunch of information because I didn’t know what I was doing. It was frustrating, to be sure. To help you avoid the same awful fate, read on to learn how to safely move your Lightroom catalog.
Why Move Your Lightroom Catalog (3 Reasons)
First of all, why on earth would you move your Lightroom catalog and risk losing the information contained in it?
If you’ve read our article on where Lightroom stores photos and edits, you’ll know that all your editing information is stored in your Lightroom catalog. The photos themselves are not stored there, but rather Lightroom’s instructions for how to edit the RAW files.
This information has to be connected to wherever your photos are stored. When you move your Lightroom catalog, you break the connections. If you don’t know how to restore them, you’ll be in trouble.
So back to our earlier question, why risk it?
1. Working on Different Computer
Technology changes quickly and you will have to update your computer at some point. In order to continue working where you left off, you need a copy of the Lightroom catalog from your old computer so you can put it on your new one.
Another reason is to be able to work on images from another computer. However, keep in mind that once moved, the catalog doesn’t sync. Whatever information you add from that point forward will not be synced over to the other computer.
You’re not working in the cloud here, you’re creating a duplicate and moving it to a separate location.
2. Creating a Backup
Redundancies are a photographer’s best friend. While you should have Lightroom set to create automatic backups, those backups are stored in the same location. If your hard drive were to be damaged, you would still lose your Lightroom catalog.
That’s why it’s a good idea to copy your Lightroom to an external location occasionally. If your hard drive crashes, you’ll only lose the work you’ve done since the last backup – not all of it!
3. Running Out of Disk Space
Your Lightroom catalog doesn’t have to be stored in the same place as Lightroom. Most photographers run into space issues sooner or later on their main hard drive. A good way to deal with it is to store large amounts of information on an external drive instead.
The first thing to go should be your photo collection. You don’t need hundreds of gigabytes of RAW photos clogging up your computer.
Another heavy file that you can move is your Lightroom catalog. Lightroom the program has to stay installed on your hard drive, but the catalog doesn’t have to be there.
How to Move Your Lightroom Catalog
Now let’s get to the good stuff. How do you make the move? Let’s go through the steps!
Note: the screenshots below are taken from the Windows version of Lightroom Classic. If you are using the Mac version, they will look slightly different.
Step 1: Find the Catalog’s Location
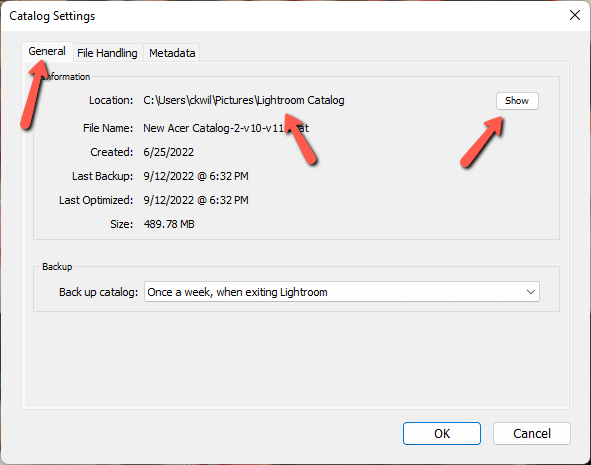
First, you need to find the file. The easy way to do this is to go to Edit in Lightroom’s menu and click Catalog Settings.

Make sure you’re in the General tab. You’ll see location information that shows you the file path to where your Lightroom catalog is stored. To go straight to the location, click Show on the right.
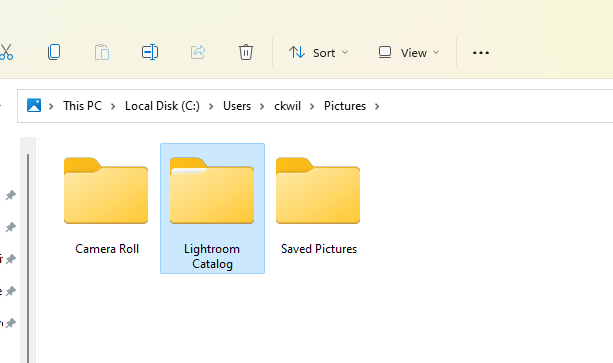
Your computer’s file manager will open directly to the catalog.
Step 2: Copy or Move the Catalog to the New Location
Now it’s time to move or copy the catalog. Moving transfers the catalog to a new location and nothing is left behind. Copying creates a new copy of the catalog and puts it in a second location.
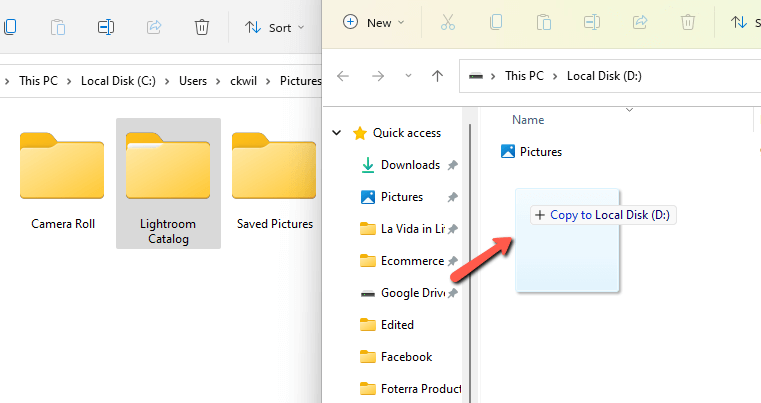
You can move the catalog by clicking on it and dragging it to your new location.
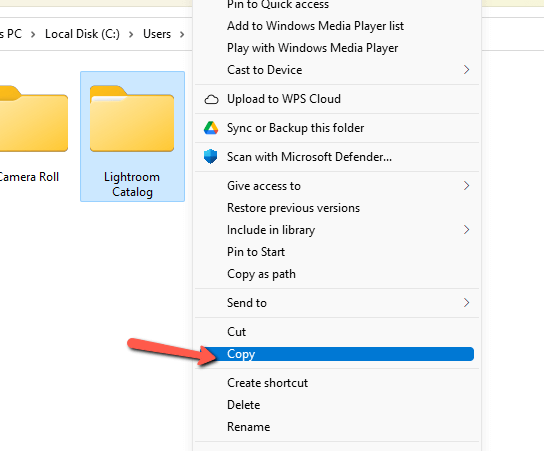
However, even if your end goal is to move the catalog (as opposed to making a copy) I would recommend copying it. After you’re sure that the catalog is safely and correctly in the new location, you can come back and delete the original. It’s just a touch safer that way.
Note: the last time I moved my catalog, I put it all together in this “Lightroom Catalog” folder. Normally, you’ll see several files ending in .lrcat and .lrdata. Make sure you get all of them.
Step 3: Check the New Catalog
The transfer may take a few moments depending on the size of your catalog. Once finished, close out of Lightroom then double-click the catalog file in the new location to relaunch Lightroom with the new catalog. The file looks like this:

Step 4: Relink Missing Folders
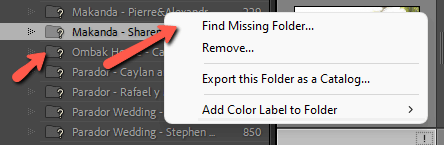
When you open the new catalog, it’s likely you’ll see a bunch of question marks next to the image folders. The connections have been broken between the Lightroom catalog and the image files.
To fix this, right-click on your topmost folder and choose Find Missing Folder. This will open your computer’s file manager so you can navigate to and choose the correct folder to relink.
Repeat for any other folders that may have been overlooked. If you have your pictures organized within one file you should only have to do it once.
Step 5: Delete the Original File
If your goal was to copy the catalog, you’re finished. However, if you wanted to move it, now you go back and delete the original file after ensuring that everything is working properly.
Super simple!
Curious to learn more about using Lightroom? Check out the split toning tool and how to use it here!