
How many photos do you have in your Lightroom catalog? Can you find everything easily?
Hey there! I’m Cara and I know how it goes. When you first start using Lightroom, you’re excited and amazed by the impressive capabilities of the program. You just start throwing your photos in there until, one day, you realize it’s a mess and you can’t find anything!
Well, not to worry, Lightroom is amazing for editing and for organizing your images. If you’ve already got a hot mess going on, it might take a little to sort it out. But once you start using Lightroom’s organizational tools and get a system going, it’ll be a cinch to find anything!
Let’s take a look at what’s available.
Note: the screenshots below are taken from the Windows version of Lightroom Classic. If you are using the Mac version, they will look slightly different.
Table of Contents
Sample File Structure
The foundation of an organized system is to manage your files. Everybody has their own system, but you should have something along the lines of this proposed system.
You should have one folder called Pictures or Photos. The next level could be the year. Then organize each event in its own folder in the appropriate year.
Those who do photography professionally may add another level in the year to divide professional and personal events into their own folders.
For example:
Photos>2022>Personal>7-4-2022IndepedenceDayFestivities
or
Photos>2022>Professional>6-12-2022Dani&MattEngagement
You don’t have to follow this structure exactly, of course. But you do need to choose a structure that works for you.
Managing Lightroom Photo Library
If your files are stored haphazardly, you’ll need to organize them into a clear structure first. But if you do this wrong, you will break the connections in Lightroom.
Then Lightroom will have no idea where to find your images. You can relink them again, but this is a big pain if you have a lot of files.
So let’s understand how to do this correctly.
As you may be aware, Lightroom doesn’t store your images. The image files are stored wherever you’ve saved them on your hard drive. When you go into a folder through Lightroom, you are simply accessing those files to make your edits.
With that in mind, you might assume that you need to move your files around on your hard drive. This is what will break the connections.
Instead, you need to move things inside of Lightroom. The files will still be moved on your hard drive to the new location and Lightroom will know where they went.
Let’s look at how this works.
Let’s say I wanted to move these full moon images down to the Family Photos 2020.
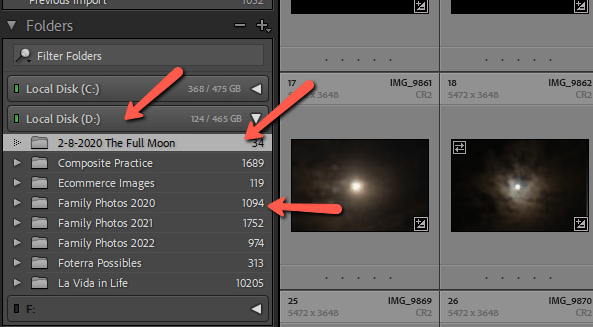
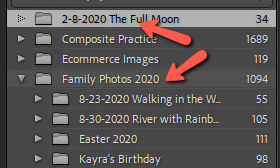
I would click and drag the folder down to hover over Family Photos 2020. The folder will open, and you must take care to drop it directly into the folder you want to move it to.
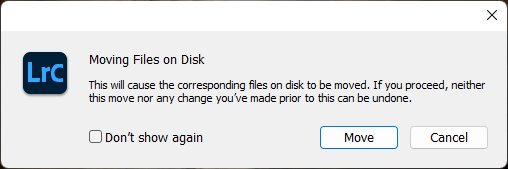
You may get a warning like this when you do this. Hit Move to keep going.
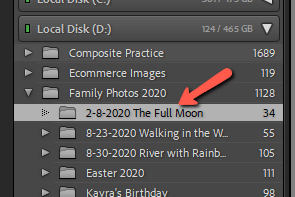
Now the moon pictures appear inside the Family Photos 2020 folder, both in Lightroom and on your hard disk.
Lightroom Collections
With the basic structure out the way, let’s look at some of Lightroom’s file management features. The awesome features that many people are not taking advantage of are collections and smart collections.
Say you wanted to group certain images together, but you want to keep them in their original folder as well. You could make a copy, but then you’re taking up extra space on your hard drive. Plus, any changes you make to either copy won’t affect the other one.
Collections allow you to group images together without having to make separate copies. Plus, since there is only one file, any changes you make are automatically synced to the other locations.
Confused?
Here’s an example. I create designs out of images that I take on our adventures around Costa Rica. Thus, I have a collection called Possible Product Design Images.
I organize all my images according to where I took them. But then as I go through, I can drop images I may want to use in product designs into this collection so I can easily access all the possible images in the same place without having to make copies.
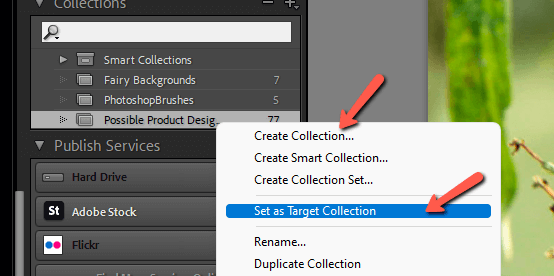
To set this up, right-click in the collections area and choose Create Collection. Then right-click on the collection you want to use and choose Set as Target Collection.
Now, as you’re browsing through Lightroom, you can press B on the keyboard and the selected image will be sent to your target collection. Press B again to remove the image from the collection.
Smart Collections
Smart collections are a little more hands-off, once you get them set up. When you create a smart collection, you can choose the parameters for the collection.
For example, photos containing a certain keyword, photos in a certain date range, photos with a certain rating (or all of the above!) Lightroom will then put all the images meeting your specifications into the collection.
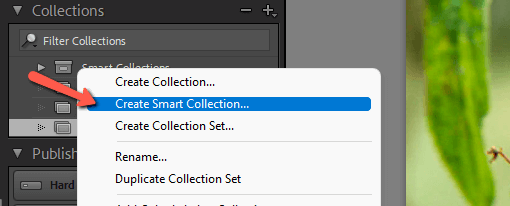
We won’t get into this too much here, but here’s a quick example. Right-click on the collections and choose Create Smart Collection.
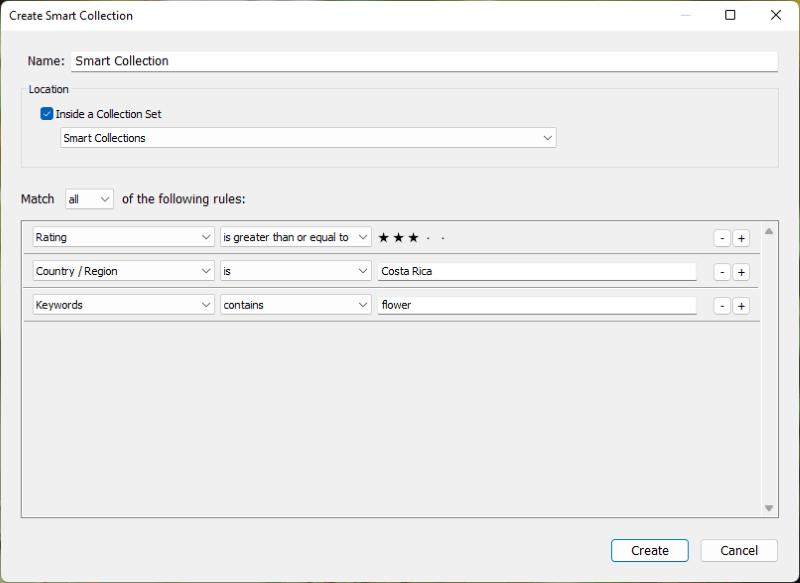
In the box that opens, choose the parameters you would like to use. I’ve set it up here that every photo taken in Costa Rica with a 3-star or higher rating and a keyword containing “flower” will be added to this collection.
Organizing Individual Shoots
Every time you bring a new shoot into Lightroom, you’ll have a bunch of photos to work with. Lightroom gives us several organizational options that allow you to quickly earmark and organize the photos as you cull and edit the images.
Flags
You can put 3 flagging options:
- Press P to Pick an image
- Press X to Reject an image
- Press U to Remove all flags
Flagging images as Rejected allows you to delete them en masse later.
Star Ratings
Press 1, 2, 3, 4, or 5 on the keyboard to rate an image 1, 2, 3, 4, or 5 stars.
Color Labels
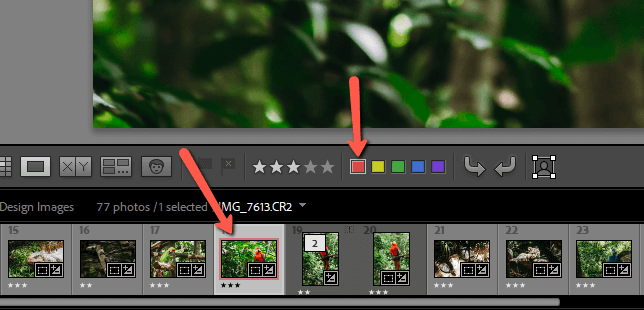
You can also give an image a color label. You can assign whatever meaning you wish. For example, I put a red label on images I want to work on in Photoshop.
You can add the label by clicking on the appropriate color swatch in the bar above the filmstrip. A little red box will appear around the image in the filmstrip.
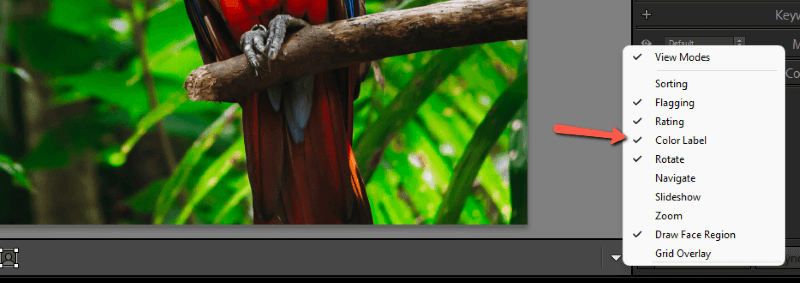
If the color swatches aren’t there, click the arrow on the right side of that same toolbar. Then, click Color Label so that a checkmark appears next to it.
Keywords
Keywords are an excellent way to precisely mark your images. If you add keywords to all your images, all you have to do is search the keyword and all the corresponding images will appear. It can be tedious, though, to keyword all your images and you’ll have to keep up on it.
To add keywords to an image, go to the Library module. Open the Keywording panel on the right. Then add the keywords you want to use in the space below.
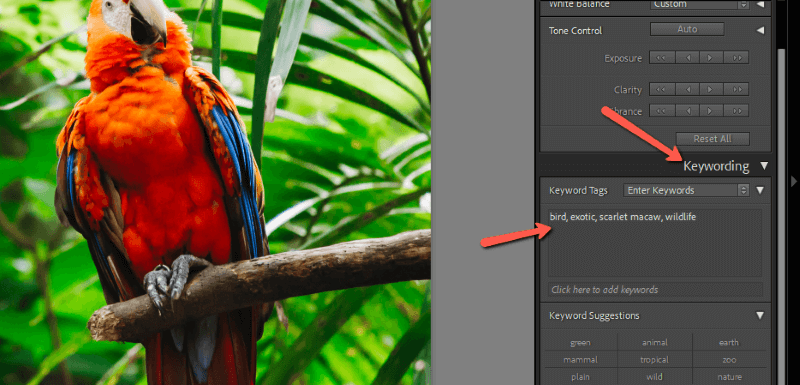
Lightroom will also offer suggestions based on prior keywords. Plus, you can create custom keyword sets so you can apply several keywords at once.
If you want to add the same keywords to multiple images at once, select all the images first. Then type in the keywords.
Final Words
Lightroom makes it pretty simple to organize your photos. It will still take a bit of work because the computer can’t read your mind…yet.
However, once you get a system down, you should never have trouble finding an image again! Curious to learn more about Lightroom? Check out how to batch edit in Lightroom here.