
How many photos do you take? A blessing of digital photography is the ability to take virtually unlimited photos in your pursuit of the perfect image. Not sure which composition is best? Try them all and you can decide on your favorite later on a bigger screen.
Of course, this can mean you end up with several hundred photos every time you get your camera out!
Hello! I’m Cara and I can definitely be accused of taking too many photos. I worry about missing something and I can’t tell you how many times I’ve found hidden gems among the photos that I at first thought were only so-so.
However, hundreds of photos take up a lot of space. This means that it takes longer to sift through your favorites as well as it fills up your hard drive faster than you’d like.
Thus, deleting your unneeded photos should be a key part of your workflow. Let me show you how to delete photos from Lightroom as well as share some thoughts on how to choose which ones to delete.
Note: the screenshots below are taken from the Windows version of Lightroom Classic. If you are using the Mac version, they will look slightly different.
Table of Contents
Deleting Photos from Lightroom
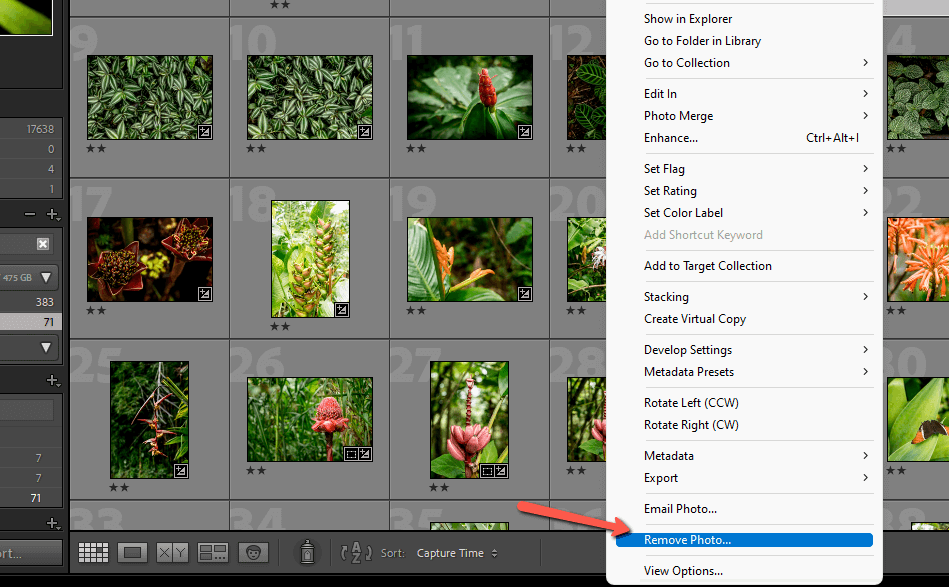
You can delete photos both from the Library module and the Develop module. Simply right-click on the image and choose Remove Photo from the menu.
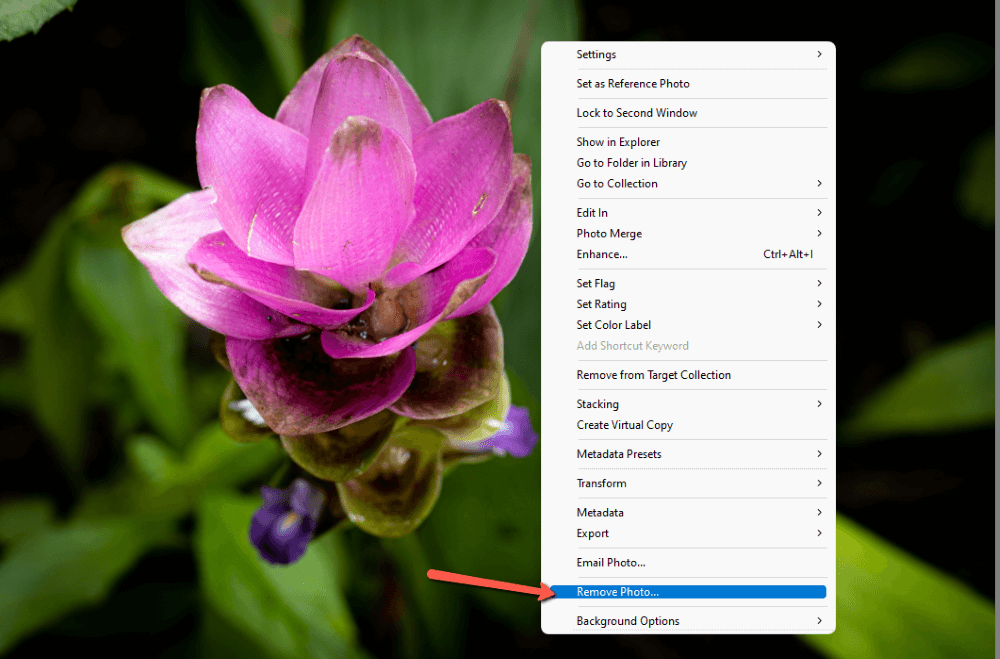
This menu is also available in the grid view of the Library module.
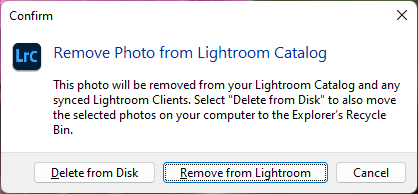
You get three options that appear in the window that opens. You can Delete from Disk which removes the photo from your folder completely. Or you can Remove from Lightroom to remove the image from your Lightroom catalog but keep it on your hard drive.
If you made a mistake, press Cancel to go back without deleting anything.
Deleting Photos En Masse
Of course, deleting photos one by one like this can get tedious. A better option is to use the Reject flag, which allows you to delete multiple photos in Lightroom.
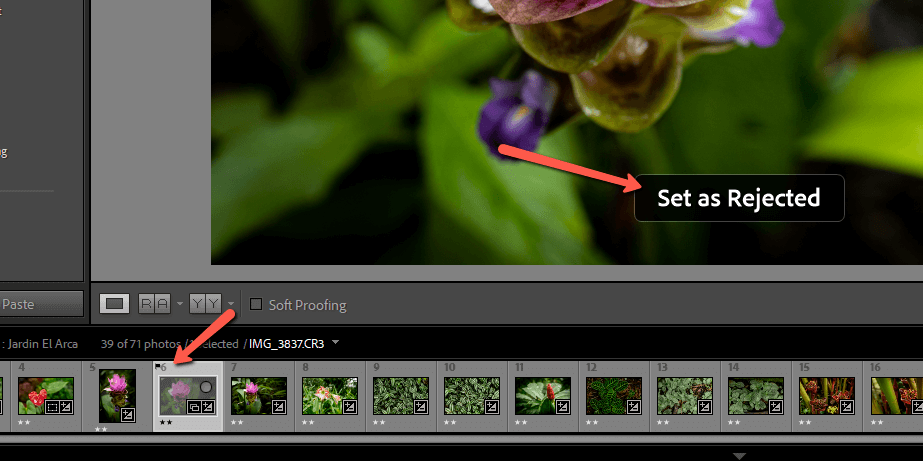
As you’re culling your images, mark the ones you want to delete by pressing X. This will flag the photo as rejected. Check out this article to learn more Lightroom shortcuts.
When you reject a photo, Lightroom will let you know with this little Set as Rejected note that pops up on the bottom of your photo. Plus, down in the filmstrip, your photo will be marked with a flag and grayed out.
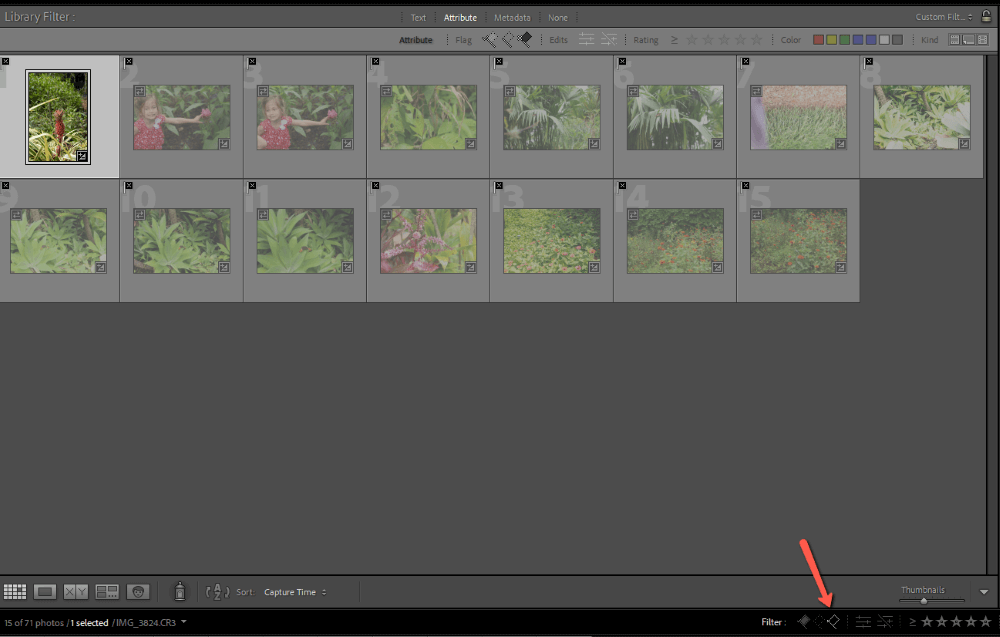
If you want to double-check your images quickly, filter them to show only rejected images. Click the rejected flag icon in the filter tray at the bottom right of your image. Press G to go to grid view in the Library module so you can see them all at once.
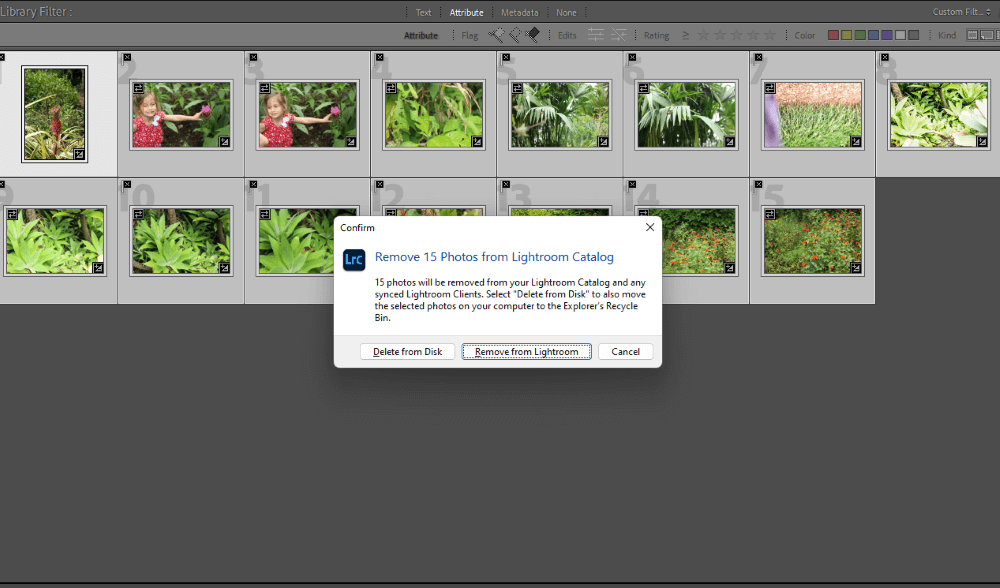
If you want to delete all photos at once, press Ctrl + A or Command + A to select all the images. Then press the Backspace or Delete key. Lightroom will ask what to do with the 15 selected images (or however many you have).
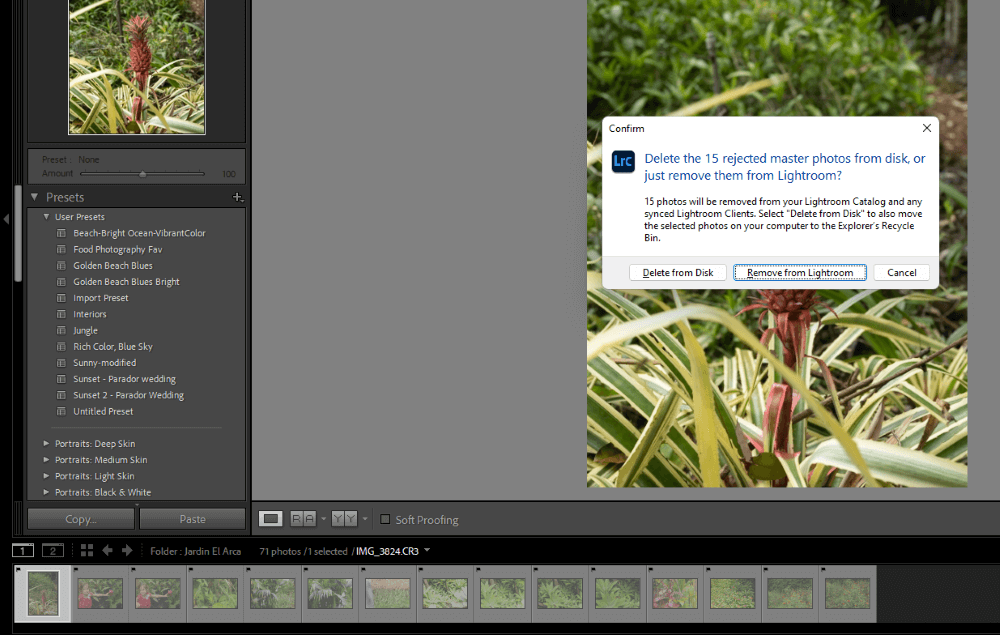
You can also just press Ctrl + Backspace or Command + Delete without selecting any images. Lightroom will automatically choose all the rejected images that are active in your filmstrip at the moment.
If you haven’t been good about deleting your images, but they are flagged, then you can purge them all at once. In the Library module, choose All Photographs from the Catalog panel on the left.
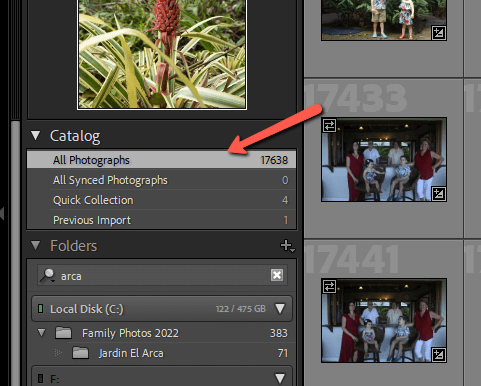
Lightroom will automatically select all the rejected images and give you the option to delete them. As you can see, I’ve been keeping up on my deletions, lol.

Problems Deleting Images
What if you can’t delete photos in Lightroom? Sometimes you’ll go through these steps and Lightroom will tell you that the operation cannot be performed. There are a couple of things that could be causing this.
Run as Administrator
First, you might not have administrator permissions in Lightroom. To check this, go to Start in Windows 11 and open All Apps.
Right-click on Adobe Lightroom, hover over More and choose Run as administrator from the menu.
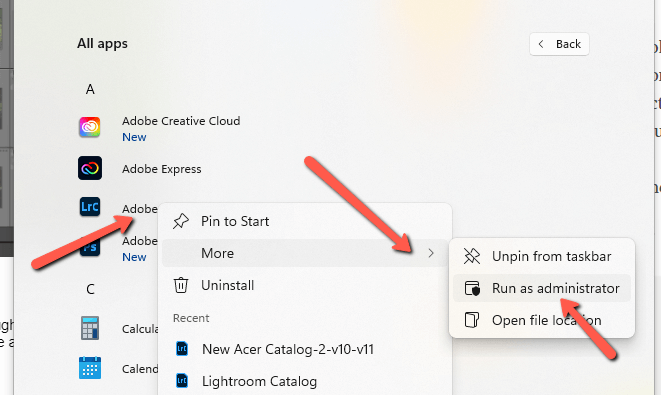
Now try deleting the files again.
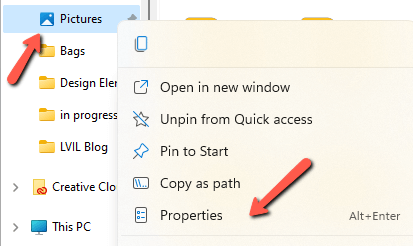
Files Are Read-Only
Another potential problem is that the files have been set to Read-only. In Windows 11, go to the top-level folder where all your images are stored. Right-click on this folder and choose Properties from the menu.
Under the General tab, check the Read-only box in the Attributes section near the bottom. The box should not be checked, i.e. it should look like what you see below.
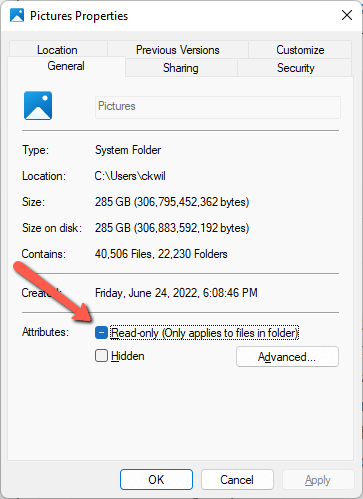
If it is checked, uncheck it and answer yes when asked if you want to apply it to all subfolders and files. Now go back into Lightroom and try again.
Bonus Tip: How to Choose Which Photos to Delete
The actual act of deleting photos in Lightroom is easy, picking which photos to delete is significantly harder. Everybody has their own workflow that works for them. I’ll share mine to see if it helps you.
When I cull photos, I either reject them or give them one star. Duplicates, blurry images, test shots, etc get an immediate rejection. Everything that I might use gets one star and the rest of the images I leave alone. They’re there in case I need them but they aren’t the best.
For example, when there are 12 people in the photo it can be hard to get them all smiling, with their eyes open, etc at the same time. Thus, I pick the one where the most number of people look the best but I may need to grab a head or two from one of the other photos.
After I’ve finished editing all the images from the shoot, I’ll come back and go through the unstarred ones again. Sometimes I might find something new that I like but most of the time I delete them too now that I’m sure I won’t need them.
Other people have different workflows that work better for them. You find what works for you. The main thing is to make sure you don’t needlessly fill up your hard drive with images you won’t ever use.
Speaking of workflows, do you know about DNG files in Lightroom? They can also help you save space on your hard drive. Check out our article here to find out if you should be using them!