
Movavi Video Editor
Summary
Movavi Video Editor offers a good balance of video editing features and ease of use, intended for casual users who want to create their own videos to share online or with their friends and family. After putting it to the test by creating my own short video, I found it simple to use, despite a few areas of the user interface that could be improved in future versions. Youtube integration made it easy to get my video online, and the entire process was remarkably problem-free (despite one error that was actually my own fault for not being familiar enough with Youtube.)
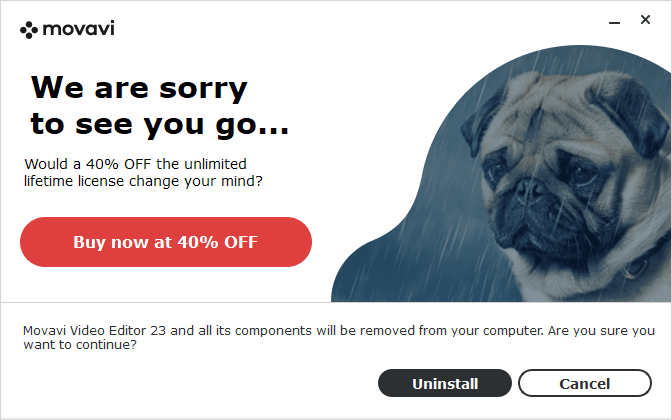
The biggest issues with Movavi Video Editor aren’t problems with the app itself but rather with the way it is marketed and sold to new users. The app and the sales website are both filled with shady marketing practices and so-called ‘dark patterns’ that are intended to force the user into paying as much as possible. Can you think of any other software that automatically tries to upsell you on ‘Download Insurance’ so you can re-download the software you paid for at a later date? They should be ashamed of themselves.
What I Like: Simple interface. In-app tutorials for beginners. 4K video support. Hardware acceleration.
What I Don’t Like: Some UI elements need work. Limited control over effects. Predatory marketing practices. Usage reporting is enabled by default.
Is Movavi Video Editor really free?
Does Movavi reduce video quality?
Movavi is capable of reducing video quality in order to create smaller files, but it does not automatically lower the quality of your videos. It can create optimized versions of your high-resolution clips to make the editing process smoother and faster, but the final rendered version of your video is made using the high-resolution original files.
Does Movavi leave a watermark?
Movavi only leaves a watermark on exported files if you use the time-limited free trial version. If you purchase the full version of the software, there is no watermark on your exported files.
Is Movavi Video Editor good for beginners?
It is a simple video editing program that’s aimed at the casual and enthusiast markets. You definitely wouldn’t want to use it for a professional project, but it’s more than capable of creating movies for sharing on the web or with your friends and family.
Is Movavi Video Editor safe?
Yes, it is absolutely safe to use, although there is one feature during the installation process that you should pay attention to. Once the installation is completed, the installer asks to run the program, but it also asks your permission to send anonymous usage statistics to Movavi.
Other than this one minor potential privacy issue, the program is safe to use. The installer file and the installed program files pass security checks from Microsoft Security Essentials and MalwareBytes, and no adware or third-party software is installed.
Table of Contents
Why Trust Me for This Review
My name is Thomas Boldt, and I’m now one of the oldest members of the SoftwareHow review team. I have been trained as a graphic designer, and I’ve worked with a wide variety of video editing and motion graphics software programs on both PC and Mac. Another part of my training involved user interface and user experience design, which has allowed me to identify and appreciate the differences between well-designed programs and those that could use some more work.
As part of my work with SoftwareHow, I’ve also reviewed a number of other video editing programs, giving me a balanced perspective on the capabilities and issues with similar software available on the market right now.
Movavi has no input or editorial review on the contents of this review, and the views expressed here are my own – with a bit of help from JP, who reviews the Mac version of the software to ensure we get a full understanding of how it works cross-platform.
Detailed Review of Movavi Video Editor
Movavi isn’t the most complex video editor available, but it still has more features than I have space to cover in this review. Instead, I’m going to take an overall look at the user interface, and then go through the processes involved in actually creating your own video, including media importing, basic video clip editing, applying effects, and some of the fancier editing options, then I’ll show you how Movavi can export your videos so you can share them with the world.
The Movavi User Interface
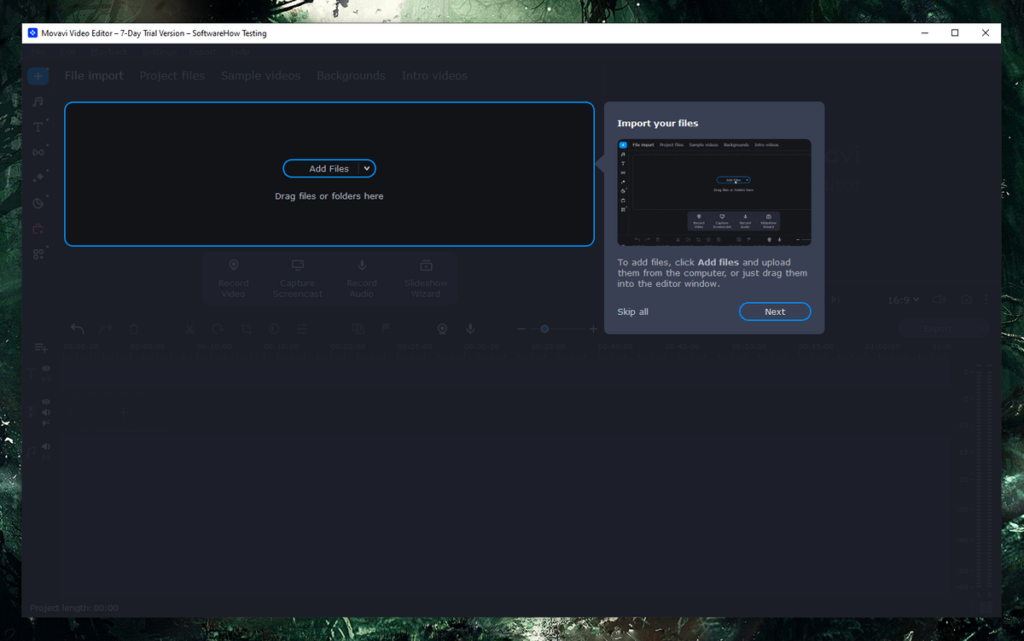
If this is the first time you’ve run the program, you’re presented with a quick in-app tutorial that introduces you to the interface. While it’s a very basic intro, the information is still quite useful – especially if you’ve never used a video/movie editor before. It provides new users with a basic workflow, starting with importing media, how the video timeline works, and how to apply effects.
Once you’ve sorted through all that, you’re presented with the main interface. It will be immediately familiar to anyone who’s used similar video editing programs before, such as Wondershare Filmora or TechSmith Camtasia, but even those who are new to it can pick it up quickly.
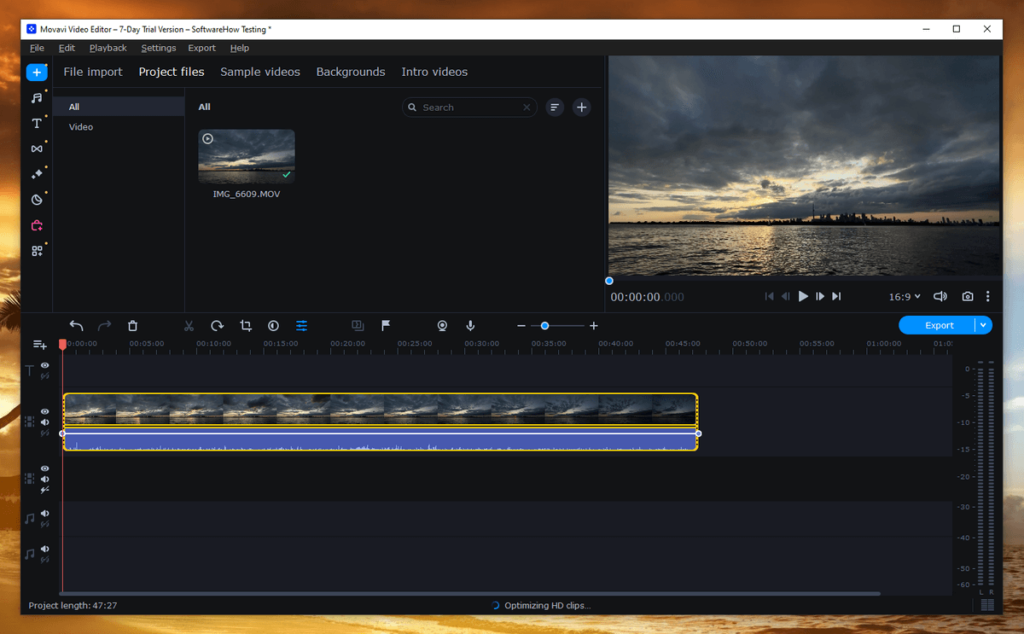
There are three main sections: the media library section in the top left, the preview window in the top right, and the timeline running along the bottom. The timeline is broken down into 3 tracks: audio, main video, and titles, which allows you to separate the various elements of your project. If necessary, you can add additional tracks of each type.
My personal take: It’s strange, but I think Movavi has become more difficult to use in recent versions, instead of easier. As they add new features to compete with the other video editors out there, they are losing the simplicity that made them stand out in the past, and the interface just looks like every other video editor.
Importing Media
The first step in any video project is importing media, and it’s extremely easy to do in Movavi Video Editor. The media that you import gets placed in the Project files section, a dramatic improvement from previous versions which automatically placed each clip you imported directly into the timeline.
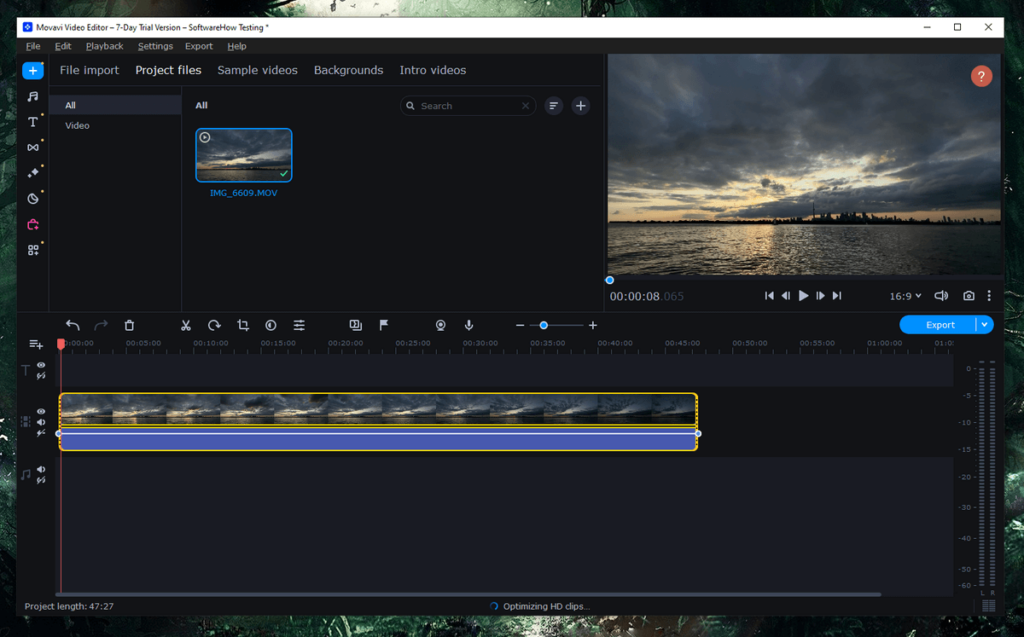
During my testing, I experienced no lag whatsoever when reorganizing 4K videos in the timeline, so at least that aspect of the process is quite smooth and simple. Movavi does run an optimization process on each HD/4k clip you add, which can temporarily make the app run a bit slow, but it does speed things up once it’s finally done.
It’s also easy to record video directly within the program using a compatible device such as a webcam or connected camcorder, although I have no such devices at the moment, so I couldn’t test this aspect of the program. For those of you making tutorial videos or other similar content, this will be a great help.
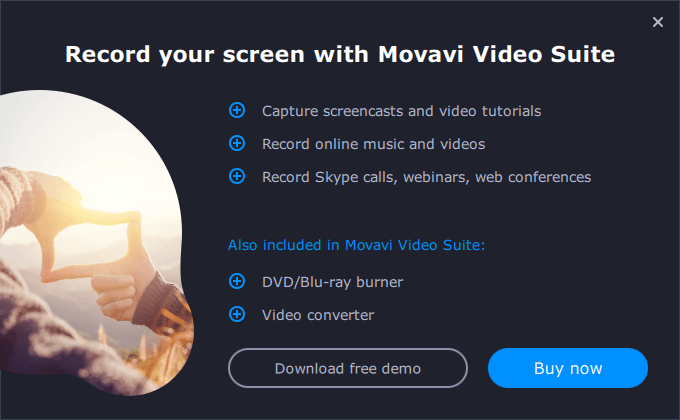
The other issue I had with media importing appeared when I tried to test the screen capture function – only to find that it’s not actually a function in the program.
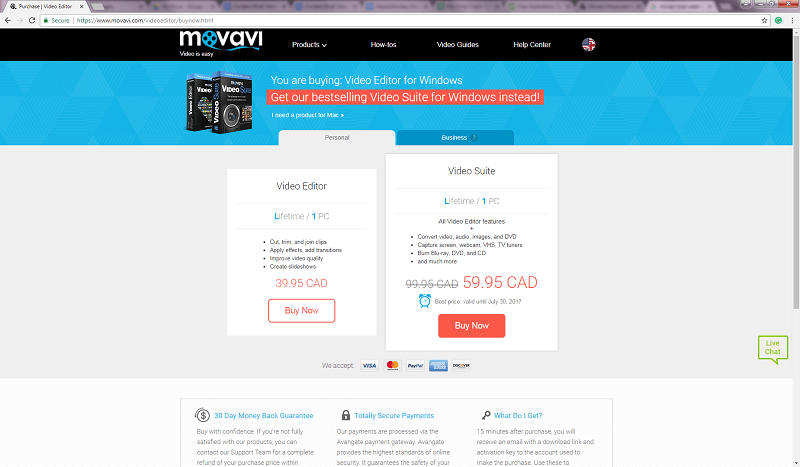
Instead, the icon is just a link to a demo or purchase of their more powerful Movavi Video Suite program – which would be extremely frustrating if I had already purchased the Video Editor program instead of just testing out the trial version.
JP’s note: It was the same while I was testing the Mac version. Once I clicked “Buy Now,” I was directed to the Movavi Super Video Bundle for Mac offer page. While the bundle looks really affordable considering the value of those four nice programs, I dislike this cross-sale tactic because it shows up at the wrong time. When users click on “Capture Screencast,” they expect this feature to be accessible. I hope the Movavi product team will reconsider this issue and perhaps address it in the next version.
Basic Video Clip Editing
When it comes to basic editing tools, Movavi does an excellent job. Working with the timeline itself is quite simple and responsive when positioning your various video clips, and I experienced no lag when adjusting clip length or trimming videos into multiple sections. Timeline zooming was equally smooth, allowing you to get down to the frame-by-frame level quickly for precise placement of transitions and effects.
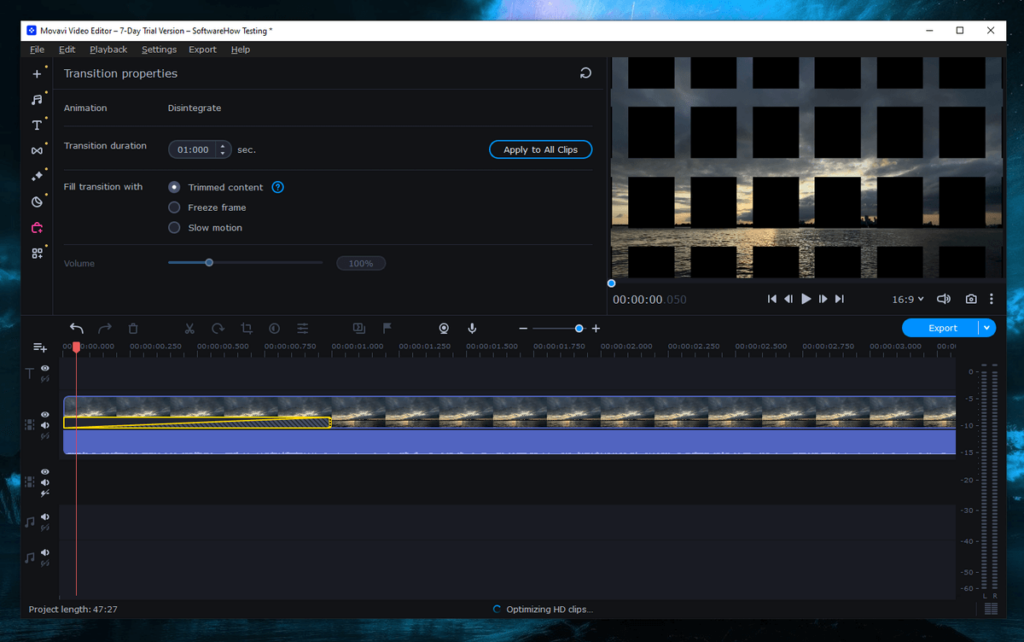
Transitions are simple and easy to add by dragging and dropping from the Transitions section of the media library onto the clip you’re working on. There are plenty of transitions to choose from, and of course, there are many more available from the Effects store, as long as you have an active subscription.

There’s a helpful transition wizard that simplifies the process of adding transitions between different clips, which can be an irritatingly tedious process in some of the other video editing apps I’ve used (looking at you, Premiere Pro!). It doesn’t give quite as much control as I’d like, but if you’re stitching a lot of clips together, it can really speed up the process.
My personal take: Basic editing used to be Movavi’s main focus, and as a result, these tools are the most polished in the entire app. Everything works smoothly and effectively, even on my 8-year-old laptop.
Applying Effects
Movavi Video Editor comes with an impressive range of transitions, filters, and other effects, and Movavi operates an online store filled with even more options – for a monthly subscription fee, of course. The store can be accessed directly within the app, but it is only available within the small media section of the interface in the upper left, making it difficult to use.
Applying any of the effects is as simple as dragging and dropping them onto the desired clip in the timeline section, or you can apply any effect to all clips by right-clicking and choosing ‘Apply to All Clips.’
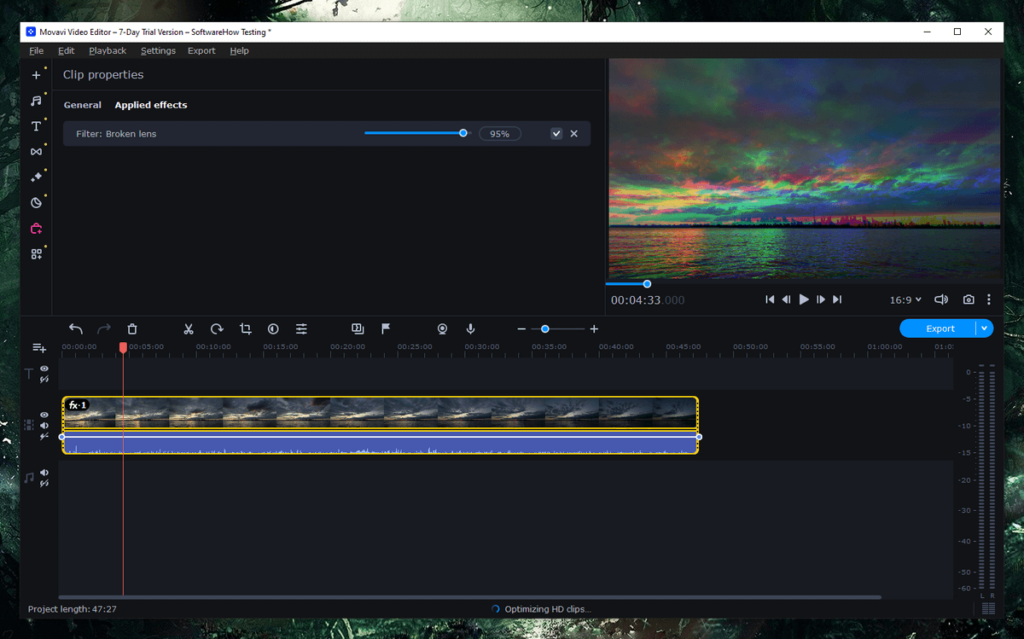
In case you go overboard and add too many effects, Movavi has a nice and direct way of showing you every effect that’s been applied to a specific clip. Clicking the ‘fx’ icon in the top left of each clip shows a complete list of the applied effects, including rotations, crops, speed changes, and stabilization.
The program also has a fairly standard set of titles and callout overlays (arrows, circles, speech bubbles, etc.), although you’ll have to download most of the available free options before they can be used. I guess they do this to keep the overall app installation size as low as possible, but it can be a bit tedious if you don’t have a stable internet connection.
My personal take: The effects store is only available through a subscription plan with a higher yearly cost than the app itself, which seems ridiculous to me, but if you make a lot of videos and need fresh content regularly, it may be worth it for you. Apparently, there are only 4 new effect packs added each month, which seems a bit low to me considering the cost.
Additional Editing Tools
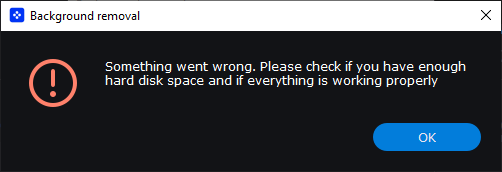
There are some useful additional video tools, including color adjustments, highlight/conceal, slow motion, image stabilization, and chroma keying (aka “green-screening”). The latest version has also included an AI-powered version of chroma keying that doesn’t depend on a specific background color.
It works fairly well, although you should definitely choose the ‘Precise mode’ if you want to get a decent result. It also might not work on every video – I tested it on a video of my cat, Juniper, and it gave me a confusing error message, although I think this is because it’s intended to be used on videos featuring human faces, not feline ones.
Not all of the tools are 100% successful, as I discovered when testing the ‘Magic Enhance’ color adjustment. I’m not sure what’s magical about totally ruining the exposure of my video and desaturating it, but you’ll have to be the judge about what to use and when!
Last but not least, there is an impressive range of tools for editing the audio of your project, including an equalizer, normalization, beat detection, noise cancellation, and various audio distortion effects. You also have the ability to record a voiceover from within the program, which is another useful feature for tutorial creators or any other situation where you want to add a bit of commentary.
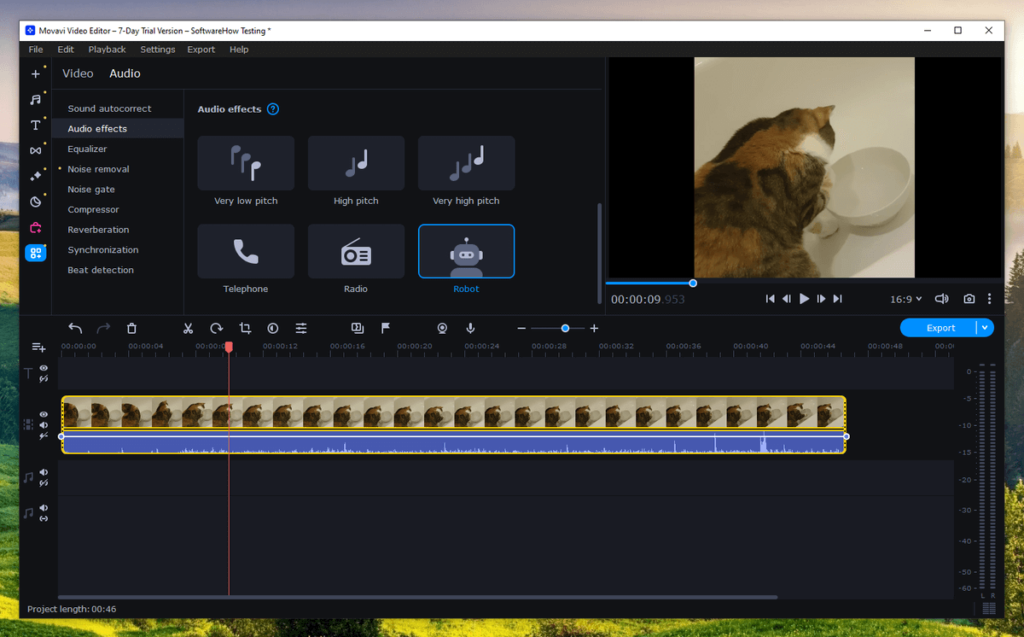
I tried to get Juniper to meow so that I could try out the Robot voice effect on her, but she just looked at me like I was crazy, so I had to settle for testing it on my own voiceover. I wound up sounding sort of like the spaceship’s computer from The Hitchhiker’s Guide to the Galaxy, which makes it a success as far as I’m concerned.
The number of available audio tools is actually quite good when compared to many other popular video editors, which seem to shy away from offering too much in the way of audio processing. The latest version of Movavi also allows you to layer different audio effects, which is a big step forward from previous versions that only allowed you to apply one effect per track.
My personal take: These are the tools that will let you have a lot of fun with your videos, and all the tools that I tested worked quite well, when used properly – as long as you don’t expect them to be Hollywood-level special effects.
Exporting and Sharing
Once your masterpiece is prepared, you’re ready to share it with the world. In addition to saving your video to your computer, Movavi includes the ability to share directly to a Youtube, Google Drive, Vimeo, or TikTok account. I tested the Youtube integration since I don’t have accounts with the other services, and the sign-in process was smooth and bug-free. This was a nice change from some other experiences I’ve had with social media integration and will be a real timesaver for dedicated YouTubers.
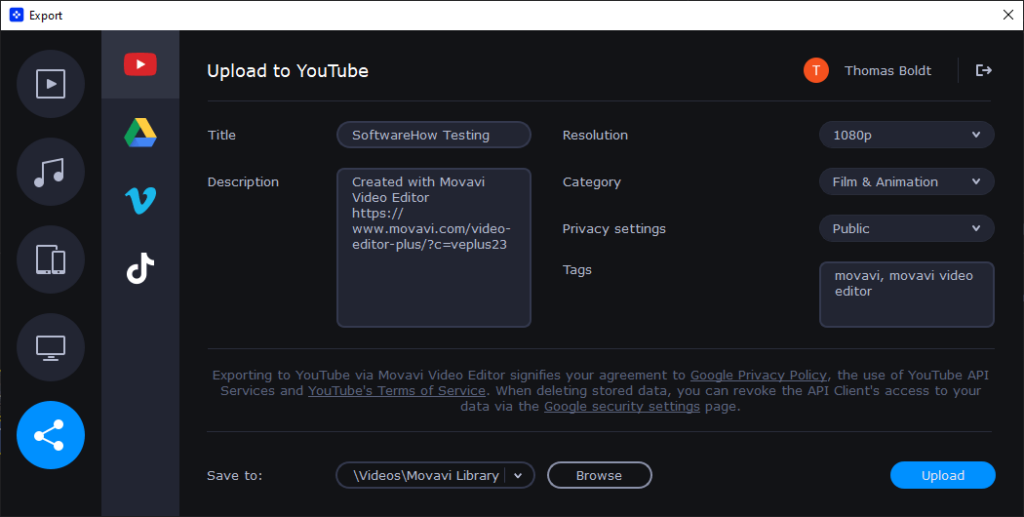
Once you’re at the export screen, you have a wide range of options for preparing your videos. There isn’t quite as much control over your export settings as some other programs provide, but there aren’t many situations where it’s actually helpful for casual users to change the bitrate and other highly technical settings. Instead, for most situations, this simple set of choices will make the export process much smoother and easier than other programs.
After changing the Privacy setting to ‘Private’, I started the export and upload process. The rendering itself went quite smoothly, but I had issues with the automatic upload aspect.
However, this was not Movavi’s fault, as it turns out that I didn’t have a proper channel set up on my Youtube account. A quick visit to the site fixed that, and once I tried again, everything went smoothly.
Of course, it’s still watermarked due to the trial limitations, but everything worked quite well otherwise! While it’s not a professional video editor by any means, Movavi Video Editor is useful for making quick videos to share online or with your friends and family.
My personal take: Other than the basic editing tools, this is probably the most effective and problem-free section of the app. It’s always refreshing when these online service integrations actually just… work properly.
The Reasons Behind The Ratings
Features: 4/5
It’s not the most full-featured video editor out there, but it doesn’t pretend to be, either. It does a perfect job of providing casual users with the ability to edit, join, and mix video and audio into a new creative project. If you want to experiment with complex video edits like chroma keying, Movavi lets you produce decent results with a minimum of effort.
Pricing: 3/5
Movavi has some major pricing issues, including wildly variable costs depending on how you reach the shopping cart purchase stage. The developer also makes a slightly more expensive but more fully-featured program, which makes this app less attractive. But worst of all, they use a pricing system that pressures people to purchase while thinking they’re getting a special deal, and their whole sales system is filled with little tricks like this:
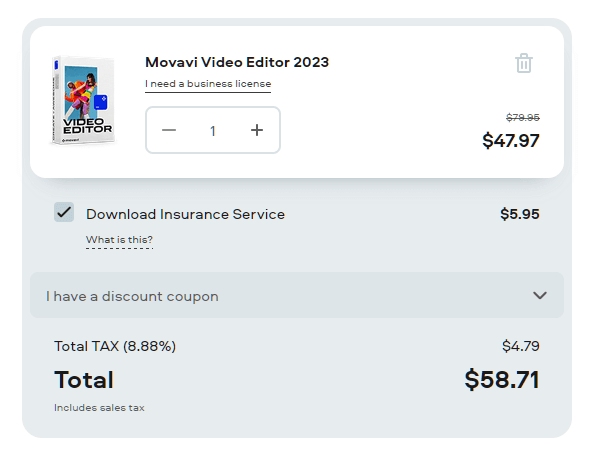
“Download Insurance Service” is a ridiculous way to squeeze a little more money out of your customers for a service that should be free of charge with any software purchase.
Ease of Use: 4/5
The program has a fairly simple interface that makes it easy to learn, even for users who are new to the world of video editing. For those who are intimidated by the idea of working with video for the first time, there is a quick introductory tutorial built into the program about how to use each main feature. I think the program has actually gotten a bit more difficult to use in recent versions as they add more features and the interface gets more cramped, but it’s still accessible for new users.
Support: 4/5
Movavi does a great job of providing instruction within the program, but they also pay close attention to providing additional support online, thanks to the large knowledge base of articles and guides on their website. Unfortunately, there isn’t much support information available from third-party communities around the web, so you’ll have to rely entirely on the developer for help.
Alternatives to Movavi Video Editor
Filmora is a very similar program to Movavi Video Editor, even to the point of having a roughly similar layout. It has a few more features, but in my experience, it also had a few more bugs.
Camtasia is a much more powerful program than Movavi Video Editor and comes with an understandably higher price point. If you’re looking for a video editing program that offers a more professional level of control over effects and editing, this is a great option.
Movavi Video Suite is sort of like Video Editor’s older cousin, and it’s not much more expensive than Video Editor. It has a few more features, including the screen recording feature that we discussed earlier, but if you’re on a tight budget you may be better off choosing the cheaper Video Editor.
Final Verdict
Movavi is a capable video editor for most casual projects, allowing you to quickly produce content and share it on Youtube and TikTok thanks to the built-in uploading options. It can even be used for more serious content, and it holds up well when working with long 4K video clips. There are plenty of effects, titles, and overlays to keep most editors happy, although the newer AI-powered background removal tool could use a bit more polish.
Unfortunately, while the app itself is a capable video editor, I really don’t like the marketing tactics used throughout the Movavi sales website and within the app itself. I think that the best way to convince the developers to be more honest and upfront is to avoid purchasing this app – at least until they change their approach, even if that seems rather unlikely. There are equally capable video editors at similar price points from other companies that don’t use predatory marketing practices, so you should explore your options a bit further.
Do you have a question about Movavi Video Editor that I didn’t answer in this review? Let me know in the comments below, and I’ll see what I can do to help.
I need to sync the videos from 3 cameras shooting different angles, cutting between them in the final video. Can this software do this?
Great article. However, you keep repeating “It’s not properly equipped for professional video work” What do you mean? What’s professional video editing work?
Side note: remember, this is a casual video editing software for casual users, not professionals. Maybe ‘wannabes’ professional video editing like me.
Thanks for a very well done piece on this software. It helped me considerably in deciding to purchase this program. I am still on Widows 7 for both my desktop and laptop and don’t want to change at this time (after purchasing another laptop with 10 a couple of years ago) but missed out on movie maker since I just now wanted to produce a “movie.” Decided to go with the MVE 15 and give it and me both a try. Past ninety and still trying to learn.
Appreciate your work.
When viewing and editing my videos, I wish I could use the left and right arrows on the keyboard to move through the video (as is available in AVS editors).
Unless I am missing something, all that is currently available with MovAvi is movement back or forward a “single frame at a time” via the controls. The constant clicking of those controls is annoying. It wouldn’t so bad if we could hold that control down for as long as we wanted the video to roll. But we can’t. We are forced to move one frame at a time. And, using your orange slider in the timeline is not consistent for rolling…it’s jerky and therefore, also annoying. If you guys would activate the left and right arrows to roll through the video, that would be awesome. Then, by just holding down the left or right arrow, there would be a consistent rolling back or forward until you release the arrow key. It would make it so much quicker to determine split points for example. Just my own opinion. Thanks for listening.
Nowhere on their free download page are there any purchasing or pricing options. Nor do they state that the free download is only a 7-day trial. You only find that out after downloading and installing it. These are unethical marketing practices.
Hi wonder if you can help me,
I created video in Movavi it exported fine, then I added some text to the end section and now the exported mp4 is blank when played, somehow the text has overlayed the video pictures
Thanks for any help
Ric
Hi Thomas,
I was searching for a video suite that would be robust enough to covert and edit VOB files. Also, easy to use.
It is extremely important to find the right video editor, because I am creating a compilation of my niece’s mother who recently passed away.
Thank you for simplifying my research and decision!
Very nice review. I’ll go with Movavi has soon as my fund are up to date. Can I upgrade to the $79.95 version after?
Ike.
can you dub or take music from a video and and export it to a dvd? Thanks DEREK
Movavi Video Editor 10 included Picture-in-Picture capabilities. Editor 12 seems to have eliminated that feature.