
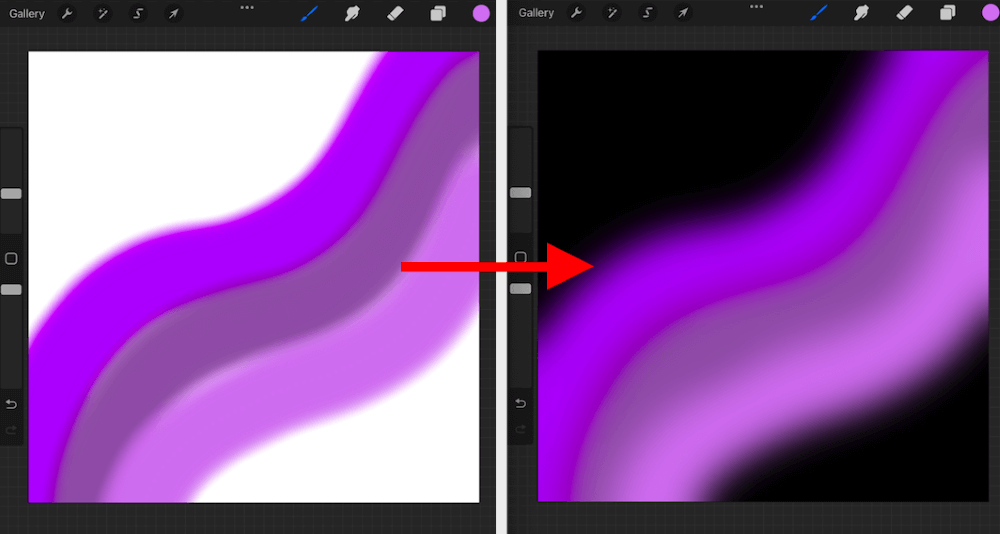
Add a series of colors to a layer on your canvas. Once you have included all of your desired colors, tap on the Adjustments tool (magic wand icon) and select Gaussian Blur. Now slide your finger or stylus to the left until your colors have blended.
I’m Carolyn and I spend most of my day on Procreate using every feature it offers to create professional artwork for my clients. After running my digital illustration business for over three years, I have learned a thing or two about using the app to its fullest.
Creating a gradient on Procreate is basically blending a series of colors together to create an ombre effect. Using the Gaussian Blur tool is the best way to do this if you are looking to create great results quickly. Today, I’ll show you how to make a gradient in Procreate.
Note: Screenshots are taken from Procreate on iPadOS 15.5
Table of Contents
Key Takeaways
- Creating a gradient in Procreate is blending colors together to create an ombre effect.
- You can use the Gaussian Blur tool to create a gradient in Procreate.
- Using the Soft Brush to apply your colors will help them to blend together better.
- This method can create really unique visuals and effects.
- You can apply this method to your text too.
4 Steps to Make a Gradient in Procreate
It is super easy to create a gradient on Procreate. Before you start, you should have an idea about what colors you are wanting to blend together so you are ready to get started. Here’s how:
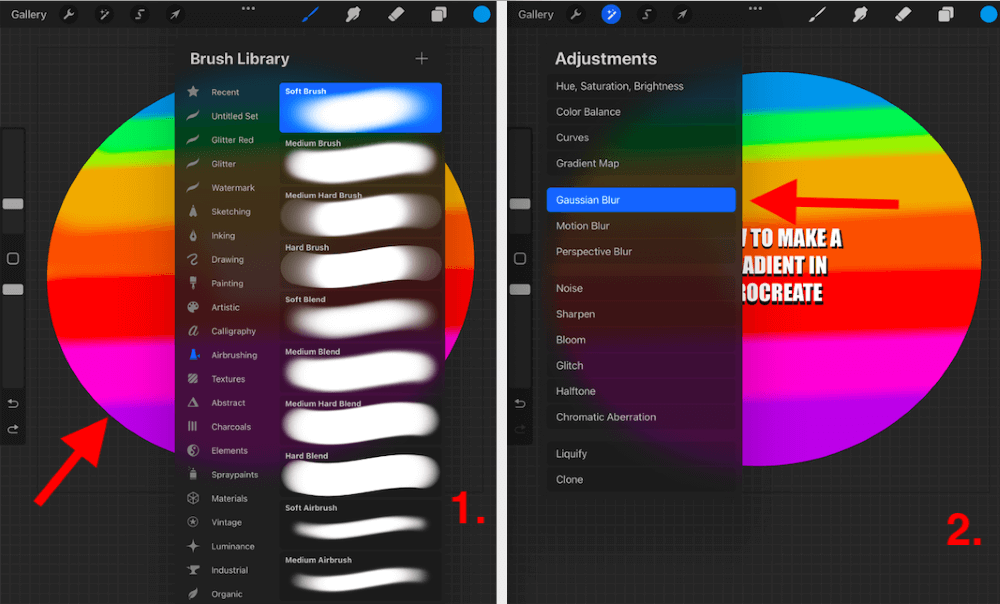
Step 1: Apply the series of colors that you wish to blend, to a layer on your canvas. You can use any brush to do this but I do find that the Soft Brush allows for a more seamless blend.
Step 2: Tap on the Adjustments tool (magic wand icon) in the top left-hand corner of your canvas. Scroll down and select the Gaussian Blur option in the drop-down list.
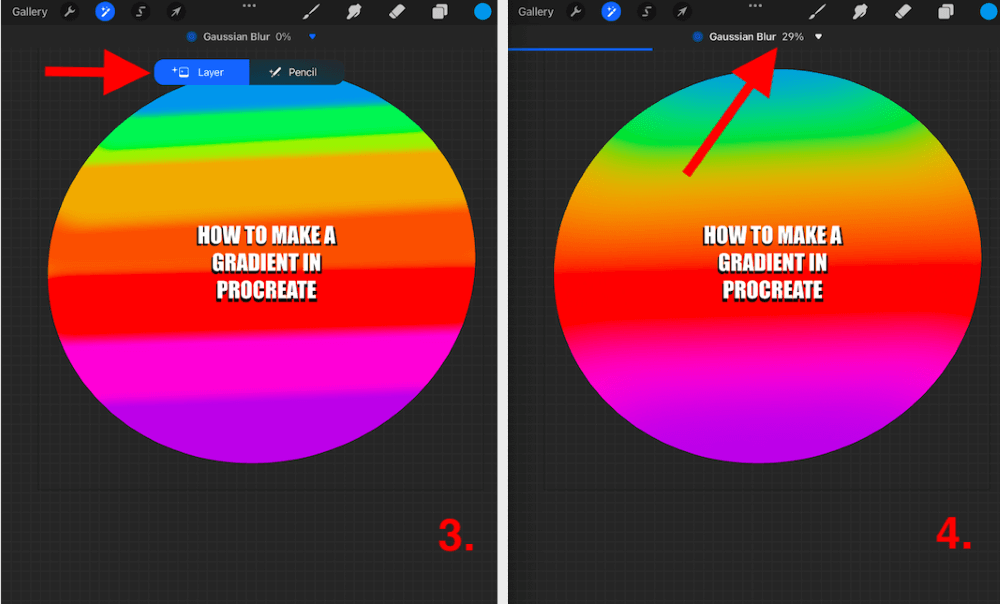
Step 3: Ensure your Gaussian Blur settings have defaulted to Layer and not Pencil. This will ensure that the entire layer is blended instead of just where you point the stylus.
Step 4: Holding down on your canvas, slowly slide your finger or stylus to the left-hand side until you reach the desired blended effect. You will see the Gaussian Blur percentage at the top of your canvas. When you’re done, tap on the Adjustments tool.
Pro Tip: If you are using the Gaussian Blur tool on a shape rather than an entire layer, ensure you have activated the Alpha Lock in order to avoid the colors bleeding outside of the lines.
What Can You Do With Gradients (Examples)
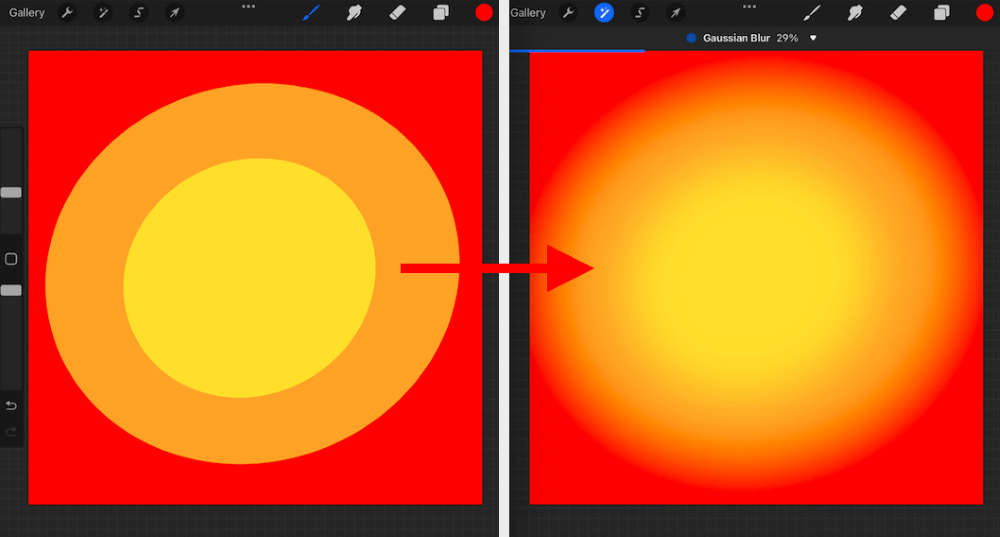
Below I have created a few samples of how you can use this tool to create different gradients. This tool can be really useful for creating sun backgrounds, rainbow effects, or even softening a series of sharp shapes.
You can create gradients in all different types of shapes and sizes.
You can use the Gaussian Blur tool on any of the Procreate brushes.
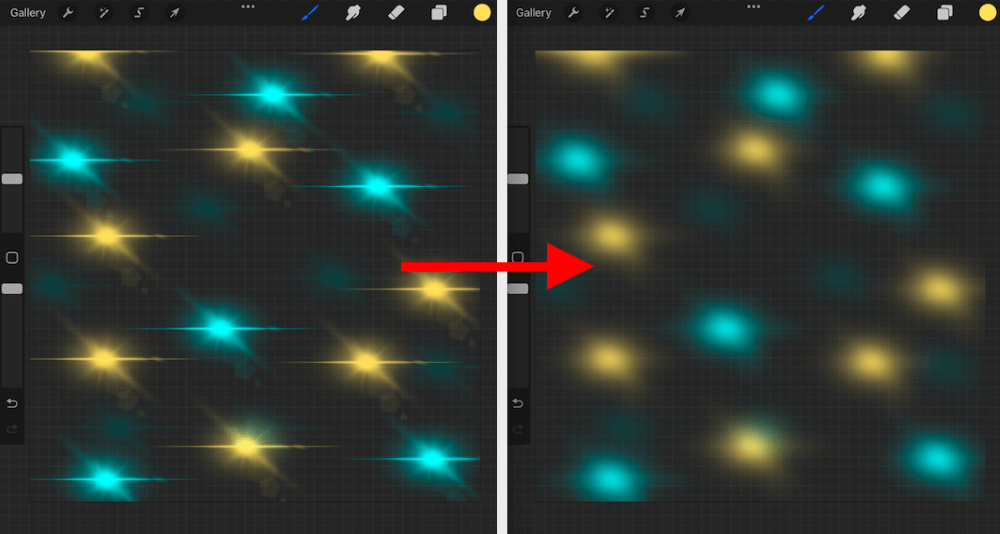
You can create unique patterns and sequences and you don’t always have to fill the entire layer.
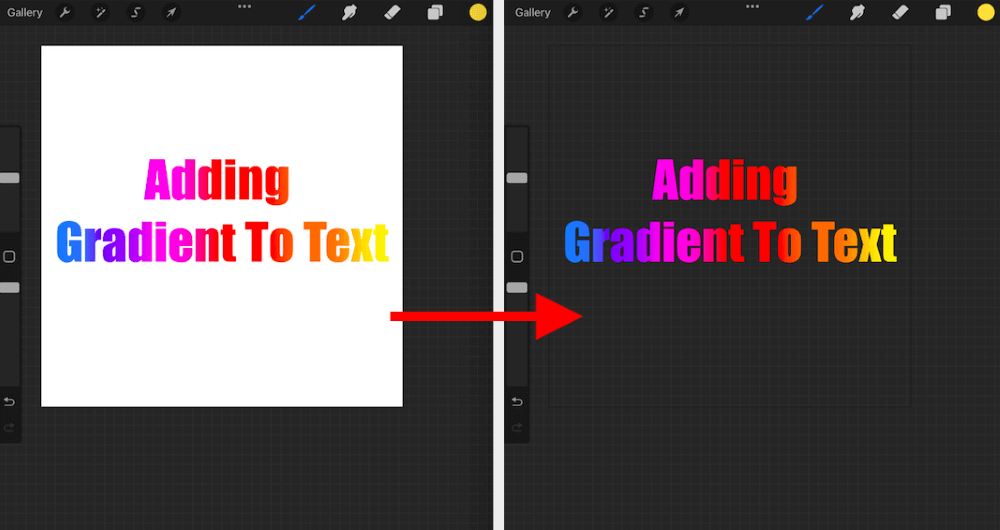
You can add gradients to text by following the method above and then using the Clipping Tool. This will fill your text with the gradient layer you have created beforehand.
Try experimenting with different types of Procreate brushes to see what results you can come up with. You’d be surprised how different this tool will affect different brushes, color palettes, and combinations.
Art With Flow created a really quick and simple video tutorial on YouTube. This shows you how to create a gradient using the same method as shown above.
How to Use Gradient Map in Procreate
Gradient Map is another function of the Procreate app that allows users to quickly invert colors and adjust the scale of the tones within a drawing. This can be done in 3 simple steps and gives you full control of your color scale. Here’s how:
Step 1: After applying your color and using your Gaussian Blur to blend them, tap on your Adjustments tool (magic wand icon). Scroll down and tap on the Gradient Map option.
Step 2: At the top of your canvas, tap on the Gradient Map tool. This will now give you the option to invert the colors of a full layer or an area guided by your stylus. Here you can also slide your toggle to adjust the percentage of gradient that you wish to use.
Step 3: You will see at the bottom of your canvas, there is a Gradient Library. This is a selection of different palettes you can choose to use to invert your colors. You can tap on each one to see how it affects your colors.
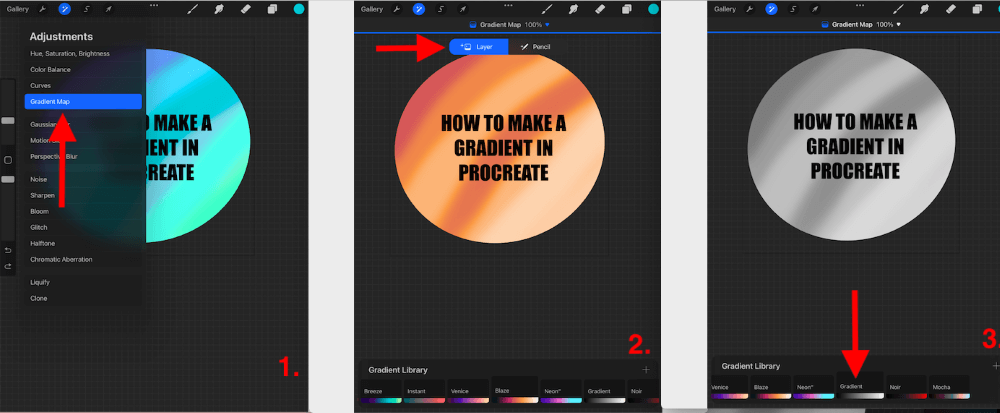
Pro Tip: This tool is awesome if you want to turn a colored image into a black-and-white or grayscale artwork. You can do this by selecting the Gradient color palette in your Gradient Library.
FAQs
There are quite a few questions around this topic so I have selected a few of the most frequently asked ones and briefly answered them below:
How to make gradient text in Procreate?
You can follow the method above to create your gradient. Then add your text and use the Clipping Tool. This will fill your text layer with the gradient layer you created beforehand.
How to create a gradient in Procreate Pocket?
You can follow the exact same steps shown above except you will have to tap on the Modify button in order to access the Adjustments tool.
How to make a gradient circle in Procreate?
You can create a gradient on a layer in Procreate and then use the Selection tool to draw and create a circle over that layer manually. Then select Copy & Paste and it will create a brand new layer with your circle gradient.
How to use Procreate gradient brush?
You can follow the steps above but switch your Gaussian Blur settings to Pencil. This means the tool will only blend the area that you draw on using your stylus or Apple Pencil and acts like a gradient brush.
How to create a sunset in Procreate?
I get asked this question a lot. A great way to start is to use some warm sunset colors like yellows, oranges, and reds and apply them in a linear fashion onto your layer. Blend them together using the Gaussian blur tool and this should result in a stunning sunset background.
What is Gradient Map in Procreate?
This often gets mixed up with making gradients. The Gradient Map tool allows you to change and invert your colors based on the different palettes available. This can be accessed through the Adjustments tab also.
Conclusion
This is a straightforward and easy way to create a beautiful ombre effect that can be used for various things. Whether you’re creating a beautiful sunlit sky background or adding a colorful rainbow to a children’s book cover, this tool will help you create stunning designs.
I recommend trying this out today and definitely experimenting with different colors, shapes, and techniques. The results of using this tool are truly endless and can really add a creative aspect to your work that you may have never used before.
Have you tried to make a gradient in Procreate? Leave your feedback in the comments below so we can learn from each other.