
Combine the layers that you want to remain still. Separate the layers that you want to animate. Open your Actions tool (wrench icon) and select the Canvas menu. Slide your Animation Assist toggle on and adjust your frames accordingly. Then share it as an MP4.
I’m Carolyn and I’ve been running my own digital illustration business for over three years. I have a variety of clients each with individual needs which means that Procreate is my all-in-one program. It offers a huge selection of functions making it my go-to app for digital artwork.
The Animation Assist feature on the Procreate app is a very popular one and more and more people are starting to learn how to use it every day. This setting can be used for a wide range of projects including creating GIFs, making short videos, and animation tools for drawing.
Table of Contents
Key Takeaways
- Procreate has a feature that allows you to create short animated videos and GIFs.
- The Canvas Size will affect how many frames you will be able to add to your animation.
- Animations can be saved as many different file types including Animated MP4 and PNG files.
How to Animate on Procreate – Step by Step
Choose the drawing you want to animate and duplicate it. This will preserve the original artwork in case you’re not happy with the finished result and need to start over. Then follow this step-by-step method:
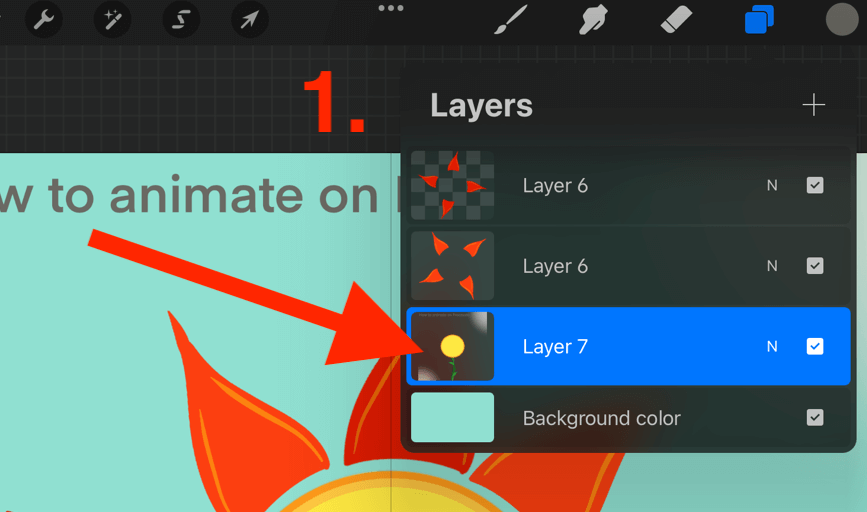
Step 1: Combine all of the layers that you don’t want to animate. These will act as your “Background” and will remain still and intact throughout the animation process. Separate all of the layers that you want to animate with.
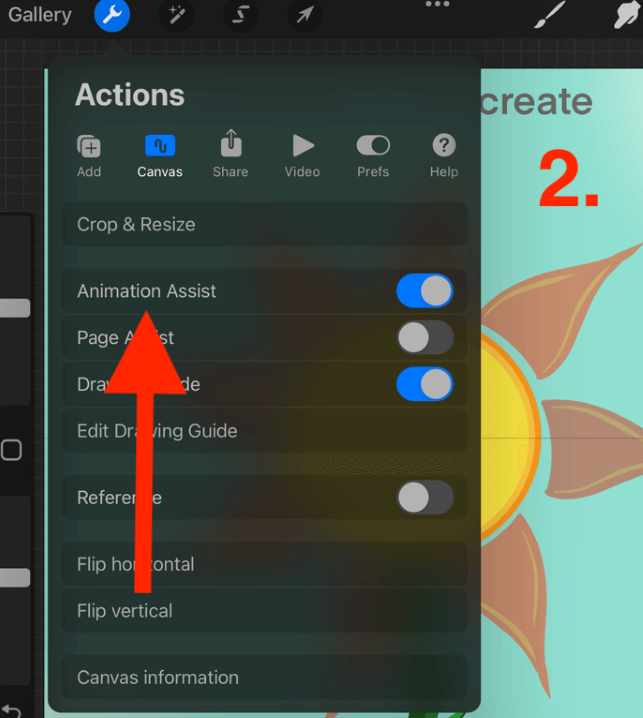
Step 2: Open your Actions tool (wrench icon) and tap on your Canvas menu. Activate your Animation Assist by sliding the toggle to on. Your animation toolbox will appear at the bottom of your screen.
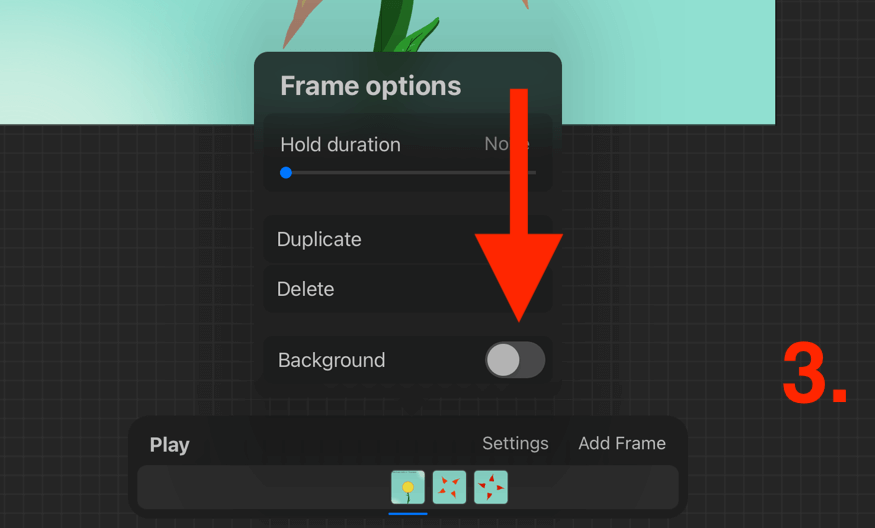
Step 3: Each layer in your canvas will become a frame. Select your “Background” layer from Step 1 and tap on the Settings of your animation toolbox. Slide the Background toggle to on and this will keep your background layer still throughout the process.
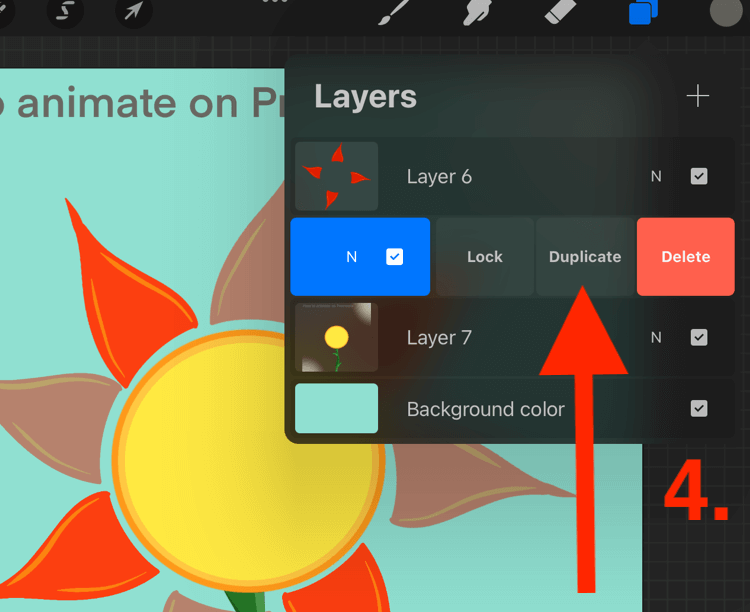
Step 4: Duplicate the layers you want to move by sliding left on each layer thumbnail and tapping Duplicate.
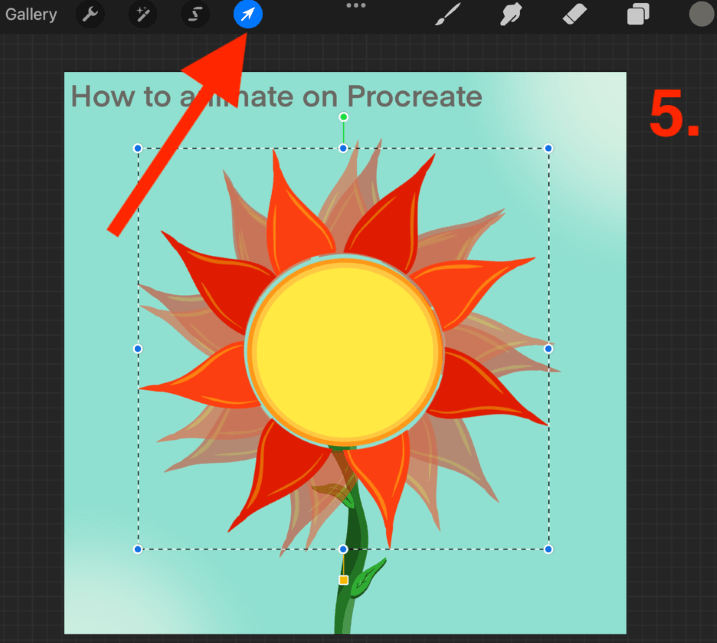
Step 5: Use the Transform tool (cursor icon) to rotate each layer to create some movement.]
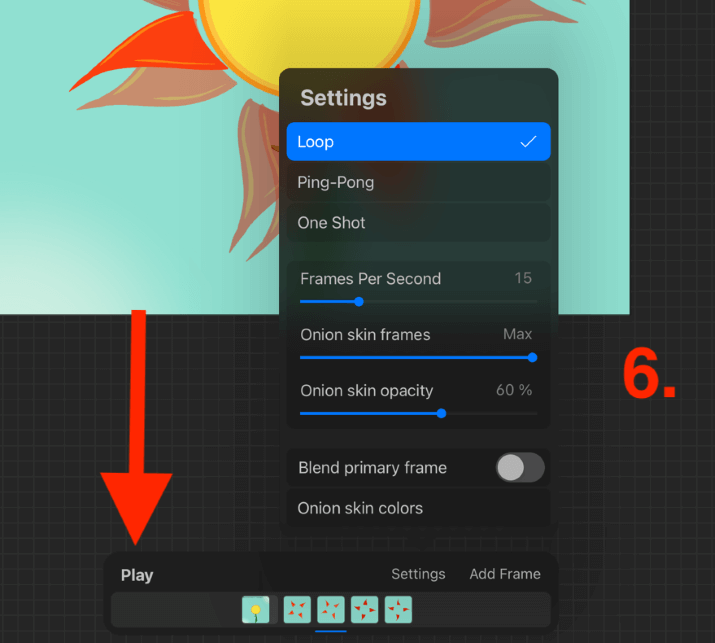
Step 6: In your Animation Assist toolbox you can adjust the Settings of your animation. I chose the Loop option with 15 frames per second. You can tap on Play at any time to preview your animation.
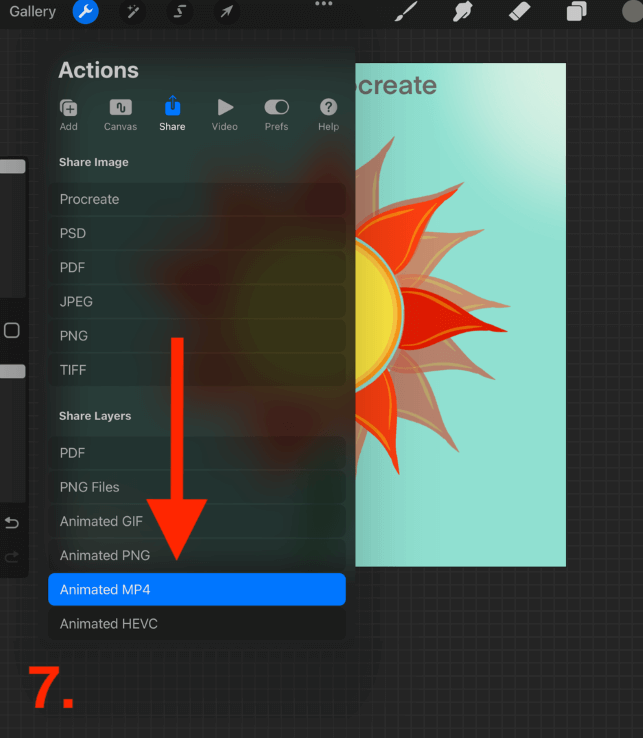
Step 7: Once you’re happy with your animation, you can share it by tapping on the Actions tool (wrench icon) and selecting the Share menu. Share as an Animated MP4 and export it to your device. This will save it as a short video in your Photos app.
Step 8: Your Animated MP4 file will save as a short video on your device. You can save it as Max Resolution or Web Ready. Web Ready will compromise the quality of your animation as it will be compressed so I suggest sticking with Max Resolution.
Hints & Tips
If you want to add more natural movement to your animation, you can use the Liquify tool instead of rotating your layers with the Transform tool. Here’s how:
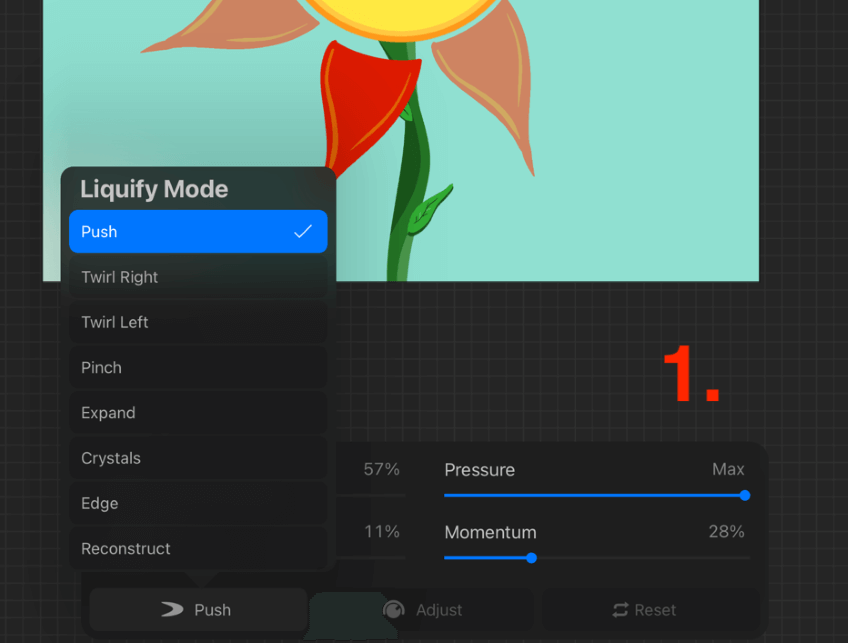
Step 1: Open your Adjustments tool (magic wand icon) and scroll down to select the Liquify option. In the bottom left-hand corner of the settings toolbox, you can select which movement you want to use. I suggest using push for a natural movement effect.
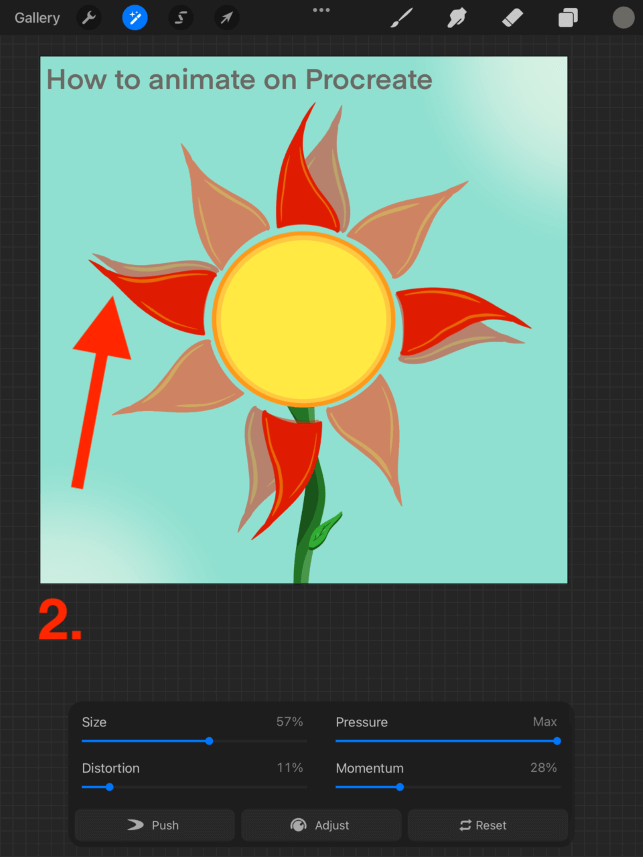
Step 2: Using your finger or stylus, make subtle adjustments by pulling the shape of your layer to different angles. This will create a gradual sense of movement in your final animation.
Besides the Liquify tool, there are a few settings in the Animation Assist toolbox that can have an impact on how your animation will turn out.
Feel free to experiment with these tools and explore your options during the process. Here is a breakdown of what they mean:
Loop, Ping Pong, and One Shot
These are your playback pattern options. Loop will continue to play your frames. Ping Pong will play your frames randomly in a back-and-forth pattern and One Shot will play all frames in order once through.
Frames Per Second
This is the total amount of frames that will play per second and determines the speed of your animation. The more frames per second, the faster your animation will play.
Onion Skin
This refers to each one of your animated layers. You can change the settings to whether you want to see each frame and determine each frame’s opacity. You can also change the color of your Onion Skin depending on your personal preference.
Play
At any point during your editing session, you can playback your animation to see how each of your changes affects how it comes out. I recommend playing back your animation frequently as each change can make a big difference to your video.
FAQs
Below is a selection of your frequently asked questions regarding this topic. I have briefly answered them for you:
How to animate in Procreate with sound?
Procreate does not offer the option to add sound to your animations just yet. You can work around this by saving your animation and editing it on another app like iMovie.
Is Procreate good for animation?
Procreate offers you all the functionality you need for creating animated artwork in the app. Some users who are animation specialists may choose to use other software for their work but personally, for basic animation, I find that Procreate is awesome.
How to use animate on Procreate Pocket?
Procreate Pocket also offers the Animation Assist feature. You must tap on your Modify button in order to access this setting under your Canvas menu.
Conclusion
The Animation Assist feature of the Procreate app is a great way to get started with animation, especially if you’re new to the world of digital art. It may take some time to figure out the settings depending on what you are trying to create and the results are epic.
Follow the step-by-step above today to get started on creating animated videos or GIFs on Procreate. This process is quick to learn but a little bit more time-consuming to perfect but what skill isn’t? This tool can come in very handy for expanding your creative abilities.
Do you use the Procreate Animation Assist feature? Share your animations or tips below in the comments section.