
AfterShot Pro 3
Summary
Corel AfterShot Pro 3 is an excellent RAW image editor that provides a fast, compact workflow. It has solid library management tools, excellent developing options, and a flexible plugin/add-on system.
The software is aimed at professional photographers, but may not be quite ready to fulfill that role properly thanks to certain issues with the way it handles localized editing. For those who are already using a standalone editor such as Photoshop or PaintShop Pro in their workflow, this is a minor issue that shouldn’t prevent you from making good use of AfterShot Pro’s compact single-screen workflow and fast batch editing.
What I Like: Compact Single-Screen Workflow. Fast Batch Editing. Widescreen UI Design. No Catalog Imports Required.
What I Don’t Like: No In-Program Tutorial. Small UI Issues. Localized Editing Process Needs Work. Preset Packs Are Expensive.
What is AfterShot Pro used for?
It is a complete RAW editing workflow program available for Windows, Mac, and Linux, allowing you to develop, edit and export your RAW images. It is aimed at the professional market, as you might guess from the name, but it is still struggling to challenge Adobe Lightroom as the most commonly-used RAW editor.
Is AfterShot Pro free?
No, AfterShot Pro 3 is not free software, but there is an unlimited 30-day free trial available from the Corel website. After that time is expired, you can purchase the full version of the software for a very affordable $79.99, although as of this writing Corel is featuring a 20% off sale, bringing the price down to just $63.99. This makes it one of the most affordable standalone RAW editors on the market by a significant margin.
Where to find AfterShot Pro tutorials?
Many of the features of AfterShot Pro 3 will be familiar to users of other RAW editing programs, but in case you need a little bit of guidance, there is some tutorial information available online.
Table of Contents
Is Corel AfterShot Pro Better Than Adobe Lightroom?
AfterShot Pro is Corel’s direct challenge to Adobe Lightroom’s dominance of the RAW editing market, and they aren’t ashamed to admit it. Front and center on the AfterShot Pro website is a claim that the latest version handles batch editing up to 4 times faster than Lightroom, and you can read the datasheet they published here (PDF).
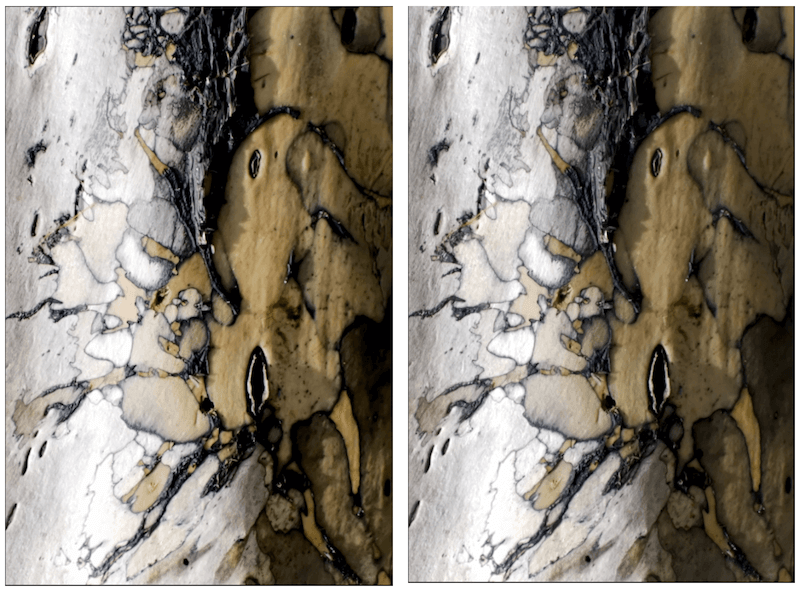
One of the most interesting differences between Lightroom and AfterShot Pro is the way they render the same RAW images. Lightroom uses the Adobe Camera RAW (ACR) algorithm to render images, which often come out with narrower tonal ranges and slightly washed-out colors. AfterShot Pro uses its own proprietary algorithm to render RAW images, and it almost always produces better results than ACR.
While seems to be faster, there are still some issues that Corel will have to overcome to properly challenge Lightroom. Speedy batching is great, but AfterShot’s clumsy localized editing has a long way to go to catch up to Lightroom’s excellent local options. If you’re not interested in doing localized edits, though, AfterShot’s compact one-screen workflow and better initial rendering might be able to convince you to switch programs. The best way to find out is to read this review and then test it for yourself!
Why Trust Me for This Review
Hi, my name is Thomas Boldt, and I’ve been working with image editing software for over 15 years. I trained as a graphic designer while teaching myself photography at the same time, eventually working as a product photographer shooting everything from jewelry to artistic furniture.
Over the course of my photographic practice, I’ve experimented with a number of different workflows and image editors, giving me a wide range of insight into just what can be expected from a top-notch program. My training as a graphic designer also included courses on user interface design, which helps me sort the good programs from the bad.
Disclaimer: Corel provided me with no compensation or free software in exchange for this review, nor have they had any kind of editorial review or input on the content.
A Closer Review of Corel AfterShot Pro 3
AfterShot Pro 3 is a large program, with a number of different features that we don’t have time or space to go into. Instead, we’ll look at the most common uses of the program, as well as anything that makes it stand out from the other RAW editors on the market. Please also note that the screenshots below are taken from the Windows version, so if you’re using AfterShot Pro for Mac or Linux the interface will look slightly different.
General Interface & Workflow
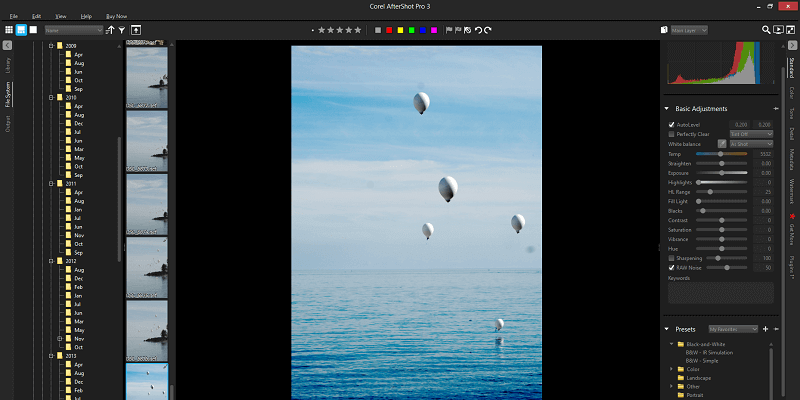
Corel managed the download and installation process very carefully, so I was a bit surprised to be dropped into the deep end when it came to actually using the software. As you can see below, the interface is a bit busy and there is no introduction or tutorial splash screen to provide any guidance.
You can visit the AfterShot Pro learning center through the Help menu, though, and their videos were able to provide some of the basic information about using the program. It’s worth noting that the main introduction video appears to be slightly out of date at the time of this writing, showing some minor UI changes compared to the version I’m using.
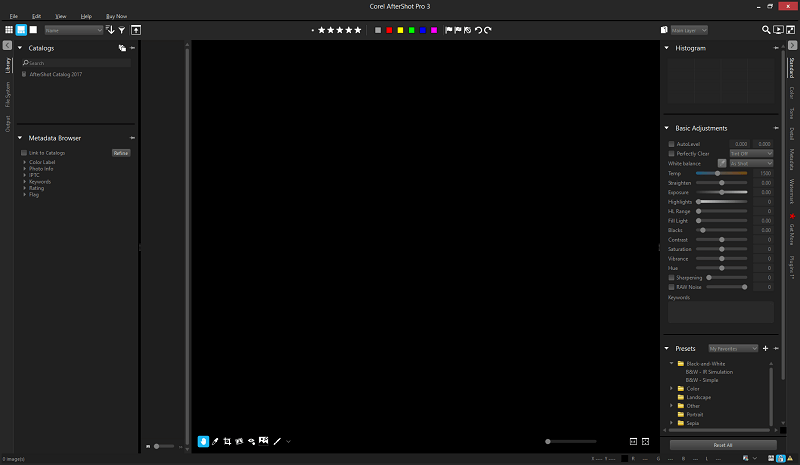
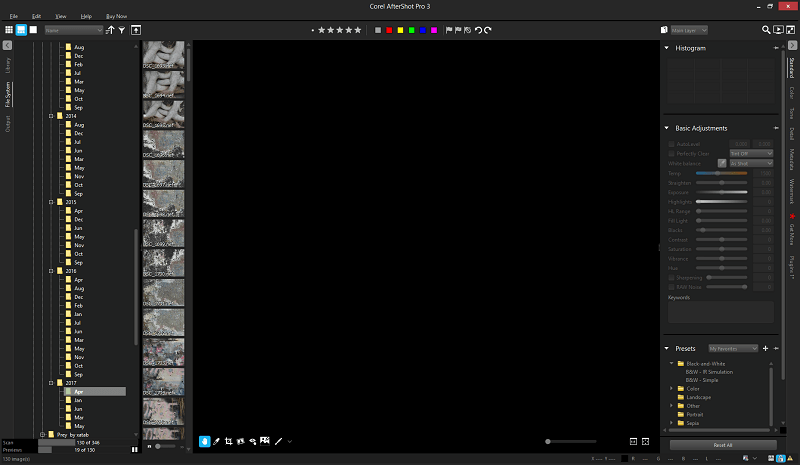
Once you start to get used to the interface, you can see that it’s actually rather well-designed in a style that takes advantage of the extra horizontal width of widescreen monitors. Instead of placing the filmstrip navigation below the main working window, it runs vertically down the left side of the preview window. This means that you’ll get larger previews of your full-size images without having to constantly show or hide aspects of the interface (although you still can, if you want to).
Another interesting choice is that Corel has decided to buck the trend of following Lightroom’s module layout system, instead choosing to keep every tool and feature in a single main interface. This is part of the reason that the UI seems a bit cluttered at first, but it definitely has its advantages when it comes to speed and consistency.
The aspect of the UI that I found most confusing initially was the vertical text navigation at the extreme edges of the window. On the left, they allow you to navigate between Library and File System views of your images, while on the right you can navigate through the different editing types: Standard, Color, Tone, Detail. You can also quickly download new camera profiles to match your specific camera equipment, if they’re recent enough not to be included in the default installation, apply watermarks, or work with additional plugins. The vertical text navigation is a bit difficult to read at first, but once you get used to it, you realize it conserves a lot of screen space without compromising usability too much.
Library Management
One of the biggest workflow advantages to AfterShot Pro 3 is that you don’t have to maintain a catalog of imported photos – instead, you can choose to work directly with your existing folder structure. Since I already organized all my photos in folders by date, this is extremely helpful to me and saves some importing time. You can create image catalogs if you prefer, but it’s generally faster not to unless your folder structure is a mess (we’ve all been there at one point). The main advantage of using catalogs is that you can search and sort your library by metadata instead of just a basic folder structure, but the trade-off is the time it takes to import.
Otherwise, the library management tools are quite excellent and will be immediately familiar to anyone who has worked with Lightroom in the past. Color tagging, star ratings and pick/reject flags are all available to help you sort through larger collections at once, whether you’re using catalogs or folders. The only thing that feels slightly inconsistent is that the metadata editor is included as a tab on the right navigation among the editing controls when it might be better off on the left navigation with the library tools.
Basic Editing
Most of the editing features found in AfterShot Pro 3 are excellent. They are fairly standard options by this point, but the adjustments are applied quickly. Automatic camera/lens correction worked smoothly and flawlessly without any help from me, which is a nice change compared to some of the other RAW editors I have reviewed recently.
There are two main automatic adjustment settings in AfterShot Pro, AutoLevel and Perfectly Clear. AutoLevel adjusts the tones of your image to make a certain percentage of the pixels pure black and a certain percentage pure white. By default the settings are far too strong, which gives an incredibly exaggerated contrast effect as you can see below. Of course, you probably won’t want to use automatic adjustments, but it would be nice to have a reliable option to do so.

Perfectly Clear is included as part of a licensing deal with Athentech, which also provided the Perfectly Clear Noise Removal tool found in the Detail tab. In theory, it optimizes lighting without clipping any shadow or highlight pixels, removes tints and adds a bit of sharpening/contrast. It does a better job with this tricky image, but still not quite right.
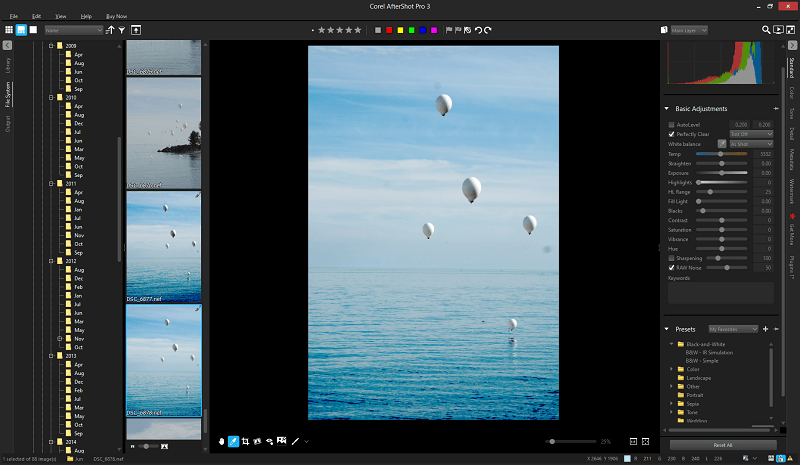
I decided to give it a simpler image to work from to see how well it would handle it, and the final results were much better.
While experimenting with the editing process, I encountered a few strange UI quirks. There is no way to quickly reset a single edit – to return the highlight range to its default setting of 25, for example, a setting you might forget. You have to either remember the default or reset every setting at once, which hardly makes for a streamlined workflow. Using the Undo command might seem the easiest way to overcome this, but I found that when using it with the Straighten edit, it actually took 2 or 3 repetitions of the command to get back to zero. This may be due to how the sliders are programmed, I’m not entirely sure, but it’s a bit irritating.
You can also use the scroll wheel on your mouse to scroll through the whole editing panel on the right, but as soon as your cursor crosses over a slider, AfterShot then applies your scrolling action to the slider setting instead of the panel. This makes it a little too easy to accidentally adjust settings without meaning to.
Layer Editing
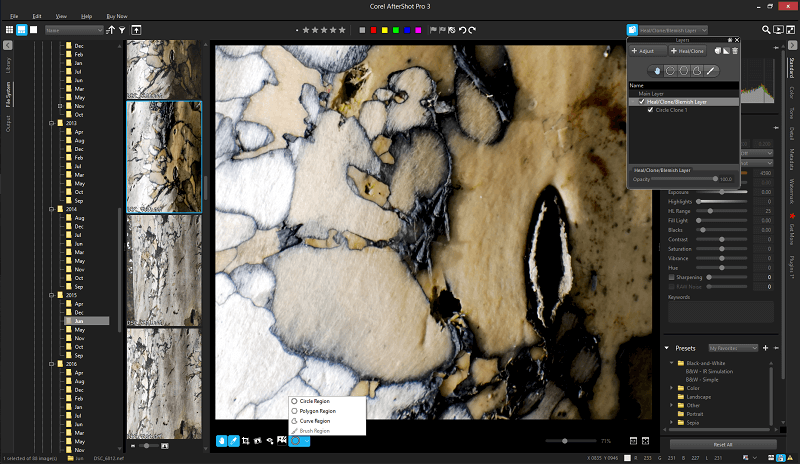
If you want to dig deeper into more localized edits, you’ll be using the layer manager to add, edit and delete adjustment layers. Accessed from the top toolbar, it allows you to create two types of layers: an adjustment layer, which allows you to create localized versions of any of the main editing options, and a heal/clone layer, which allows you to duplicate sections of an image. You can use various shapes to define the affected regions (the Corel version of masking), or you can use a freehand brush.
For some completely inexplicable reason, you cannot use the brush tool to define a region on a heal/clone layer. Maybe I’m just conditioned from working with Photoshop, but I found this to be quite frustrating. Good cloning isn’t always the easiest thing to do, but it’s much more difficult when you’re limited to working with clumsy preset shapes.
Even when you’re working with a more typical adjustment layer, the default settings are slightly strange. Show Strokes is initially turned off, which makes it essentially impossible to tell exactly where you’re brushing at first glance. There’s also no option to create a gradient on adjustment layers, unless you’re willing and able to paint one yourself using feathered brushes.
This area of the program has some great potential, but it definitely needs a little more polishing before it’s ready to meet the standards set by the rest of the available features.
Preset Packs
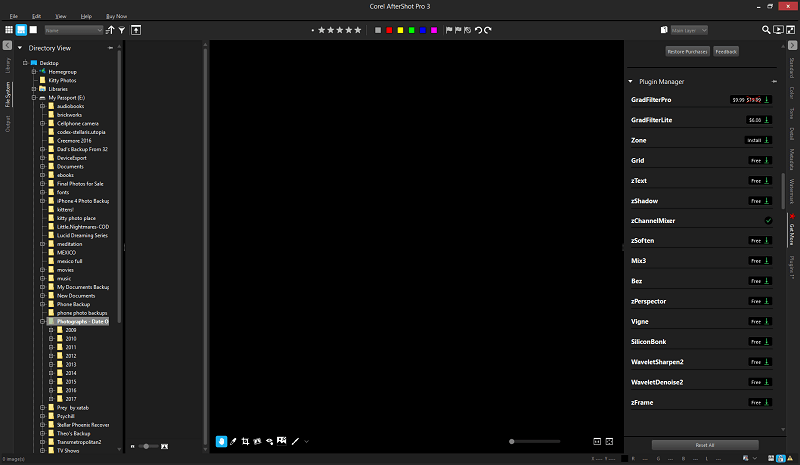
One of the more unique features of the program is the ability to download and install various add-ons in the form of camera profiles, plugins and presets from within the interface itself using the Get More tab. The camera profiles themselves are all free, and almost all of the available plugins are free as well.
The download and installation process was extremely fast, although it does require restarting the application to enable the new download. It might also be nice to have a little bit of a description to see what exactly ‘zChannelMixer64’ does before downloading it, although some of them are a bit more obvious than others.
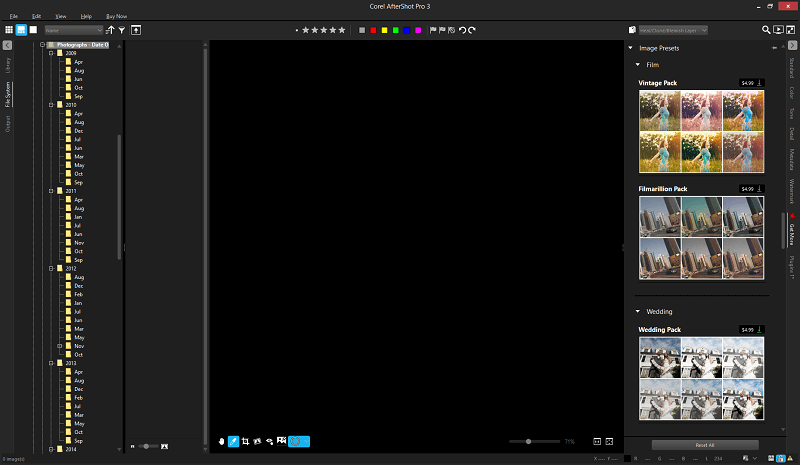
The preset packs, which from what I can see are mostly glorified Instagram filters, are astonishingly expensive at $4.99 or more per pack. That may not seem like much, but buying all of the preset packs would wind up actually being more expensive than the initial purchase price of the software itself. This makes me think that Corel is counting on them to act as a continuing revenue stream, although I’m not sure who they think the target market is.
Reasons Behind My Review Ratings
Effectiveness: 4/5
Overall, AfterShot Pro 3 has excellent library organization and editing tools. The only thing that prevents me from giving it a 5 star rating is the clumsy localized editing tools, which definitely need some more polishing before they are ready to match the quality of the program’s other features.
Price: 5/5
AfterShot Pro 3 is one of the most affordable RAW image editors available today, and may even be the cheapest available. It provides a great balance of features considering its incredibly low price point, although it is only available as a standalone program that will require additional purchases in order to stay up to date with the latest version.
Ease of Use: 4.5/5
Once you get used to the interface, AfterShot Pro 3 is generally quite easy to use. Again, the localized editing tools become something of a frustration, but that’s the only element that prevents me from giving it a 5-star rating. Otherwise, the user interface is well-designed, compact and customizable, allowing you to use it the way that works best for you.
Support: 4/5
Corel has provided excellent tutorial support for their website, although there is an almost complete lack of support from any third party provider such as Lynda.com and no books available on Amazon. I didn’t run into a single bug while using the software during my testing, but if I had, it would have been relatively easy to get in touch with their support staff thanks to the online support portal.
AfterShot Pro Alternatives
- Adobe Lightroom (Windows/Mac) is one of the most popular RAW editors on the market, and with good reason. It’s a solid program that is well-designed with a thoroughly tested user interface. Adobe Camera RAW, the algorithm that processes RAW image data, isn’t quite as nuanced as those found in other programs, but Adobe makes up for it with the rest of the program’s ease of use. Read our full Lightroom review here.
- Capture One Pro (Windows/Mac) is arguably the most powerful and accurate RAW image editor out there. Aimed directly at the high-end professional market, it has excellent RAW rendering features, although it is definitely not the easiest program to learn. If you’re willing to put the time into learning it, however, it’s hard to beat in terms of technical quality.
- DxO PhotoLab (Windows/Mac) is an excellent standalone editor, although it lacks many of the additional features found in AfterShot Pro such as library management. Instead, it focuses on extremely easy automatic corrections thanks to DxO’s massive library of lens testing data that allows it to perfectly correct optical distortions. It also features an industry-leading noise cancellation algorithm in its ELITE edition. Read our full PhotoLab review for more.
You can also read our detailed guides on the best photo editor for Windows and Mac for more options.
Conclusion
Corel AfterShot Pro 3 is an excellent program that is almost ready to make a takeover of the RAW editing market. It has great RAW rendering capabilities and solid non-destructive editing tools, although its layer-based editing definitely needs more work on the usability side of things.
If you’re already a Lightroom user, it’s definitely worth a look, especially if you do a lot of batch editing as part of your existing practice. If you’re working on a higher-end professional level, it probably won’t be able to convince you to change your software allegiance, but it’s definitely one to keep an eye on for future releases.
So, do you find this Aftershot Pro review helpful? Share your thoughts below.
AfterShot does not support the raw files for my camera. This despite the fact that my camera has been on the market for four years and my camera raw is supported in Paintshop’s Camera Raw Lab.
Support was not helpful. He just gave me a list of supported cameras. In the end, he me link to where I can ask for a refund.
Thanks for your very helpful review. I’ve found AftershotPro 3 is always fun to use, not bloated, and fast to use. It reminds me each time I use it that processing our shots should be an enjoyable experience. With some photo software, it feels like an endurance test.
Thanks for the thorough and well-written review, Thomas!
What are the differences / strengths between Aftershot 3 and ACDSee Phot Studio? Which would be better in terms of library management, and RAW editing?
Hi,
This month I bought Paintshop Pro 2020 Ultimate and in the package were included Corel Aftershot Pro, PhotoMirage and Corel Painter Essentials. Total price € 63.
I used Paintshop before and I am going through all the tutorials now. My questions: How usefull is it for me to study Aftershot Pro too? What does it add to my Paintshop knowledge and experience?
Albert
Some programs have an erase tool that takes out photo bombers etc. Does this program have it?
only 7 Nikon cameras supported on Raw and only one of those is a Pro camera also no DNG support knocks out 20k of my library only found out after purchasing it.
It doesn’t support RAW from smartphones (e.g. S9), GoPro, or many cameras. PaintShop loads my RAW files, but not AfterShot. I think Corel bought this program and as often happens when a product is bought, they allow it to die and be discontinued.
I just started using Aftershot Pro 3 AFTER USING LR6 for quite some time. My reason for the switch is Adobe is no longer supporting LR6 and i have no plans to subscribe and pay $9.9 /month when products like this is readily available at a reasonable cost and works quite well.
Hopefully Corel will listen to its users and and continue to improve this product. I am in for the long haul . Goodbye Adobe
I have two software’s Corel After-shot 3 and corel paint shop pro x 9 .I am hobby photographer and beginner. Want to auto correct pictures. With which software I should start.
Thanks
Regards
If you’re shooting RAW images, you’ll definitely want to use Aftershot 3. If not, then Paintshop Pro might be the better choice, although I’m not familiar with the X9 version.
Aftershot pro 3 does not support APPLE DNG raw files. This is a 10 out of 10 missing feature. So if you wanted to shoot raw files on your phone guess what Aftershot Pro has essentially told you… nope.. not happening.
Their tech support told me today 9/18/2018 that they’ll submit my ‘suggestion’ on Apple DNG support to development. Oh that’s lovely that should take about 20 years.
Their silence on the subject (Corel’s) is enlightening. It’s amazing that they can blow off the entire Apple market.
Unfortunately I think that Corel is definitely a Windows-focused developer. They’ve been around for long enough that they should know better, but it does seem like their Apple support is a secondary consideration.
@BjB: You need to import the CR2 plugin for your camera. Than you can edit CR2 files without problems. I use a MacBook Pro 2016 (TouchBar) and my Fuji files (.RAF) are editable nicely in AfterShot Pro 3.
Thanks for the tip, Arnoud!
Hi, I have a problem with Aftershot pro 3 and it is that I converted Fuji raw files in Lightroom classic CC as DNG and now that I want to open them in Aftershot Pro3 it does not recognize them. Corel technical support tells me that your program does not recognize Adobe DNGs. What can I do?
Universal formats rarely are, as frustrating as that is. Do you still have the original RAW images? I don’t use the DNG standard, so I’m not too familiar with how it works, but you may have to go back to your original files. You can read up on the DNG format here: https://petapixel.com/2015/12/08/dng-the-pros-cons-and-myths-of-the-adobe-raw-file-format/
Note the ‘cons’ section – it seems like DNG support isn’t very good outside of the Adobe ecosystem.
While it may be a LR challenger what it lacks is support for a lot of Canon cameras. I have contacted Corel and all I would get is a link to leave feedback to Support to include my camera in the next patch. Come on Corel let’s step it up and support all DSLR’s.
Your title: Can It Compete As A Pro RAW Editor
definitive answer: no, it can not … this would have to support current cameras and the updates for new camera profiles are implemented quickly. But if it takes months or years. If that does not work, After Shot is a joke … and longtime customers get upset.
If you had to work with ASP, you would not have a job, just think about it
I started with Aftershot 2 and updated to ASP3 when it was released. I bought it because it looked like it would meet my needs, particlarly my need for a good program which runs on Linux. I like it a lot, but as a studio photographer involved with training other photographers and models I need tethering. Corel has ignored the requests of the photographic community for this feature. But Darktable, an outstanding Open Source program, does have it. As a consequence I am using Darktable more often. The online tutorial assistance is meagre from Corel, but abundant for DT. And DT runs on Mac Windows and Linux.
Interesting, I’ve never heard of Darktable before, I’ll have to check it out! I agree that the lack of tethering is a frustrating gap in the featureset, but I think that despite the ‘Pro’ part of the name it’s definitely not ready for heavy studio usage.
Hello, great review! I’m a student whose hobby is taking photos(I don’t have a professional camera, but I’m planning on buying one! ex. Nikon) I’m thinking of purchasing Paint Shop or AfterShotPro. Paintshop seems like it is for beginners/offers a lot of editing tools and AfterShotPro offers more in-depth editing features but more focused in editing RAW photos from my quick research. Which one do you think it’s best for me?
Glad you liked it – your research is right! If you’re just going to be editing lots of RAW photos, AfterShot is the better choice – but if you’re getting more interested in digital art and doing heavy modification of your images, PaintShop offers a lot of other tools that you might like as well that you can’t find in AfterShot. The best one for you really depends on where you want to go as a photographer =)
Aftershot Pro on a MacBook running on High-Sierra ?
A no go.
Think twice prior to buying; it simply does not process RAW files made by a EOS 80D
–
CR2 comes into the editing window and when trying to edit, the Macbook hangs …..
Interesting! Thanks for sharing your experience here, BjB.
It’s worth noting that the review above was based on the Windows version of AfterShot Pro. We’re yet to test the Mac version. Perhaps I’ll take care of that soon.
Btw, I also use an EOS 80D (bought a month ago)…still in the learning curve 🙂
I’ll remember to update you here once I give AfterShot a try on my MacBook Pro (an old mid-2012 model, 8GB RAM, replaced with an SSD).
Yes, it does support 80D. You just need to download your camera profile… https://learn.corel.com/aftershot-pro-downloads
The software doesn’t come with all photo cameras and plug-ins pre-installed.
You have to install the ones you need, which I like.
Thanks for the link, Georgi!