
Despite being a modern page layout application, InDesign is still inevitably filled with jargon from the world of typesetting – even when the terms don’t make a lot of sense in the current usage. This can sometimes make learning InDesign a bit more confusing than it needs to be, but there’s arguably a certain charm to it.
Table of Contents
Key Takeaways
- The slug, also known as slug area, is a printable section around the outer edges of an InDesign document.
- The slug is used for a range of purposes including registration marks, color sample bars, die-cut information, and sometimes for giving instructions to the printing press operator.
- Always make sure you consult your printer and follow their guidelines for the slug area, or you may spoil your print.
- Most print projects will never require the use of the slug area.
What is Slug in InDesign?
For reasons that are beyond my linguistic powers, the term ‘slug’ is surprisingly common in the world of typesetting and printing.
Outside of InDesign, it can refer to either a story in a newspaper, a piece of lead used to insert spaces between paragraphs in an old-style printing press, a single piece of printing lead containing an entire line of text, or even part of a website address.
When used in a modern document printing workflow, slug refers to an area at the extreme outer edges of an InDesign print document.
The slug area gets printed, but it is cut away during the page trimming process along with the bleed area, leaving the document at its final dimensions, also known as the document’s ‘trim size.’ So no, it’s not the same as bleed in InDesign.
Setting the Slug Area Dimensions in InDesign
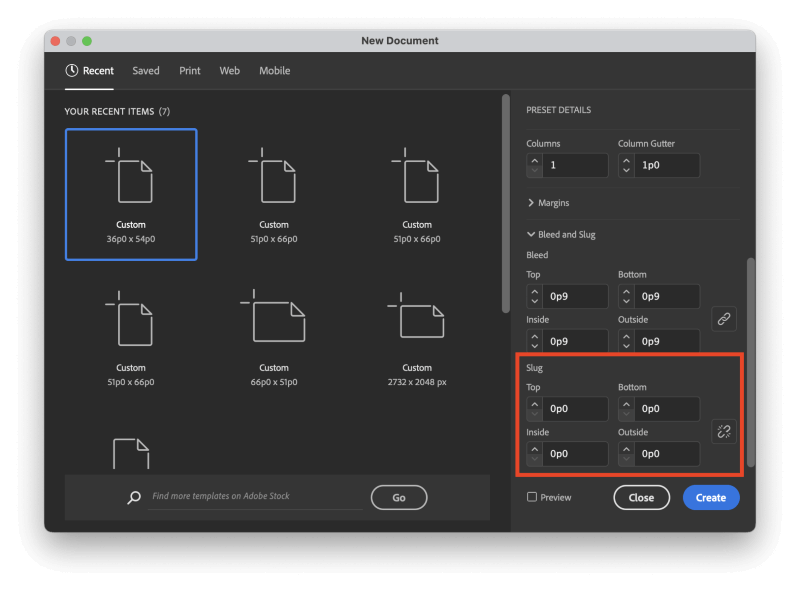
If you want to add a slug area to your InDesign document, the simplest way to do so is to set the appropriate dimensions while creating a new document.
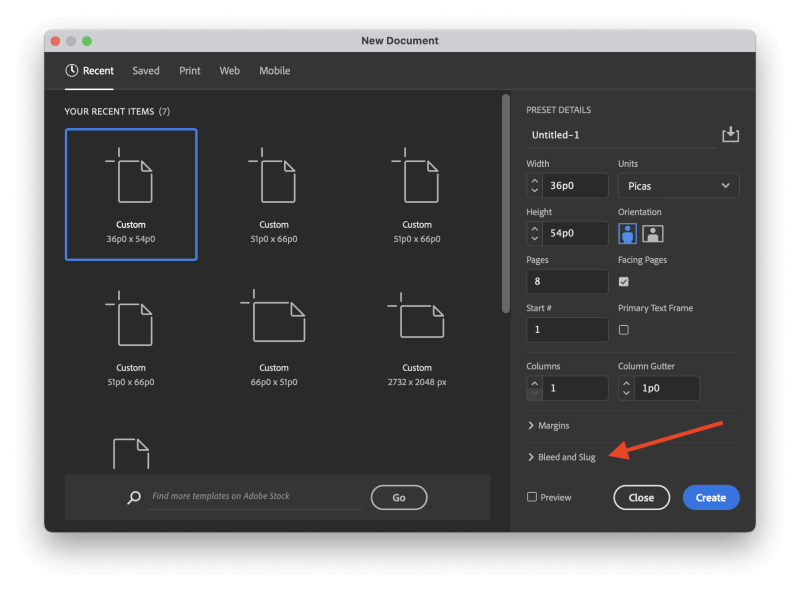
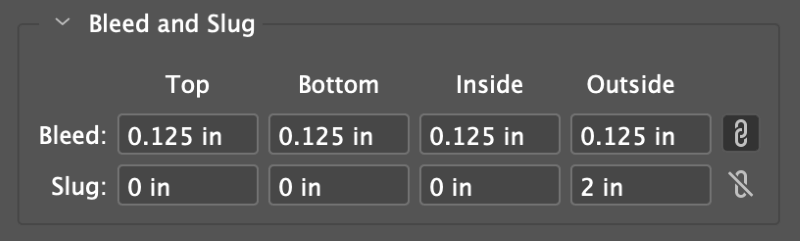
In the New Document window, look closely, and you’ll spot the expandable section labeled Bleed and Slug. Click the title to expand the section completely, and you’ll see a few text input fields that allow you to specify the size of the slug area for your new document.
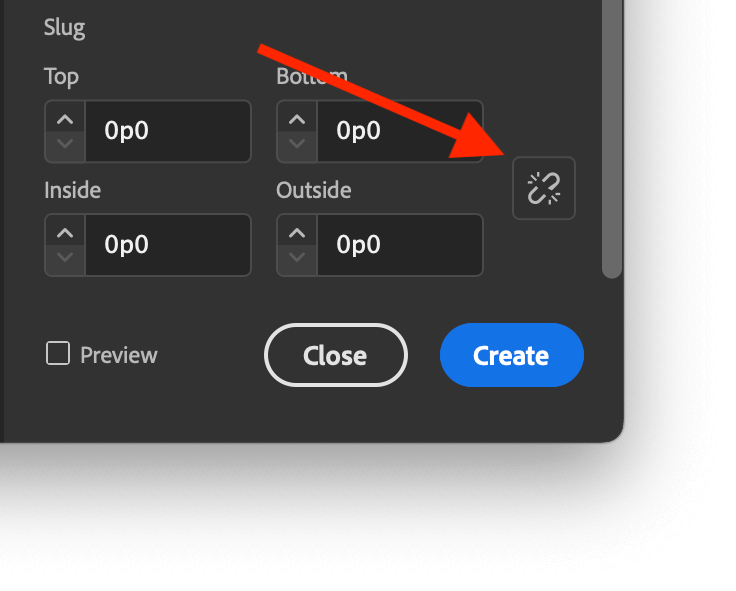
Unlike document bleed settings, slug dimensions are not linked equally by default, but you can enable linked dimensions by clicking the small ‘chain link’ icon at the right edge of the window (shown below).
If you’ve already created your document and you need to add a slug area, it’s not too late. Open the File menu and select Document Setup. You can also use the keyboard shortcut Command + Option + P (use Ctrl + Alt + P if you’re using a PC).
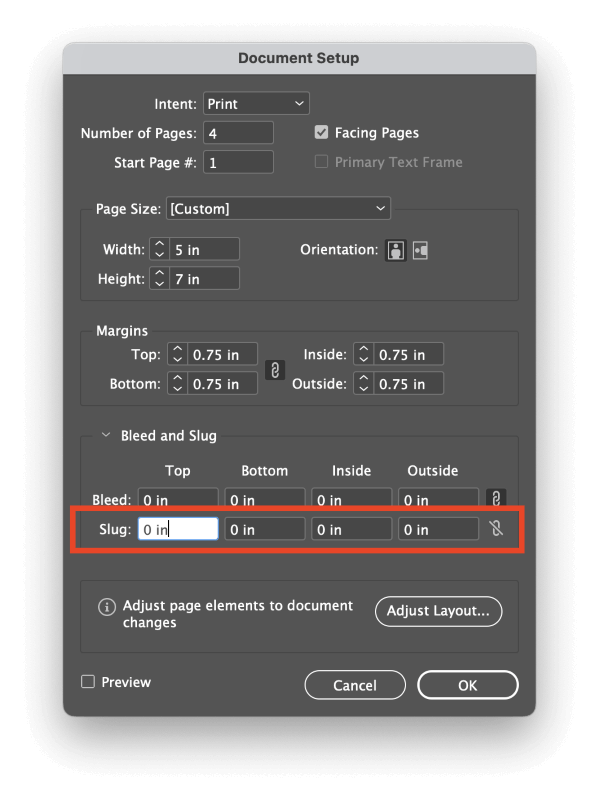
InDesign will open the Document Setup window (surprise, surprise), which gives you access to all the same settings that are available during the new document creation process. You may have to expand the Bleed and Slug section if you haven’t already configured a bleed area.
Why Use the Slug Area?
The slug area has a lot of uses, but most of the time, it’s used by the staff at your print house instead of as a part of their internal prepress process. Unless you have a very good reason to use it, it’s generally better to leave the slug area alone.
The staff at print shops have to deal with a lot of difficult issues (and difficult people), and it’s better not to add to their workload unnecessarily.
Some designers recommend using the slug area as a place to provide notes and commentary for client review.
While this is a creative use of the slug area, if you’re working on a print project, you might accidentally include the slug area while sending the final document for proofing, which could cause some confusion and delay your project.
If you really need an on-screen feedback method, the PDF format already has systems for adding annotations and client notes. It’s a better idea to get used to using the proper tools from the start and leave the slug area for its intended use.
FAQs
Ever since the earliest days of movable type, printing has always been a slightly mysterious subject. Digital printing has only made things even more complex! Here are some of the most frequently asked questions about the slug in InDesign.
Where is the Slug in InDesign?
When viewing your document in the main document window, the slug area will only be visible if you are using the Normal or Slug screen modes. Normal screen mode will display a blue outline, while the Slug screen mode will display the printable area. The slug area will not display at all in either the Preview or Bleed screen modes.
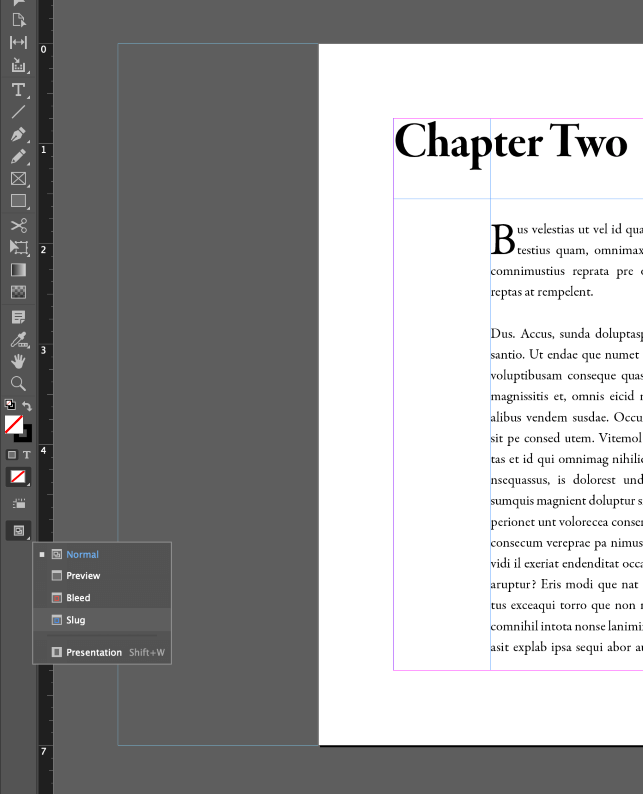
The Normal screen mode displays the slug area as a blue outline, in this case, 2 inches on the outside document edge
You can cycle between screen modes using the Screen Mode button at the bottom of the Tools panel, or you can open the View menu, select the Screen Mode submenu, and choose the appropriate screen mode.
What is the Difference Between Bleed and Slug?
The bleed area is a small printable space (usually just 0.125” or approximately 3mm wide) that extends beyond the edges of a document.
Modern printing processes usually print documents on a larger paper size than required, which is then cut down to the final ‘trim size’.
Because the trimming process has a margin of error, the bleed area ensures that all graphical elements extend fully to the document edges after trimming. If you don’t use a bleed area, slight variations in the trim blade placement can cause unprinted paper edges to appear in the final product.
The slug area is also printed and later trimmed away along with the bleed area, but the slug typically contains technical data or printing instructions.
A Final Word
That’s just about everything there is to know about the slug area in InDesign, as well as the wider world of printing. Remember that for most of your projects, you probably won’t have to use the slug area, but that doesn’t mean it should be used for client communications.
Happy InDesigning!