
People have been claiming for decades that print media is on the way out, but we never seem to actually reach that moment. With that in mind, it’s a good idea to learn the basics of print design and how they can be applied to your InDesign projects.
Bleeds are one of those jargon terms that seem incomprehensible at first but are really quite simple once you know how it all works.
Table of Contents
Key Takeaways
- A bleed is an area that extends beyond the trim size of a print document.
- Bleeds are used as a crucial safety margin by industrial printing machines during the document trimming process.
- Bleeds can be added in InDesign’s Document Settings window.
- In North America, the typical bleed size is 0.125 inches / 3mm on each margin.
What is a Bleed?
A bleed (also known as a bleed area) extends past the final trim dimensions of a document to ensure that printed colors extend all the way to the trimmed edges. This term applies to all printed documents, not just documents created with InDesign, so it’s a useful thing to know!
During the industrial printing process, your documents are printed on large sheets of paper and automatically cut down to their final trim size, but there can be variations in the exact placement of the trimming blade, even from one piece to the next within a single print run.

If you print a document this way without a bleed area, these variations in trimming position can result in narrow stripes of unprinted paper at the edges of your final document.
Not only is this distracting and ugly, but it also looks sloppy and unprofessional, so make sure that you always set up a bleed area when sending your documents out to an industrial printer!
When to Use Bleeds in InDesign
Now that you understand what a bleed is, let’s take a closer look at when you’ll need to use them.
Any time you have an image, graphic, or colored background in your design that you want to extend to the very edges of the document, you’ll need to set up a bleed area to ensure that there are no errors during the printing and trimming process.
If your document is a single sheet with no bindings, you should set up a consistent bleed for each margin.
However, if you’re working on a bound document such as a book or magazine that has facing pages, also known as layout spreads, the inside edge of each page will be hidden by the binding and should not be configured with a bleed area.
If you’re not sure what bleed settings to use for a specialized project, it’s always a good idea to consult with the staff at the print house before finalizing your layout.
How to Add a Bleed Area with InDesign
The actual process of adding a bleed in InDesign is quite simple. When creating a new InDesign document, you can set all the parameters for your document, including size, page count, margins, and more – including bleeds.
To get started, open the File menu, select the New submenu, and click Document. You can also use the keyboard shortcut Command + N (use Ctrl + N if you’re using InDesign on a PC).
In the New Document window, locate the section labeled Bleed and Slug (you’ve got to love these print terms, am I right?).
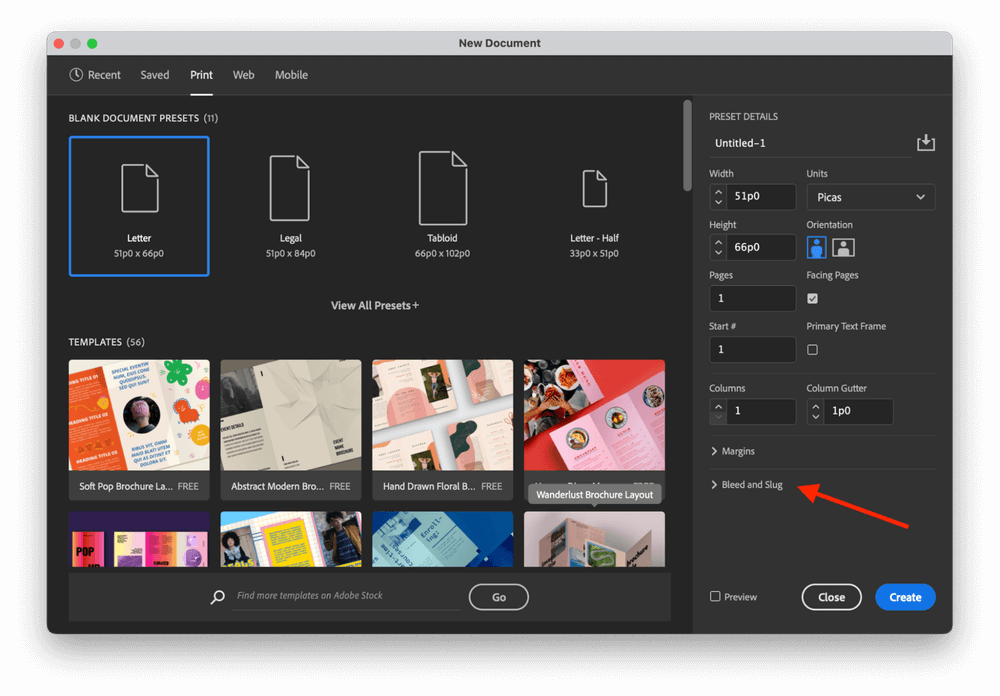
Click the title to expand the section, and you’ll be able to enter custom bleed settings for your new InDesign document.

By default, InDesign is configured to use points and picas as its units of measure, but you can enter your bleed area size in any unit you want and InDesign will automatically convert it.

If you want to enter the standard bleed size for North American printing, you can enter a value of 0.125” (the “ symbol refers to inches) and as soon as you click anywhere else in the window, InDesign will convert it into picas, and points.
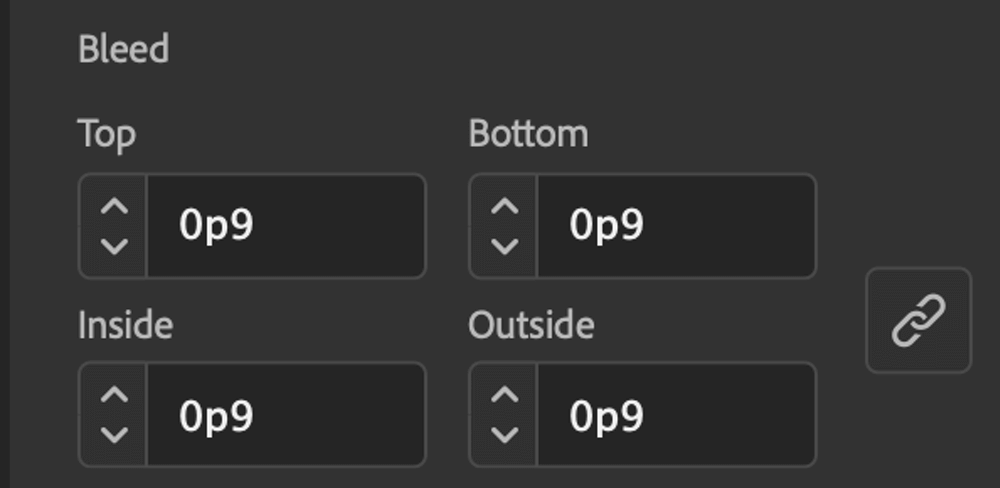
If you’re creating a bound document, then you have to click the chain link icon to unlink the four bleed values and enter a value of 0 for the binding edge, which is usually the Inside setting.
Click the Create button, and you’ll see your blank document complete with a special red outline to indicate the bleed area size and position.
The white area represents the final trim size of your document, but remember: your backgrounds, images, and graphics will need to be placed so that they extend past the trim size all the way to the edge of the bleed area indicated by the red outline.
Adding a Bleed Area to an Existing InDesign Document
If you’ve already created your InDesign Document and skipped the Bleed configuration step, or if you want to change your bleed size after you’ve already created your new document, it’s just as easy.
Open the File menu and select Document Setup.
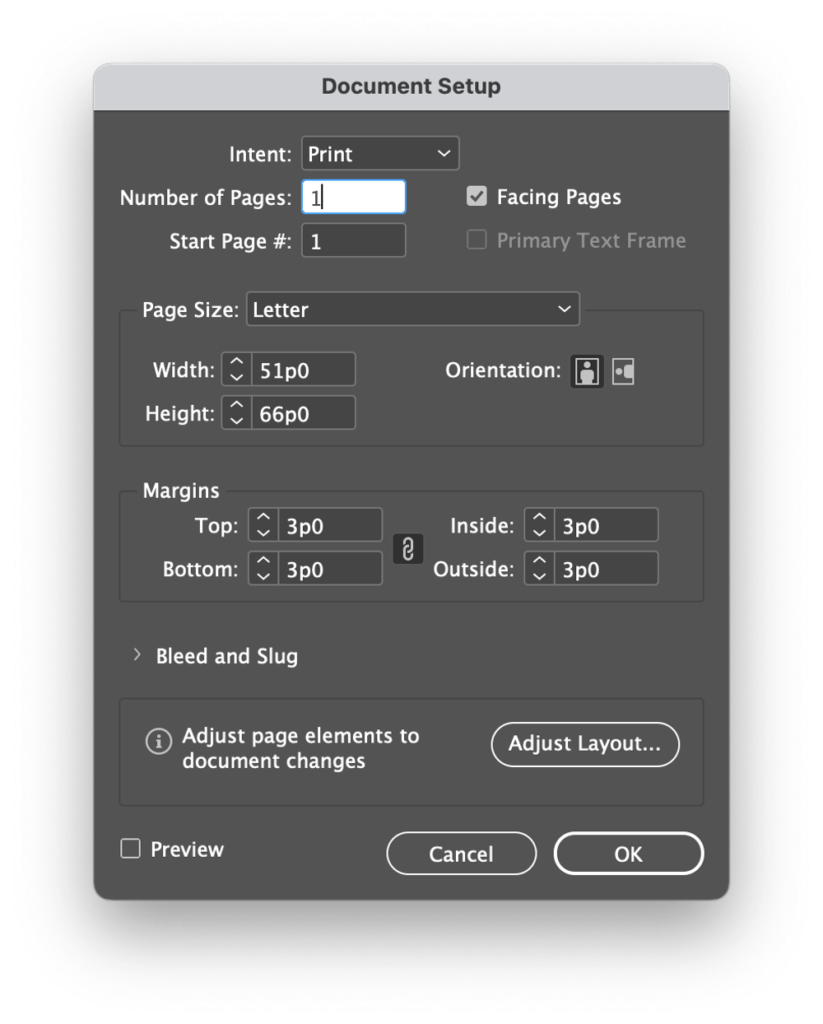
Click the arrow next to Bleed and Slug to expand that section, and you’ll be able to enter new bleed values.
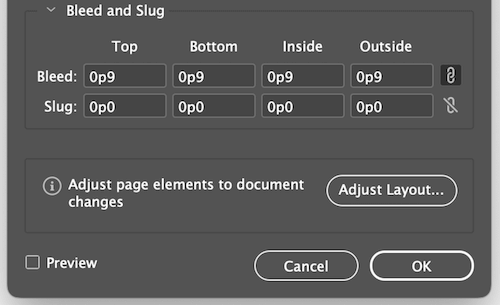
That’s all there is to it!
Exporting Your InDesign Document With Bleeds
In most situations, properly configuring your bleed settings in InDesign’s document settings will ensure that any PDFs you export will also include all bleed dimensions and information.
If your PDF exports from InDesign aren’t showing the bleed area, take a closer look at your settings during the export process.
In the Export Adobe PDF window, select the section using the pane on the left.
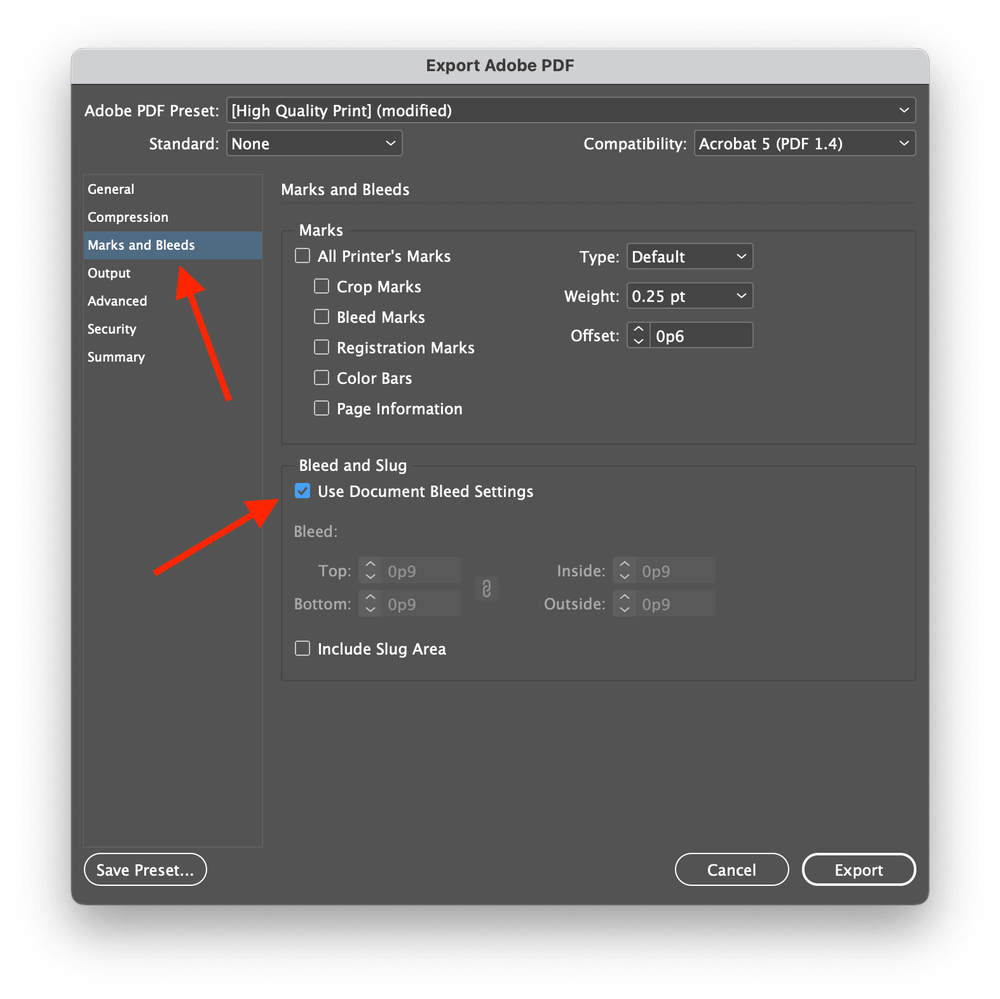
Check to make sure that the box labeled Use Document Bleed Settings is checked, or you can uncheck it and enter custom bleed dimensions that will only apply to the exported PDF file without changing the settings in your original InDesign file.
A Final Word
That’s just about everything there is to know about what bleeds are, how they work in the printing process, and how to use bleeds properly in InDesign. Remember that it’s always smart to maintain a good working relationship with the print staff who are in charge of turning your digital designs into printed reality, and they can be an invaluable resource!
Happy printing!