
Have you ever wondered why your lines look wobbly and uneven? The trick to getting nice, smooth strokes isn’t just about having a steady hand – it’s about using stabilization. This feature can transform your artwork by giving fluidity and control to your lines.
Hello, I’m Zoe, a freelance illustrator. When I first started using a stylus, I was amazed by how digital artists could create such flawless lines. It seemed like tablets were incredibly sensitive, and I found myself spending hours trying to perfect my lines.
As it turns out, making a few adjustments to the stabilization settings of my tools made a world of difference. Smooth lines made drawing much more comfortable, allowing me to focus on creativity rather than just getting a straight line.
In this guide, I’ll walk you through the process of stabilizing your tools in Clip Studio Paint and show you how to add the stabilization setting to tools that don’t display it by default along with some other adjustments that can help you achieve strokes that are as regular (or irregular!) as you like!
Let’s dive right in!
Table of Contents
Key Takeaways
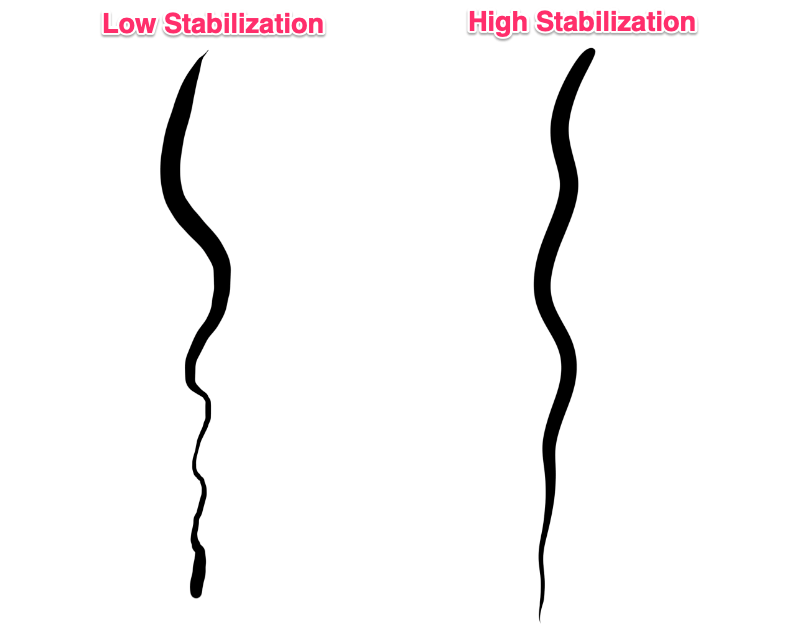
- Pushing the stabilization slider up creates smoother and more fluid lines.
- Pulling the slider down reduces correction, making lines respond more directly to your input, often resulting in a shaky appearance.
- The stabilization slider works with pens, brushes, erasers, and lasso tools.
- Going for maximum stabilization isn’t always necessary; occasionally, a touch of irregularity can lend a more natural feel to your artwork.
Read on to learn everything about stabilizing your strokes in Clip Studio Paint.
Note: All screenshots from this tutorial are taken from the CSP Mac version.
Adjusting Stabilization in Clip Studio Paint
Stabilization can be adjusted from the Tool Property palette. Here’s how you can find this feature and make adjustments:
Step 1: Pick the drawing tool you want to adjust. Here, we’ll be using the default G-Pen.
Step 2: Locate the Stabilization function in the Tool Property palette.
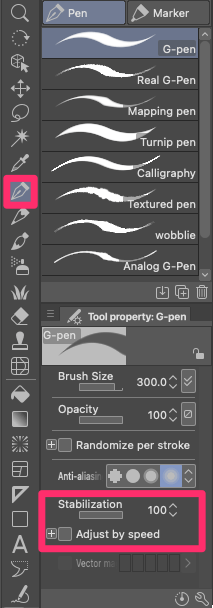
Step 3: Move the Stabilization slider to control how much your strokes are corrected as you draw in real time.
Adjusting the stabilization slider to the right increases the level of stabilization in your drawing. This works by using algorithms to smooth out shaky movements when you’re drawing. Here’s how it benefits your artwork:
- Cleaner Lines: Stabilization makes digital lines and curves appear less shaky, resulting in neater and cleaner drawings.
- Enhanced Control: It enables you to draw fine details and precise shapes with ease, reducing unintended jitters caused by your hand movements.
- Efficiency: Stabilization speeds up drawing by minimizing the need for constant corrections, giving your digital art a cleaner and more professional appearance.
On the other hand, dragging the slider to the left reduces stabilization. While stabilization is great for creating smooth and precise lines, sometimes you might want to make it less strong or turn it off completely. Here are cases where lower stabilization works well:
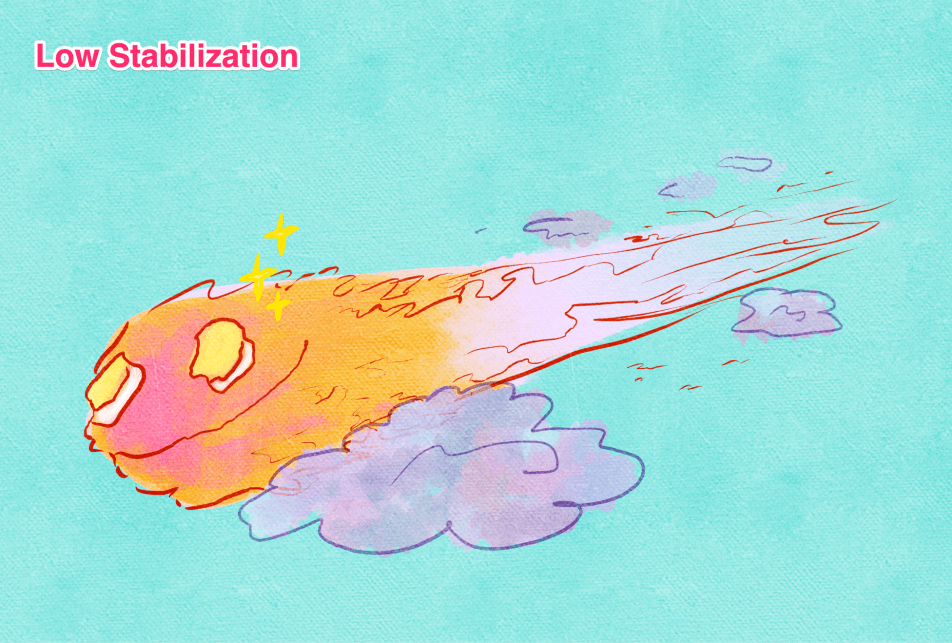
- Natural Feel: When using brushes for coloring, you might prefer a more traditional, organic feel over a completely digital look. In these instances, a slight wobble in your strokes can actually enhance the artistic quality.
- Expressive Style: Lower stabilization can help create a sketchy and rough aesthetic.
- Covering Larger Regions: It’s also useful when painting larger areas, as high stabilization can struggle with rapid back-and-forth movements.
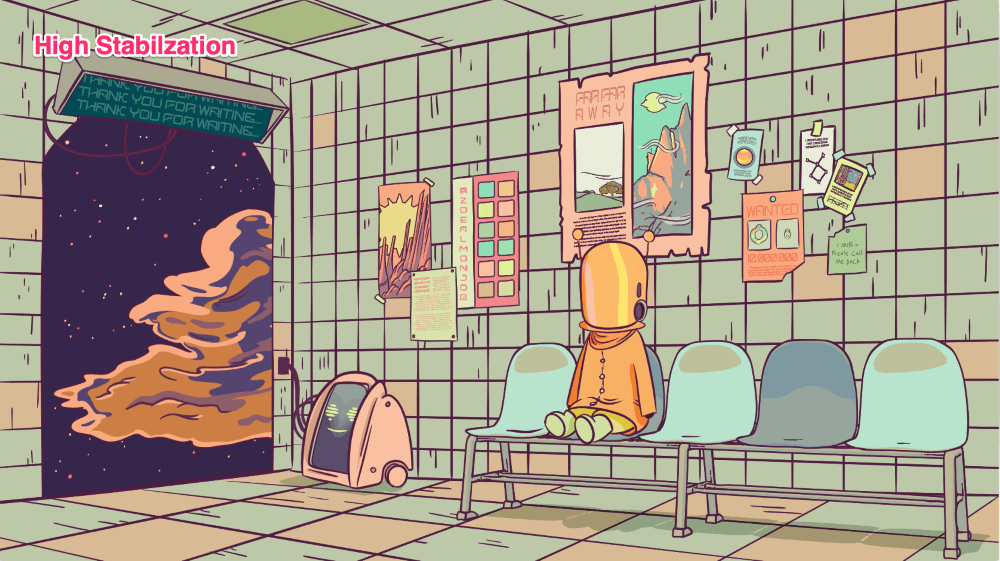
It’s important to find the right balance with stabilization. Keeping it high all the time can lead to overly smooth and less lively results. Ultimately, the ideal level of stabilization is about what makes you comfortable and meets your artwork’s unique demands.
Adding Stabilization to Different Tools in Clip Studio Paint
If you’re missing stabilization on the Tool Property palette for a particular tool, here’s how you can add it:
Step 1: Select the desired tool.
Step 2: Click the wrench icon at the bottom of the Tool Property Palette.
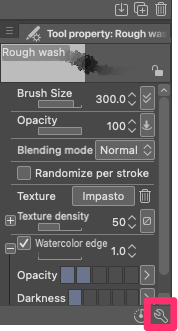
Step 3: The Sub Tool Detail window will appear. Click on Correction.
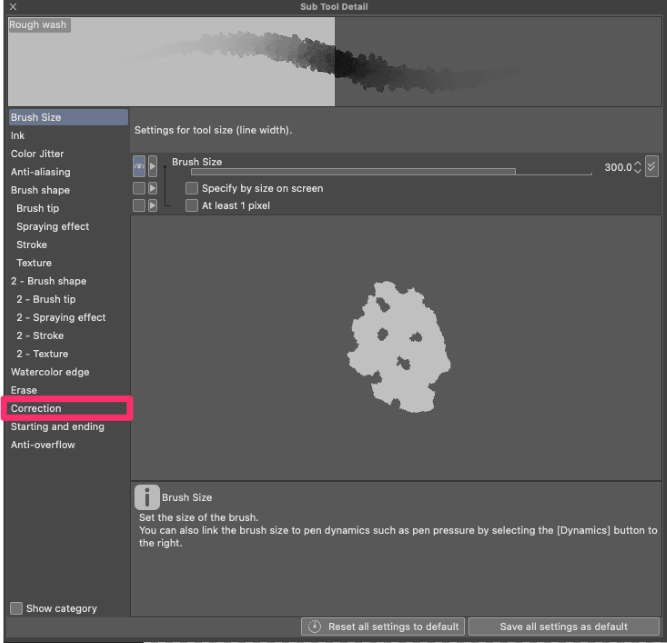
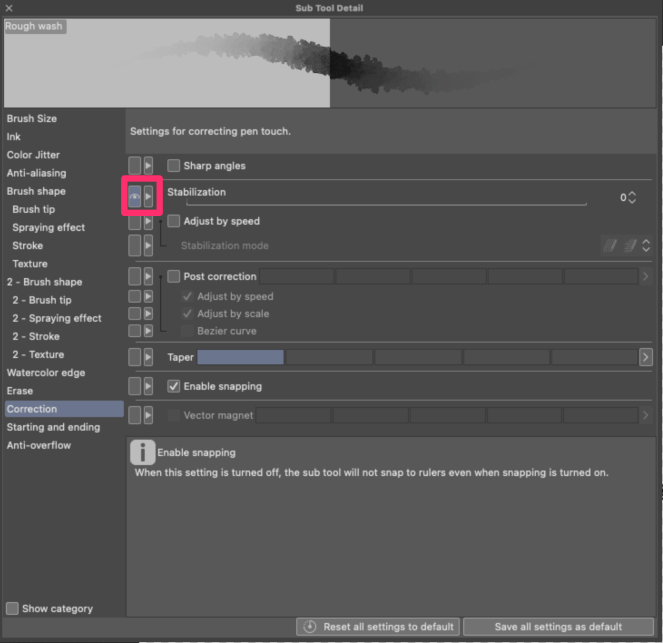
Step 4: Toggle the box beside the Stabilization slider. If it turns blue with an eye icon, the feature is added to your Tool palette.
Stabilization is compatible with various tools including pens, brushes, lassos, and erasers.
Other Corrections in Clip Studio Paint
There are more things you can do to improve your lines. Follow these steps to access these extra settings:
Step 1: Click the Sub Tool Details button (the wrench icon) on the Tool Property Palette.
Step 2: In the window that appears, you’ll find various options beside the Stabilization slider. Let’s delve into a few:
- Adjust Stabilization by Speed: When enabled, the stabilization level adjusts according to your pen’s speed. You can choose whether quick strokes increase or decrease stabilization, affecting the smoothness of your lines as you draw faster.

- Post Correction: Unlike real-time stabilization, post-correction smooths out a line after you’ve drawn it. This adjustment occurs once you’ve completed your stroke.

- Taper: This setting influences how much the line extends after lifting your stylus from the tablet. Imagine a brush with a long tip compared to a short one. The longer-tipped brush creates a gradually thinning line as you lift it, while the short-tipped brush leaves a bolder, shorter mark.

Final Thoughts
Incorporating stabilization into your digital drawing process can make a big difference, turning shaky lines into smooth strokes and giving you more control over your art.
Clip Studio Paint’s stabilization settings offer a range of choices, whether you want precise lines or a more natural feel. From tweaking stabilization based on your drawing speed to trying out post-correction and taper features, you now have the tools to tailor your lines to your liking.
Remember, different art styles need different types of lines. With stabilization, you can experiment with various styles and techniques, from subtle and controlled lines for realism to dynamic and expressive strokes for a cartoonish vibe.
If you have any questions or want to share your experiences with stabilizing tools in Clip Studio Paint, feel free to drop a comment below!