
The Lasso Tool in Clip Studio Paint helps you select and work on specific parts of your artwork, giving you better control to make changes or add effects exactly where you want them.
Hi, I’m Zoe, a freelance illustrator and graphic designer. I remember when I began, the Lasso Tool seemed a bit tricky. The way it vanishes when you click away and its flickering lines gave me an impression of a hurry.
But the reality is, you can take your time to create a precise selection. The ability to add to it step by step, even mixing it with other selection tools, and remove parts, actually makes this freehand selection method very versatile.
In this post, I’ll walk you through each step of locating and using the lasso tool in Clip Studio Paint. You’ll also pick up some useful tips for refining your selection’s edges along the way.
So let’s get to it!
Table of Contents
Key Takeaways
- You can easily add to or subtract from your selections using the Shift and Alt keys.
- You can combine the Lasso Tool with other tools or methods, like Rectangle, Ellipse, or Polyline selections, or by clicking on a layer while holding Ctrl (Windows) or Command (Mac) to auto-select its shape.
- Use Expand Selected Area, Shrink Selected Area, and Blur Border options in the Select menu to refine selections.
- Select menu options are limited to 200px. Apply the effect, then repeat the process for bigger adjustments.
Note: All screenshots from this tutorial are taken from the CSP Mac version.
Read on to learn all about how to effectively use the Lasso Tool in Clip Studio Paint.
How to Use the Lasso Tool in Clip Studio Paint
The Lasso Tool is a crucial tool for any digital artist. It’s particularly useful for isolating details, characters, objects, or any element you wish to emphasize or adjust in your artwork.
Whether you’re cleaning up edges, moving things between layers, or applying effects to a specific area, the Lasso Tool gives you the power to control and improve your compositions.
Here’s how you can make the most of it:
Step 1: Begin by opening your artwork in Clip Studio Paint.
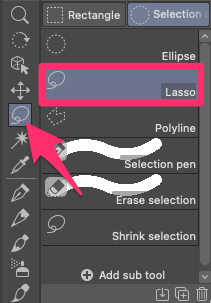
Step 2: Find the Lasso Tool icon in the left-hand tool palette and select it.
If you don’t see it, check if another selection tool like Rectangle, Ellipse, or Polyline is chosen. If so, switch to the Lasso Tool from the Selection sub-tool palette.
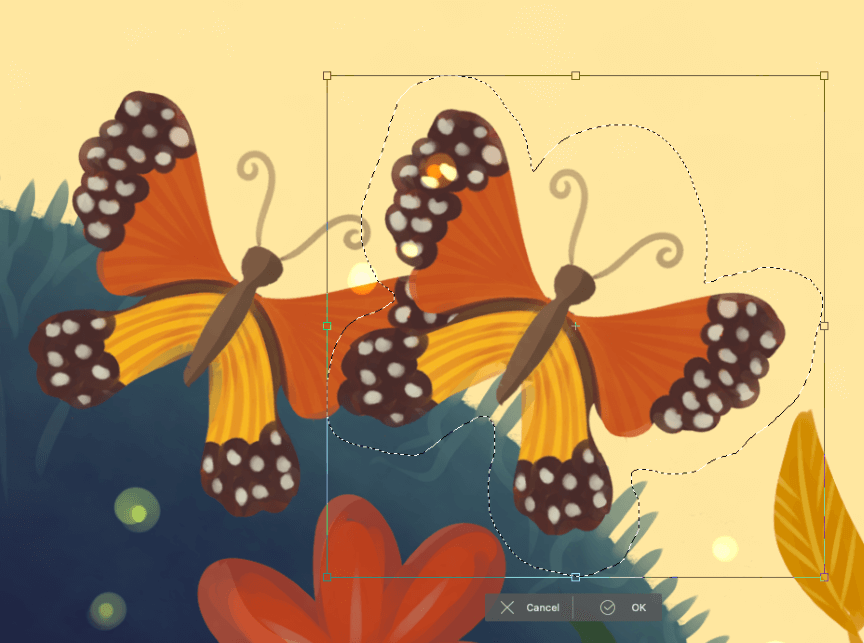
Step 3: Click and hold your mouse at the starting point. While holding, drag your mouse to outline the desired area. Release the mouse button to finalize the selection.
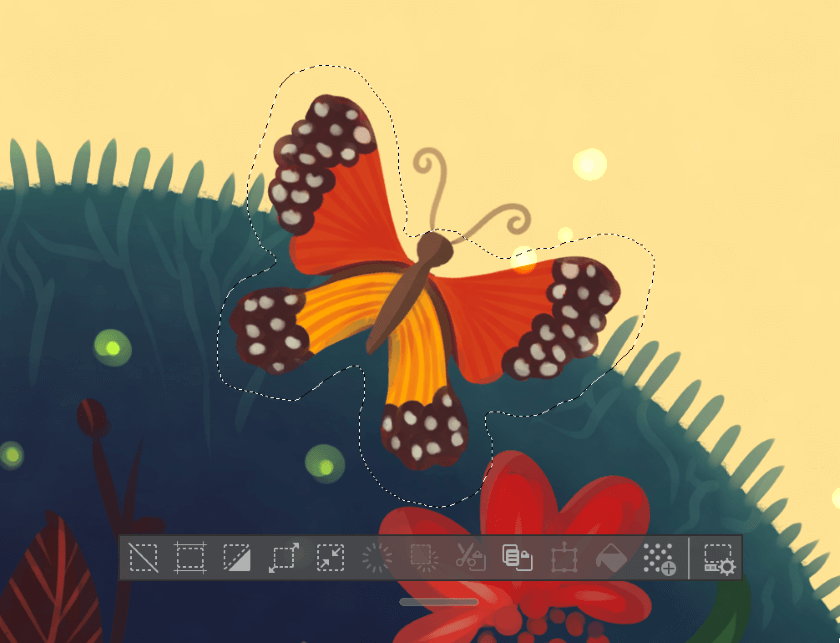
Step 4: Creating a precise selection can sometimes take multiple attempts. Luckily, you can add to or subtract from your selection easily:
To add to your selection:
- Hold down the Shift key.
- Click and drag the Lasso Tool around the area to include.
- Release the mouse button and Shift key.
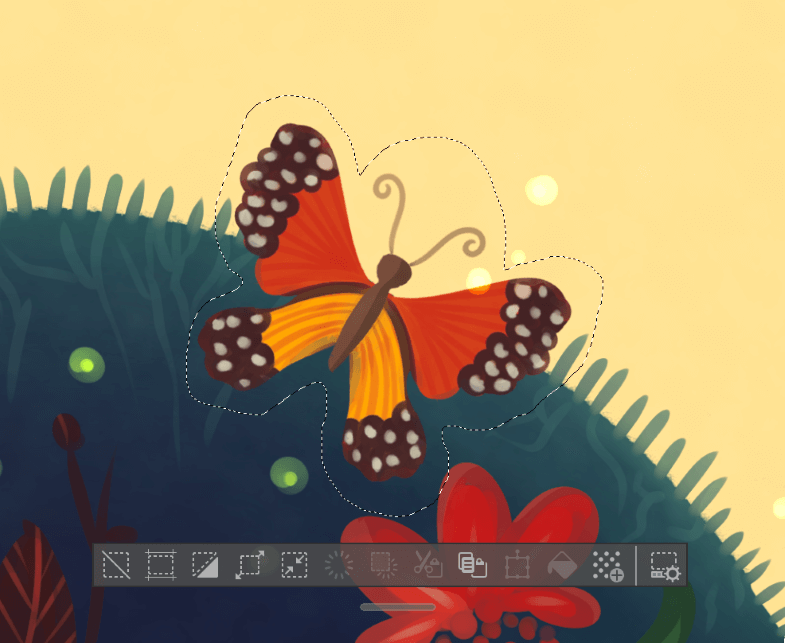
To subtract from your selection:
- Hold down the Alt (Option on Mac).
- Click and drag the Lasso Tool around the area to remove it.
- Release the mouse button and Alt key.
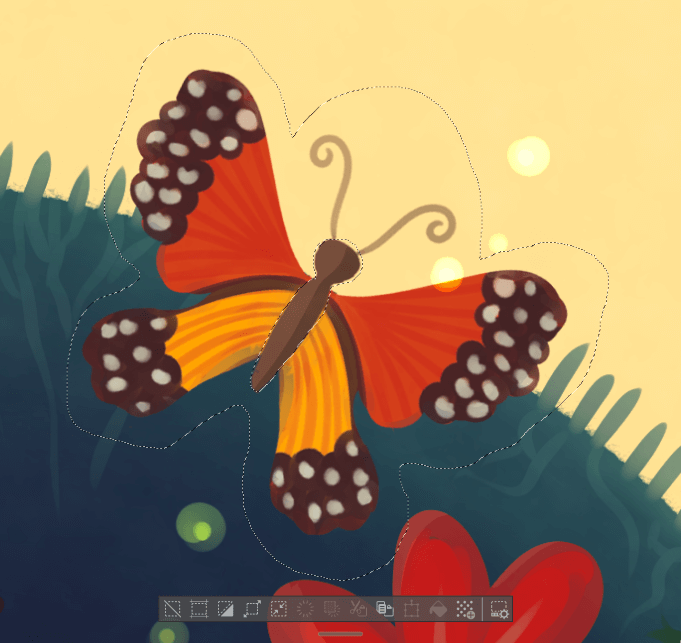
And that’s it! Your selection is now active and ready to use.
Now, if you apply an effect such as Hue/Saturation/Luminosity while your selection is active, the effect will only be applied to the selected area, while the rest remains masked.

Using Edit > Transform confines your edits to the shape you outlined within the selected layer(s). You can also copy or cut your selection to paste it on a new layer.
As you get more comfortable, you’ll notice that adjusting cursor movement can lead to smoother selections. For instance, if you have a steady hand, making longer and more fluid strokes can lead to a more natural selection shape.
How to Refine Selection in Clip Studio Paint
At times, you may find it necessary to fine-tune your selection. To access these settings, navigate to the Select menu.
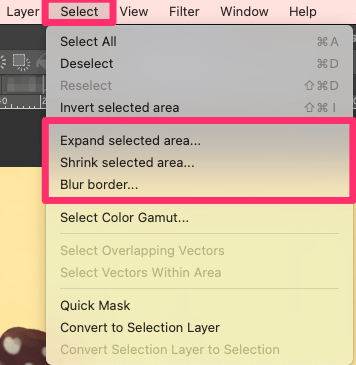
Let’s take a closer look at each one:
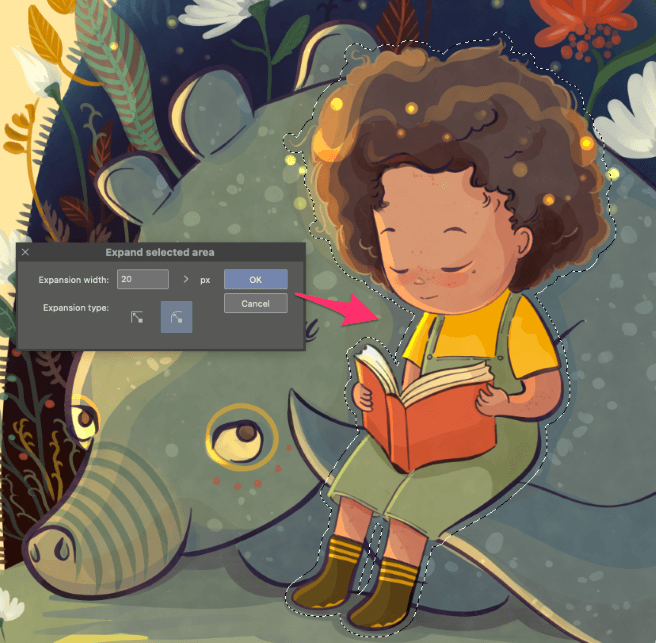
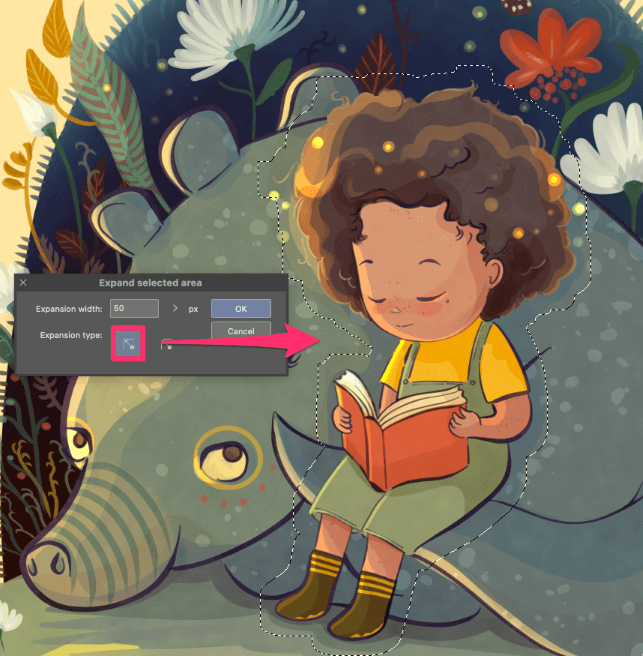
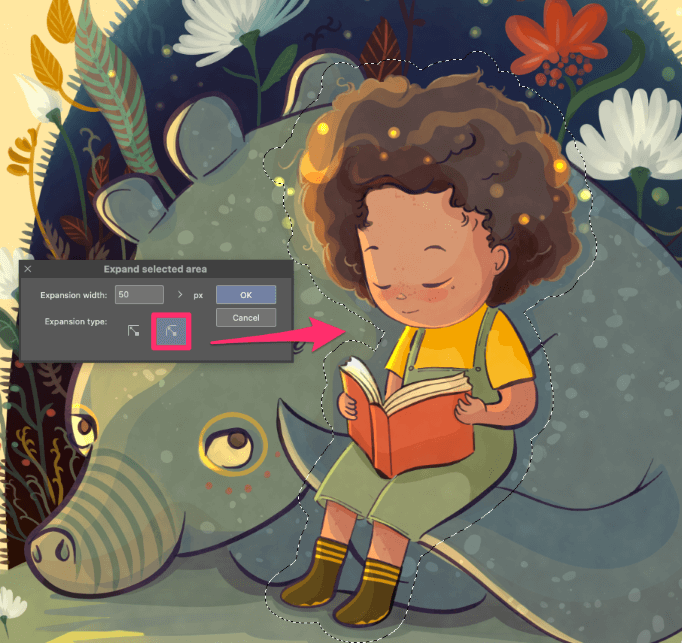
Expand Selected Area:
Use this option to make your selection larger.
It’s useful when you want to capture additional details around your chosen area. For example, when isolating a character from the background, you can use this function to include subtle elements like strands of hair.
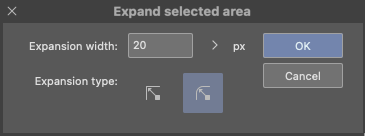
Click on Expand Selected Area, and a window will pop up. Here, you can type in how much bigger you want your selection to be, up to 200 pixels.
You can also pick between rounded or sharp angles for the expansion method. Rounded angles make the edges stretch out more smoothly, while sharp angles result in more jagged extensions.
Shrink Selected Area:
The Shrink Selected Area option lets you make your selection smaller.

Enter a value, and your selection’s edges will shrink by that much.
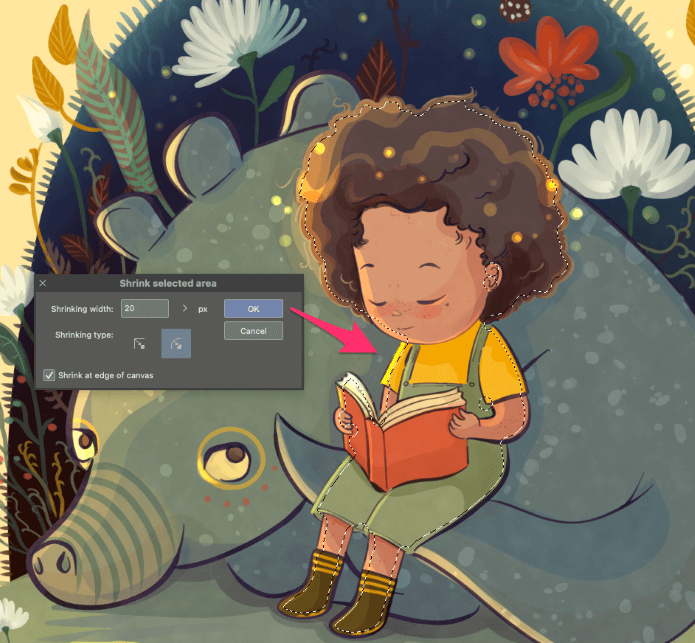
Similar to the expansion, you’ll see two types of angle options. These affect how the corners get processed when you’re reducing.
You’ll also see the Shrink at Edge of Canvas checkbox. Turning this on allows you to shrink the selected area even when it’s right on the edge of the canvas.
Blur Border:
Adjusting the blur value applies a softening effect to the edges of your selection.
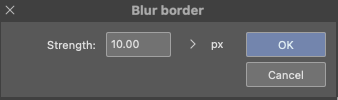
A lower value, such as 5-20 pixels (depending on your canvas size), subtly blends the edges with the surroundings, creating a seamless integration.

On the other hand, a higher value, up to 200 pixels, makes the edges more see-through. This results in an even more gradual transition between the selection and the rest of your composition.

Final Thoughts
The Lasso Tool is great for quickly sketching out uneven shapes for a basic selection, but it also gives you the freedom to refine it meticulously by adding or removing until it’s just right. The option to adjust and blur your borders comes in handy for various scenarios where you want to isolate an element seamlessly.
I hope this guide has been helpful in teaching you how to use the Lasso Tool in Clip Studio Paint. If you have any thoughts, tips, or feedback, feel free to share in the comments below!