
Are you having problems using Skype on your Mac? Maybe it’s conflicting with another app, or it shows the ‘quit unexpectedly’ error when you launch it?
This might be due to the associated files and folders of the older version interfering with your downloads. Perhaps something went wrong with the macOS update and you need to completely uninstall your current Skype before reinstalling the latest version.
Maybe you want to delete Skype for a good reason. Perhaps your friends have moved to Oovoo and Discord and you simply want to get rid of Skype from your Mac completely to free up a bit extra storage.

Whatever your intent is, you have come to the right place. We’ll show you how to uninstall Skype in different ways, with step-by-step tutorials.
The first method shows you how to manually remove Skype from your Mac and reinstall it. The other two methods are more efficient but come with the trade-off of installing another app.
Anyway, just choose which method best fits your situation. Let’s get started.
Using a PC? Also read: How to Uninstall Skype on Windows
Table of Contents
1. Uninstalling Skype with the Traditional Way (Manually)
Note: This method is best suited if you have extra time on your hands and do not mind taking extra steps to do it manually.
Step 1: First, you need to quit the Skype app. You can do this by moving your cursor to the top-left corner, clicking on the menu, and selecting “Quit Skype”.
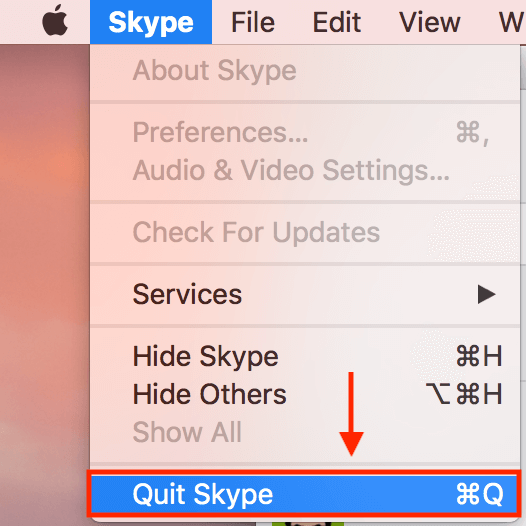
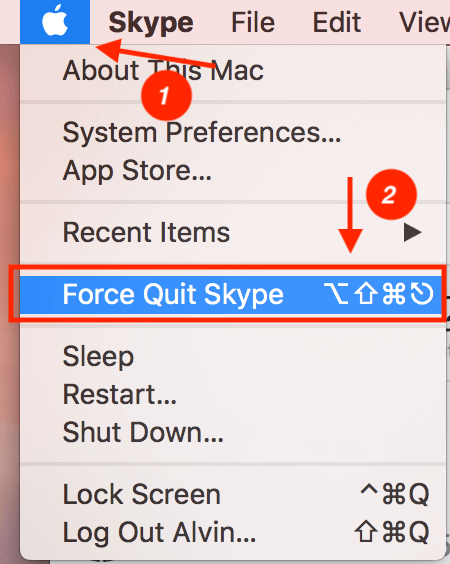
Alternatively, if you prefer to use Mac shortcuts, hit “Command+Q” on your keyboard. If you are experiencing problems with quitting the app, simply force quit it. To do this, click on the Apple icon and hit “Force Quit”.
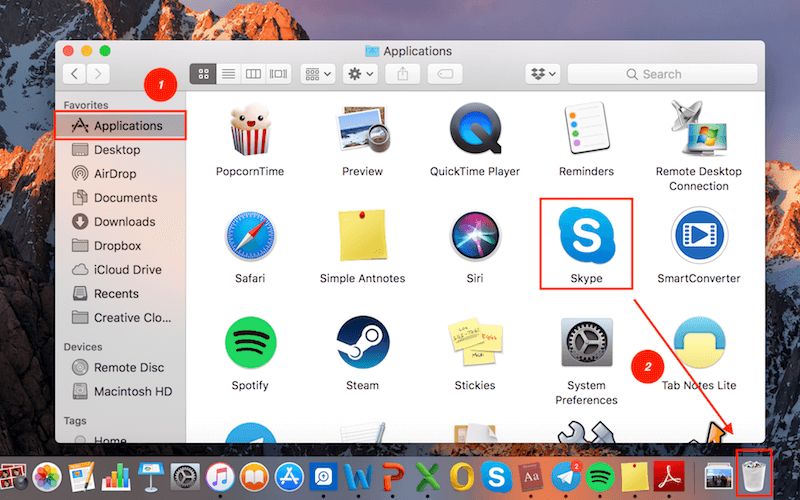
Step 2: Delete Skype by dragging it from your Applications folder to the Trash.
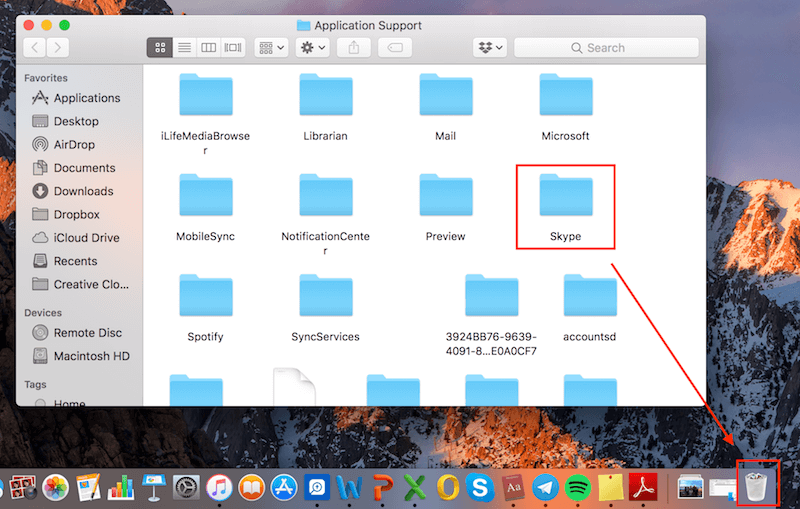
Step 3: Remove Skype from Application Support. Go to Spotlight Search at the top-right corner of your screen. Type “~/Library/Application Support” and hit Enter.

You will be directed to the place where all application files are stored. Locate the “Skype” folder and drag it to the trash.
Note: This will delete all your Skype chat and call history. If you want to keep them, skip this step.
Step 4: Remove the remaining associated files. Go back to Spotlight Search at the top-right corner again, then type “~/Library/Preference”‘ and hit Enter.
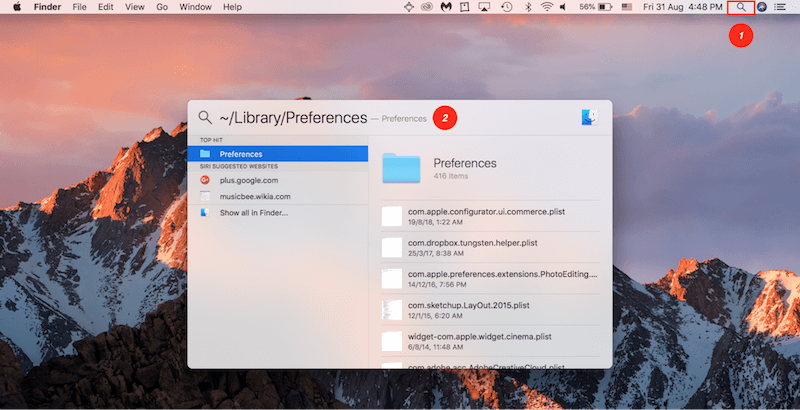
Now type ‘Skype’ in the search box. This will show you the folders associated with the app. Ensure that your filter is set to Preferences and not This Mac. Proceed to drag the associated folders into the trash.
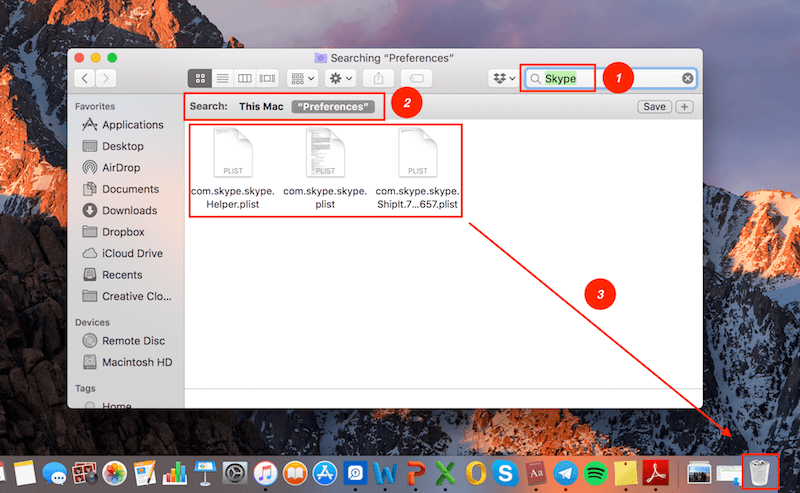
Step 5: Open Finder and enter “Skype” in the search bar to do a final check on the remaining items related to Skype. Move all of the results to the trash. Then empty your trash to delete all the files.
That’s it! If you do not have the extra time to remove Skype manually, or Skype can’t be uninstalled using this method, try the following methods instead.
2. Uninstalling Skype with AppCleaner (Free)
Best For: If your Mac is not in desperate need of clearing massive storage space and you just need a one-time uninstallation of an app.
AppCleaner, as its name says, is a free third-party uninstaller app that allows you to thoroughly remove unwanted apps in a drag-and-drop manner. You will see that on the right-hand side of the webpage, there are different versions to download.
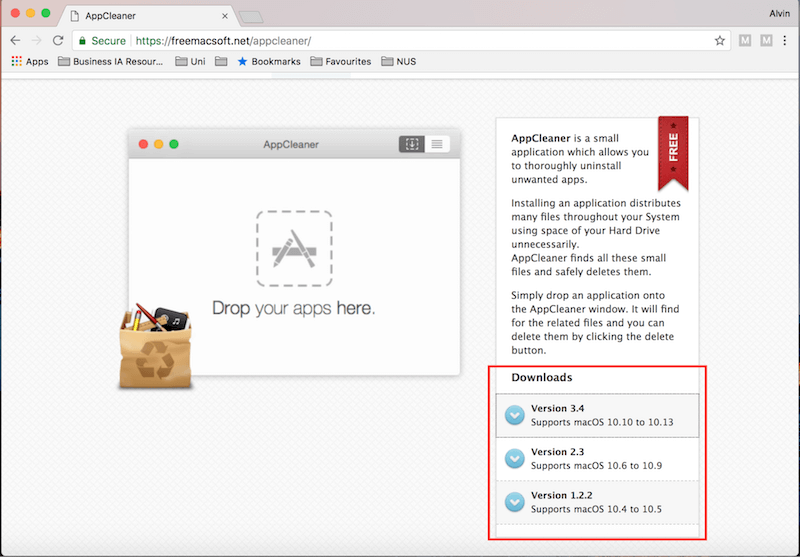
Make sure you check your macOS version first and download the correct version of AppCleaner accordingly. You can do this by clicking on the Apple icon at the top right, then clicking on About This Mac. There you’ll be able to find the info.
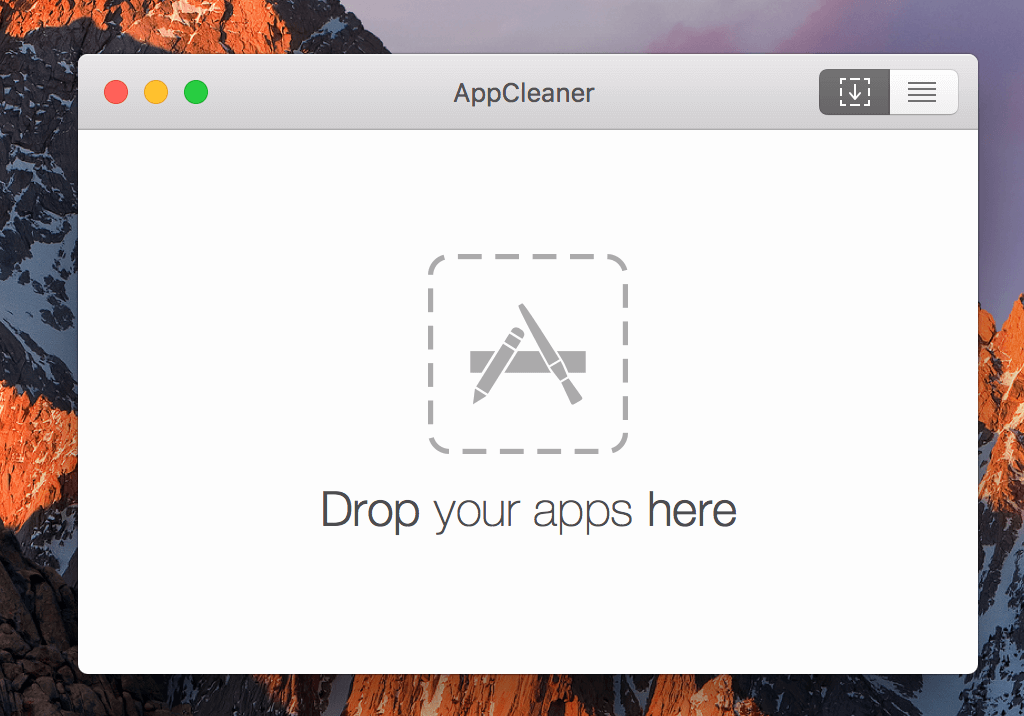
Once you download and install AppCleaner, you will see the main window.
Next, open a Finder window and go to Applications. Proceed to drag your Skype application into the AppCleaner window.
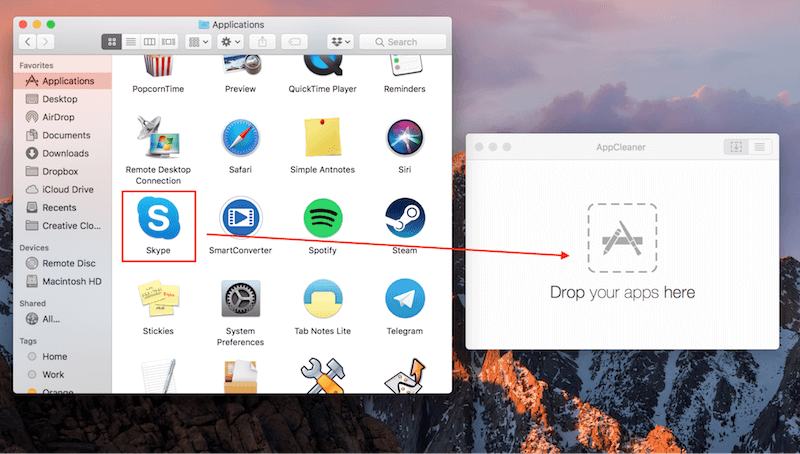
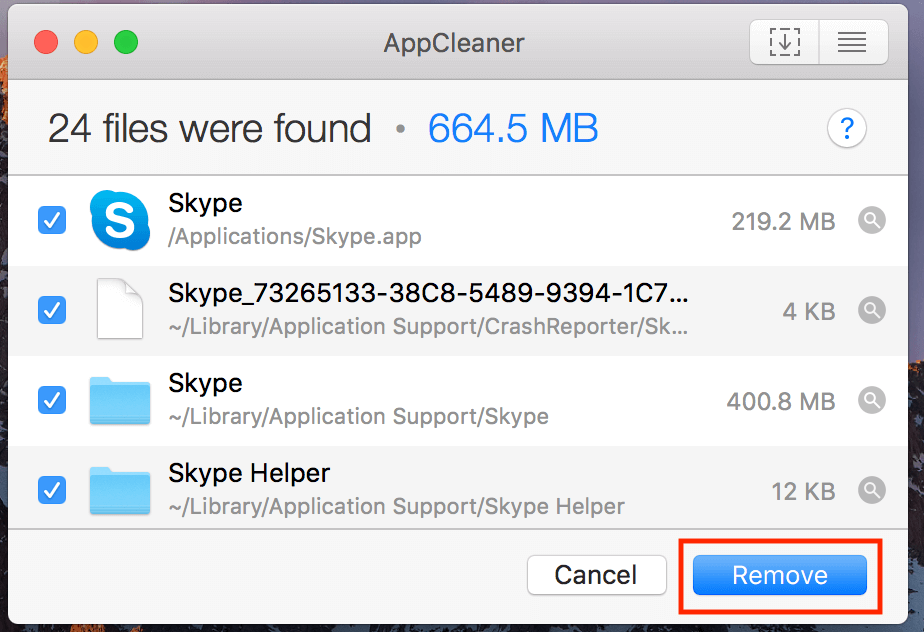
The app will locate all of Skype’s associated folders for you. See? 24 files totaling 664.5 MB in size were found. Then all you have to do is click ‘Remove’ and you’re all set.
Not happy with AppCleaner? No problem! We’ve got another great option for you.
3. Uninstalling Skype with CleanMyMac (Paid)
Best For: Those of you who need to free up more storage space on your Mac — i.e. not only do you want to remove Skype, you also want a list of other apps to uninstall and you want to do this in a batch.
CleanMyMac is one of our favorite solutions. We run the app regularly to clean up our Macs and the app never fails to deliver its promise. In addition, it actually includes a dozen features that allow you to do many things, including uninstalling third-party apps in bulk.
To uninstall Skype (and other apps you don’t need anymore), start by downloading CleanMyMac and installing it on your Mac. Then follow the four steps as indicated in the screenshot here.
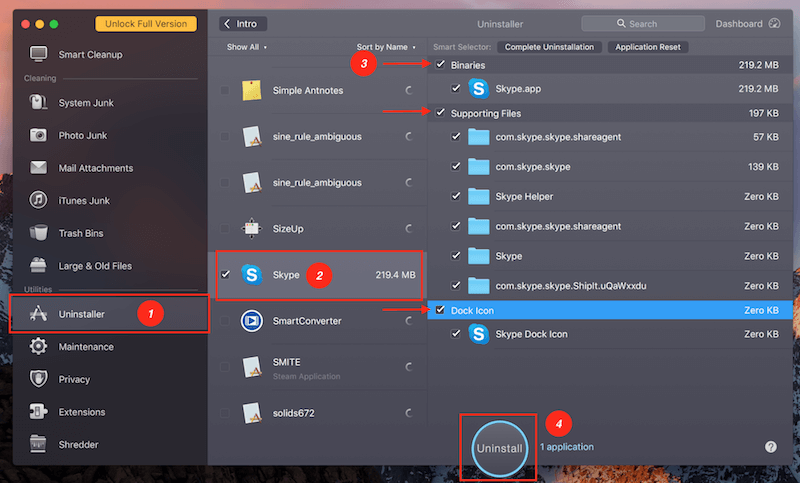
On the main screen, click on Uninstaller. The default filter is Sort by Name so everything is listed in alphabetical order. You should easily find Skype by scrolling down. Check the box beside the icon. CleanMyMac will search for Skype as well as all of its associated files. You simply check all the boxes. Finally, hit Uninstall.
Done!
Note that CleanMymac isn’t free; however, it has a free trial that allows you to test drive. If you like the app, you can purchase it later on. You can then use it to clean unnecessary files on your Mac on top of deleting applications.
How to Reinstall Skype on Mac?
So now you have successfully removed Skype from your Mac machine, and you want to reinstall the app. Here’s how to do it:
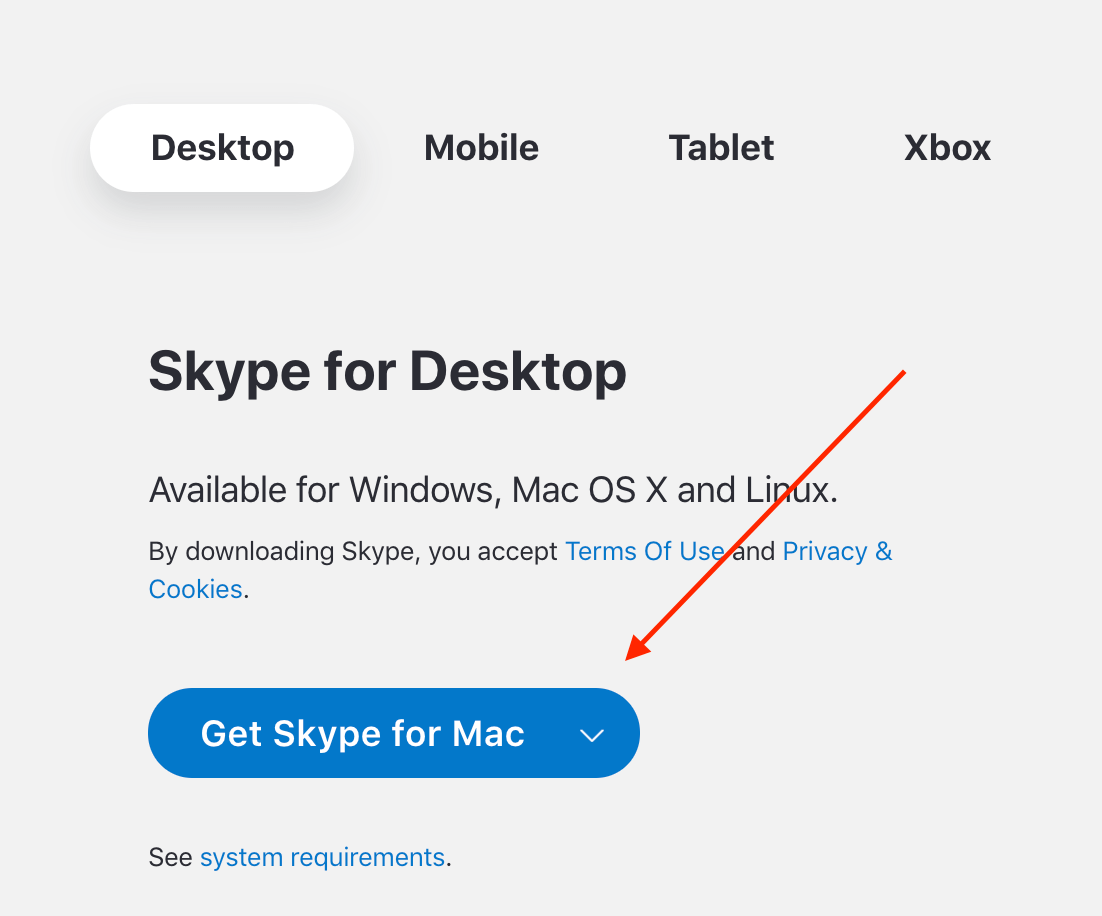
Note: Skype is not available on the Mac App Store. You need to go to the official Skype website to download the app.
First, visit this page, make sure you are under the Desktop tab, then click on the blue button Get Skype for Mac.
Wait until the download is complete, then follow the instructions to get Skype re-installed on your Mac. The installation process should be very straightforward; we won’t elaborate here.
That wraps up this article. We hope you find it helpful. If you have any further questions. Leave a comment below.
Hey ALVIN TEO.
Thank you so good solutions,This problem has plagued me for many days, thank you for the solution
Allo,
I dont have Skype any more you cot it and I told you to not renew my contract for using the phone but I just saw in my credit card that you tock the amont for the renewing
that.I would like to have a credit for that .
Thank you
nice explaining with picture. I like your this trek. Thanks for sharing information..