
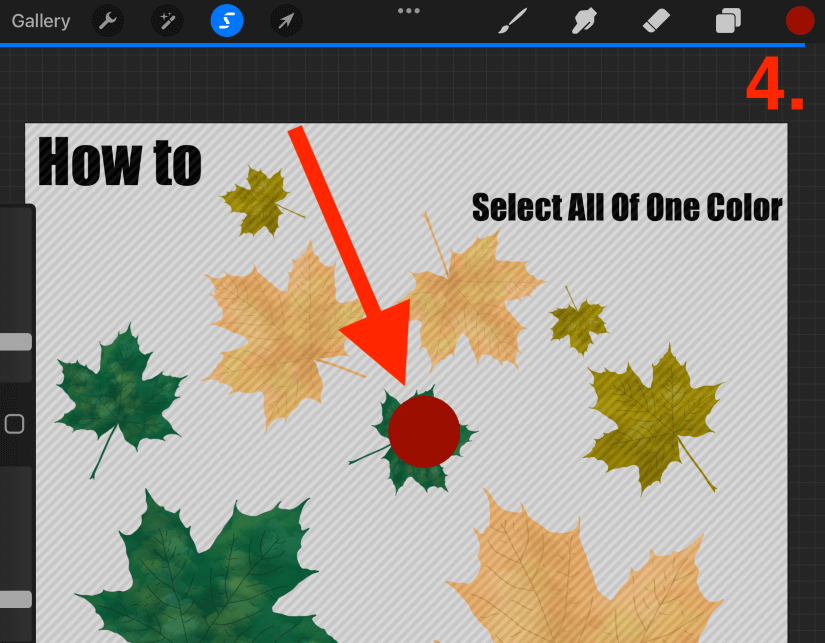
You can manually select all of one color in Procreate using the Automatic Selection tool and tap on all areas of the color you want to select. These are now selected and ready to be removed, copied, or filled.
I’m Carolyn and three years ago I established my very own digital illustration business. Since day one, I have used Procreate to create every single one of my projects and artworks for each of my clients so I am very familiar with the app and all of its amazing offerings.
Unlike Photoshop and other design apps, Procreate does not have a feature dedicated to automatically selecting all of one color within a canvas or project. However, there is an alternative way to achieve almost the exact same results.
Today, I’m going to show you two ways to select all of one color in Procreate.
Table of Contents
Key Takeaways
- Procreate does not have a tool designated to select all of one color in a canvas or layer.
- You can use the Automatic Selection tool to manually select all of one color in Procreate.
- This method works best on larger shapes or basic projects but will not work great on finer details or very elaborate artworks.
- Once you have manually selected all of one color in Procreate, you will have the option to change the color, fill in the color or erase the colored objects completely.
Method 1: Color Drop
This is a hands-on way to manually select all of one color by identifying and isolating every shape or object of that color within a canvas or layer. You can combine your layers to do this quickly or repeat this method on each individual layer until all of the colors are selected.
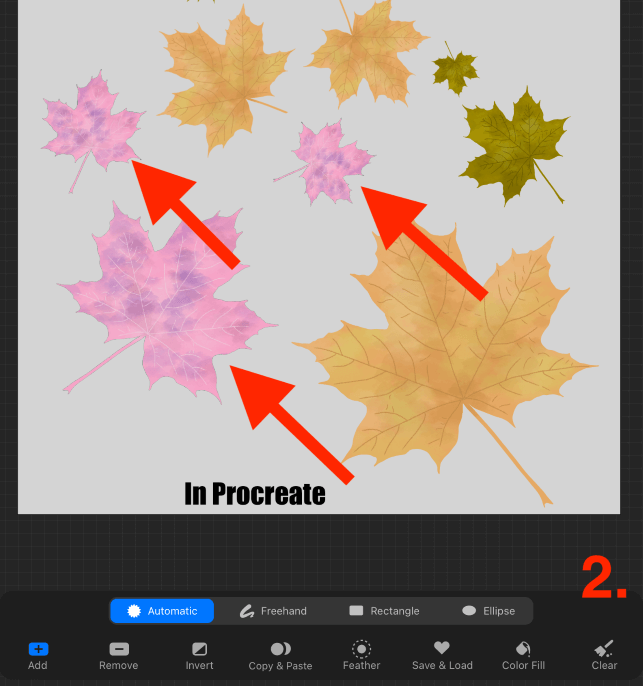
Step 1: Open your Selection tool by tapping on the S icon in the top left-hand corner of your canvas. At the bottom of the canvas, there will be a settings window. Select the Automatic setting.

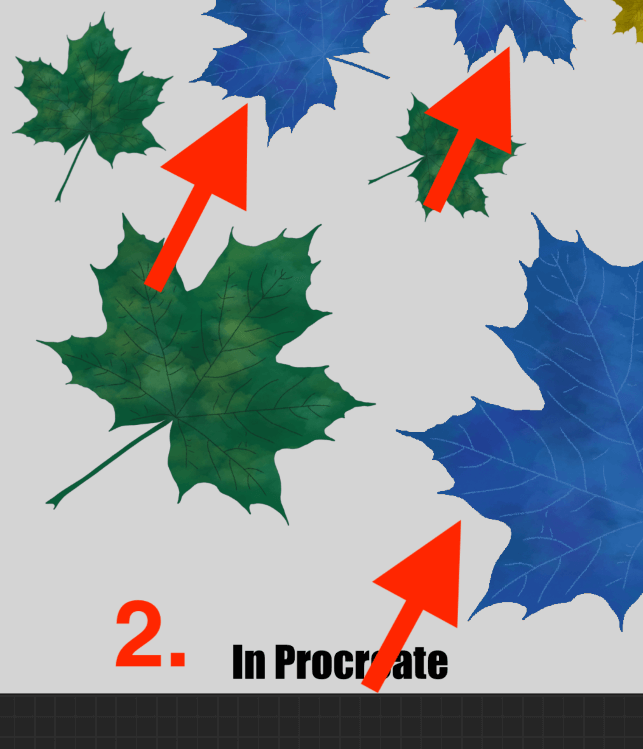
Step 2: Using your finger or stylus, tap on every shape or area that consists of the color you want to select. You will know when it is selected as it will turn a neon highlighted shade depending on the color. I selected all of the color green in my example.
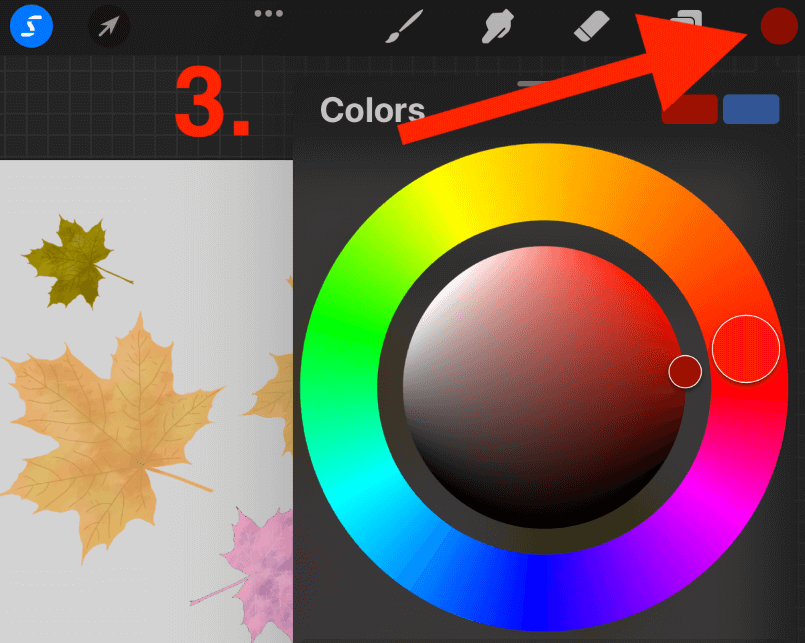
Step 3: Select the color you want to change it to by tapping on your Color Disc in the top right-hand corner of the canvas. Glide your finger or stylus around the color wheel until you decide which color to use.
Step 4: Holding your finger or stylus down on the Color Disc, drag and drop the color directly onto your highlighted shapes. As the color green is selected, the Selection tool will automatically deactivate and protect the surrounding areas of the canvas.
Step 5: Your selected color green has now been changed to the new color. Once you are done making your changes, simply tap on the Selection tool again to confirm your changes and close the tool.

Pro Tip: This tool works best with larger, more simple shapes. It may not work as well with more elaborate and detailed projects.
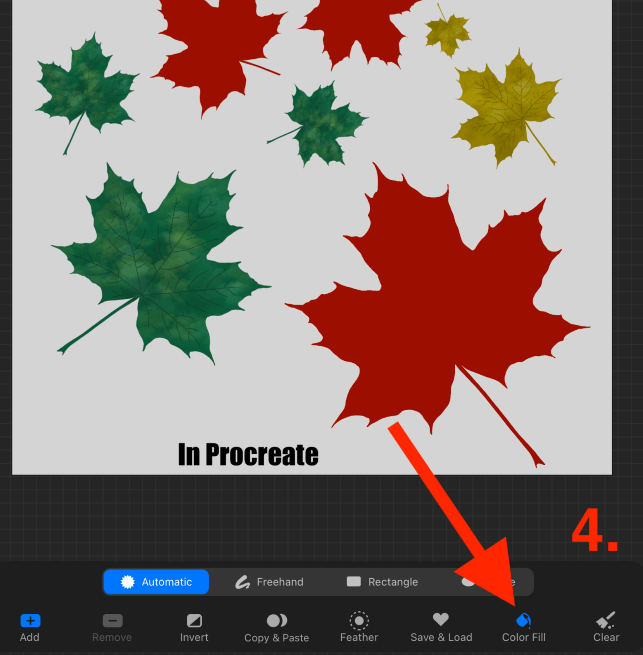
Method 2: Color Fill
This method will show you how to select a specific color within your canvas and then fill it with a color. This works best if you are looking to completely change the color to a basic, filled color without preserving any details of the shapes that you select. Here’s how:
Step 1: Open your Selection tool and choose the Automatic setting.
Step 2: Using your finger or stylus, tap on every shape or area that consists of the color you want to select. You will know when it is selected as it will turn a neon highlighted shade depending on the color. I selected all of the color yellow in my example.
Step 3: Select the color you want to fill it with by tapping on your Color Disc in the top right-hand corner of the canvas. Glide your finger or stylus around the color wheel until you decide which color to use.
Step 4: In the settings window at the bottom of your canvas, tap on Color Fill. This will automatically fill all of your selected areas with the active color that you chose in the last step. When you are done, tap on the Selection tool again to confirm your changes.
Alternatively, if you aren’t looking to change or fill the color of your selected areas, you can eliminate the color altogether by using the Eraser tool. The Selection tool will deactivate the remainder of the canvas so you don’t have to worry about keeping inside the lines.
FAQs
Here is a selection of a few of your frequently asked questions about selecting all of one color in Procreate.
How do I select and copy color in Procreate?
You can use the Eyedropper tool in order to replicate an existing color from your canvas or photos. Simply tap on the square in your sidebar or hold down on your canvas until the circular Eyedropper tool appears. Then move it over to the color you want to copy and release your hold.
How to select a color and delete it in Procreate?
You can use the method above to manually select all of the colors you want to delete. Once it is selected, simply use your Eraser tool to eliminate the color altogether.
How to select something in Procreate and move it?
You can use the Automatic or Freehand selection tool to select the object you want to move. Once it is selected, at the bottom, tap on Copy & Paste. This creates a copy of your object in a new layer and you can use the Transform tool to move it anywhere on your canvas.
Conclusion
Even though there is no dedicated tool in Procreate that can automatically select all of one color, it doesn’t mean it’s not possible. It might just take a little bit more time and patience to do so as it becomes a more hands-on and manual process than other design programs.
Familiarizing yourself with the Selection tool is a good place to start either way as it offers users so many options when it comes to technically manipulating and editing your canvas. I spend a lot of time trying to explore and learn all of the amazing functions this setting offers.
Do you use the same method to select all of one color in Procreate? Share your feedback in the comments section below.