
All it takes to render in Premiere Pro is to press the Enter Key on your keyboard. From then on, you will have a smooth playback.
Have you noticed or experienced lagging while playing back your video projects in Adobe Premiere Pro? Or perhaps the effects and transitions you added to your project sequence don’t seem to play back very well?
If you’re experiencing this, you likely need to render your project.
Let me take you through rendering– the different ways and functions of each rendering process, how to render as MP4, why your rendering might be slow, and some common rendering issues.
Table of Contents
How to Render in Premiere Pro
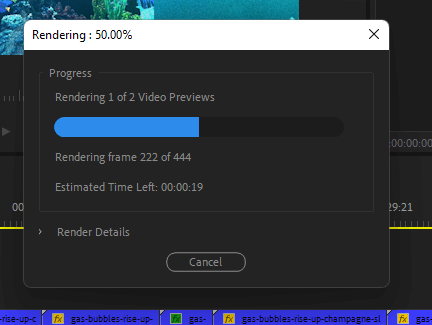
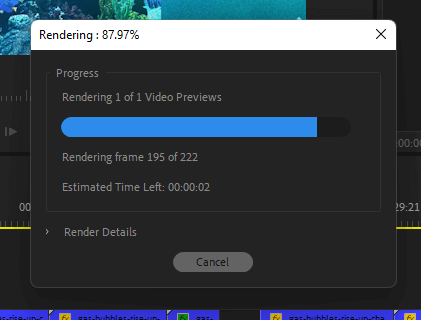
To render means temporarily creating video and audio files to help your timeline smoothly playback. Rendering your project takes a little time, depending on your system specifications, but it’s worth doing to ensure your project is playing back at full speed and quality.
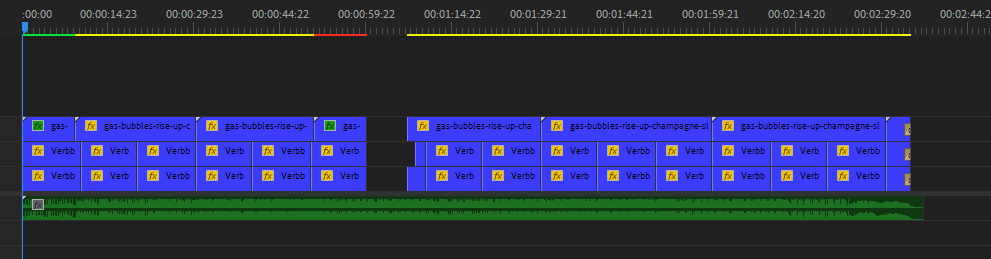
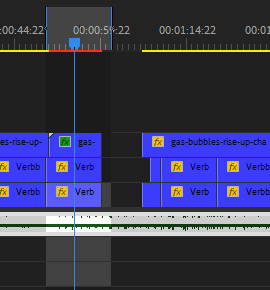
Before I walk you through the processes, let’s understand the colors shown on your sequence timeline before we move ahead because it will help you understand the process very well.
There are three colors in your timeline to keep note of.
The green color indicates that the footage has been rendered successfully.
The yellow color indicates that there is no render preview available, the footage will be rendered before playing back in real-time, and there is every chance of lagging, I mean not playing back in full quality.
The red color indicates no rendered clip associated with the footage you are playing back and nothing to help your timeline play smoothly. So, regarding the segment where the red color appears, it is sure that lagging playback will happen here.
Moreover, there may be a segment without any color, which means that the playback can play smoothly because the footage is not heavy for Premiere Pro to play back or simply because you have no clips there.
Different Ways to Render Premiere Pro Project
The fastest and easiest way is to select the area you want to render with the in and out point on your timeline, or you can choose to render the whole sequence, which will not require marking an in and out point.
Then click on the Enter Key, then you will see your sequence begin the rendering process.
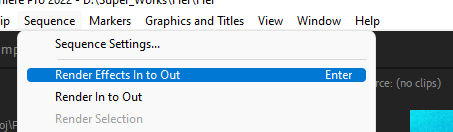
Then long way but yet sequential and understandable is to Go to the Sequence Menu > Select Render Effect In to Out, then your sequence will begin to render. This method will only render those heavy clips on which you apply effects.
If you have little time to render all clips in your sequence, select the portion you want to render with the in and out point.
Go to the Sequence menu > Render Selection. This method will only isolate the rendering to the selected portion of your sequence alone.
How to Render as MP4
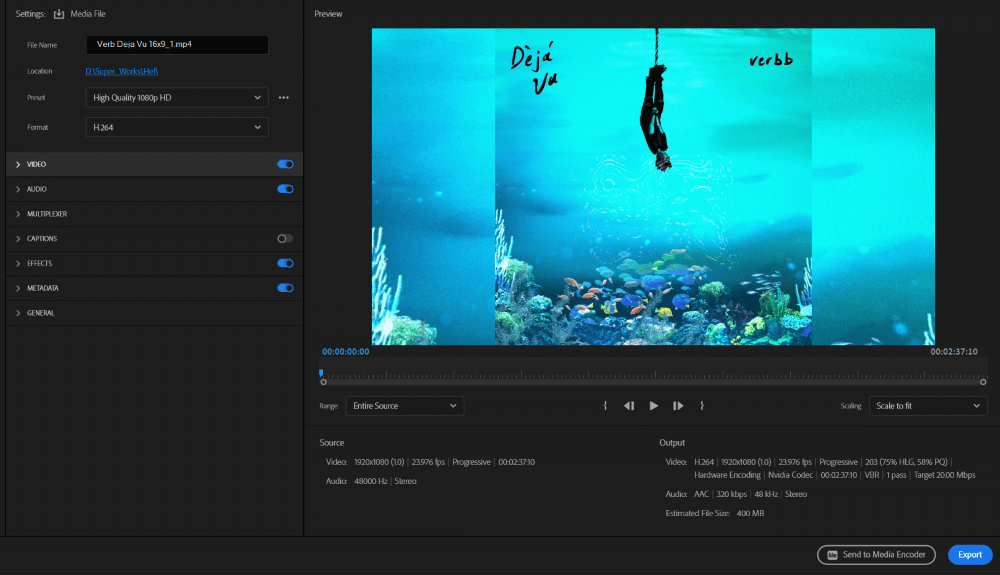
There’s a considerable difference between Rendering and Exporting. Rendering, which I discussed here, will only affect your playback. But Exporting will affect your final output, the final project that you will show to the whole world.
So, you’ve got the terms right. To export your project as MP4, Go to File > Export > Media, or press the Ctrl key + M while still in your timeline panel.
A dialogue box will pop up; set your Format to H.264 and use a preset of your choice. Ensure you choose the correct path to where you will export your project. Then hit on the Export Button. Sit back and relax.
For more concise knowledge on Exporting your Sequence, check out this article.
Why is my Rendering So Slow
If you’re rendering a massive project, maybe you have many video clips or several effects in your project, and your rendering process could take longer. At the same time, the slow rendering may be a result of your system specifications.
Thus to avoid the slow rendering pace, make sure you are using a system with a good graphics card and enough RAM as specified by Premiere Pro. My Pro tip is to use SSD (Solid State Drive) to store your projects. Choosing to render your project periodically can save time in the exporting process.
Why Am I Facing Rendering Issues
At times, you can face issues while rendering your project. Most issues might not be from Premiere Pro but from the system writing permissions. This system is writing permission deals with the saving of the rendering files on your computer.
The writing permission issue could be insufficient storage space on your computer. Thus, try as much as possible to free up your storage drives before rendering or exporting your project.
Conclusion
To improve your timeline playback and speed up your workflow, learn to render your clips. How do you do that? Select the area you want to render and click on the ENTER Key, and you will see your lagging project rendered and playback smoothly without frustrating you.
Are you getting frustrated? It happens; I have once been in that shoe. Feel free to drop your questions in the comment section. If I have encountered the same thing, I will be happy to provide a solution to it.