
Did you know you can remove glare from glasses in Lightroom? Photoshop is generally thought to be the king when it comes to edits like this, and it is. But that doesn’t mean that Lightroom is powerless.
Hey there! I’m Cara and I do the bulk of my photo editing in Lightroom. It’s more efficient for working with large batches of images.
If I need something from Photoshop I can always send the photo over, but the less back-and-forth the better, right? Let’s look at two tricks here for removing glare from glasses in Lightroom.
Note: the screenshots below are taken from the Windows version of Lightroom Classic. If you are using the Mac version, they will look slightly different.
Table of Contents
Method 1: Remove Glare Using the Spot Removal Tool
The Spot Removal tool in Lightroom is a handy little tool for removing unwanted items in an image. It makes it easy to remove blemishes on the subject’s face or even whole people from the background of an image.
It is not as precise as the Clone Stamp tool in Photoshop. But sometimes that precision isn’t necessary and you can make the edit quickly without popping over to Photoshop.
You’ll find the Spot Removal tool on the toolbar just above the Basics panel on the right side of Lightroom. It looks kind of like a band-aid.
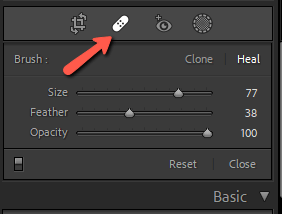
The tool has two modes – Clone and Heal. The Clone mode clones the source spot you choose and copies it over the area you want to hide. You can blend the edges a bit with the feather tool, but it makes no attempt to match the surrounding pixels.
The Heal mode tries to match the color of the surrounding pixels as much as possible. Sometimes this can cause weird color bleeds, but largely it helps to produce a natural result.
Both modes offer three settings – Size, Feather, and Opacity. You can adjust these as necessary for your image.
You can use either one for this technique and you should experiment with both to find out which offers the best result.
Remove Glare with the Spot Removal Tool
To remove glare from glasses, start by zooming in on the person’s face to see your work better.
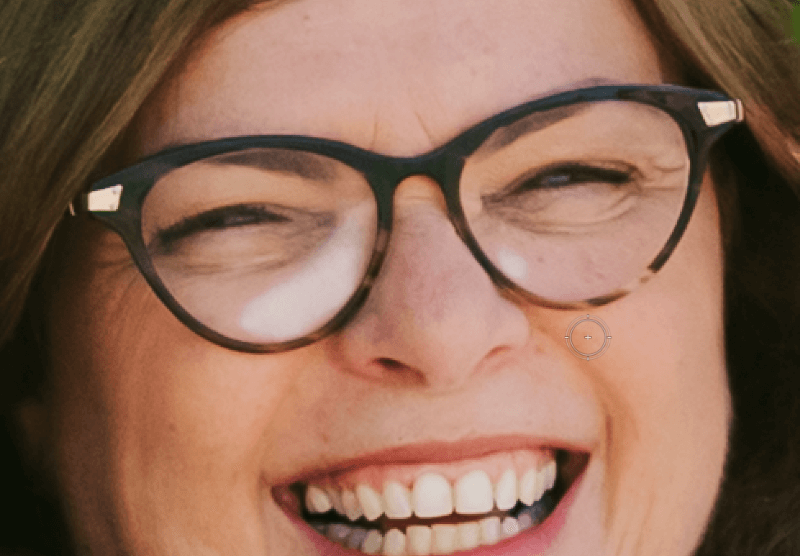
Select the Spot Removal tool on the right and adjust the size with the slider or by using the left and right bracket keys [ ]. Let’s start with the Heal mode and paint over the area that needs adjusting.
This is what I got on my first pass. I touched the frame of her glasses a tiny bit, so I got that dark color bleed in the corner there. I’ll have to try again.
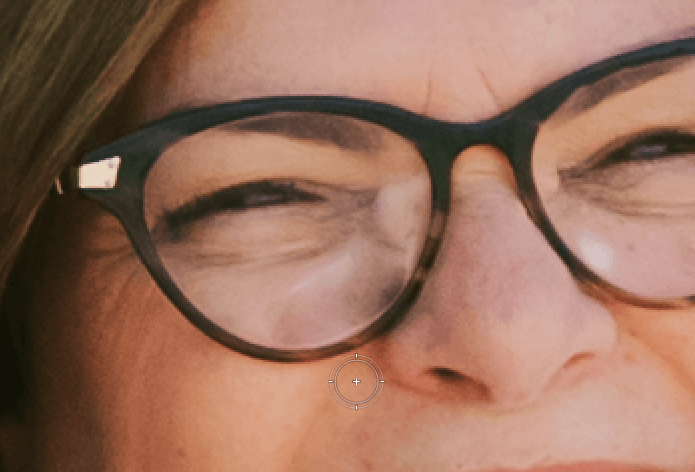
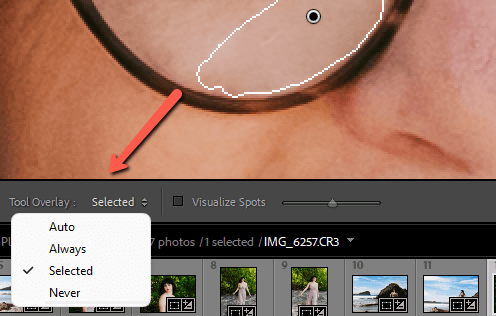
Lightroom automatically grabs pixels from somewhere else in the image to clone. Sometimes it doesn’t work out so well, lol. To fix it, grab the little black dot on your source point and drag it to a new spot in the image.

This spot works a little better.
Note: if you don’t see the boundaries and black dots, check the Tool Overlay setting in the lower left corner of your workspace. If it is set to Never, the visualizations won’t show up. Set it to Always or Selected.
Once you’re happy with your selection, press Enter on the keyboard or click Done in the lower right corner of your workspace.

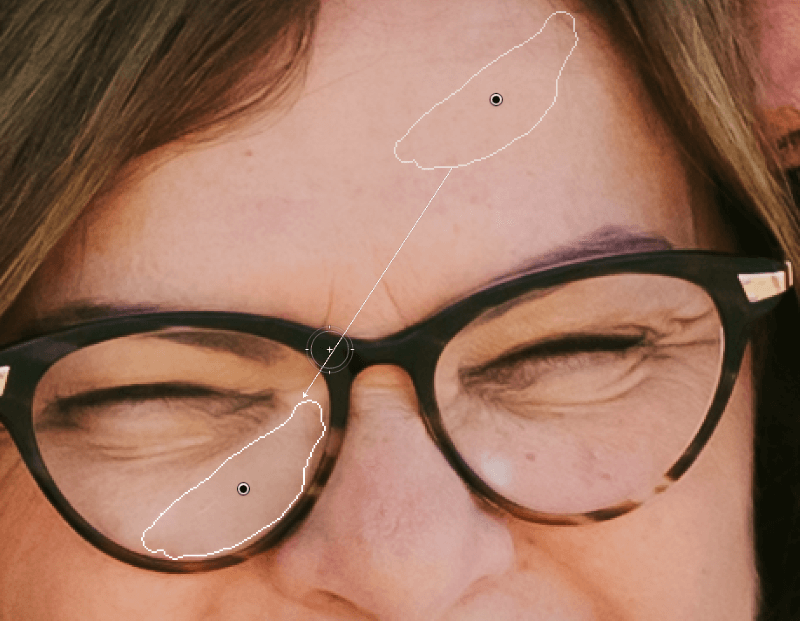
This actually looks pretty good here. I’ll clean up that spot on the other lens as well and here’s the before and after.


Not too shabby!
Method 2: Remove Glare using the Adjustment Brush
The Spot Removal tool works well in photos like my example where the glare is over the skin or another easily clonable area. But what do you do if the glare is over the eye?
You can still carefully clone, trying to reconstruct the eye by using the other one. Though honestly, that’s a lot of work and Photoshop provides betters tools for that.
The other option you can try in Lightroom is to adjust the colors, highlights, saturation, etc to minimize the glare.
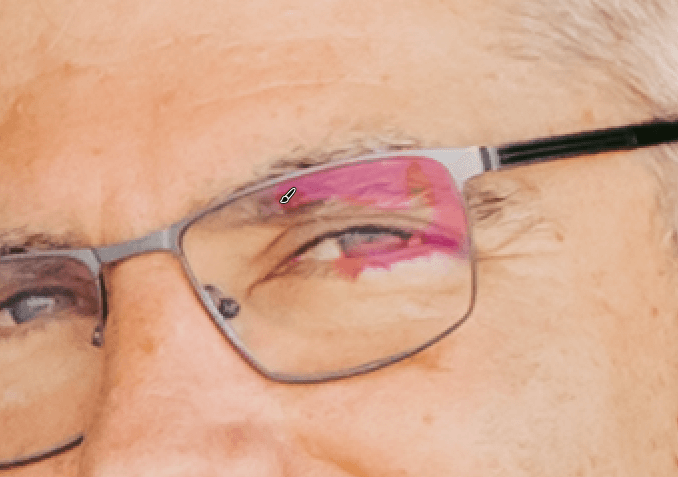
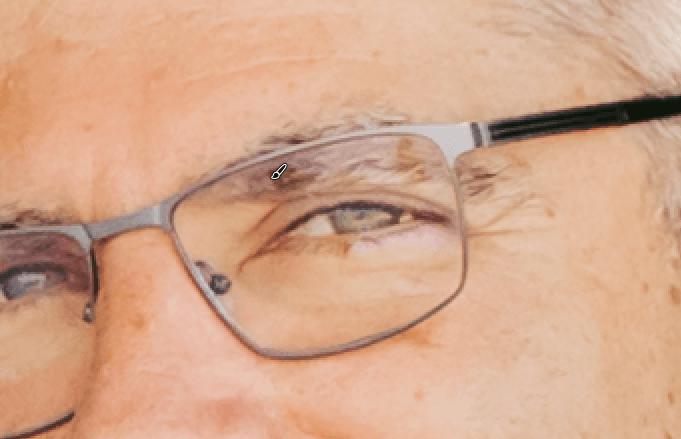
To restrict the adjustments to only the glare, let’s choose the masking tool from the toolbar on the right. Click Create New Mask (omit this step if there are no other masks active in the image). Choose the Brush tool from the list, or press K on the keyboard and skip it all.

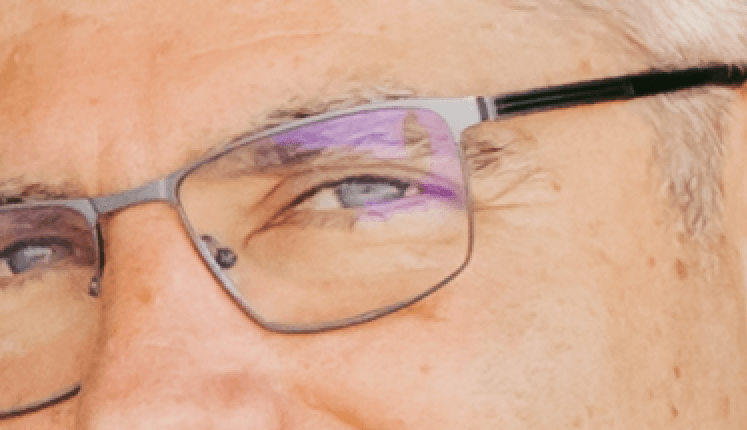
Zoom in on your subject. In this image, he’s got some weird purple glare on his glasses.
Paint over the glare with your adjustment brush.
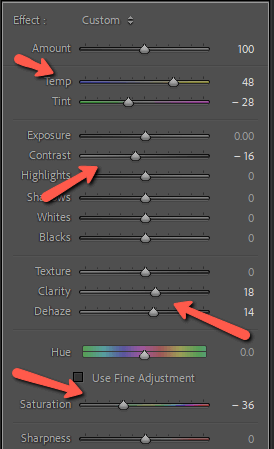
Now, start moving the sliders for the adjustment brush to minimize the glare as much as possible. Since I’ve got a lot of color in this glare, I started messing with the white balance and saturation sliders first.
Dehaze is a good setting to try and sometimes bringing down the Highlights is a helpful move. I also bumped up the Clarity and brought down the Contrast.
Here are my final settings.
And here’s the result.
It’s not perfect, but it has minimized the glare quite a bit and this image is zoomed in at 200%. Once we back out, the glare won’t be obvious at all. Plus, it only took a couple of minutes of fiddling around to do it!

Did you learn something new today? How about another fun one? Check out how you can whiten teeth in Lightroom here.