
I take more photos with my phone than I make phone calls. Chances are you’re the same. iPhones include incredible cameras and create convenient photo albums.
But that convenience can lead to trouble. It’s too easy to accidentally tap the trash can icon or delete the wrong photo. Photos hold precious memories, and losing them can be upsetting. Many of us are willing to pay money to get our most valued photos back.
Fortunately, if you realize your mistake within a month or so, the solution is easy, and we’ll show you how it’s done. After that, there are no guarantees—but data recovery software offers a good chance of rescuing your photos, videos, and more.
Here’s what to do.
Table of Contents
First, Double-Check the Photos Are Permanently Deleted
You may be lucky—or just well-prepared—and have an easy way to get your photos back. This is particularly true if you recently them or regularly back up your phone.
Recently Deleted Photos
When you delete your photos, your iPhone’s Photos app actually holds on to them for up to forty days . . . just in case. You’ll find them at the bottom of your Albums page.
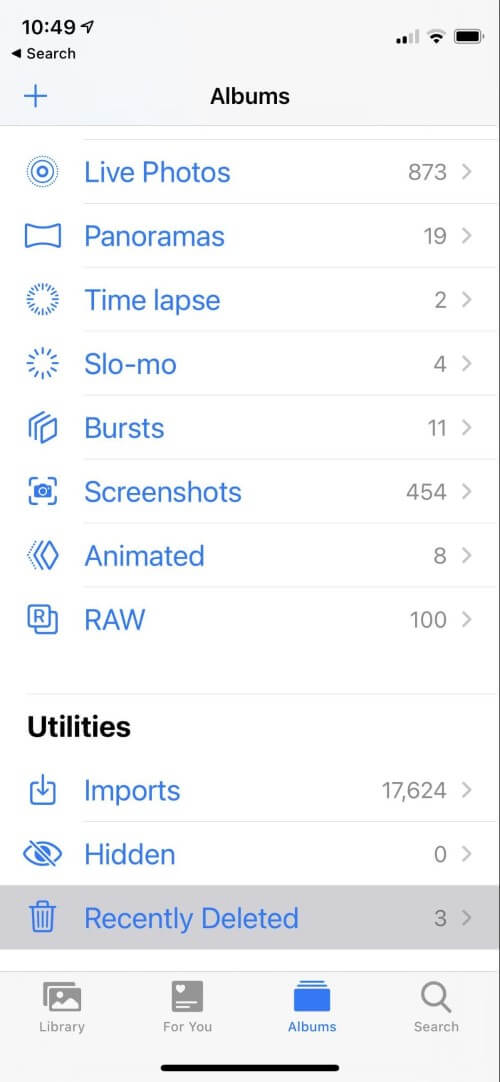
View the photo you want to get back and click Recover. Here’s an example from my own phone: a blurry view of my fingers that I don’t actually want back.

iCloud and iTunes Backups
If your iPhone is regularly backed up, you may still have a copy of that photo. It might happen with an automatic backup to iCloud each night or when you plug your device into your computer’s USB port.
Unfortunately, restoring that backup will normally overwrite everything on your phone. You’ll lose any new photos you’ve taken since the backup, as well as other documents and messages. You need a better way.
That means using one of the data recovery apps we cover in the next section. We explain the process in detail in our article How to Recover Deleted Photos from iCloud.
Other Backups
Tons of web services offer to back up your iPhone’s photos automatically. If you use one of them, you may find a copy of your deleted photo there. These include Dropbox, Google Photos, Flickr, Snapfish, Prime Photos from Amazon, and Microsoft OneDrive.
Get Your Photos Back with Data Recovery Software
Data recovery software can scan and rescue lost data from your iPhone, including photos, videos, contacts, notes, music, and messages. There’s no guarantee you’ll be successful. With continued use, the deleted photos will eventually be overwritten by new ones.
I tested ten different recovery apps in this Best iPhone Data Recovery Software roundup. Only four of them were able to restore a photo that I deleted. Those apps were Aiseesoft FoneLab, TenorShare UltData, Wondershare Dr.Fone, and Cleverfiles Disk Drill.
They cost between $50 and $90. Some are subscription services, while some can be purchased outright. If you value your photos, that’s money well-spent. Fortunately, you can run the free trial of each of these applications and see whether they can locate your lost photos before you pay.
Note that these applications run on your Mac or PC, not your iPhone. You need to attach your phone to your computer using a USB-to-Lightning charging cable to make the magic happen.
Here are the steps to follow using each of these apps to rescue your deleted photos.
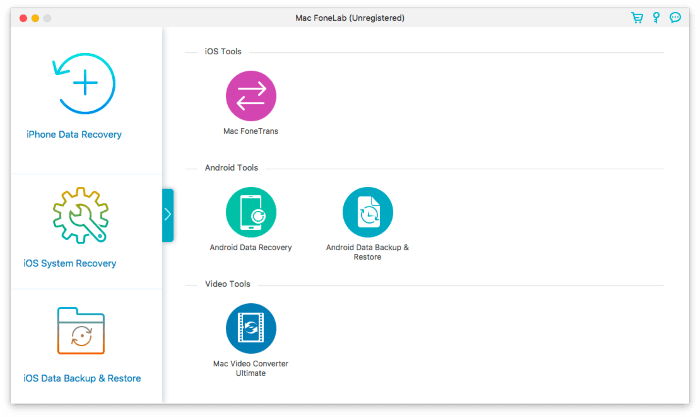
1. Aiseesoft FoneLab (Windows, Mac)
Aiseesoft FoneLab is an excellent choice for most users. It’s relatively fast and successfully restored a deleted photo when I tested it. The Mac version costs $53.97; Windows users will pay $47.97. Like most recovery software, you can try the app first and see whether it can locate your lost photos before paying.
Here’s how to use it:
First, Launch FoneLab on your Mac or PC and select iPhone Data Recovery.
Then, connect your phone using your USB charging cable and click Start Scan.
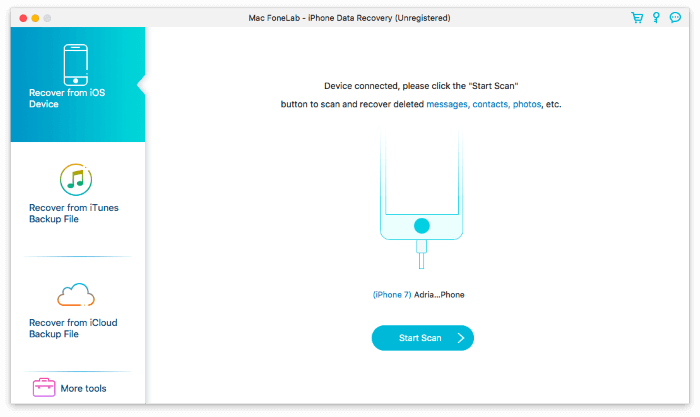
The app will scan for all types of lost and deleted items, including photos. When I tested the app, this took just under an hour.
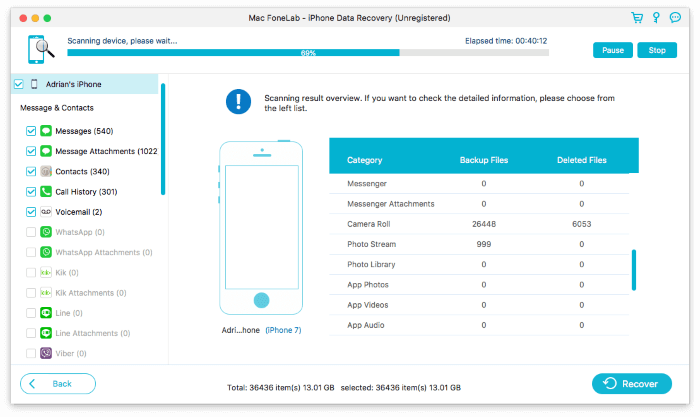
Select the photos you want and click Recover.

If the list is so long that it’s difficult to find the ones you want, you can narrow it down by displaying only photos that have been deleted. From there, you can group them by the date they were modified.
Tenorshare UltData is another solid choice for photo recovery. You can subscribe for $49.95/year on Windows or $59.95/year on Mac. You can also purchase a lifetime license for $59.95 (Windows) or $69.95 (Mac).
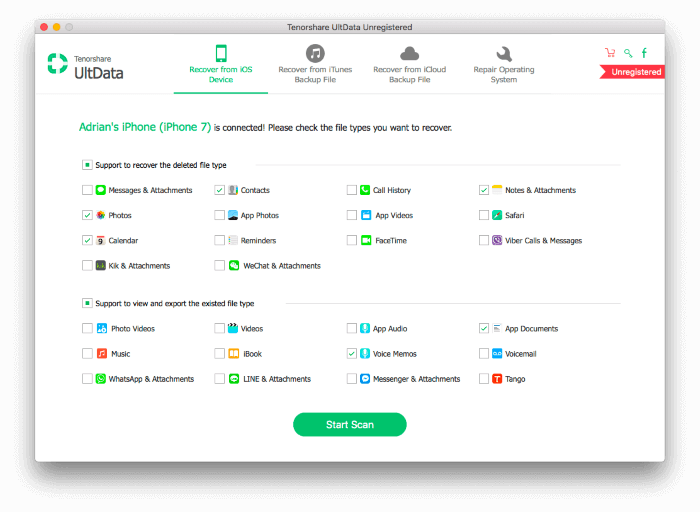
To use the app, launch UltData on your Mac or PC and connect your phone using your USB charging cable. Under “Support to recover the deleted file type,” check Photos and any other types of file you need to recover. Click Start Scan.
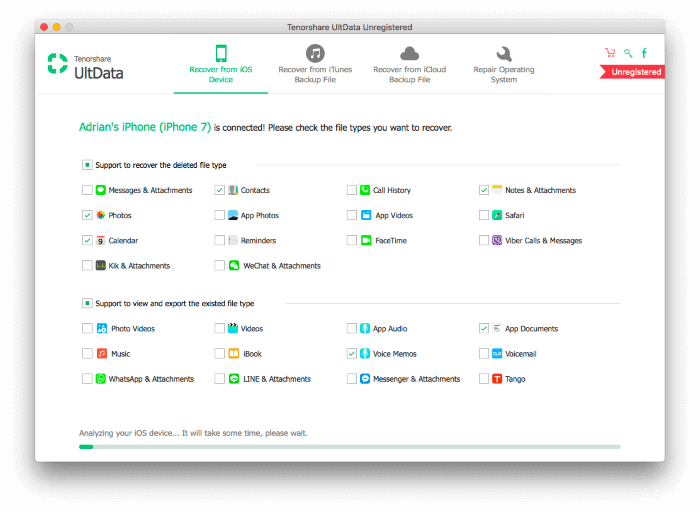
The app will start analyzing your device. When I tested the app, the process took just under a minute.
After that, it will scan for deleted files. My test took less than an hour.
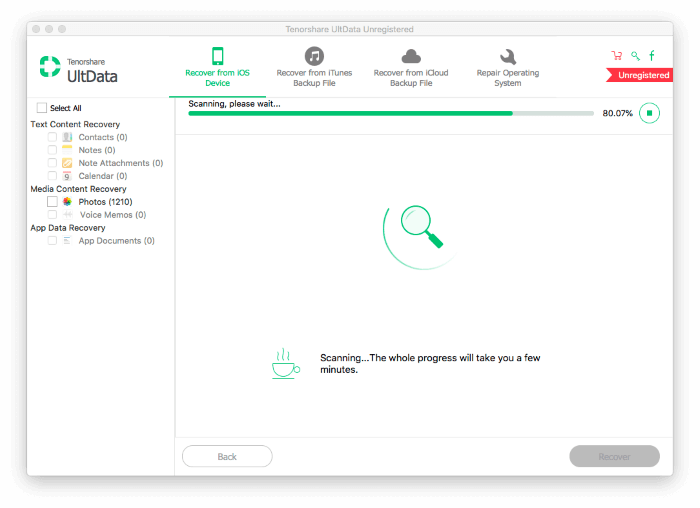
Towards the end of the scan, you can start to preview the files and select those you want to recover.
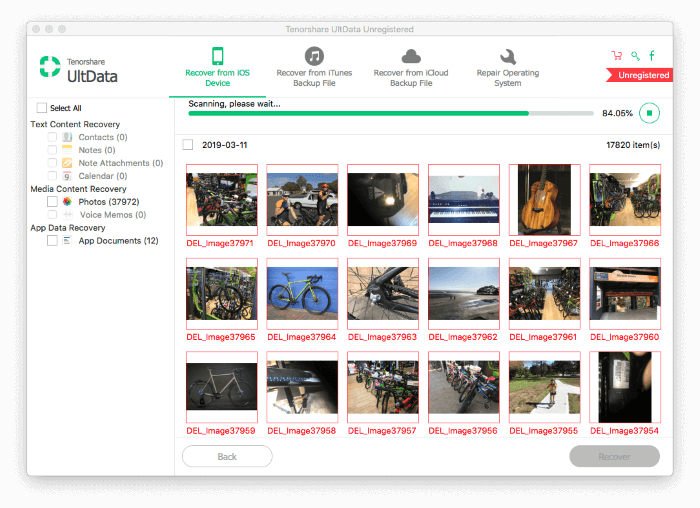
Once the scan has finished, make sure all the photos you want are selected, then click Recover. To narrow down the results, you can list just the files that have been deleted and group them by the date they were modified.
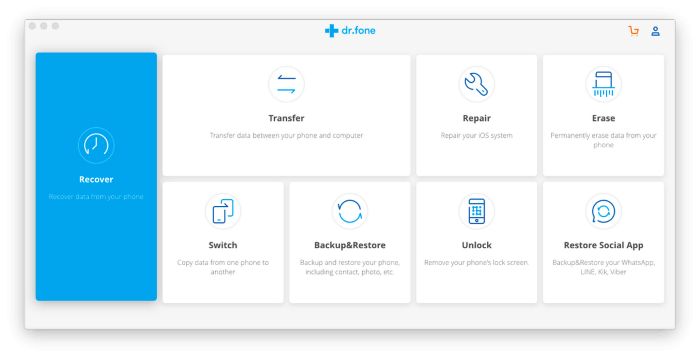
Wondershare Dr.Fone is a more comprehensive app. It provides more features but also scans at a significantly slower clip than other apps. A subscription will cost you $69.96/year. Learn more in our Dr.Fone review.
Here’s how to recover photos. First, launch the application on your Mac or PC and connect your phone using your USB charging cable. Click Recover.
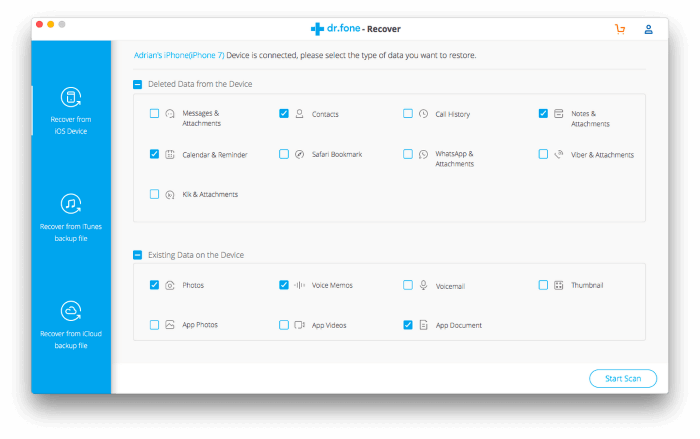
Select Photos and any other types of content you want to restore, then click Start Scan. Be patient. When I tested the app, the scan took around six hours, though I was scanning for more than just photos. The fewer categories you have selected, the faster the scan will be.
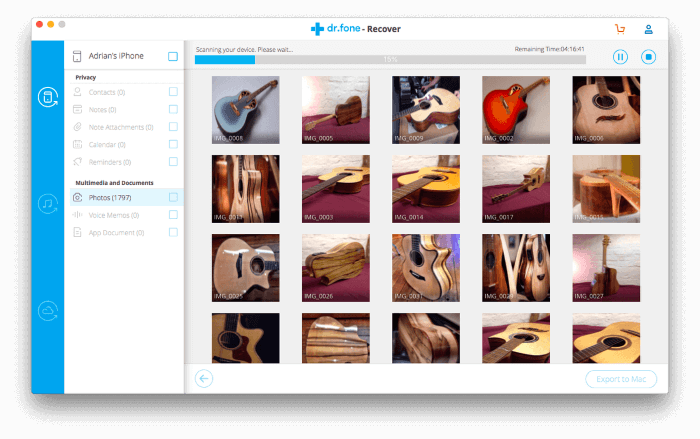
After the scan, select the photos you want to restore and click Export to Mac. It’s not possible to restore them directly to your phone using this app.
4. Cleverfiles Disk Drill (Windows, Mac)
Cleverfiles Disk Drill is primarily an application for recovering lost data on your Mac or PC—but fortunately, it also supports iPhones. You can subscribe for $89/year or shell out for a lifetime license of $118. You can learn more in our Disk Drill Review, though the focus of that review is restoring data from computers rather than phones.
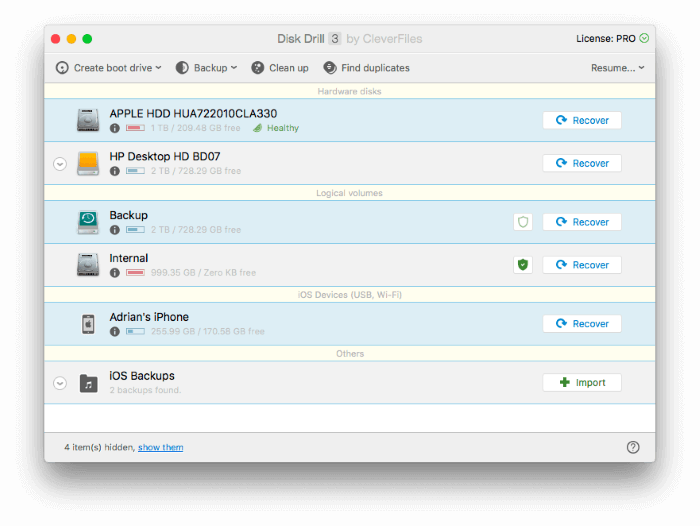
Launch Disk Drill on your Mac or PC, then connect your phone using your USB charging cable. Under “iOS Devices,” click the Recover button next to the name of your iPhone.
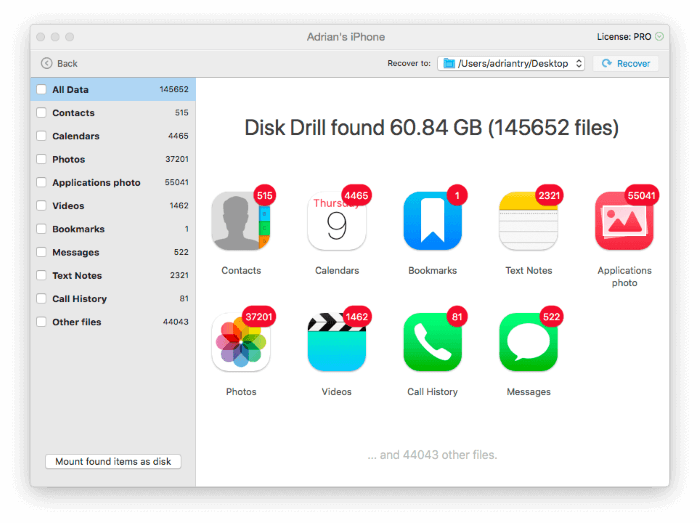
Disk Drill will scan your phone for lost files. When I tested the app, the scan took just over an hour.
Locate and select your photos, then click Restore. In my case, that meant sifting through tens of thousands of images. The search feature may help you narrow down the list.
So What Should You Do?
If you somehow deleted some photos from your iPhone, first check that they’re not permanently deleted. Have a look at your “Recently Deleted” album and explore whether your photos may still exist in a backup somewhere.
If not, it’s time to try your luck with data recovery software. Wait until you have some time and a clear head—it may take hours.
If you’d like more details about the different ways data recovery software can help, check our article Best iPhone Data Recovery Software. It contains clear charts of the features each app offers and the details from my own tests. That includes the length of time each scan took, the number of files located by each app, and the types of data they successfully recovered.