
Ever wonder what the secret is to clear, well-lit iPhone photography without overexposure or dullness? It all lies behind the HDR function of your iPhone camera. You may have seen the HDR feature before but do not know what it is. If so, this article will clear this up for you.
Note: In case you are interested, we tested and wrote a roundup of the best HDR software before, like Aurora HDR and Photomatix.
What is HDR?
HDR is a setting within the iPhone camera, and the letters stand for High Dynamic Range. An HDR photograph, or a set of photographs, is a method used to achieve a more dynamic depth to your images. You can learn more from this Apple guide.
Instead of taking a single photo, HDR takes three photos at different exposures and then stacks them together. The iPhone processes it automatically for you and the best parts of each photo are highlighted in the combined result.
Below is an example of how a photo looks with and without HDR.
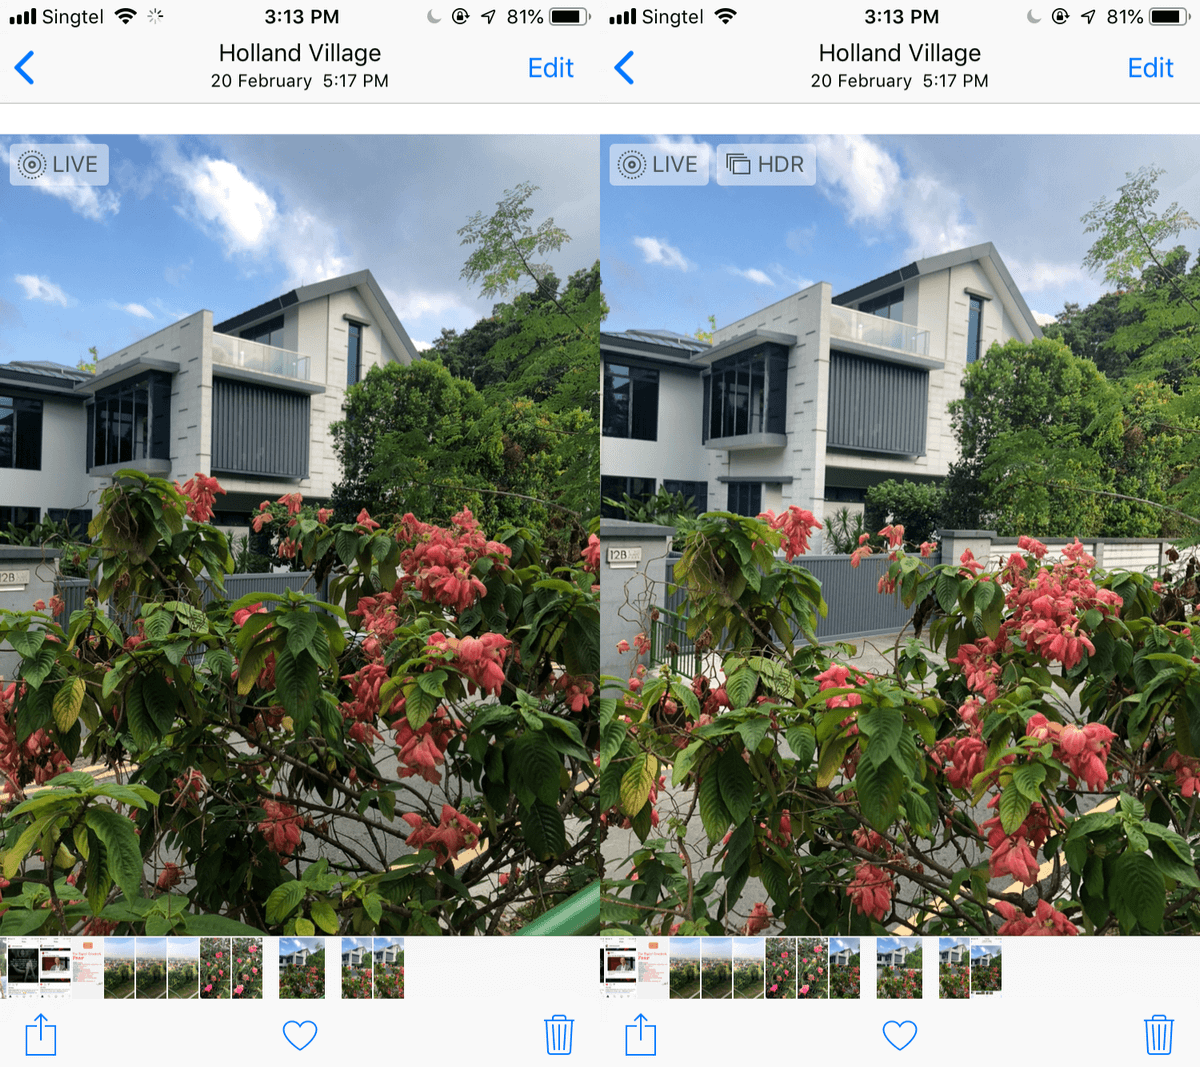
As you can see, in the first photo the greenery is darker and more dimly lit. However, with HDR, parts of the picture are brighter and clearer.
Basically, using HDR means that your camera will process photos differently than normal in order to capture greater detail from bright and dark areas in your photo. It takes multiple shots and then combines them to balance the exposure. However, while the function would benefit certain photography situations, it could also be bad for others.
When Should You Use HDR?
As mentioned, while HDR could bring out the best of your photograph in certain situations, there are others where it could dampen it instead.
For landscapes, sunlight portrait shots, and backlit scenes, HDR is a great choice. It helps achieves the goal of reconciling both land and sky in your shots, without making the sky look overexposed or the scenery look too washed out.
You should use HDR when attempting to capture landscape photos. As landscape and scenery-based pictures tend to have contrasting colors between land and sky, it’s hard for your phone to capture all of the details in one photo.
You risk dimming the exposure for all the details to be visible only to end up with an extremely dark, unflattering photo. This is where the HDR function comes in handy, as you can capture the sky’s detail without making the land look too dark, and vice versa.
Another situation where you should use HDR mode is sunlight portraits. Overexposure is common when there’s too much light shining on your subject’s face. Strong sunlight can cause the focus of your camera to be either too dark or too bright, accentuating unflattering aspects of the subject. With HDR mode, the lighting is controlled and evened out, thus eliminating overexposure issues.
However, HDR is not a cure-all for any bad conditions that come up during your photography session. There are several occasions where you should not use HDR, as it could make things worse instead of achieving better photography results.
For example, if any of your subjects are moving, HDR increases the chance of a blurry photo. Since HDR takes three pictures, your final result will not be flattering if the subject in the camera moves between the first and second shots.
There are times when a photo looks nicer when it is highly contrasted. However, the beauty of HDR lies in its ability to brighten up areas that are darker with shadows. If there is a dark shadow or silhouette you want to highlight, in order to achieve a stark contrast look, HDR will make this less intense, resulting in a more washed-out photo.
The strength of HDR also lies in its ability to bring out vivid and saturated colors. If your scene is too dark or too light, HDR can bring some of those colors back. However, if you’re dealing with colors that are extremely loud to begin with, HDR can wash the saturation out, resulting in an overly-saturated photo.
One of the downsides of taking HDR photos is that these photos take up a lot of storage, similar to the Live function. Keep in mind that you’re taking three photos in one with HDR. If you’re looking to save on storage space, avoid turning on the function that keeps all three photos in addition to the HDR photo under your Camera settings.
How Do You Use the HDR Feature on iPhone?
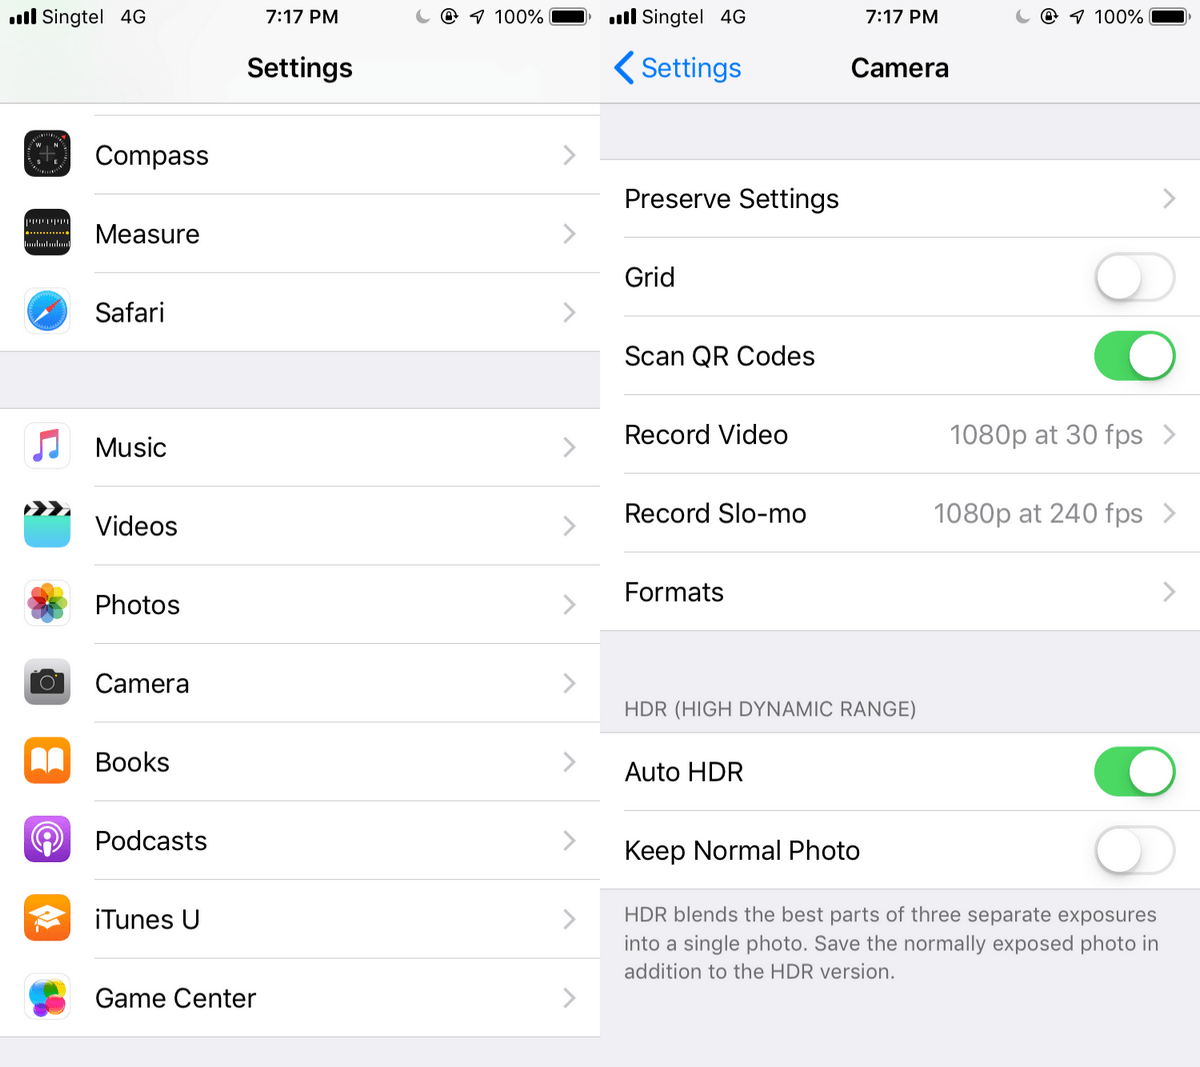
For the iPhone 7 and newer models, you’ll have HDR on by default. If you find that your HDR function has not been turned on, here’s how to get it started.
Under Settings, search for the Camera section. Turn on HDR mode at the bottom under “Auto HDR”. You can also choose to turn “Keep Normal Photo” on; however, this will take up a lot of space in your phone as it keeps each of the three photos in addition to the final HDR shot.
It’s as simple as that! You can also choose to turn off HDR anytime you want. The downside of the later iPhone models having an automated HDR function is that you cannot choose when to trigger HDR in a photo.
HDR mode is only triggered when the camera deems it necessary for your picture in terms of light and shadow. There are times when iPhone fails to detect that HDR is needed, yet there is no option to turn on the function manually. Thus, the older generation of iPhones has it good in the sense that HDR has to be manually turned on in order for it to capture the photo in that mode.
With the older iPhone models, you had to manually select HDR in order to use the function. Now, if your model of iPhone is 5 and below, you can turn on HDR directly within your camera. When you open your Camera app, there will be an option to turn HDR on.
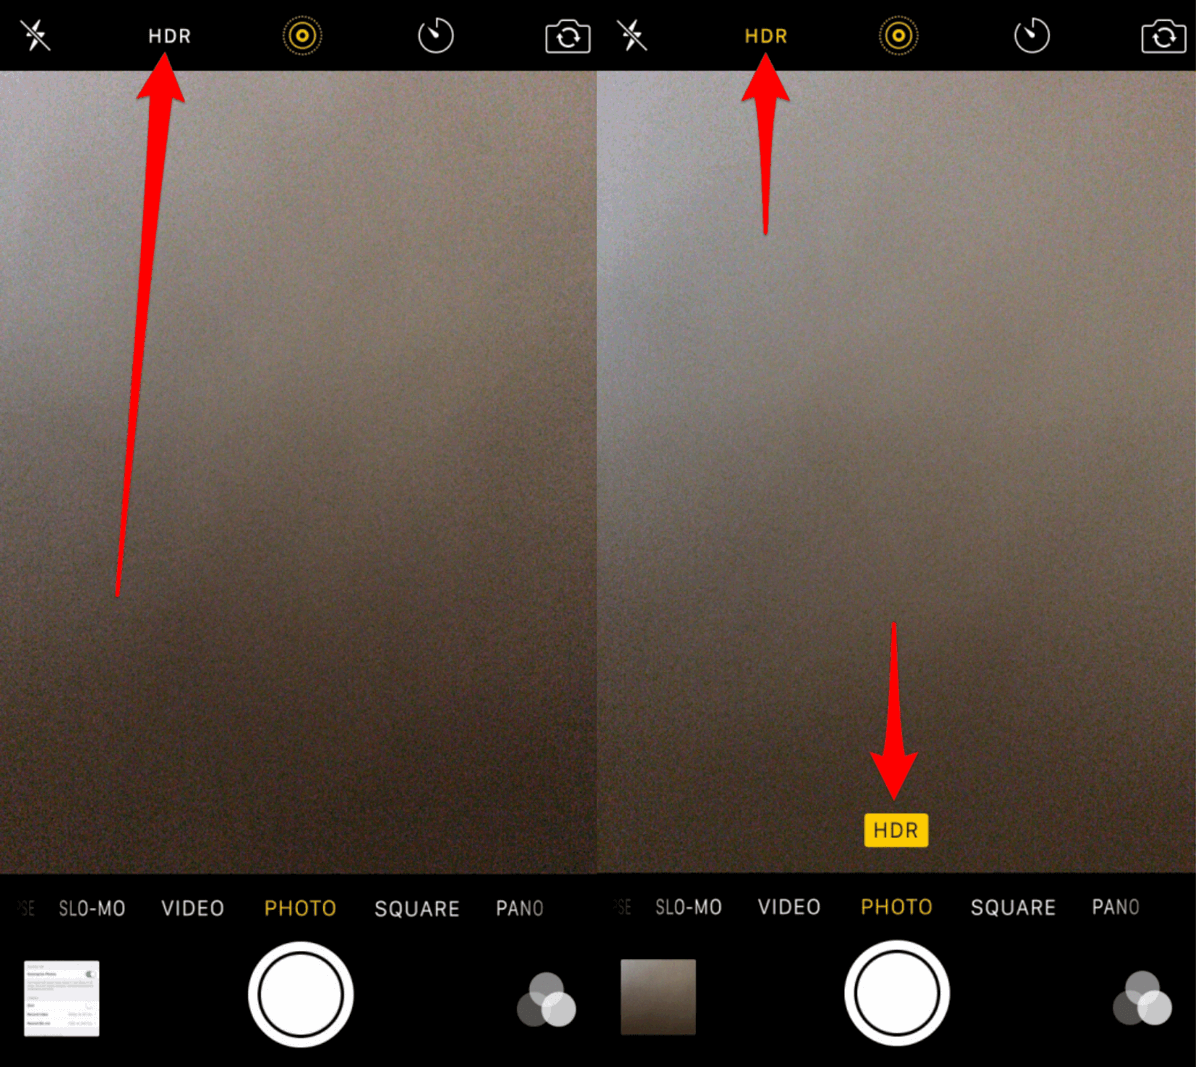
After tapping the option to turn on HDR camera, click away on your shutter button! Your photos will be taken in HDR. It’s simple to use, making moments easier to capture clearly.
With that, we hope this article shed some light on what the HDR mode exactly is. Leave a comment below if you still have any questions about iPhone HDR.